Jitter
Overview
|
|
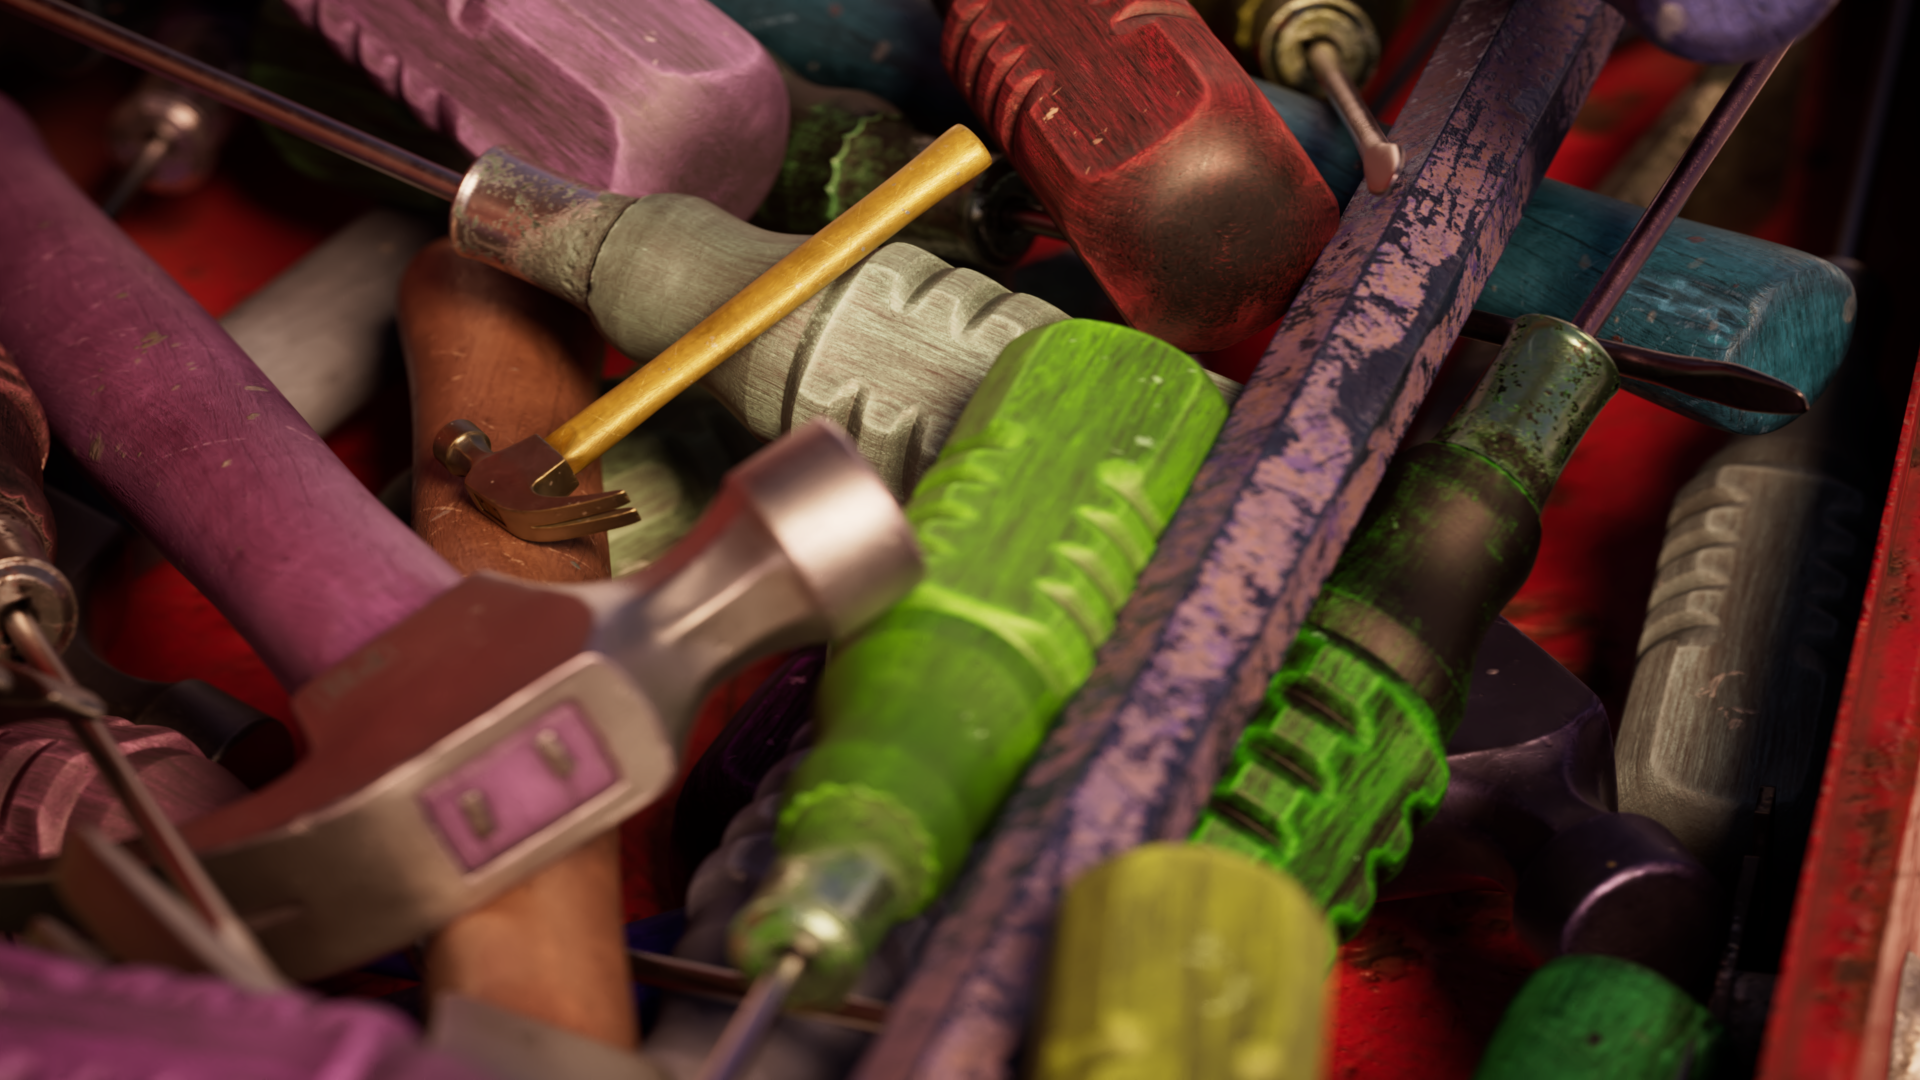
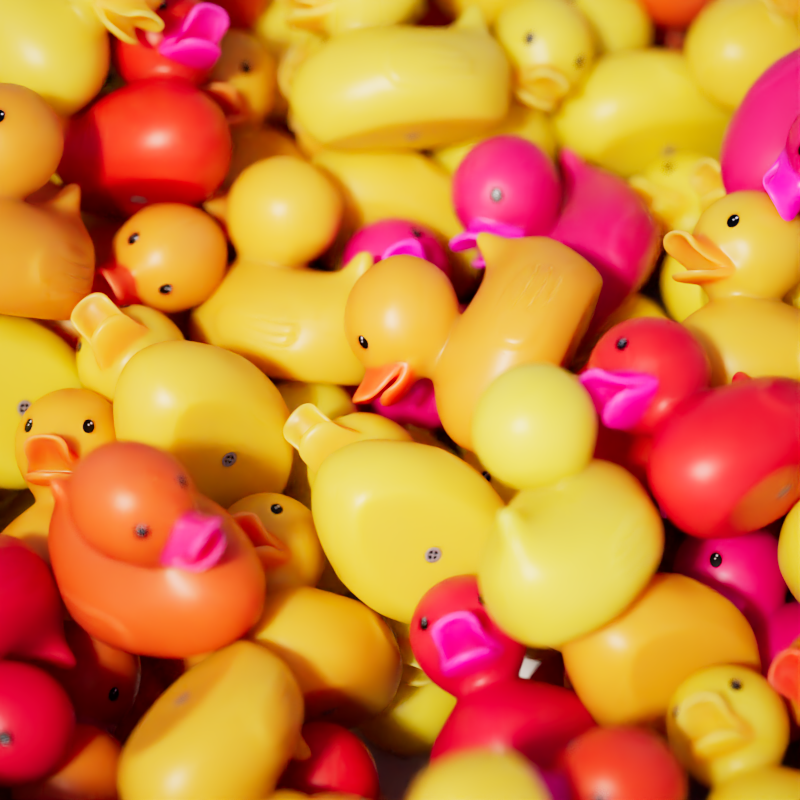
| Models from polyhaven.com | |
The Jitter shader can be used to create randomized colors and float / integer values based on automatically generated attributes. For example, automatically adding unique color variation to different objects or using randomly generated float values to control things like metalness or roughness per-object. This is accomplished by pairing an input ID with a randomized seed, the input ID controls how the source objects are differentiated and the seed allows the user to quickly change the randomized output for each variation option.
Examples
Connecting custom User Data
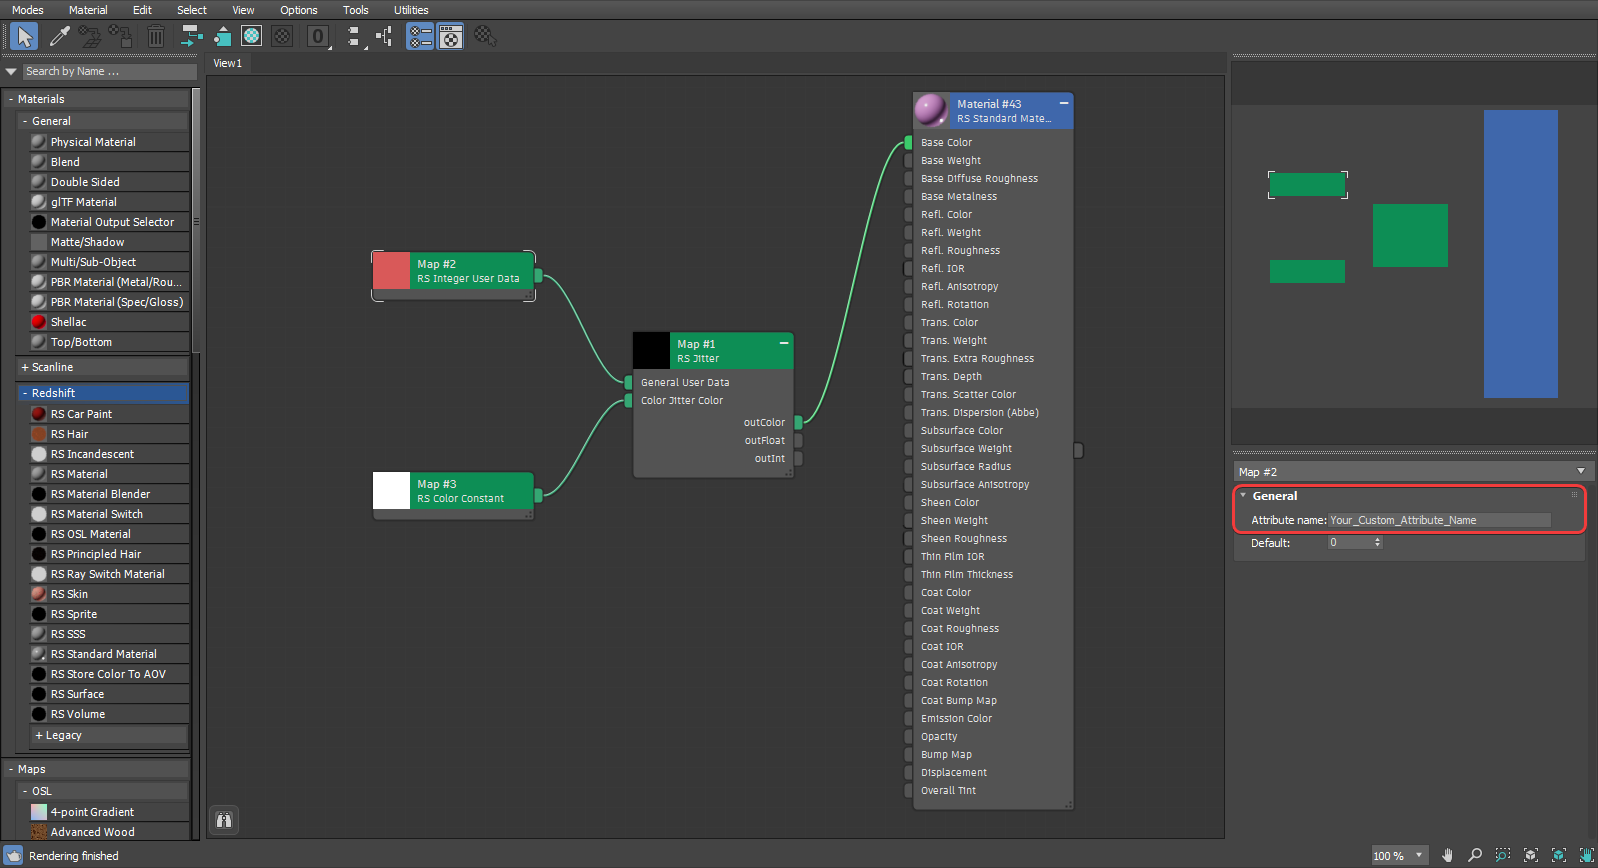
To use a custom attribute to drive a jitter node create a User Data node that matches the data type of your attribute, in the example below an Integer User Data node is used. The "Attribute name" in your User Data node must use exactly the same name as the attribute added to your objects or else the data will not be found.
Then set the Jitter node's Input ID Mode to "User Data ID" and connect the output of your User Data node to the "User Data" input on the Jitter node as demonstrated in the image below. Once all hooked up your custom attribute will now be used to control randomization throughout your scene.
|
Controlling the maximum number of unique IDs
The Jitter node is great at adding random variation to a large number of objects but there may be times where you want to limit the total number of unique variations. For example, if you have 100 objects and use an Input ID that provides a unique ID for each object then you will get 100 different variations. You could limit the total number of variations manually by using custom user data or you could just use an extra Jitter node.
In the example described below a limited number of color variations is used to demonstrate this set up but it can also be used for limiting the unique number of random floats and integers.
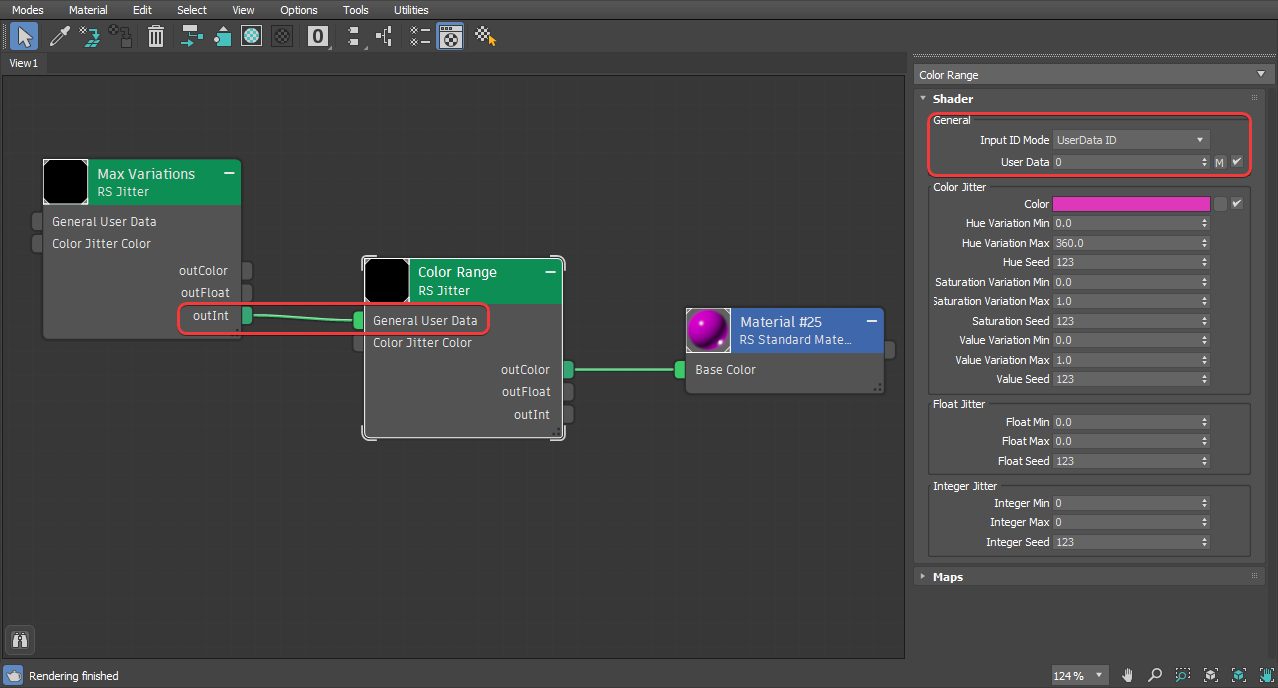
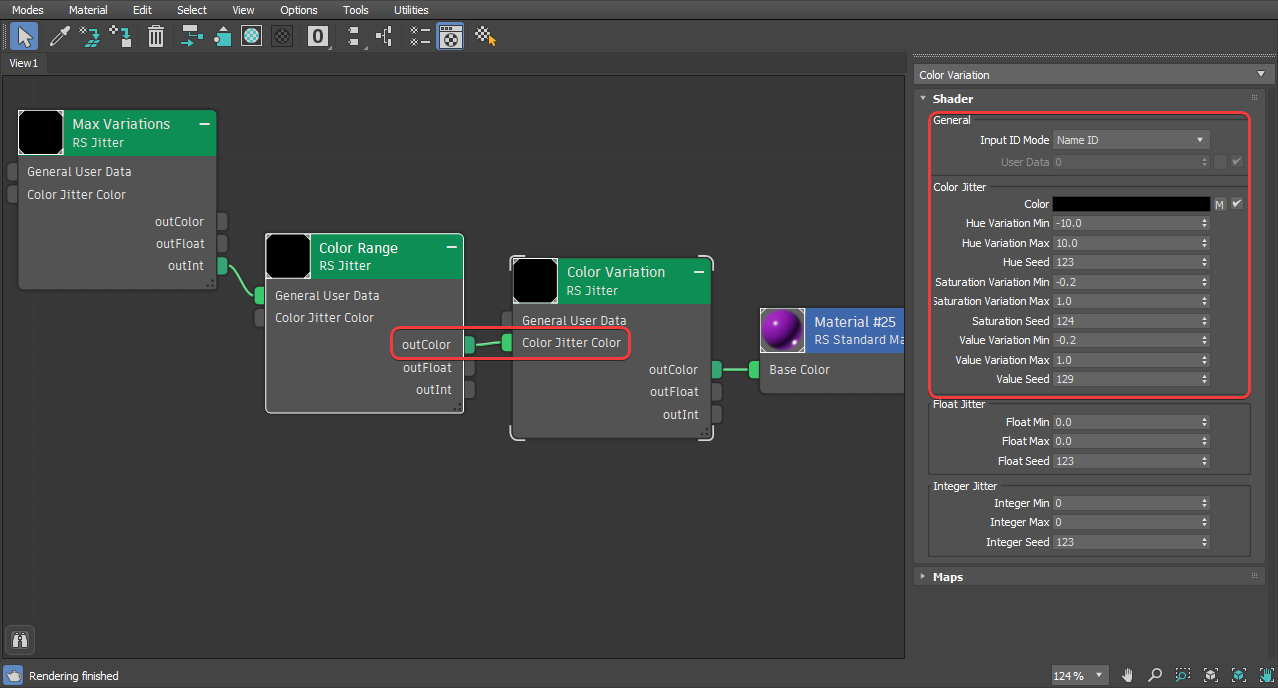
Start by creating a Jitter node with an Input ID that provides a unique ID for each object in your scene and call it "Max Variations," this node is used to control the maximum number of variations in the final output. Create another Jitter node with the Input ID Mode set to "User Data" and name this node "Color Range," this node is used to control the actual color output of your unique variations and it should be connected to a color input in your shader. Then connect the "Max Variations" Integer output to the User Data input on the "Color Range" node.
|
With this setup the total number of color variations is controlled by adjusting the min and max integer values on the "Max Variations" node, the number of unique integers in the output range corresponds directly to the number of unique color variations. For example an integer min of 0 and a max of 3 results in 4 unique colors (0,1,2,3) or an integer min of 1 and a max of 5 results in 5 unique colors (1,2,3,4,5).

|

|

|

|

|
| Integer Min-Max: 1-1 Unique Colors: 1 |
1-2 2 |
0-2 3 |
1-3 3 |
1-5 5 |
The "Color Range" Jitter node is used to determine the actual color output, controlling the extent that the hue, saturation, and value can change based on the source color, however the total number of unique variations for hue, saturation, and value will always be limited to the maximum number of variations. For example, with an integer min of 1 and a max of 3 you will only ever get 4 unique color hues, 4 unique saturation levels, and 4 unique value levels.
In the example below the only parameter that is changed is the maximum hue variation, note how the unique ID of each object does not change but the color changes drastically as the value increases. When the maximum variation range is low it is difficult to tell that there are 3 unique colors but this becomes more apparent as the variation range grows.
| Hue Variation Max: 0 to 360 Unique Colors: 3 |
The seed values can be adjusted to quickly trial different results, changing the Integer Seed on the "Max Variation" node determines the distribution of unique IDs across all objects.
| Changing the Integer Seed |
Changing the hue seed on the "Color Range" node determines the distribution of unique hues across all objects, allowing you to quickly test different color palettes.
| Changing the Hue Seed |
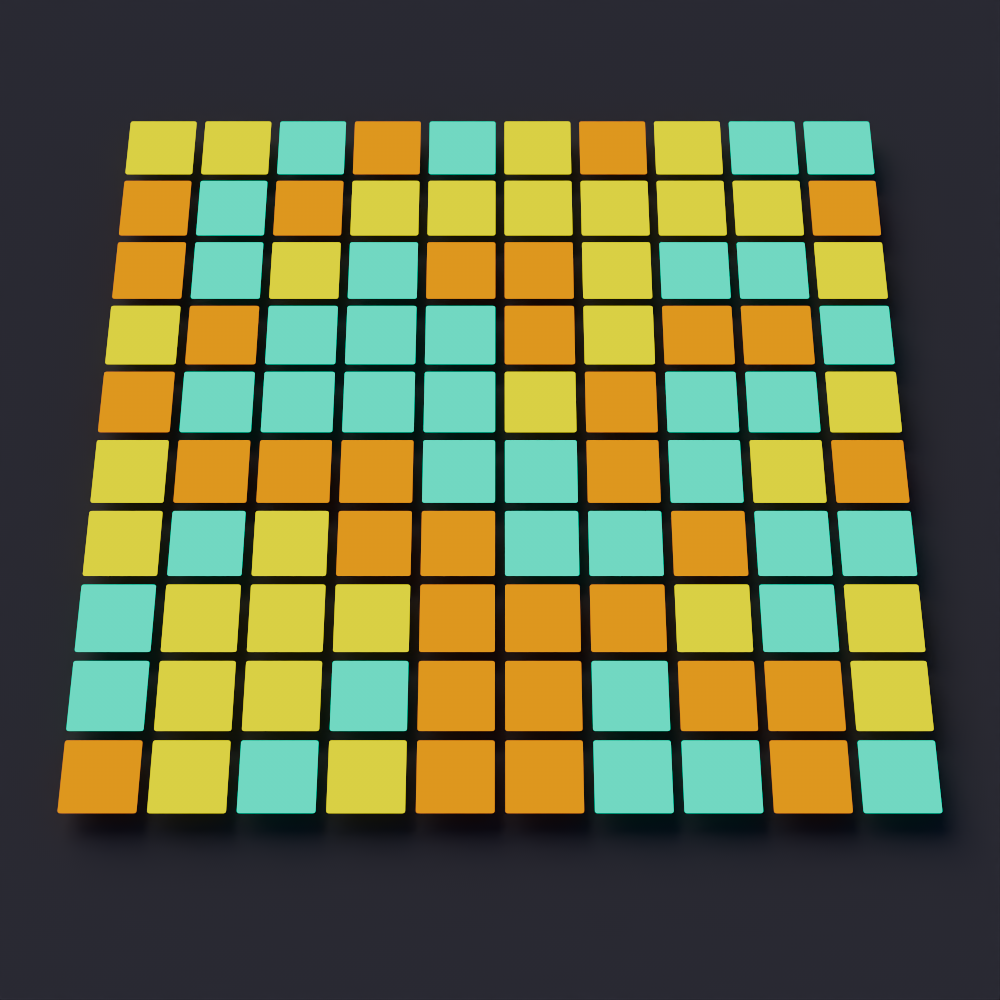
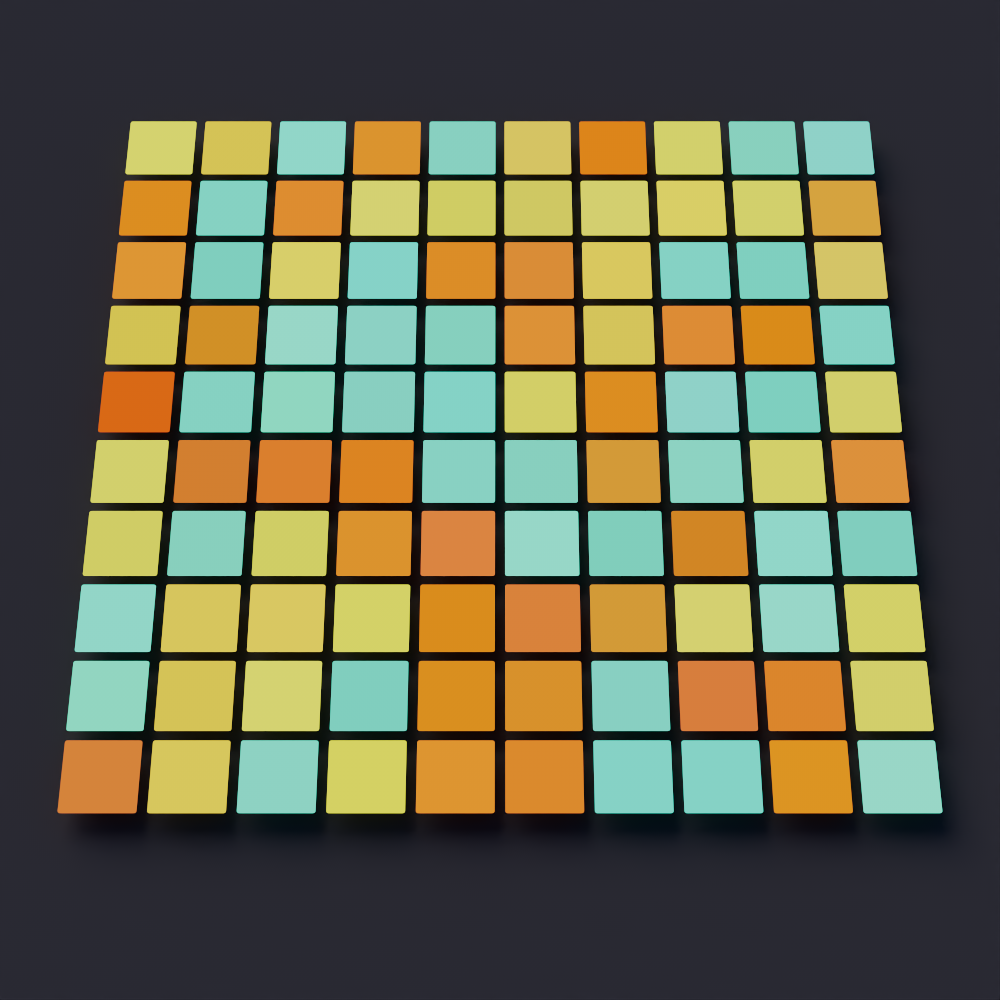
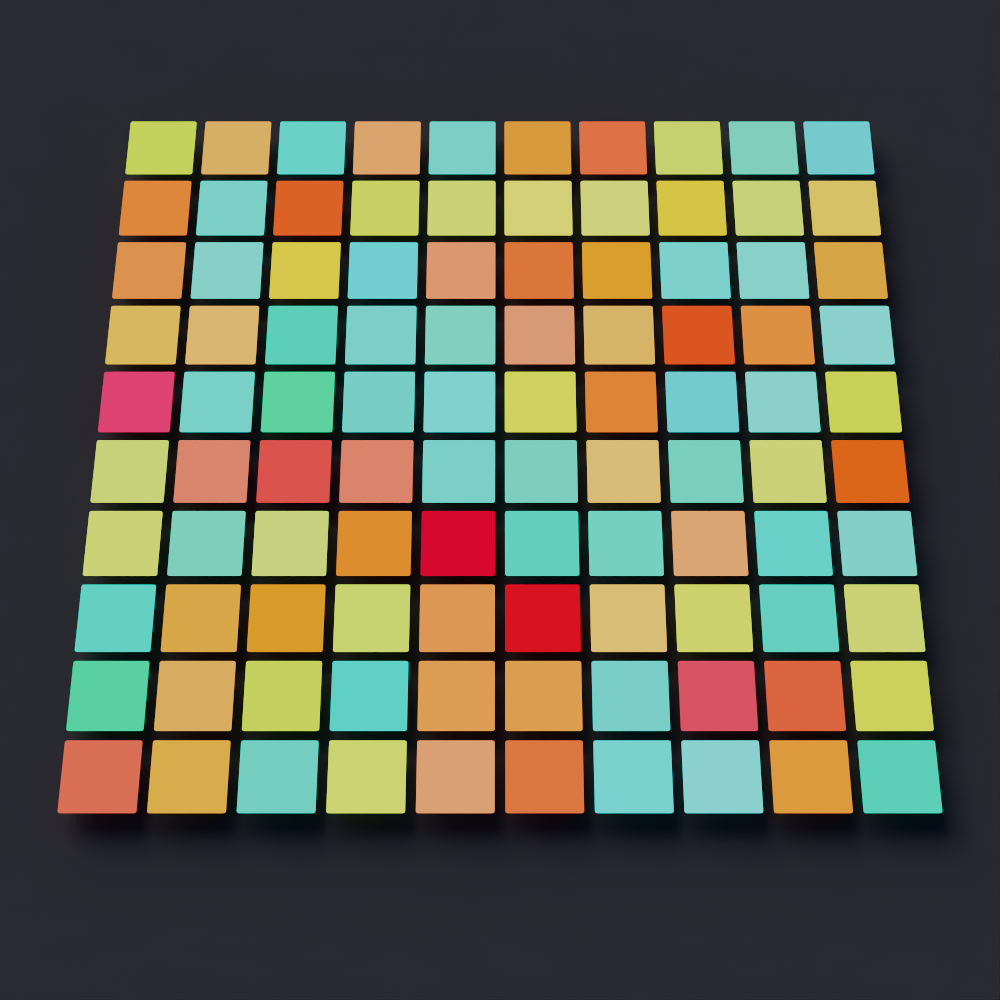
If you are happy overall with your limited color palette but would still prefer some slight variation this setup can be taken even further with the addition of yet another Jitter node. Create a new Jitter node called "Color Variation" and use an Input ID that provides a unique ID for each object in the scene. Connect the Color output of the "Color Range" node to the Color input of the "Small Color Variation" node.
|
By keeping the variation range small the final result will closely resemble the base color palette while adding some subtle visual interest.
|
|
|
| Hue Min-Max: 0 Saturation Min-Max: 0 Value Min-Max: 0 |
-10 to 10 -0.2 to 0 -0.2 to 0 |
-30 to 30 -0.2 to 0 -0.2 to 0 |
Parameters
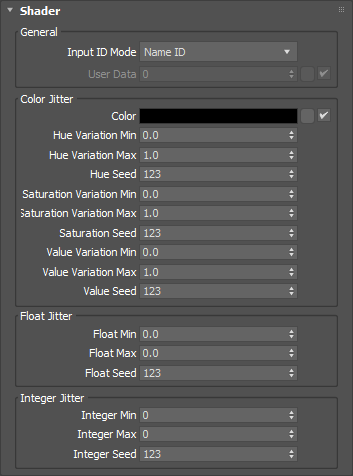
|
General
Input ID Mode
Controls what attribute the randomization is based on.
-
Name ID - Randomization is based on an objects name in the scene.
-
Object ID - Randomization is based on the Redshift Object ID that a user can set on each object. This works exactly the same as using an Integer User Data node with the "RSObjectID" attribute.
-
UserData ID - Randomization is based on a custom user attribute. Frequently this is accomplished with an Integer User Data node as the "User Data input" to the Jitter shader which references an attribute added to objects in the scene.
Redshift reserves the following intrinsic attributes:
-
RSObjectID - An integer ID that Redshift tracks which can be set by the user per-object.
-
RSNameID - A string ID that Redshift tracks based on the names of scene objects.
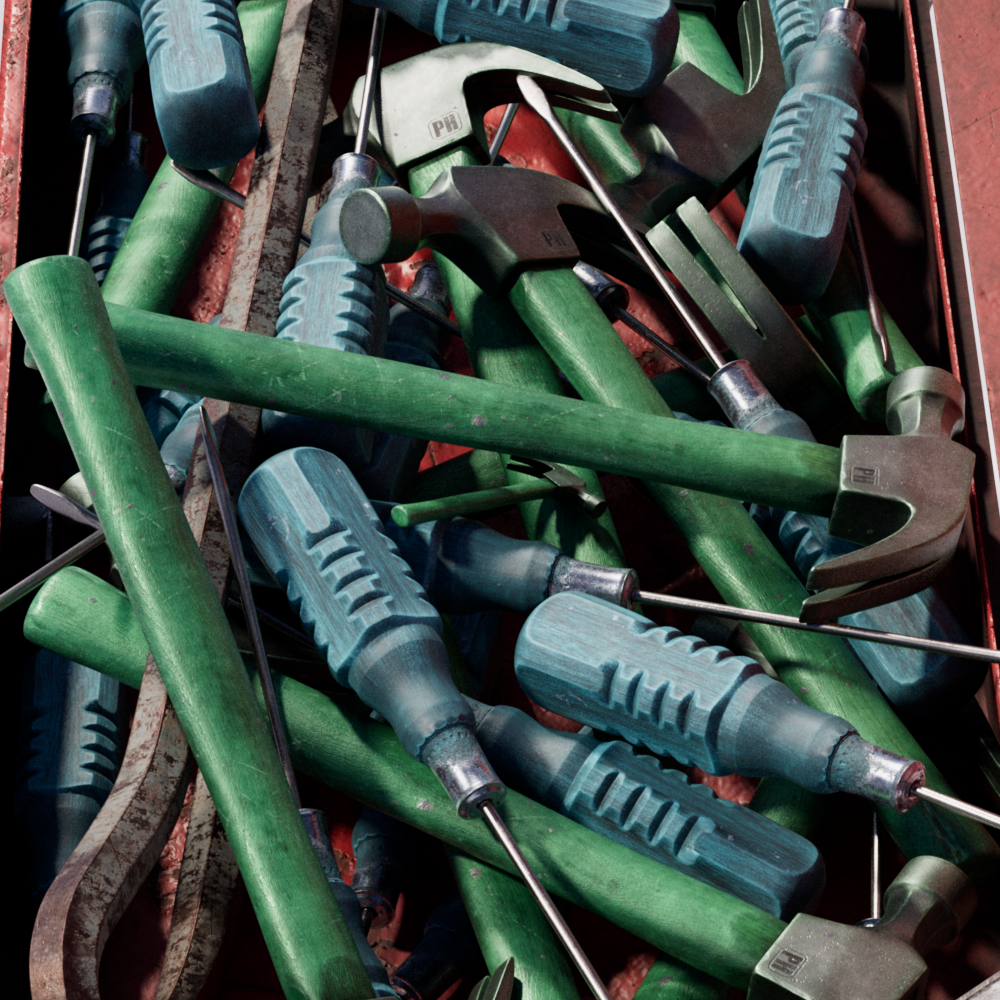
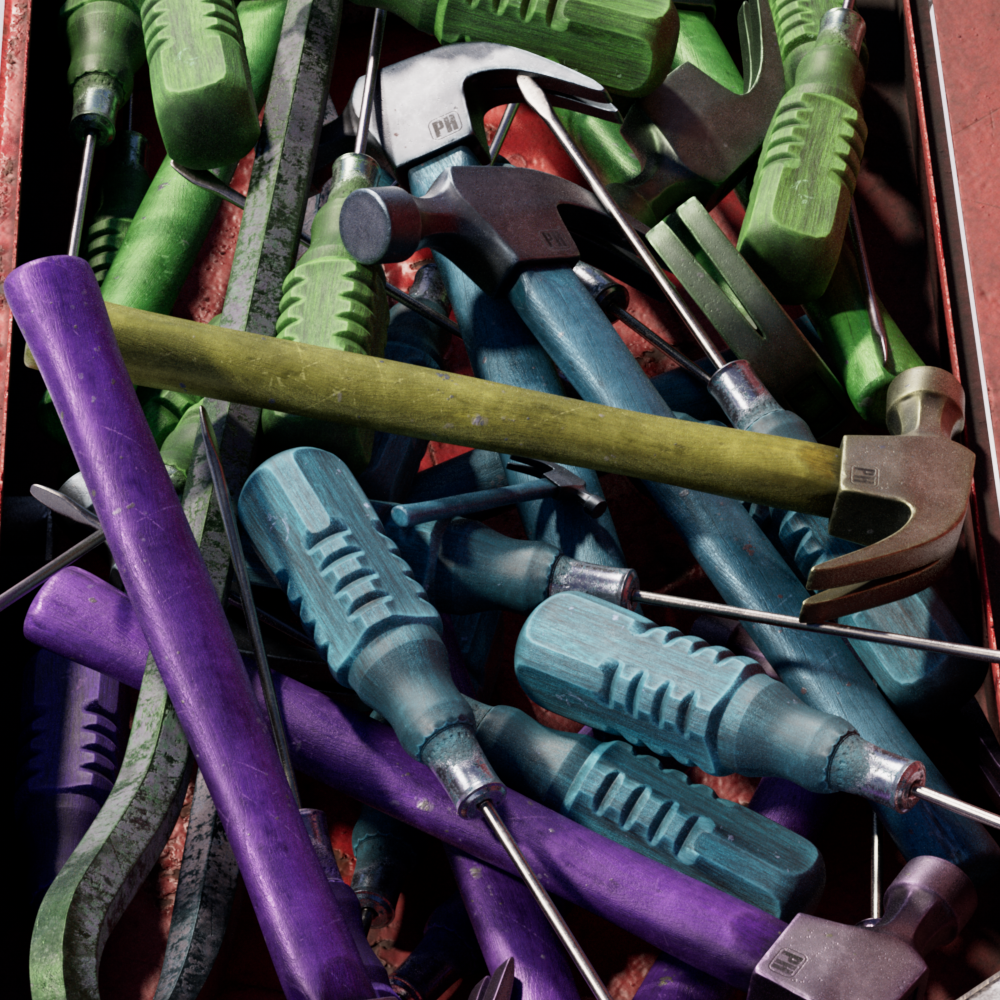
In the example images below three different tool models are used to demonstrate the Jitter shader. When using Name ID each individual tool has its own unique color, this is because each tool has its own unique name in the scene. However, when using Object ID there are only three unique colors - one for each distinct kind of tool because all hammers have the same object ID, all screwdrivers have the same object ID, and all crowbars have the same object ID. In the UserData ID example a custom integer user data attribute was added with a unique ID for the tools on the top, middle, and bottom parts of the screen as well as a lone hammer in the center. This results in four unique colors but they are not limited to tools of the same kind.

|
|
|
| Input ID Mode: Name ID | Object ID | UserData ID Integer User Data with custom user attribute |
User Data
When the Input ID Mode is set to UserData ID an Integer User Data node or other ID source should be connected to this port. This also functions as the default value if the selected user data is not found.
Color Jitter
Color
The source color or texture that all color randomization is based on.
The higher the range in color variation the lower the impact the source color has on the final output because of how drastically the colors are likely to change, however, when color variation is low the source color becomes more important since the randomized colors stay closer to that starting position.

|

|

|

|
| Source Color: Blue Hue Max: 30 |
Red 30 |
Blue 360 |
Red 360 |
Hue Variation Min & Max
Controls how far the hue can be offset from the source color's original hue in degrees along a color wheel. Higher ranges between the min and max result in a greater potential for hue variation, a value of 0 for both results in no change.
To help visualize how the source color's hue is offset a color wheel is included in the example images below, the color wheel spins as the hue variation parameters are changed and move back toward the starting position the closer the min or max values get to zero. Note how the number of unique colors is grows as the range increases between the minimum and maximum values. In the rightmost example both the hue min and hue max are animated at the same time across the entire hue scale separated by a consistent range of 30, this results in all the colors maintaining a narrow band of color variation while still moving through all the different colors along the wheel.
| Hue Max: -40 to +40 Hue Min: 0 |
-180 to +180 0 |
-330 to + 360 -360 to + 330 |
Hue Seed
Changes the seed value that is used to determine the randomized hue. Changing the seed will result in different hues per ID.
| Changing the hue seed |
Saturation Variation Min & Max
Controls how far the saturation can be offset from the source color's original saturation. Higher ranges between the min and max result in a greater potential for saturation variation, a value of 0 for both results in no change.
It is expected behavior that previously greyscale values will take on a color if random saturation is allowed to go above 0.
| Saturation Max: -1 to +1 |
Saturation Seed
Changes the seed value that is used to determine the randomized saturation. Changing the seed will result in different saturation levels per ID.
| Changing the saturation seed |
Value Variation Mix & Max
Controls how far the color value can be offset from the source color's original value. Higher ranges between the min and max result in a greater potential for value variation, a value of 0 for both results in no change.
| Value Max: -1 to +1 |
Value Seed
Changes the seed value that is used to determine the randomized color value. Changing the seed will result in different color values per ID.
| Changing the value seed |
Float Jitter
Float Min & Max
Controls the minimum and maximum range of potential float values that can be output.
In the example image below the random float value is being used to drive a coat reflection on all objects.
| Float Max: 0 to 1 |
Float Seed
Changes the seed value that is used to determine the randomized float value. Changing the seed will result in different float values per ID.
| Changing the float seed |
Integer Jitter
Integer Min & Max
Controls the minimum and maximum range of potential integer values that can be output, always returning a whole number.
Integer Seed
Changes the seed value that is used to determine the randomized integer value. Changing the seed will result in different integer values per ID.