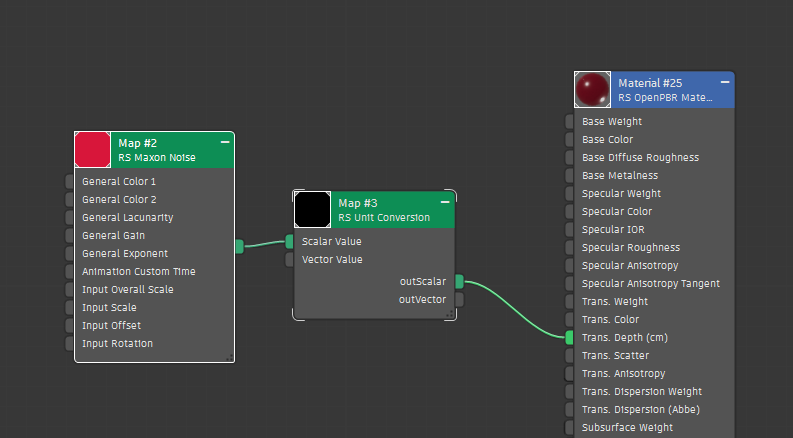
In the example below, a Unit Conversion node is connected to the Transmission Depth with a Maxon Noise used to add variation via the Scalar Value. How that node behaves is dependent on the Mode used.
|
Table Of Contents
The Unit Conversion node can be used to easily change the results when texturing a parameter that uses a physical unit. For example, the OpenPBR material uses centimeters as a fixed physical unit for several parameters like the Transmission Depth and Subsurface Radius. So if you've got a Cloudy with a Chance of Meatballs situation on your hands, with giant food raining from the sky, this node can be plugged into one of those ports and you could use meters for those massive meatballs instead. The Unit Conversion tool makes it easy to work in whatever unit you prefer, maybe you'd rather work in feet or inches?
The Unit Conversion node should only be used when "Scene Distance Units" is enabled in the Render Settings > System tab — this uses the Unit defined in 3ds Max's "Units Setup" dialog. When used in scenes with this parameter disabled it will not function as expected.
Distance based parameters in Redshift come in two flavors, Fixed units or Scene Units. Fixed unit parameters are used for physically based shading phenomena like subsurface scattering and volume transparency depth. These parameters remain constant even if you change your scene scale at the Render Settings level. Meaning if you start working with your Scene Scale in centimeters and switch to meters the previously see through bottle of soda now looks opaque. This is because the bottle model is now 100 times larger but the soda's transparency depth is still only defined as a few centimeters.
This is where Scene Unit parameters come in, these types of parameters automatically scale with the Scene Scale because they are generally used to define more artistic effects like ambient occlusion, a distance shader, or round corners. This ensures that artistically driven utility shaders don't break if you need to change your Scene Scale.
Ultimately the choice is yours because lets go back to that bottle of soda, what if you wanted it to always look the same, no matter the Scene Scale? Then you could use a Unit Conversion node connected to the Transmission Depth set to the "Scene Units" mode and then it would look the same with the Scene Scale at centimeters or meters. Or maybe you want your round corners to behave more like a physically based effect, you could use a Unit Conversion connected to the Round Corner's Radius parameter set to "Fixed" mode and it would no longer scale with the scene.
The Unit Conversion node should be used to drive a parameter that already works in units. It can be used in the following ways:
In the example below, a Unit Conversion node is connected to the Transmission Depth with a Maxon Noise used to add variation via the Scalar Value. How that node behaves is dependent on the Mode used.
|
|
Changes how the unit is defined from the following options:
Only available when the Fixed mode is used.
Defines the unit for the Length parameter from the following options:
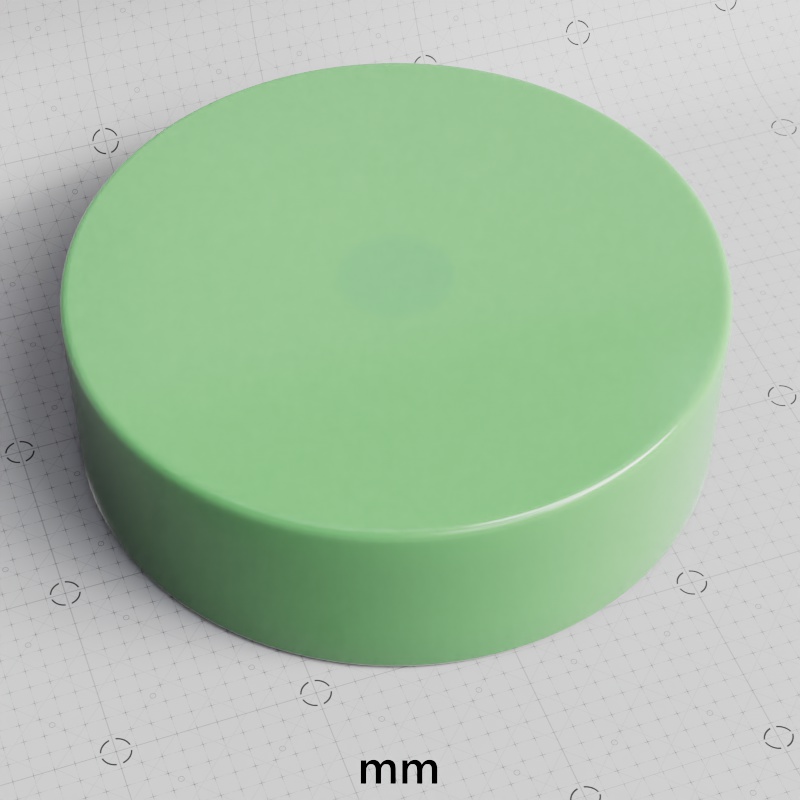
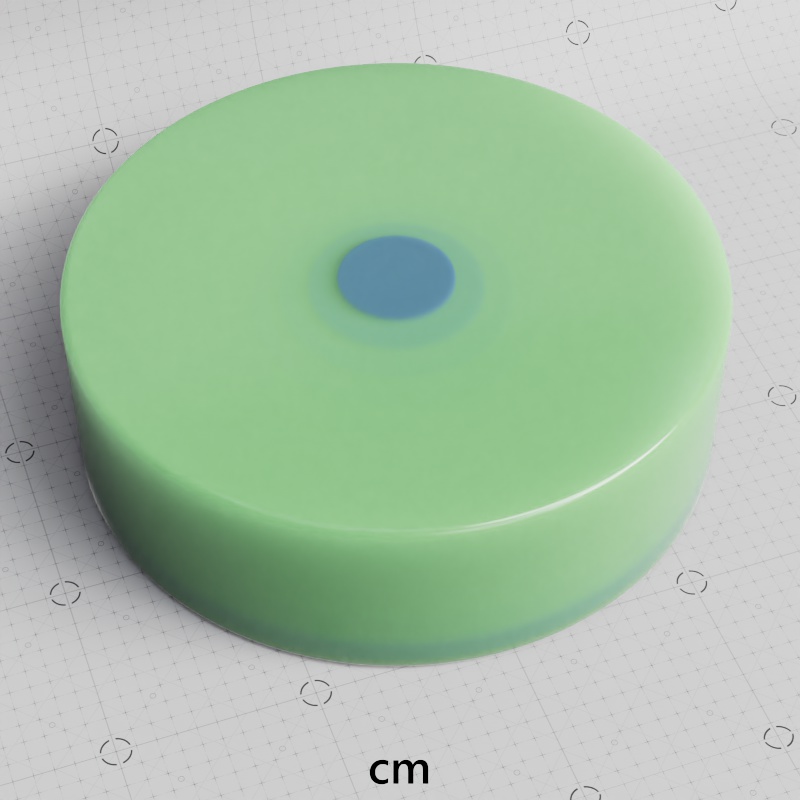
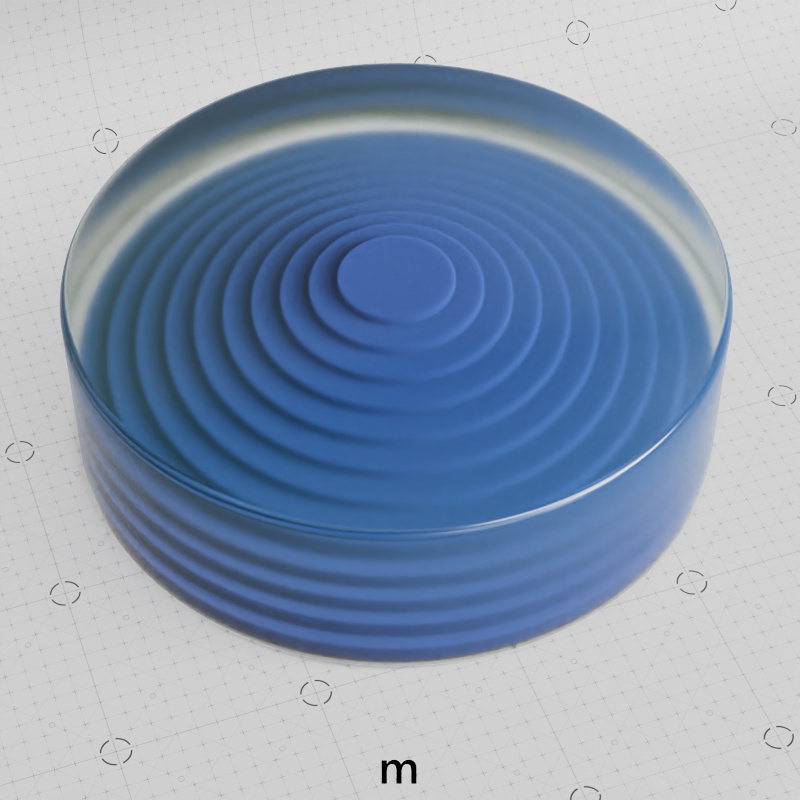
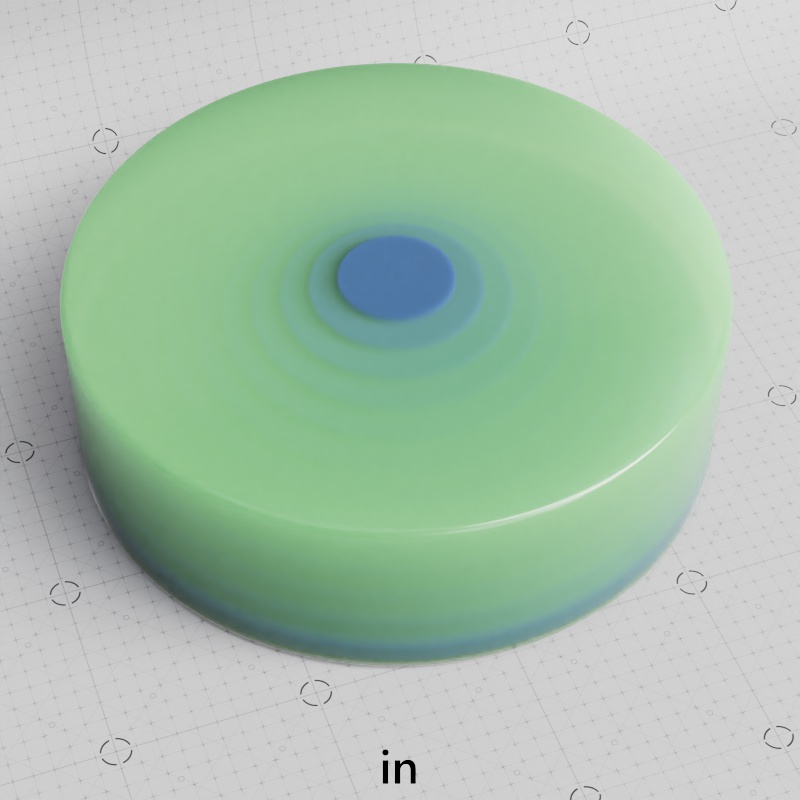
In the examples on this page a Unit Conversion node is used to drive the Transmission Depth of a green OpenPBR material. Increasing the Length allows more of the tiered blue internal structure to be revealed as the Transmission Depth increases. Each tier is 1cm taller than the last with a total of 10 tiers. The Unit Conversion node is set to a length of 1 and each time the Unit is changed the resulting Transmission Depth changes too.
Compared to the 1 centimeter starting point, when the Unit is set to millimeters (0.1 centimeters) the object looks very opaque because the Depth is much shorter, but when using meters (100 centimeters) it shows almost no signs of transmission scattering because the depth is so much longer.
|
|
|
| Unit: Millimeters Length: 1 (0.1 cm) |
Centimeters (starting point) 1 (1 cm) |
Meters 1 (100 cm) |
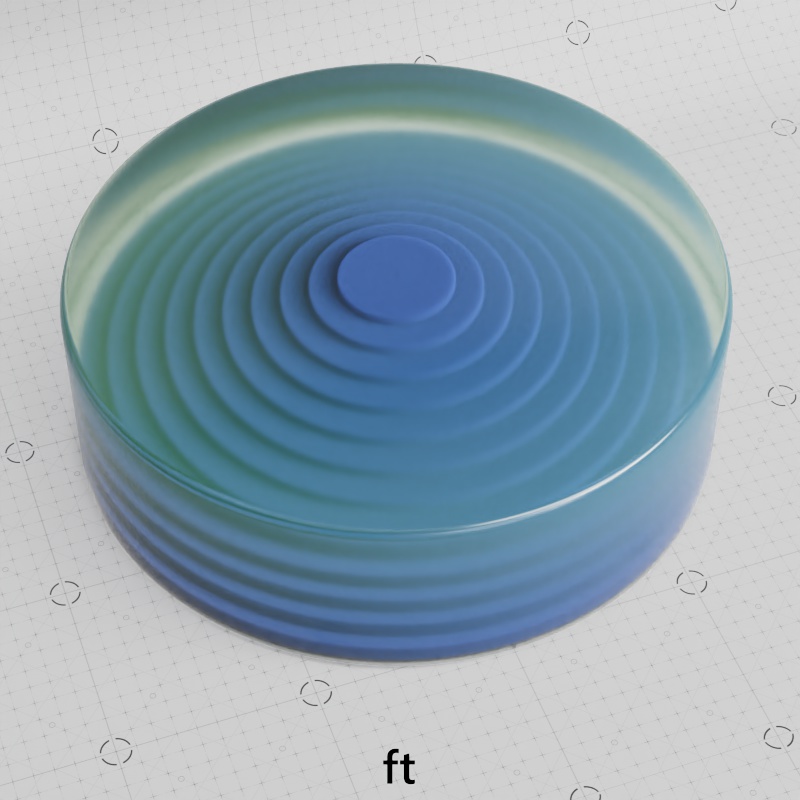
The same can be done with inches (2.54 centimeters) and feet (30.48 centimeters).
|
|
| Unit: Inches Length: 1 (2.54 cm) |
Feet 1 (30.48 cm) |
Controls the length of the output to be used in combination with a unit based parameter on another node. The total output is the result of the length in units multiplied by the Scalar/Vector value.
Here are some examples:
In the examples on this page a Unit Conversion node is used to drive the Transmission Depth of a green OpenPBR material. Increasing the Length allows more of the tiered blue internal structure to be revealed as the Transmission Depth increases. Each tier is 1cm taller than the last with a total of 10 tiers. At the starting value of 0.01 the green cylinder is completely opaque but using a value of 10 reveals all levels and the textured floor beneath.
| Length: 0.01 - 10 |
The Scalar Value input is multiplied by the Length to determine the final Scalar output. The primary use for the Scalar Value input is to connect a texture to vary the length across a surface.
The Vector Value does not affect the output when using the Scalar Output.
| Scalar Value: Stepped radial ramp | Noise texture |
The Vector Value input is multiplied by the Length to determine the final Vector output.
The Scalar Value does not affect the output when using the Vector Output.