Blender Lighting
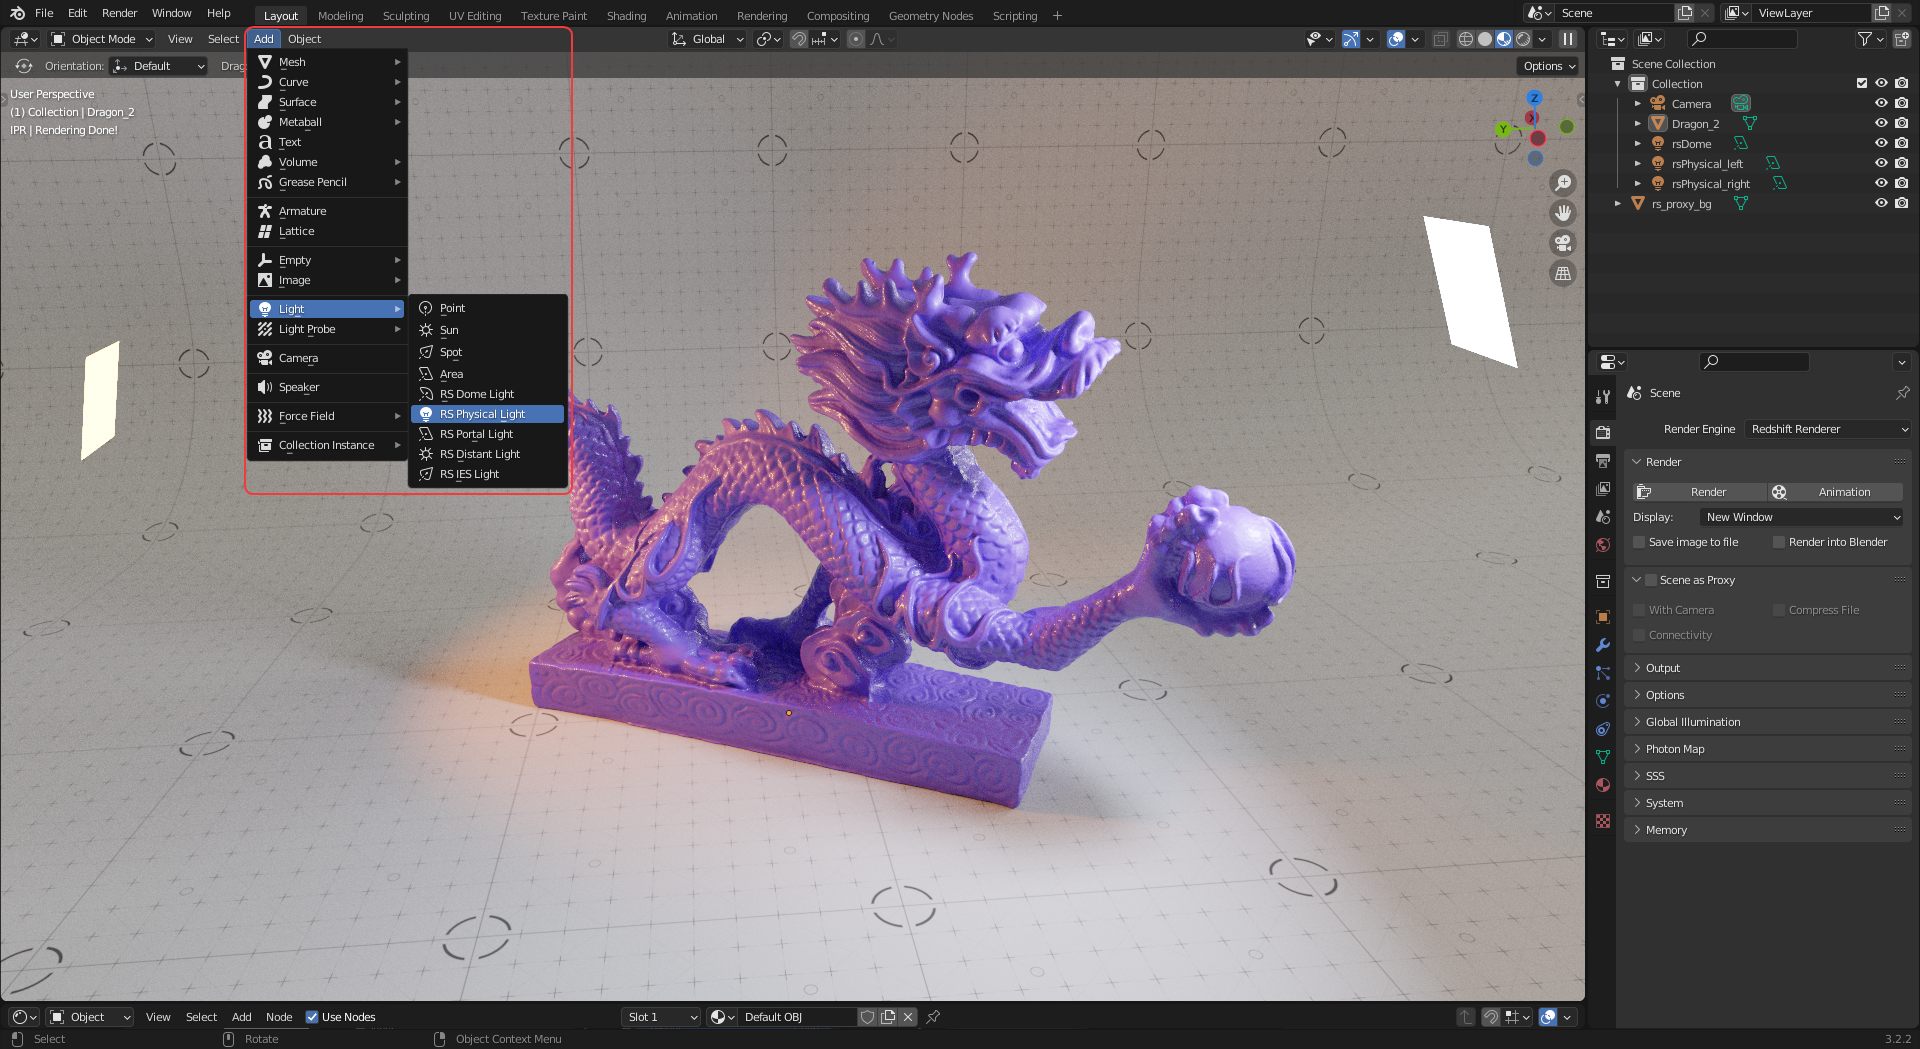
Redshift lights can be created by navigating to the Add menu's Light section and selecting a Redshift light.
|
|
| Creating a Redshift light |
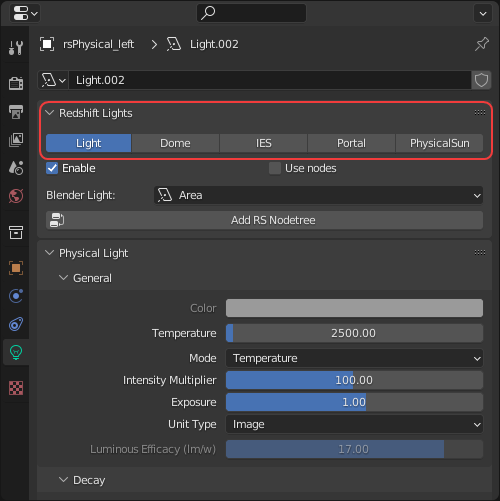
When a light is selected the Object Data Properties panel contains all the Redshift light settings.

|
| Redshift light settings panel |
These settings change depending on the light type, for more information on each parameter please see the light pages.
When using a Redshift Physical Light its light type can be changed even further by using the Blender Light drop-down menu as pictured below. For example, switching between an area light, spot light or point light. For more information please see the Physical Light type section.

|
| Physical Light type switcher |
Any Redshift light can be changed into a different type of Redshift light from the Object Data Properties panel.
|
| Redshift light type switcher |
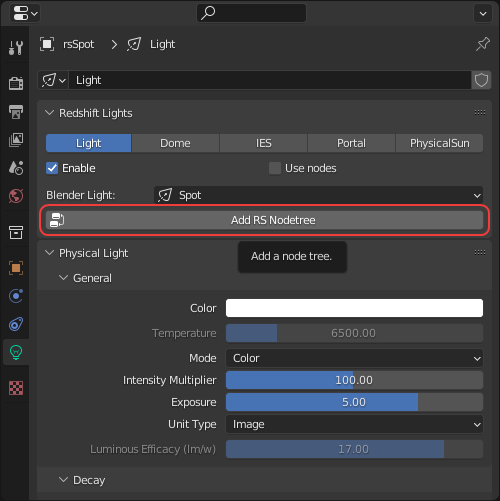
Lights in Redshift can be textured by using a Redshift node tree. The Add RS Nodetree button can be used to create and link a Redshift shader graph to a light.
|
| Add RS Nodetree button |
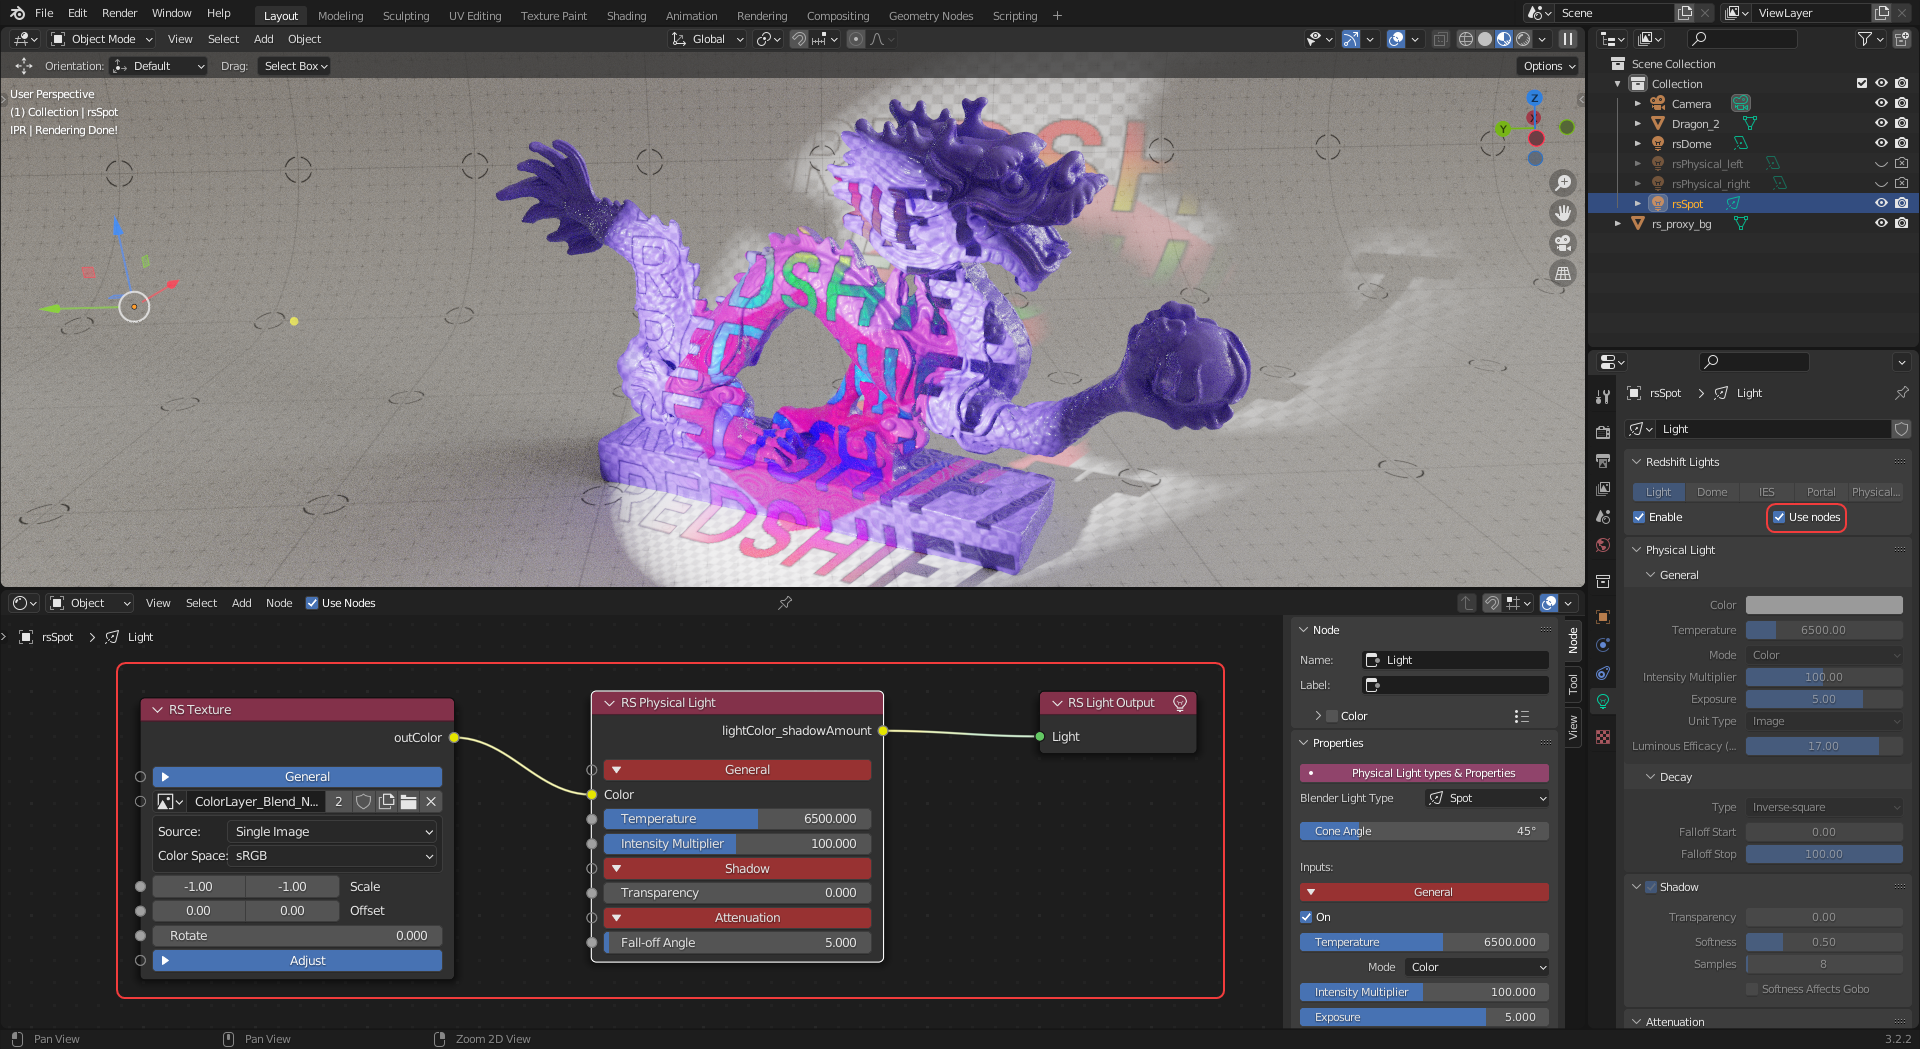
The Use Nodes toggle can be used to switch between using a Redshift light shader graph and the standard light settings, this is enabled by default when Add RS Nodetree is first used.
When use nodes is enabled many of the light's primary parameters are fully controlled by the light node inside the shader graph and those same parameters in the object data properties panel become inactive.
In the example image below an image texture is connected to the color input of a Physical Light so that the image is projected into the scene.
|
| Texturing a light with a Redshift node tree |
Light contribution can be enabled or disabled on a per-object basis when Enable Light-Mesh Associations is used.
Objects added in the Light or Shadow sections can be enabled or disabled for each light. For more information please see the Light and Shadow Linking page.
Redshift environment shaders and volumetric fog can be controlled in the World Properties panel as scene below.
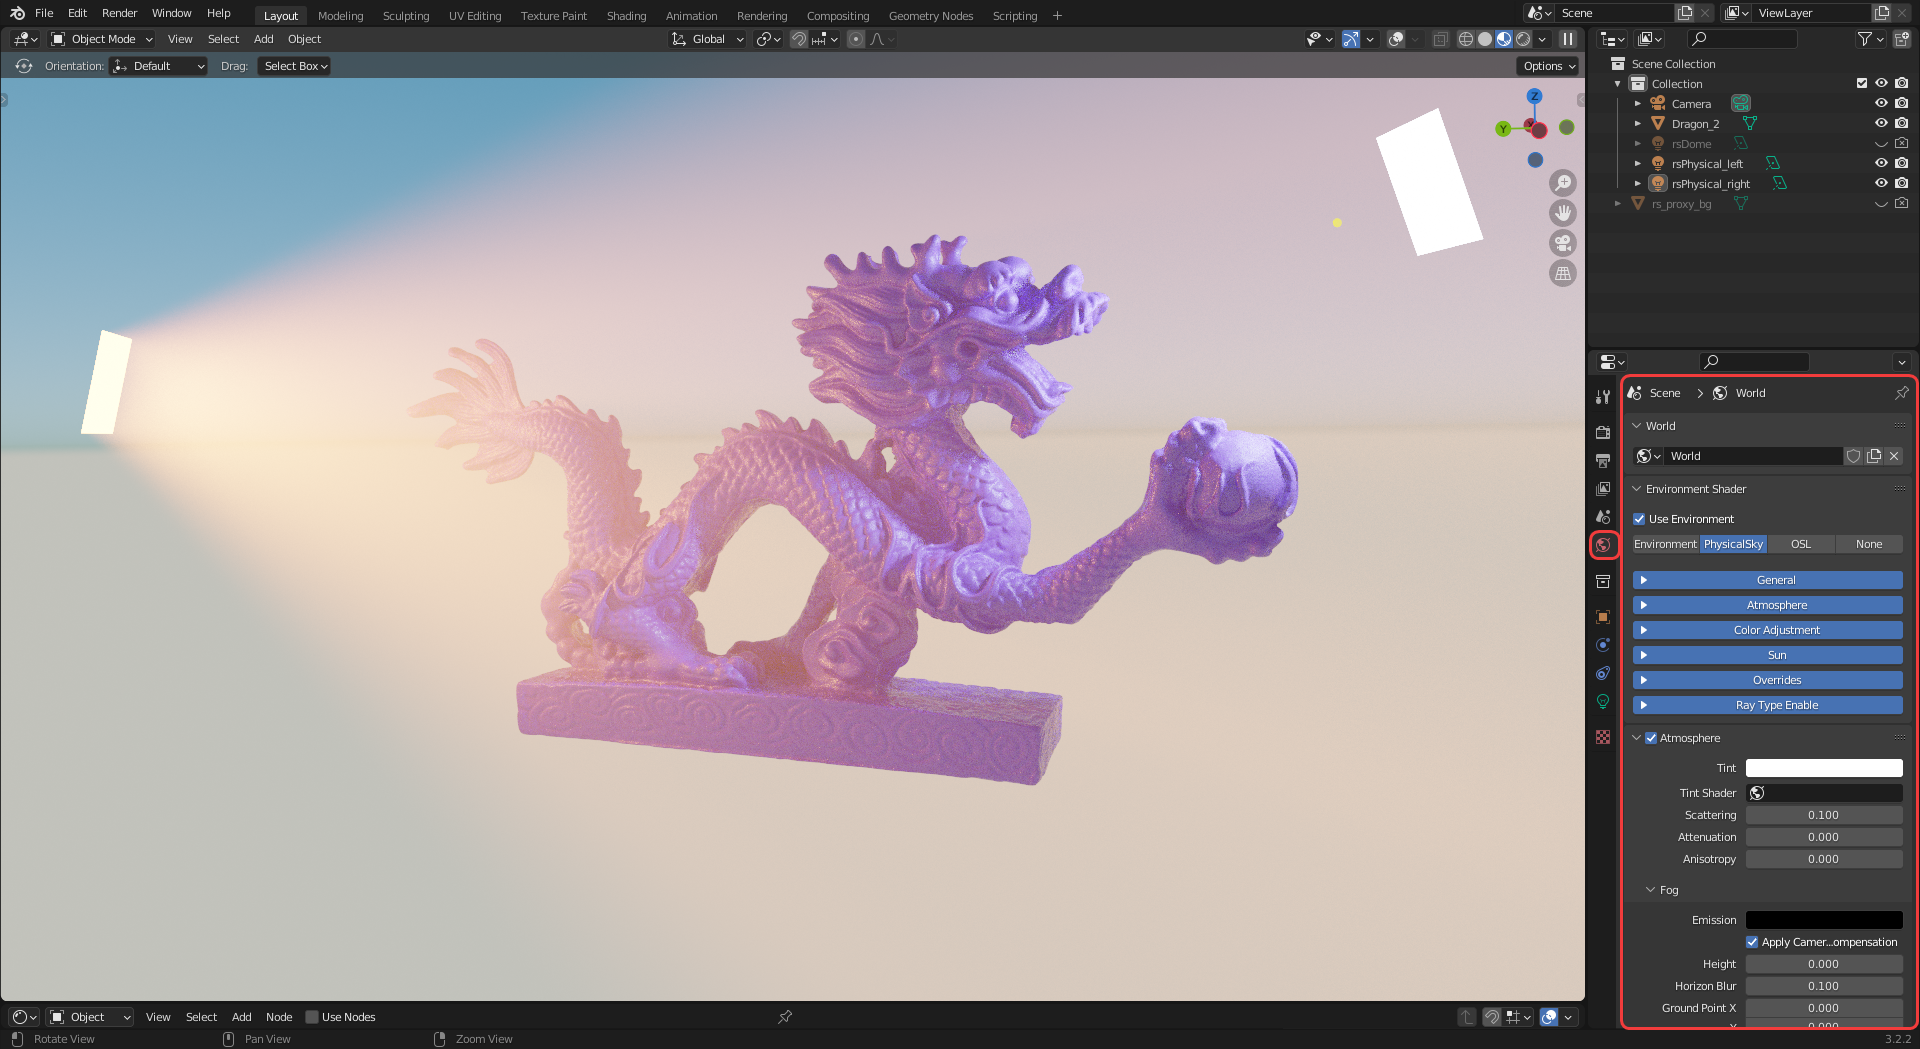
|
| Redshift environment shader settings |

|
| Changing the environment type |
The Redshift environment shaders can be switched between the following four options:
None (default)
When a Redshift environment is used a shading graph is automatically created and connected to the environment input of a RS World Output node, this can be found in the "World" context of the Shader Editor as pictured below.
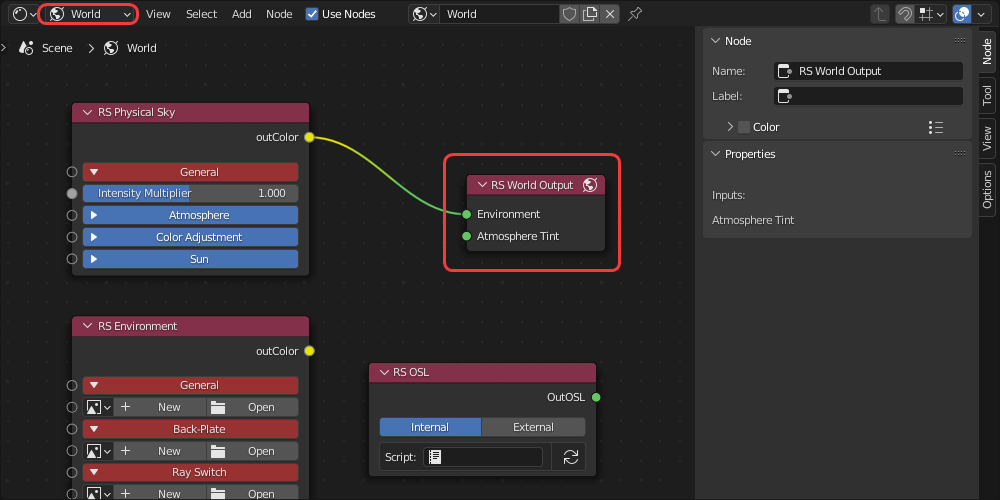
|
| Redshift environment node tree example in the World context |
To enable scene wide volumetric fog enable Atmosphere in the World Properties Panel. For more information on volume fog please see the Volume Fog page.
Volume fog requires the use of a Redshift environment even if that environment is empty / not configured. In the example image below OSL is set as the environment even though it is not set up. If environment is set to "None" the volume fog will not render.

|
| Enabling Atmosphere for volume fog |
At least one light's volume contribution scale must be set above 0 before volume fog rendering can take place.
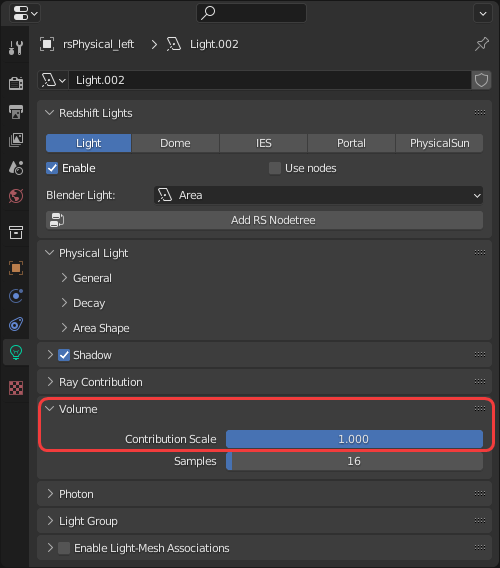
|
| Increasing a light's volume contribution |
Atmospheric fog can be broken up with a noise texture by connecting it to the Atmosphere Tint input of a RS World Output node. Then this world shader must be set as the Tint Shader for the atmosphere as pictured in the example image below.
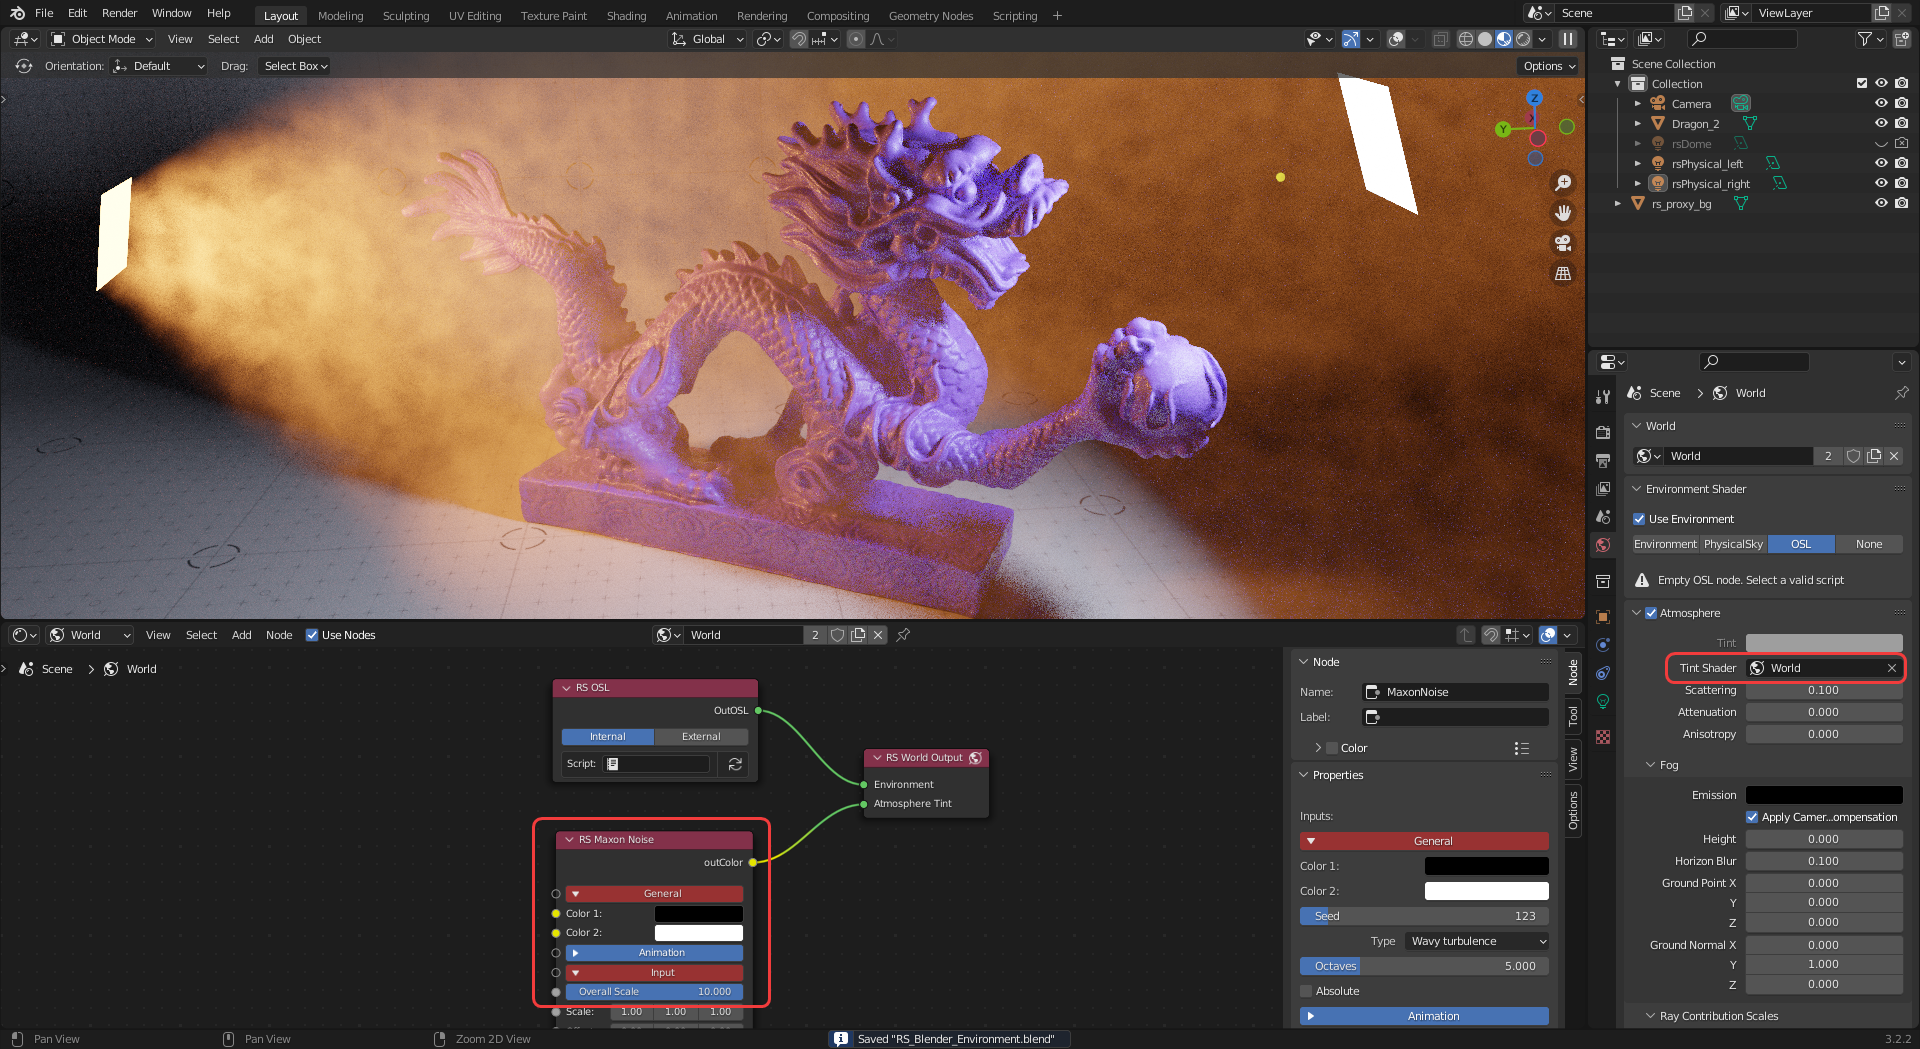
|
| Adding noise to volume fog |