Table Of Contents
There are many ways to control how objects in a scene are rendered, one of the most flexible methods is to use custom user data or built-in attributes. User data describes attributes that are manually added to objects in the scene for the purpose of driving shading networks and AOVs.
Redshift supports the following data types.
An integer is a whole number that can be negative but cannot have a decimal place.
Integers are a useful data type for organizing objects into different groups and Redshift has three built-in integer data attributes. All three can be used with a User Data Integer node as long as the correct naming is used in the Attribute Name field: RSObjectID, RSNameID and RSInstanceID. For more information, please see the Using Object ID in a shader section below.
Examples: -1, 0, 1, 3, 12, 20
A single real number, it can have a decimal and be negative. Only describes a magnitude not a direction.
Use float as the data type if scalar is not available.
Examples: -1.2, 0, 0.2, 1, 1.4, 3
A value defined by three scalar values with length and direction in three dimensional space. Frequently used for controlling 3D position, rotation, and scale.
Use float3 as the data type if vector is not available.
Examples: (0, 0, 0), (3, 2, -1), (0.3, 2.4, 5)
A color is defined by three to four scalar values that represent red, green, blue, and alpha channels.
Use float3, vector, or float4 as the data type if color is not available.
String data is only available for use with OSL nodes.
A data type made up of characters like letters and numbers.
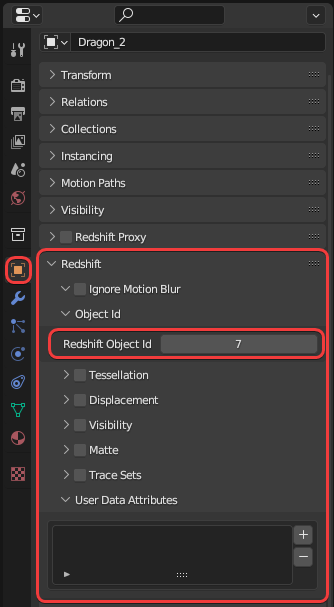
Object ID is an integer data type and is the most common of Redshift's built-in attributes. It can be used like any other integer user data in a shading graph but it is also a common preset in AOVs like the puzzle matte and the jitter node, making it an easy method of object management.
To control the Object ID navigate to the Redshift section of the Object Properties panel. Here the Redshift Object ID can be set to any integer you prefer. If you want different objects to share the same result give them the same Object ID, otherwise give them a unique Object ID.
Currently Redshift's Object ID cannot be used directly in the shader graph, instead create an integer user attribute.
|
|
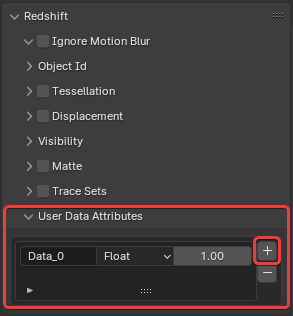
Before user data can be set per-object you first need to create the attributes to hold the custom values. To add user data to objects, select an object and navigate to the Redshift section of the Object Properties panel. Click on the plus sign in the User Data Attributes section to add a new attribute to the object, the name is automatically chosen starting with "Data_0" and increments with additional attributes.
|
| Adding a new attribute to an object |
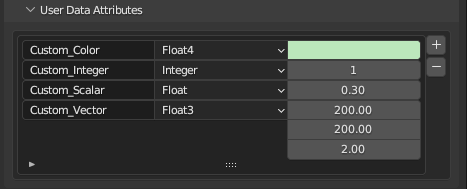
Next customize each attribute, most importantly give each attribute a unique name and set the data type.
Unique attribute names are vital because Redshift uses this case-sensitive name to access user data at render time.

|
| Changing the attribute name and data type |
After setting up each attribute their values can be changed to provide unique properties when used in a shader graph at render time.
|
| Editing custom user data on an object |
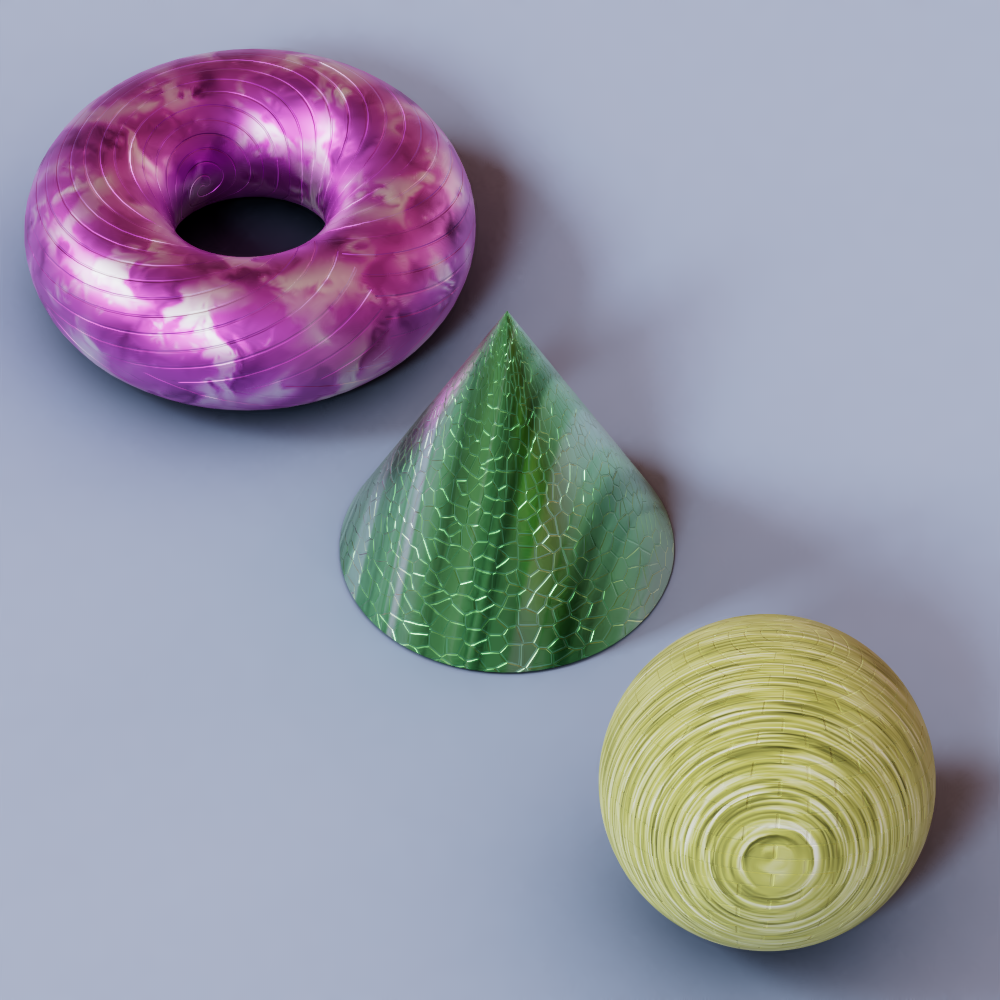
One way to use this data is with a single material to control the look of multiple different objects instead of a unique material for each, this can make material management more efficient and flexible. The final look of each object is controlled by the values set for each custom attribute that is assigned to an object. You can group objects together by giving them the same value or isolate objects by giving them unique values.
|
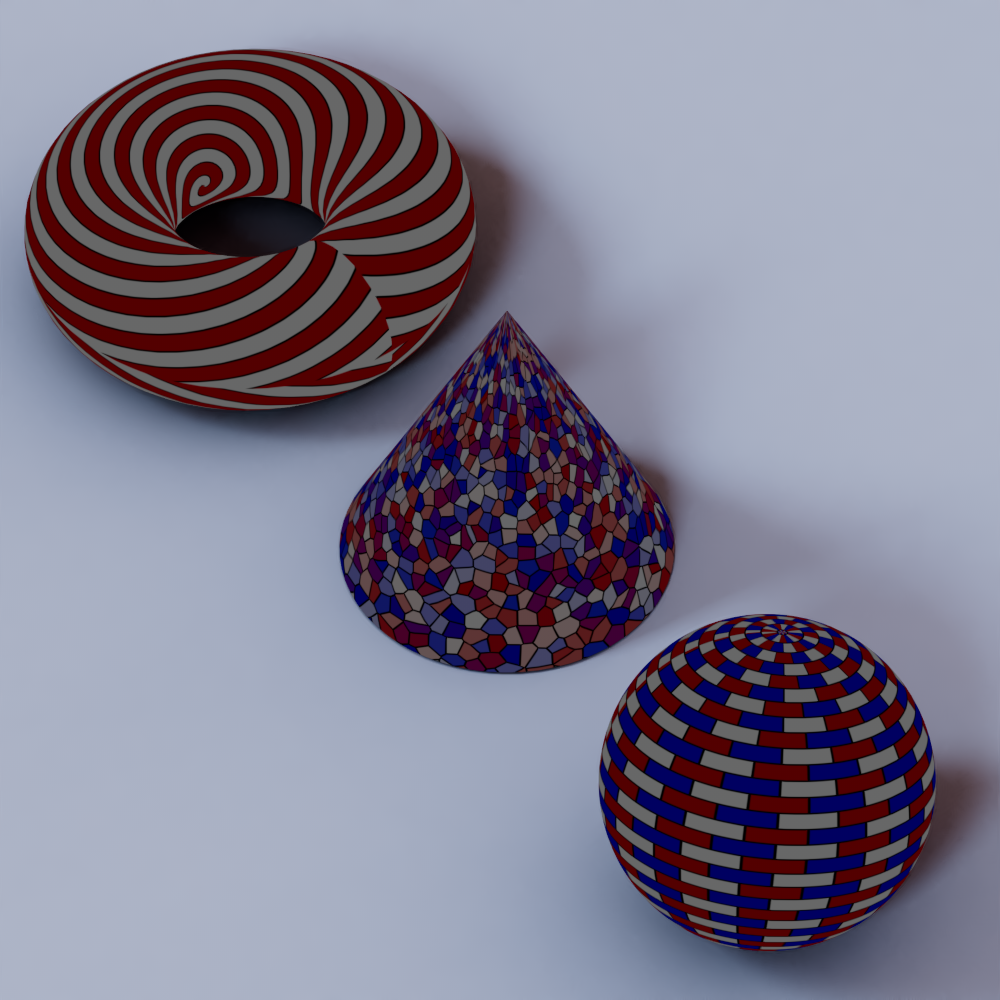
| Using a single material to control three different objects |
In this example scene there are three objects, a torus, a cone, and a sphere, that all use the same material. Each object has the same custom attributes applied to it: Custom_Color, Custom_Integer, Custom_Scalar, and Custom_Vector. These attribute names are used in user data nodes that are plugged into different ports on the same standard material. The values set on each object are as follows:
| Torus | Cone | Sphere | Material Input | |
| Custom_Color | Pink (0.8, 0.4, 0.75) | Green (0.5, 0.8, 0.5) |
Yellow (0.8, 0.8, 0.5) |
Driving base color mixed with noise |
| Custom_Integer | 0 | 1 | 2 | Driving shader switch for bump map texture |
| Custom_Scalar | 0.5 | 0.3 | 1 | Driving reflection roughness |
| Custom_Vector | (3, 3, 3) | (200, 200, 2) | (5, 5, 0.1) | Driving noise scale mixed with base color |
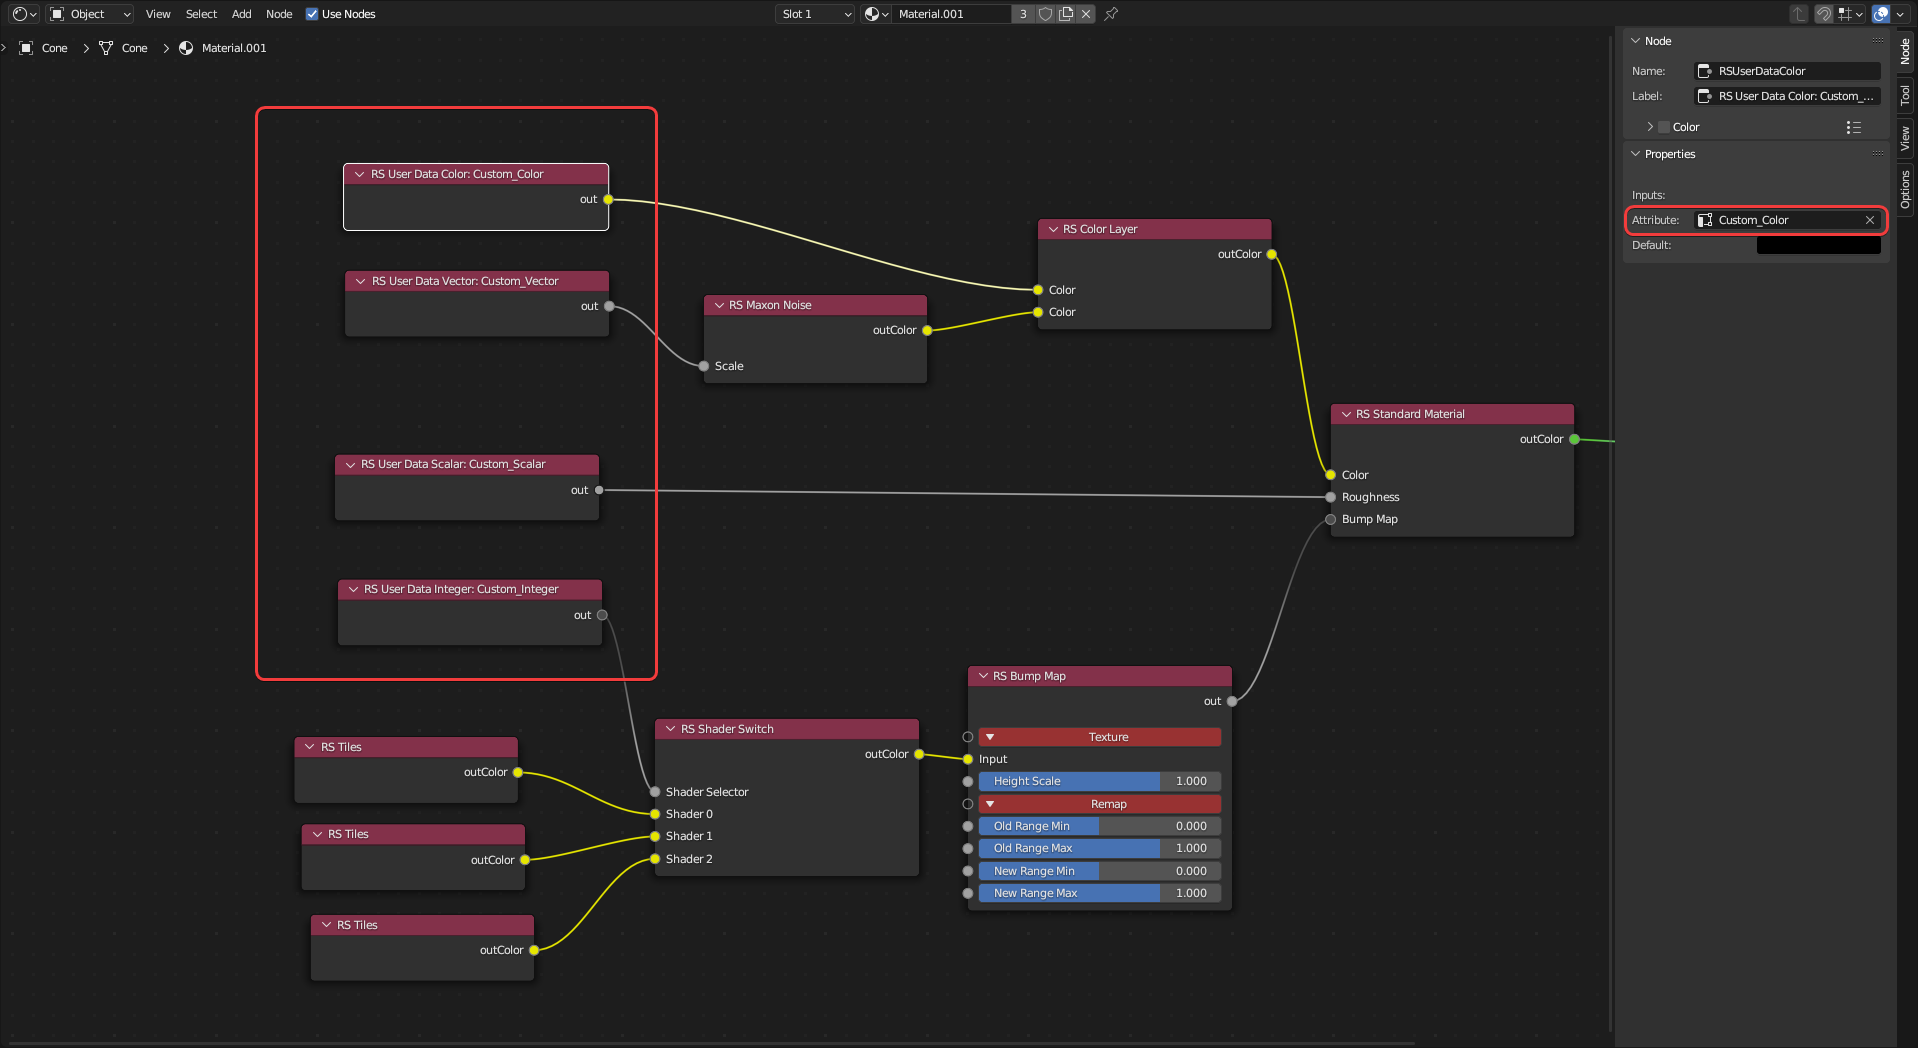
In the shader graph a user data node is created for each attribute and the relevant attribute name is plugged into the "Attribute" field, this pulls the data from the object into the shader graph and uses it to drive the output. For example, the Custom_Color attribute pulls the pink, green, and yellow colors into the User Data Color node and feeds that to the next point in the chain. This works the same for all the types of user data and opens the shader graph up to many possibilities that can be controlled without being inside the actual shader graph once initially set up.
|
The impact of each user data node can be seen in isolation below:
|
|
|
|
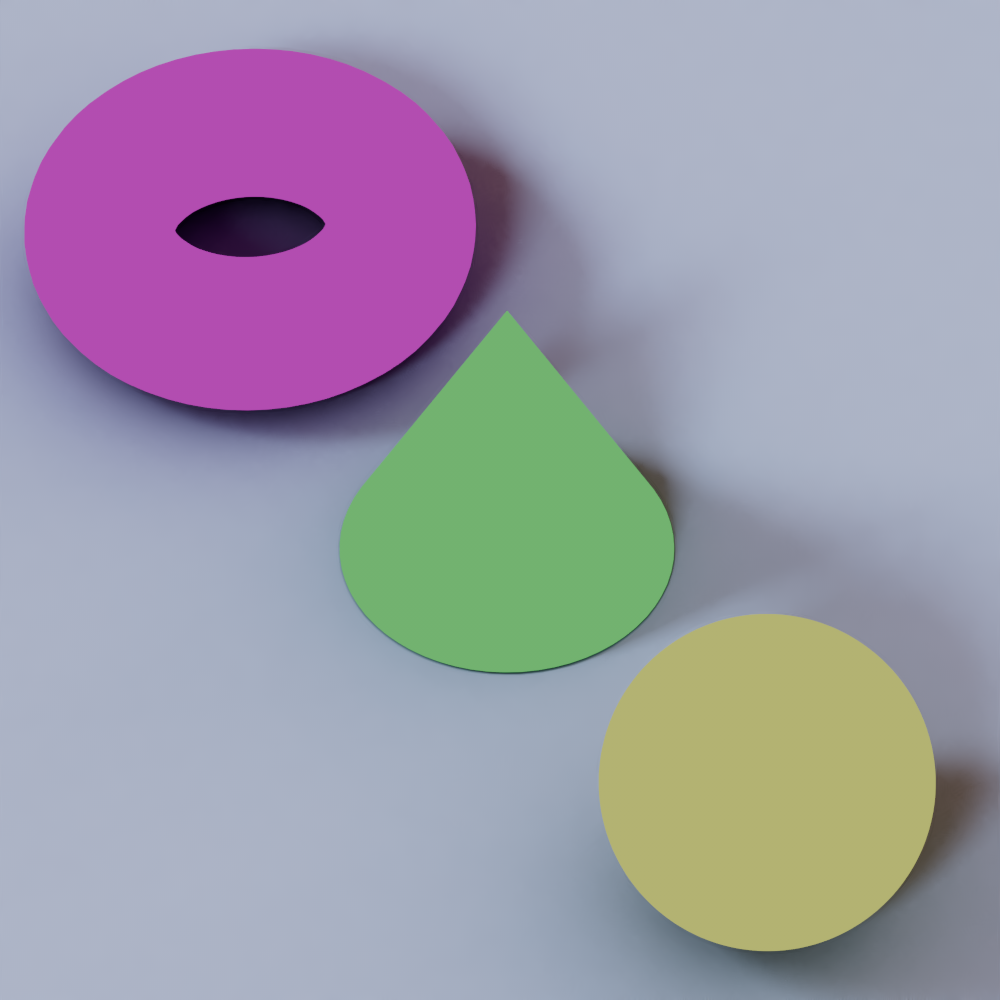
| Custom_Color Controls the base color of each object |
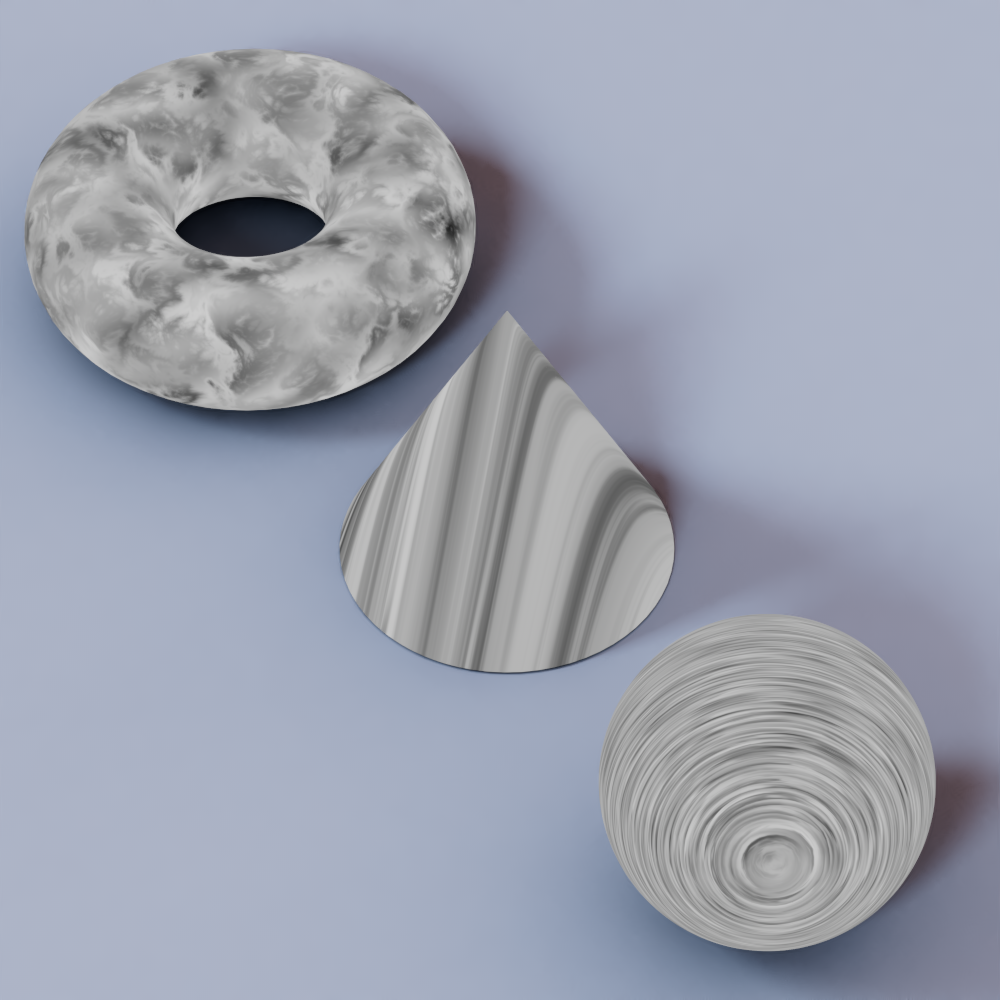
Custom_Vector Scales the same noise differently for each object |
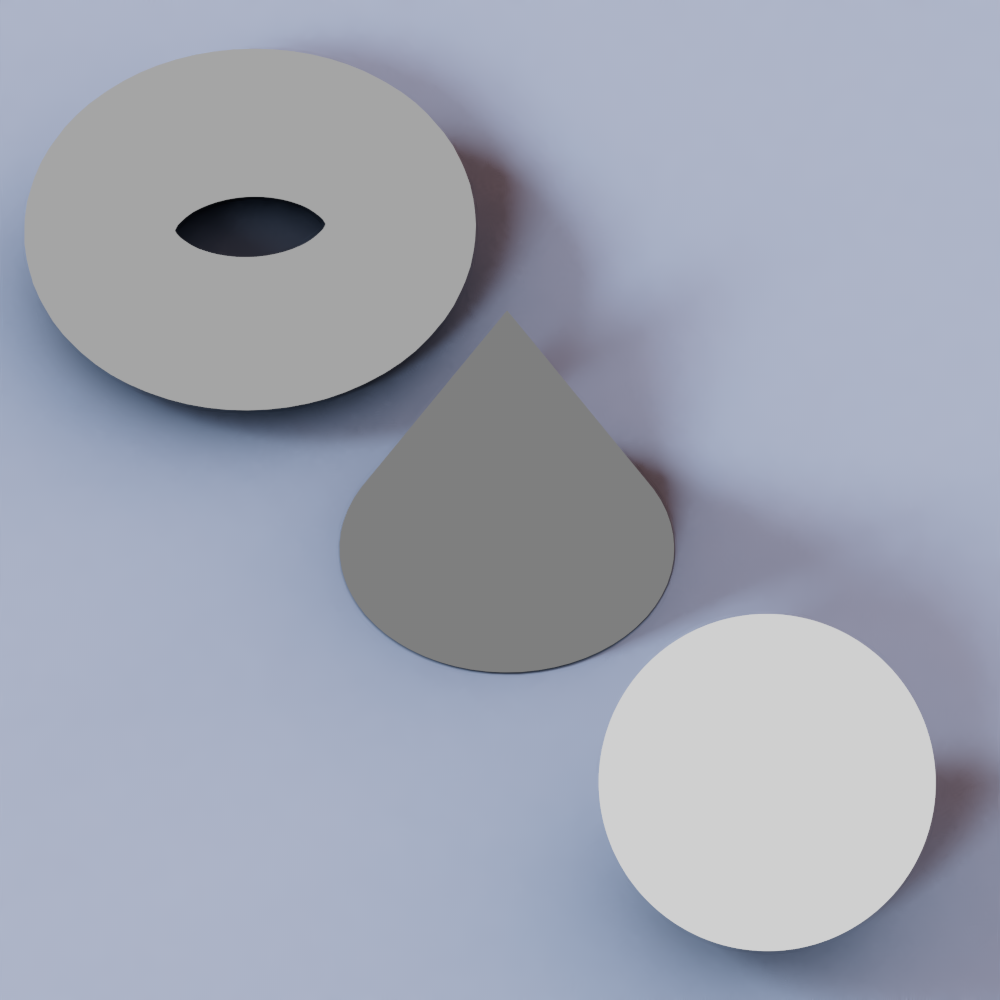
Custom_Scalar Controls the reflection roughness of each object (value visualized in greyscale) |
Custom_Integer Controls a shader switch that changes the tile texture used to drive a bump map |