Redshift Preferences
Opening the Redshift Preferences
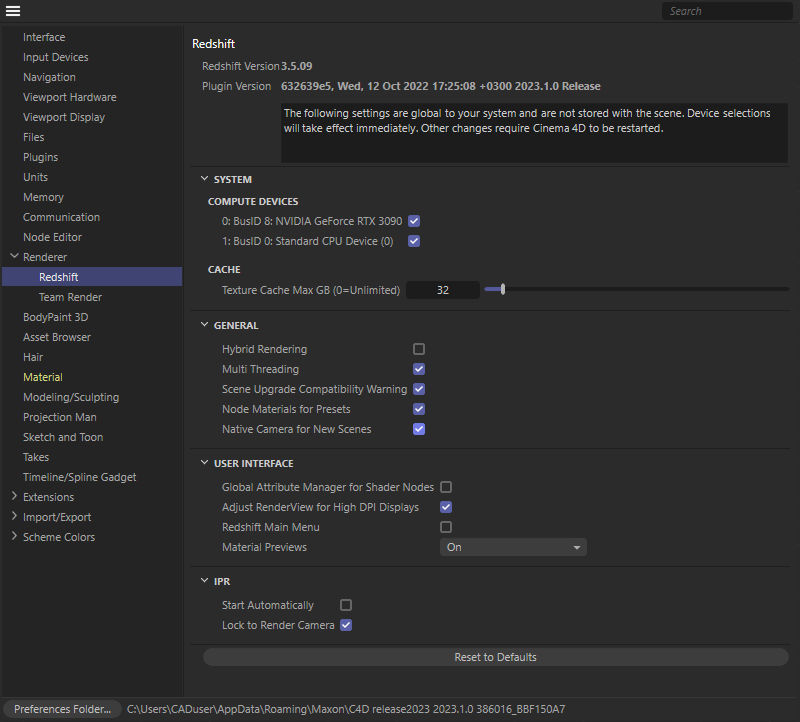
The Redshift Preferences are a part of the Cinema 4D Preferences. You can access them by opening Edit Preferences... and selecting Redshift from the Renderer category.
About Redshift
Here you can find out about the currently installed version of Redshift and its plugin.
Normally Redshift will be installed together with Cinema 4D and its updates, but you can also manually install updates of Redshift and its plugin. If you plan to do so, you can use the information found here to compare version numbers.
Redshift Version
This is the Version of the Redshift Core application. You can use this version number to compare features, for example by looking at the Redshift Release Notes.
Plugin Version
The Redshift installation also uses a separate plugin to implement Cinema 4D specific interface elements and features. Here you can find the version number and release date of the installed plugin. At the end of the displayed string there is also the lowest Cinema 4D version number required to run the plugin.
A general reminder for using Preferences with Redshift:
The following settings are global to your system and are not stored with the scene. Device selections will take effect immediately. Other changes require Cinema 4D to be restarted.
This means that you can experiment with different device configurations, for example if you have multiple graphics cards and CPUs in your system. Other settings, such as for the size of the texture cache, require a restart of Cinema 4D to become active.
System
These settings directly affect the rendering process. You can, for example, choose which devices in your system to use during Redshift's rendering.
Compute Devices
Here you can find the devices of your computer that Redshift can use for rendering. The Redshift version that comes with Cinema 4D only supports CPU rendering. If you also installed Redshift as a separate product or as part of the MAXON One suscription, Redshift can also use the GPU or even CPU and GPU together. Just mark the devices you want to use for rendering. Rendering will always be multiple times faster with modern graphics cards compared to rendering only on the CPU.
Cache
Redshift uses caches to speed up rendering and enable rendering of native Cinema 4D shaders. These cache files contain automatically baked and compiled shaders, as well as bitmaps that have been converted to Redshifts own texture format for faster processing. Here you can configure the folder used to save these caches.
Caches are not deleted automatically when you close a project or quit Cinema 4D, but you can delete cached textures manually.
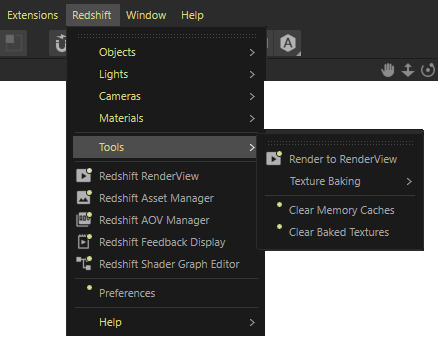
To clear caches, Redshift offers two commands that can be accessed through the Redshift menu and the Commander. As the Redshift menu is not active by default, you can open the Commander by using Shift+C and then searching for "clear".
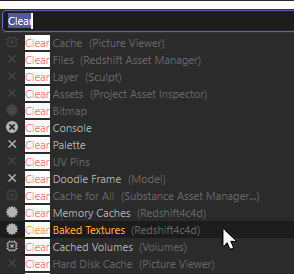
As you can see in the image above, this brings up a list of all commands that include the phrase "clear".
A double click on Clear Memory Caches will free all baked information from memory. This only addresses information stored in RAM.
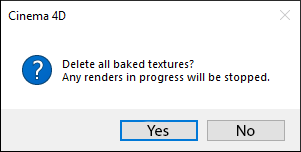
Double clicking on the command Clear Baked Textures will remove baked textures from the cache folder. This will bring up a warning dialog, that currently running renders will get stopped by this action. By confirming this warning, all cached textures from the current project will be deleted from the cache folder. All other cache files that are connected to other Cinema 4D projects will not be touched by this command!
Texture Cache Max GB (0=Unlimited)
Since caches from older projects are not automatically deleted, you can limit the size of the cache folder here so that it does not fill up your disk space over time.
Since missing caches are automatically recalculated, manually deleting files from the cache directory is also an option if disk space is needed quickly. The caches must remain untouched only as long as a rendering of the corresponding project is still running.
General
Hybrid Rendering
Activate this option if you like to use activated CPU and GPU devices for rendering. Currently this is a more experimental setting and disabled by default.
Please note that Cinema 4D only includes the CPU version of Redshift. To use GPU rendering with Redshift, you need an additional installation of Redshift. This is already included in the subscription for MAXON One users, for example.
Multi Threading
CPU related tasks are run in threads, speeding up calculations and making best use of your CPUs capabilities.
Scene Upgrade Compatibility Warning
When loading projects created with an older version of Redshift, a warning dialog is displayed. The Redshift options may have changed, leading to different render results.
Node Materials for Presets
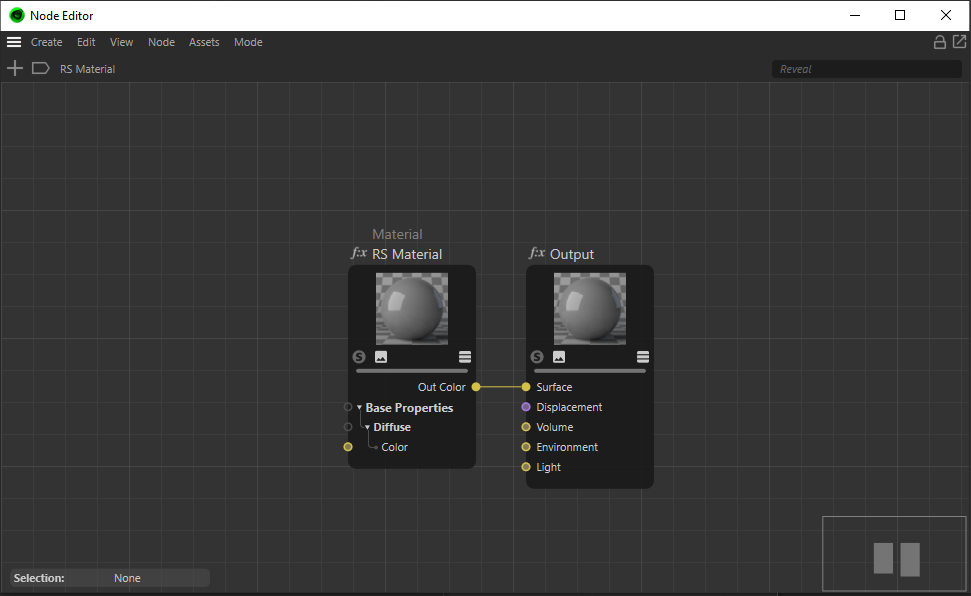
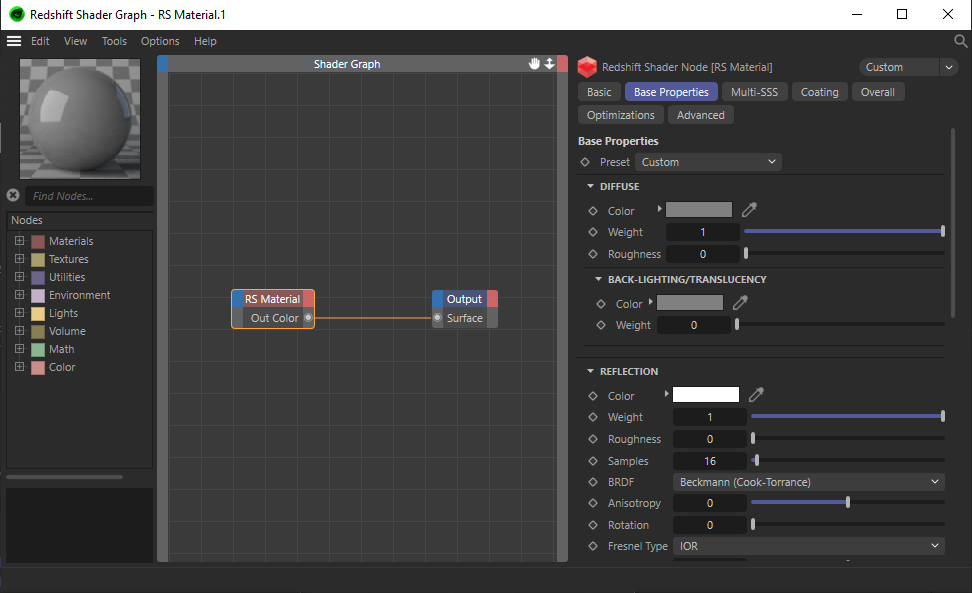
When you create a Redshift material, it is automatically created in Cinema 4D's own node system. This option is active by default. With this option turned off, Redshift materials are created within the Redshift ShaderGraph. If required, there is also a conversion option from ShaderGraph materials to Cinema 4D Node materials available, which you can access via the + menu in the Material Manager.
|
|
| A standard Redshift material in the Node Editor | A standard Redshift material in the ShaderGraph |
Native Camera for New Scenes
Redshift can use the default Cinema 4D camera object for rendering, but also provides additional post effects and rendering parameters. Therefore, it is recommended to use the native camera object with Redshift. This is created by default when Redshift is the active renderer in the Render Settings, and can be added from the Create menu or the camera icon on the right side of the layout.
If you uncheck this option, the default Cinema 4D camera is created in combination with a Redshift Camera tag. This can be helpful when working on older Redshift projects. Starting new projects, using the new, native Redshift Camera object is recommended instead. That's why this option is on by default.
User Interface
Global Attribute Manager for Shader Nodes
This option only affects the editing of shaders in the Redshift ShaderGraph. If a node is selected there, its settings can be edited directly on the right side of the ShaderGraph. If this option is switched on, changes to the node settings must be made via the Cinema 4D Attribute Manager instead.
Adjust RenderView UI for High DPI Displays
Modern monitors and displays offer ever higher resolutions without necessarily increasing the size of the screen area. The result is ever higher pixel densities. Redshift and Cinema 4D can automatically use higher resolution versions of the icons so that this is not accompanied by a visual reduction in icon size. Activate this option to use icon sizes in Redshift RenderView that are adapted to the pixel density.
Redshift Main Menu
Most Redshift tools, commands and objects are available in this separate Redshift menu, which can be made visible in the top menu bar of Cinema 4D. Since these elements can also be found in other menus, you can turn this option off if you need a little more space in the Cinema 4D menu bar.
The 'Redshift' menu in the top menu bar of Cinema 4D
Material Previews
Leave this option enabled to see an updated material preview immediately after changing a material parameter. On the other hand, editing of material parameters can be accelerated if there is no need for automatic recalculation of preview images in Node Editor and Material Manager. A third option will only update the material previews when the renderer is idle.
IPR
Start Automatically
This will start the Interactive Preview Renderer (IPR) automatically whenever you open the Redshift RenderView.
Lock to Render Camera
Redshift allows you to select which scene camera to render from right inside the RenderView by using the Render Camera dropdown menu. This Preference option will take care, that the currently active camera is used for the RenderView always.
Reset to Defaults
Use this button to activate the default settings for Redshift and undo any changes you have made on this settings page.