Ambient Occlusion
Overview
Ambient Occlusion (AO) is a shading technique that was developed back in the time when global illumination was impractical. Instead of shooting many rays and bouncing them around (which is what is needed for global illumination), ambient occlusion was used to detect the parts of the scene that are occluded from the rest of the environment (such as corners and creases).
Today's computers are much more powerful than when Ambient Occlusion was first developed and the use of global illumination is now the norm. This reduces the usefulness of ambient occlusion as a primary lighting technique. However, Ambient Occlusion to achieve different effects such as:
- Creating extra darkness/contrast in occluded areas for artistic reasons – when GI has failed to do so and has 'leaked' too much lighting in these areas (because of multiple bounces)
- Using it to implement techniques like 'dirtmaps' where shading is modified around occluded areas by blending different textures (such as moss)
The Ambient Occlusion node can be connected and combined with other rendering techniques which provides the user with a great degree of flexibility.
If you need to create a full-scene Ambient Occlusion pass please take a look at creating a Ambient Occlusion AOV.
Example
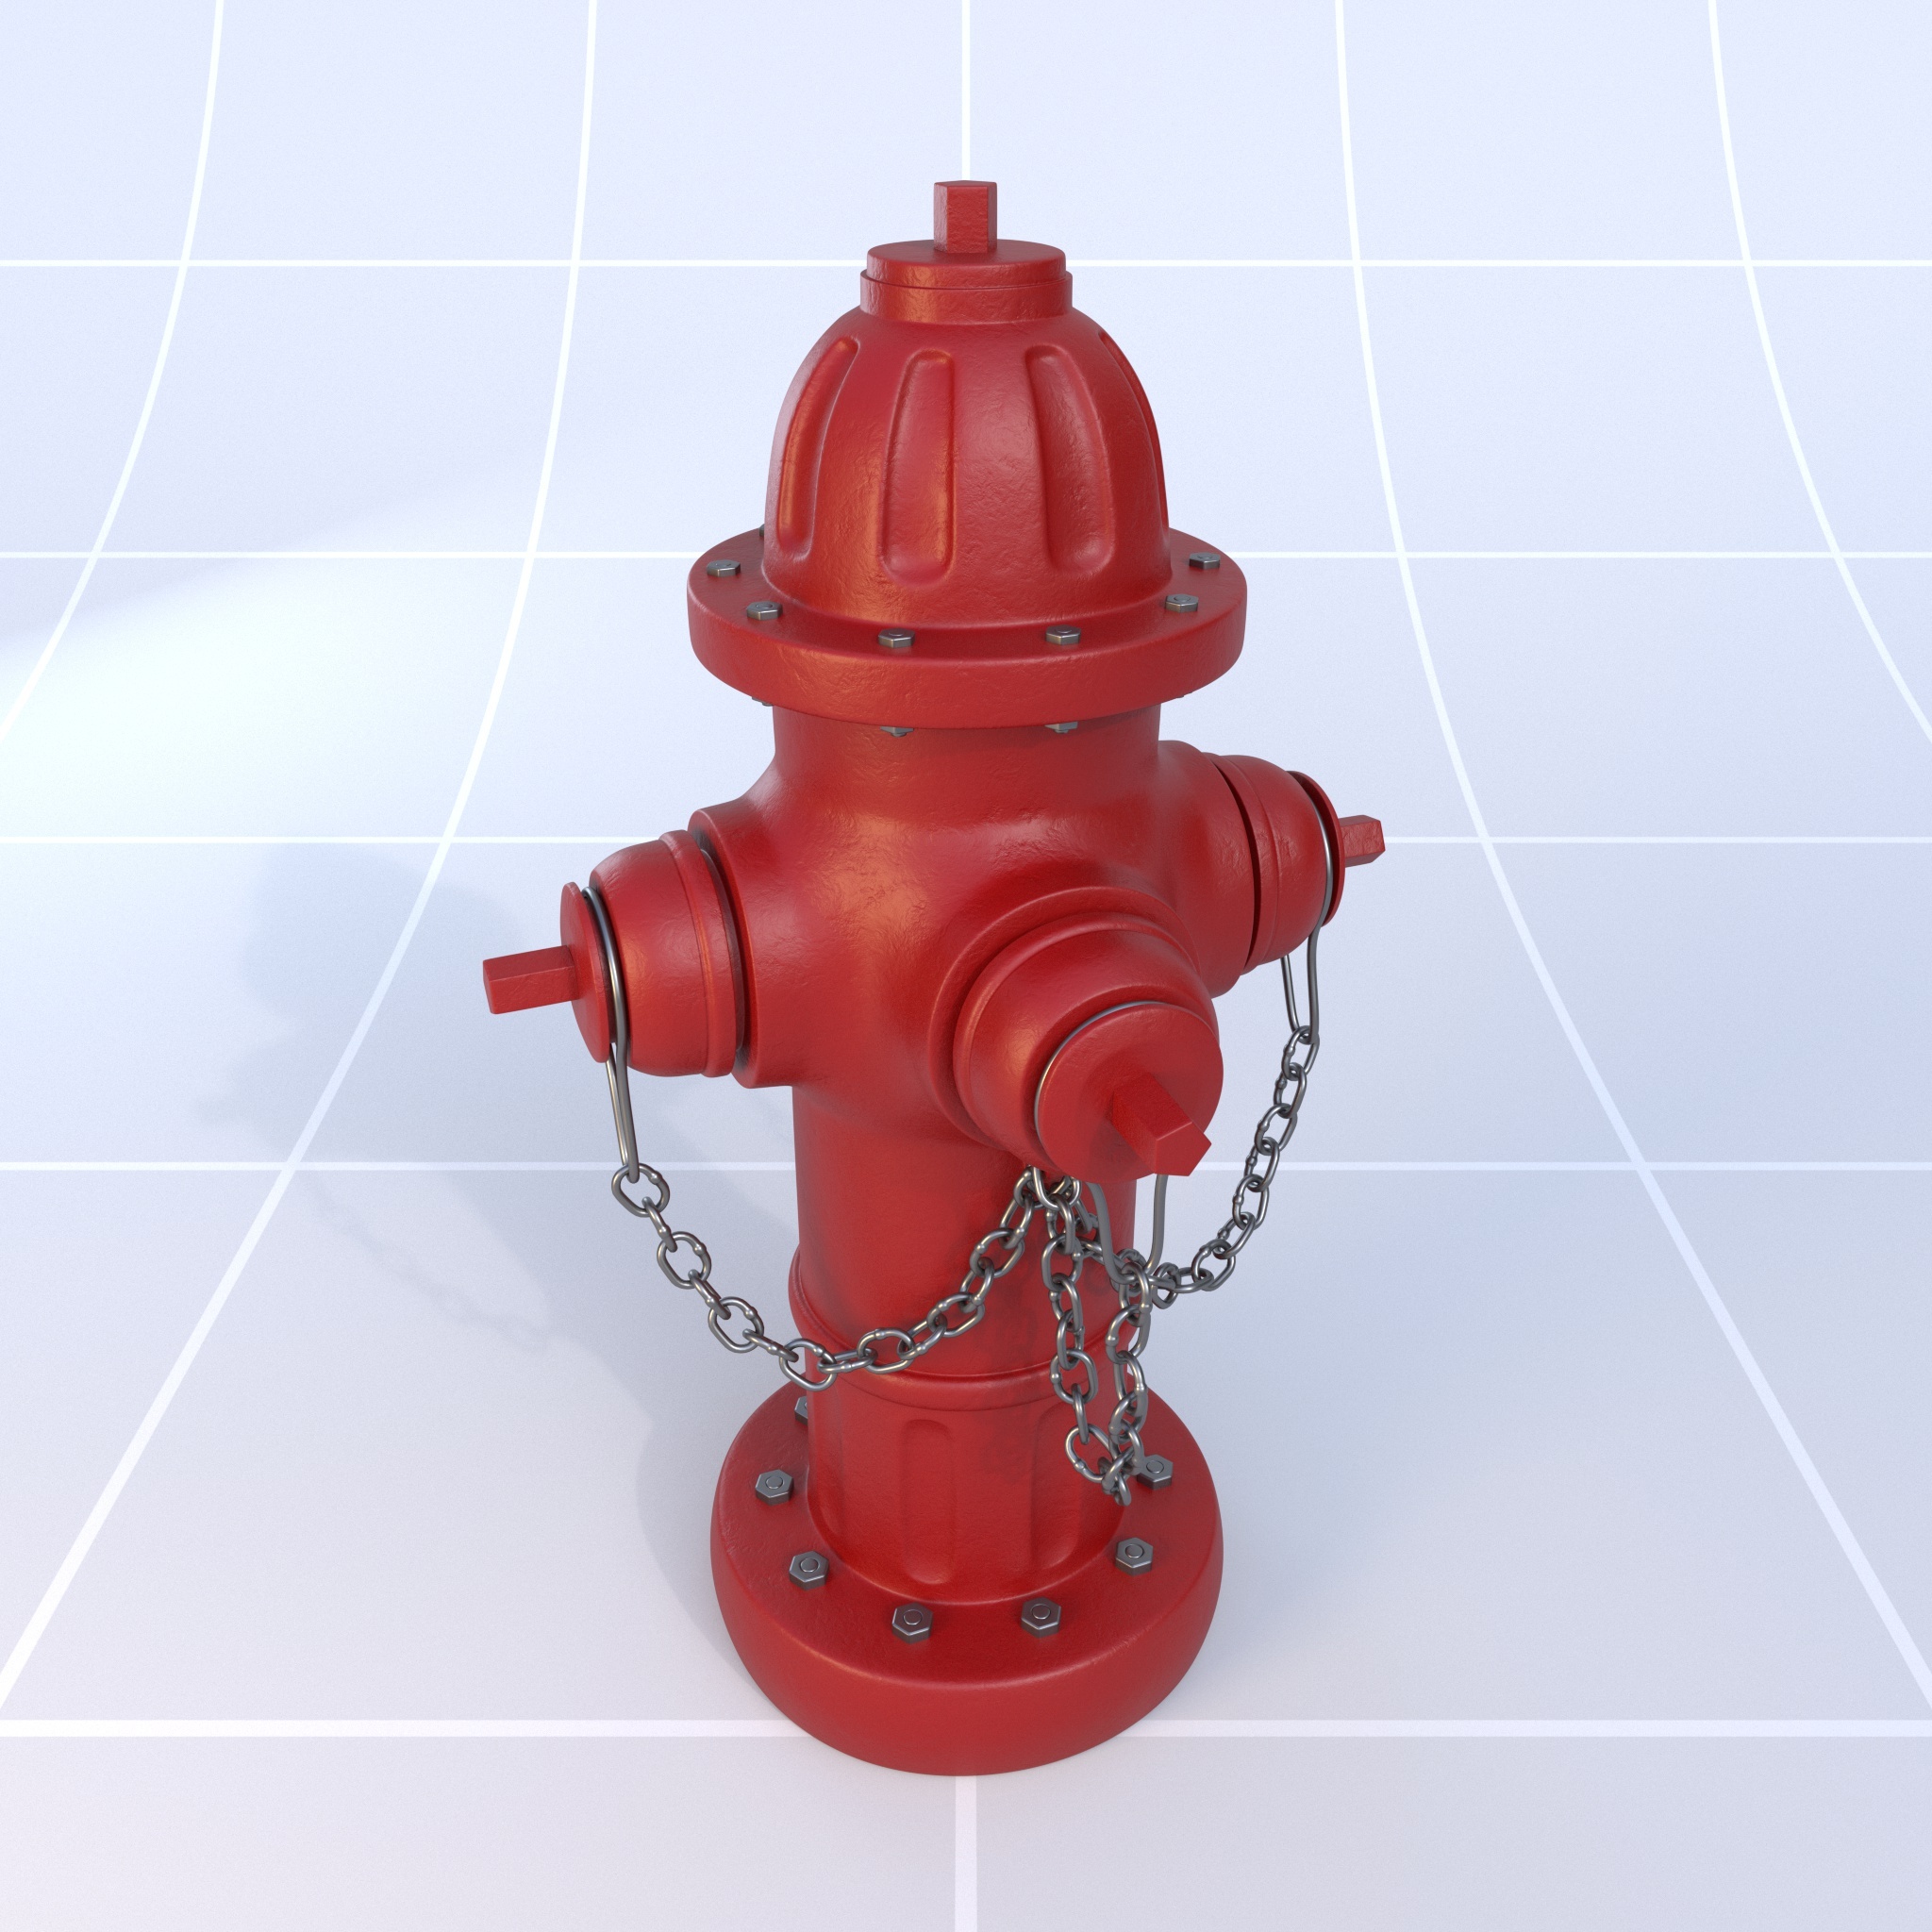
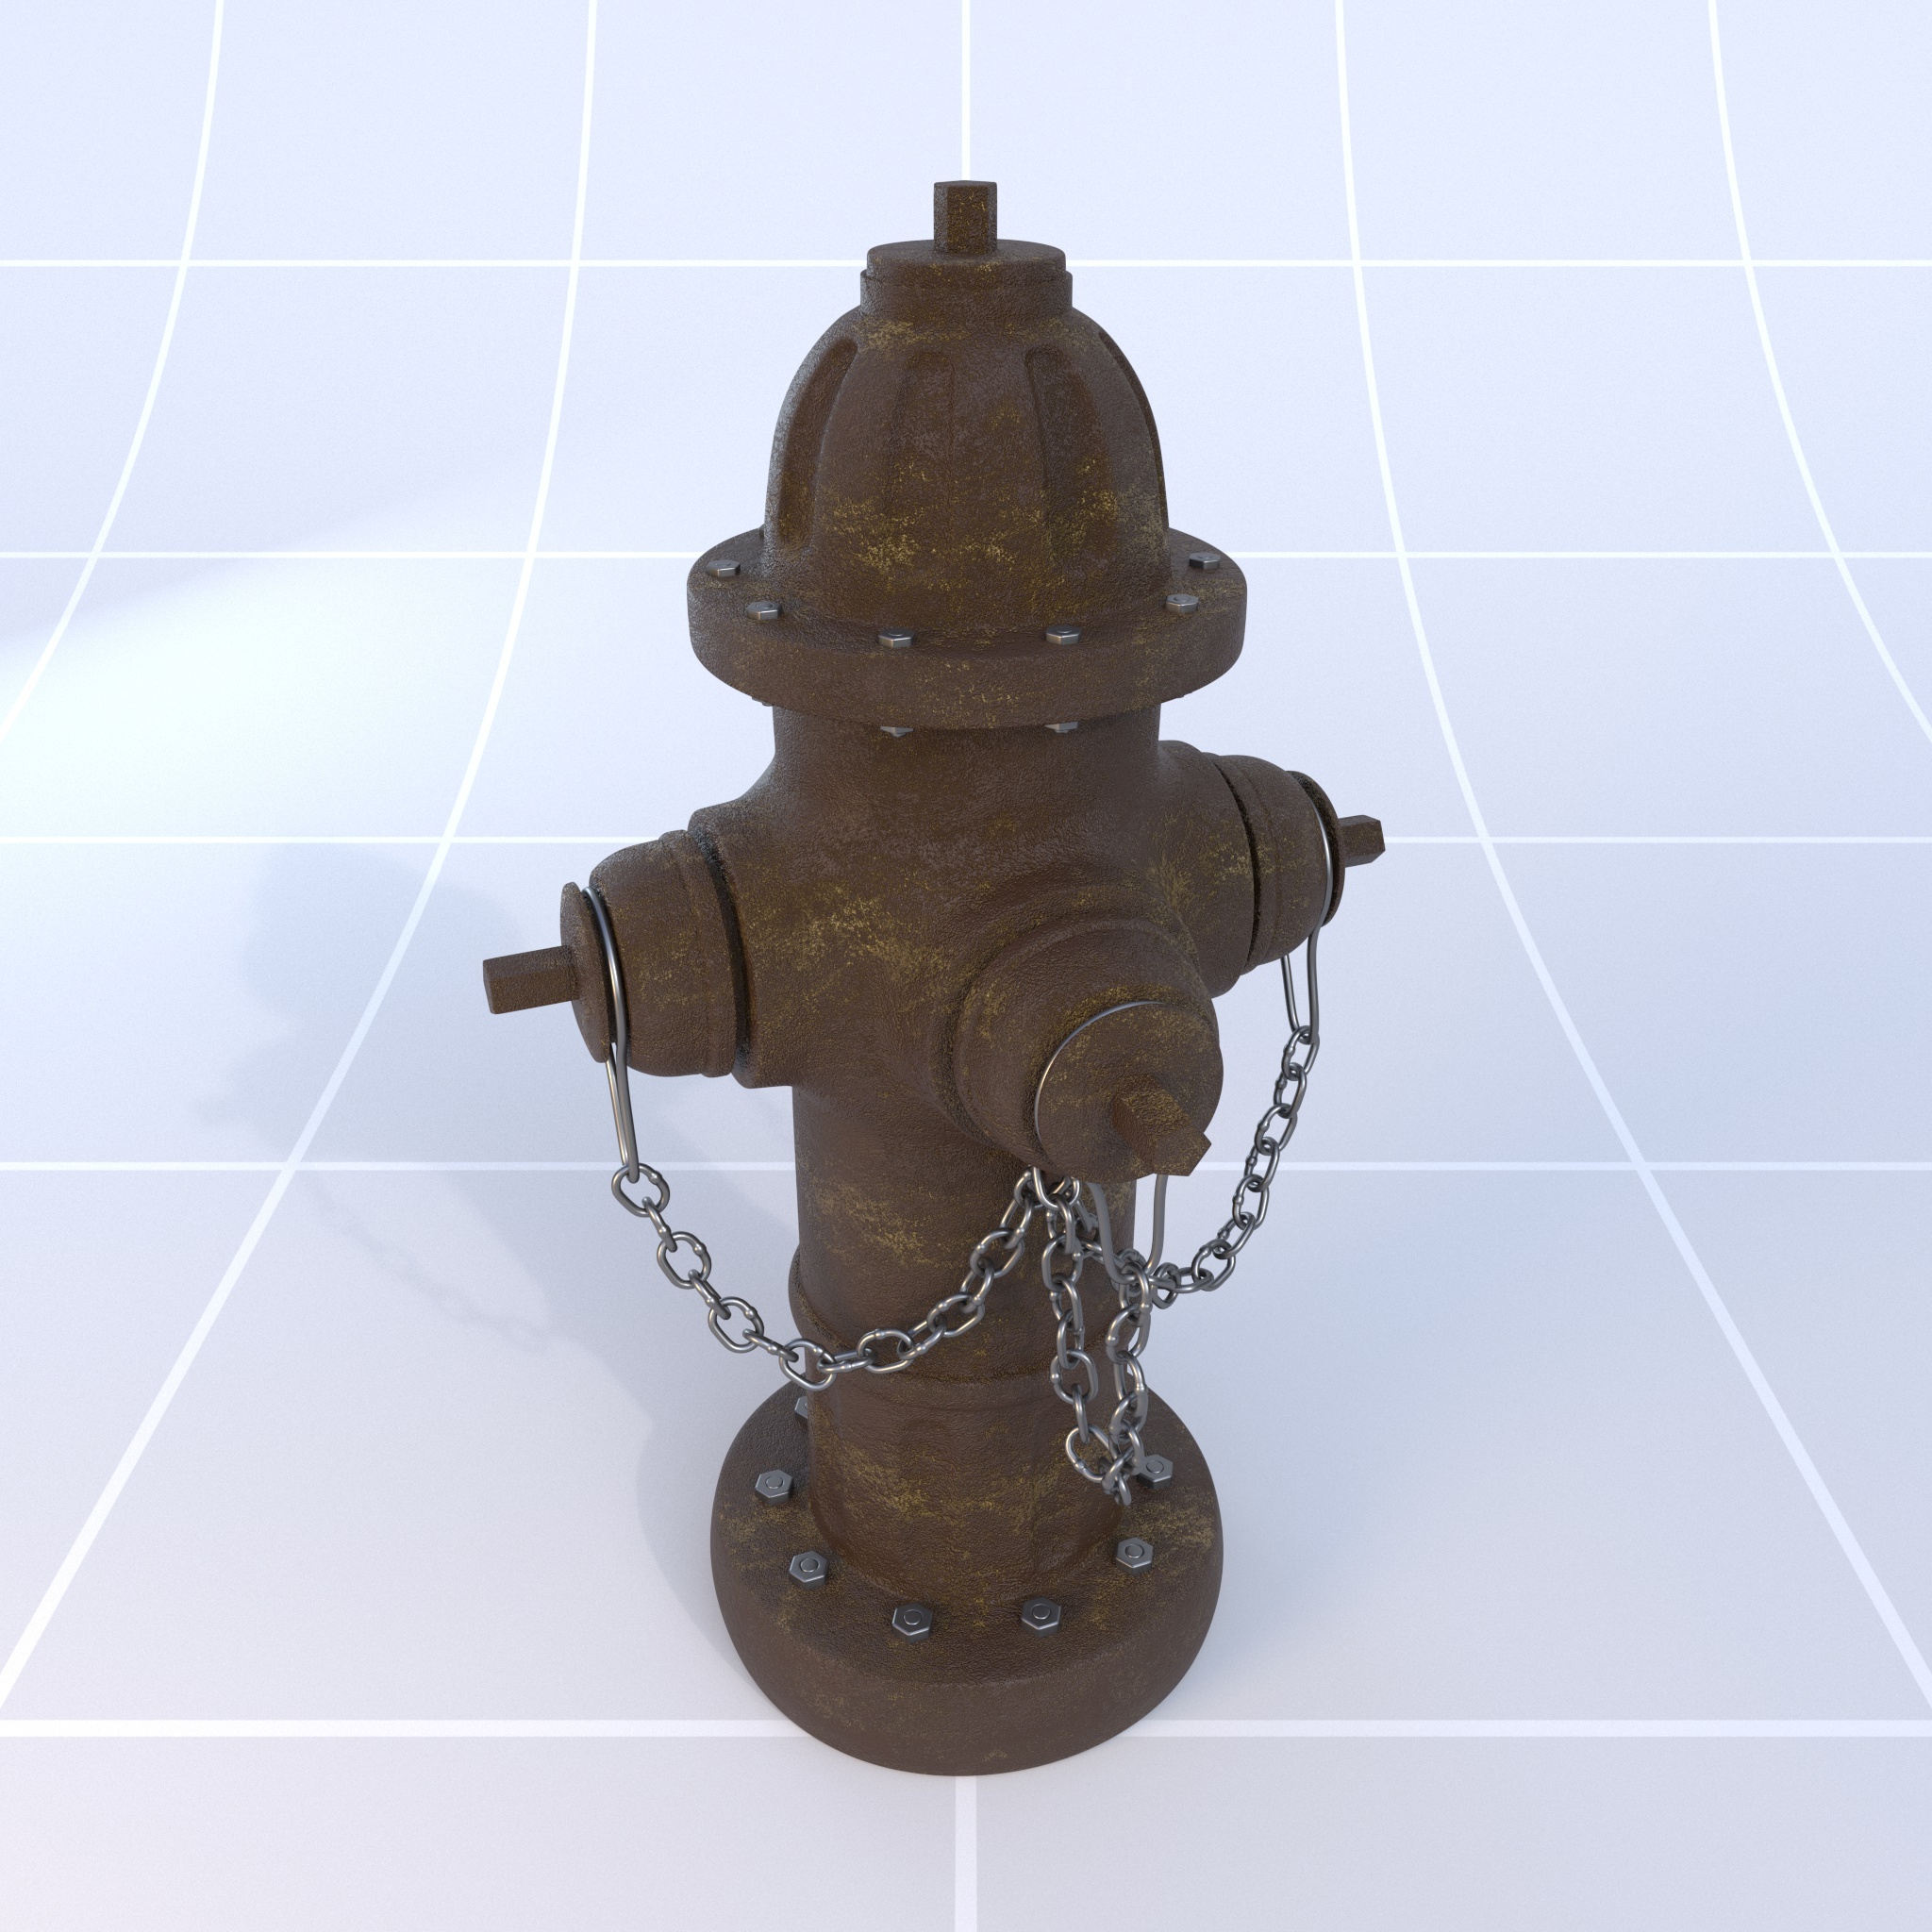
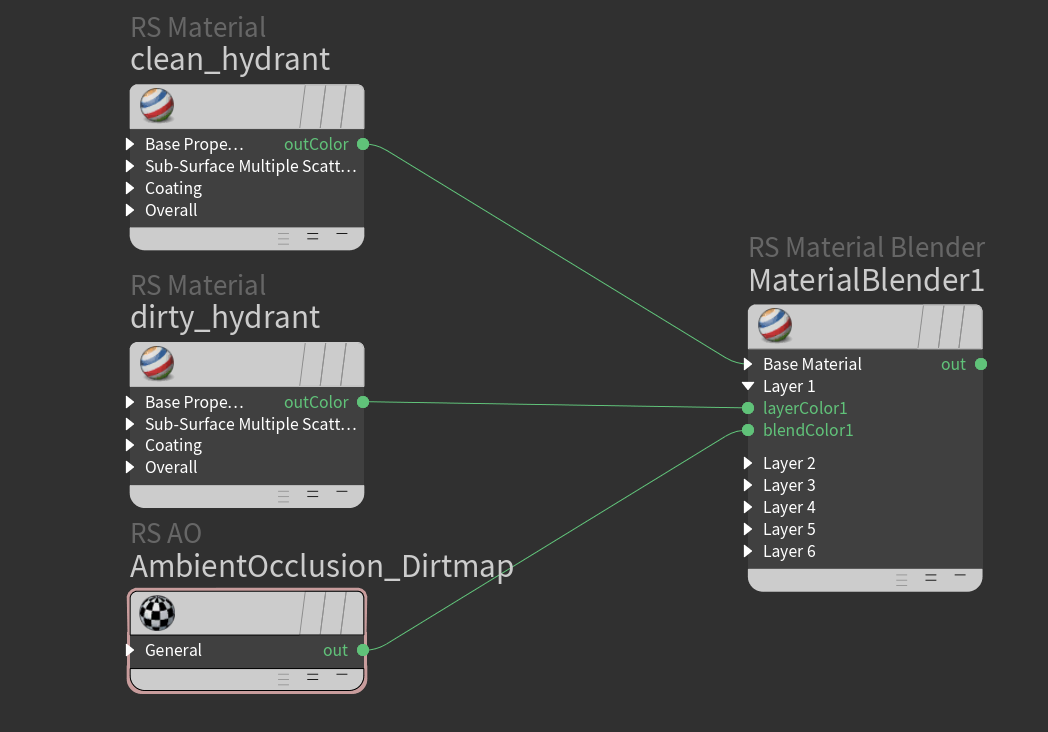
Here's an example of how to use the AO node to achieve a simple "dirtmap" type effect. The technique uses the result of a Y axis biased AO shader as a mask to blend between two different materials, a clean hydrant mat and a dirty hydrant mat. To achieve this, we use the output of the AO node to drive a Material Blender's blend color. By making use of the AO biasing the dirty hydrant shader is only revealed in occluded areas on the underside of the object.
|
|

|
| Base Color: Clean Hydrant | Layer 1 Color: Dirty Hydrant | AO Masked |
This is the shader graph used for this example.
|
Parameters
|
In the examples below the Ambient Occlusion node is previewed directly in the Surface port of a Material Output.
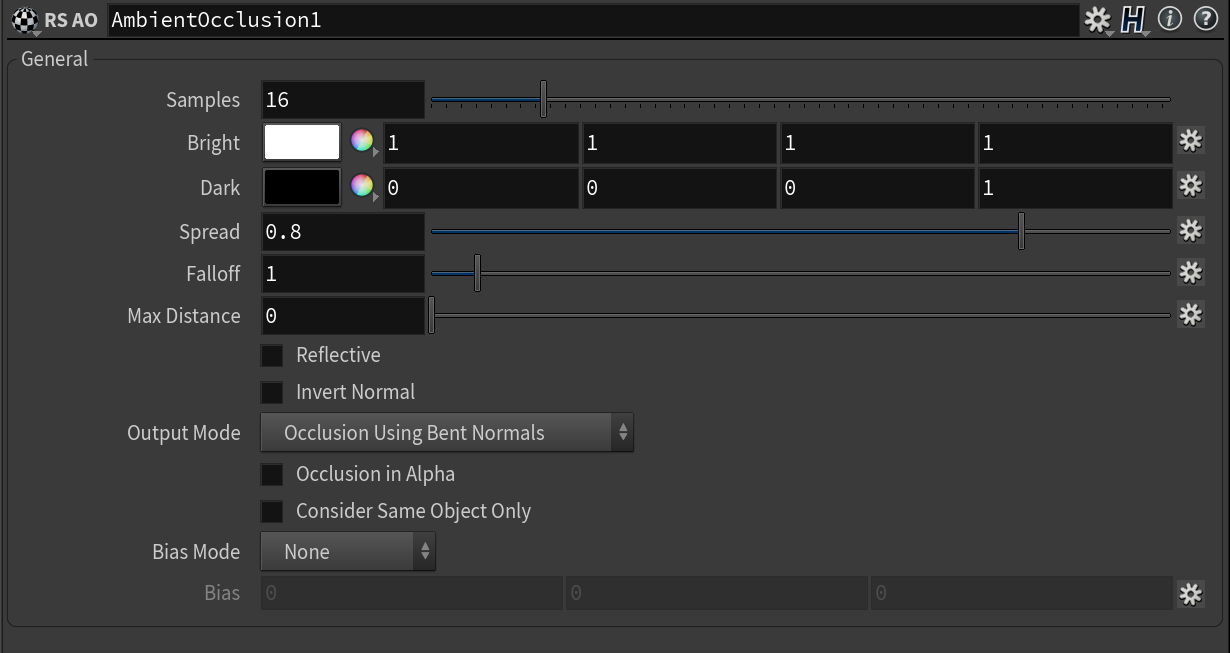
Samples
Ambient occlusion is a multi-sampled technique, this means it uses several samples (rays) per pixel. Sometimes a clean result can be obtained with relatively few samples, but if the Ambient Occlusion node is used to drive a high contrast effect more samples may be needed.
| Samples: 1 - 128 |
Bright / Dark Color
The result of the ambient occlusion node is a color. These two parameters define the darkest color (when the pixel is occluded) and the brightest color (when the pixel is unoccluded). By default the bright color is set to white and the dark color is set to black.
|

|
|
| Bright Color: White Dark Color: Black |
Green Black |
White Red |
Spread
Ambient occlusion works by shooting a number of rays for each pixel. These rays are shot outward in a hemispherical shape that produces a smoothly spread out result. The spread controls how concentrated the rays are around the pixel's normal which allows the AO effect to be 'tightened'. Lower values create a tight effect while high values create a smoothed effect.
| Spread: 0 - 1 |
Falloff
Controls the tightness of the transition between occluded and unoccluded areas. Values less than 1.0 bias towards unoccluded and values greater than 1.0 toward occluded.
| Falloff: 0 - 3 |
Max Distance
Scene Units
Controls the maximum length an AO ray can travel in scene units. The farther a ray can travel increases the likelihood it hits a distant object which results in occluded shading.
A length of 0.0 uses the maximum scene ray distance possible.
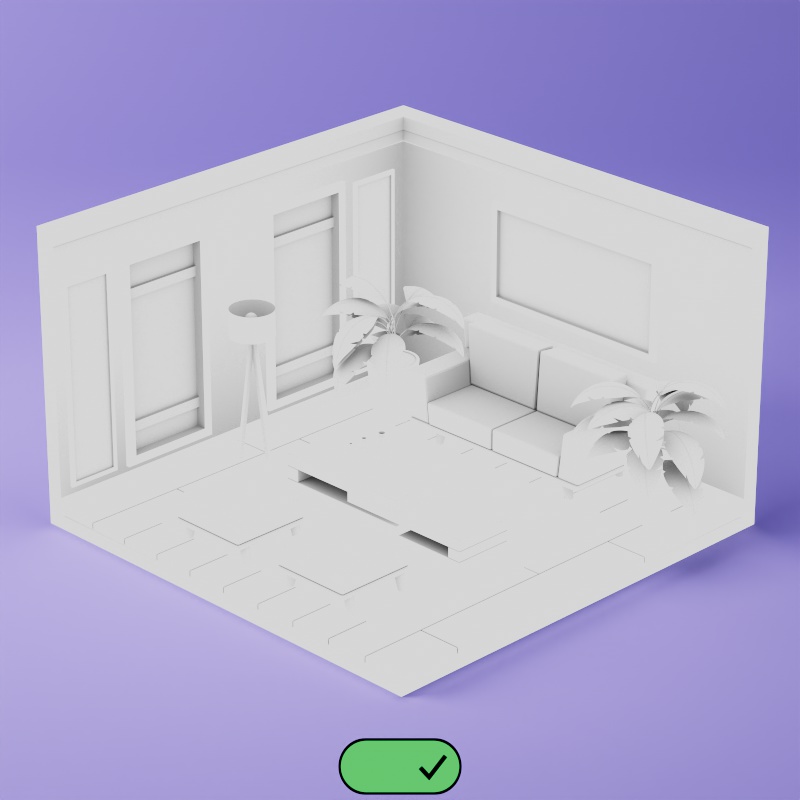
Please note, in the example scene the room is around 250 units tall.
|
|
| Max Distance: 0 | 1 - 100 |
Reflective
Normally, AO behaves as a 'diffuse' effect. However, there are cases where a user might prefer for AO to behave more like a reflection, the "Reflective" option enables this shading behavior. This can be useful when combining AO with environment shaders (using the "Sampled Environment" output mode) and you only want to show the environment in the reflections. The "Spread" parameter effectively controls how glossy these reflections are.
|
|
| Reflective: Disabled (default) | Enabled |
Invert Normal
This option allows you to reverse the occlusion effect, whereby open corners receive the occlusion.
|
|
| Invert Normal: Disabled (default) | Enabled |
Output Mode
The Ambient Occlusion node can output data in several different methods:
- Occlusion (Default) - The default output of the AO node where the occlusion is output as a color that is interpolated between the Bright/Dark colors. Every example pictured above uses the Occlusion output.
-
Sampled Environment - This will return the results of the environment shader scaled by the occlusion. In other words, occluded pixels will return a dark version of the environment lighting while unoccluded pixels will return the environment lighting unmodified. This output mode can also be useful when you want to use AO for simple lighting effects. The result looks similar to global illumination (Brute-Force) but is typically faster than GI because it skips certain computations (such as multiple GI bounces, for example).
The example shown below is not using any global illumination! It simply contains a dome light (an environment shader can also be used) and then uses "Sampled Environment" as the AO node's output mode.
-
Return Bent Normals (World Space / Object Space) - This returns the average normal of the AO rays, biased towards where there is the least occlusion.
This is a legacy output option.
Occlusion In Alpha
Normally, the alpha channel returned by the AO node contains the interpolated alphas of the Bright/Dark colors. When enabled, the alpha channel is replaced by a value which ranges between 0.0 and 1.0, where 0.0 means "completely occluded" and 1.0 means "completely unoccluded".
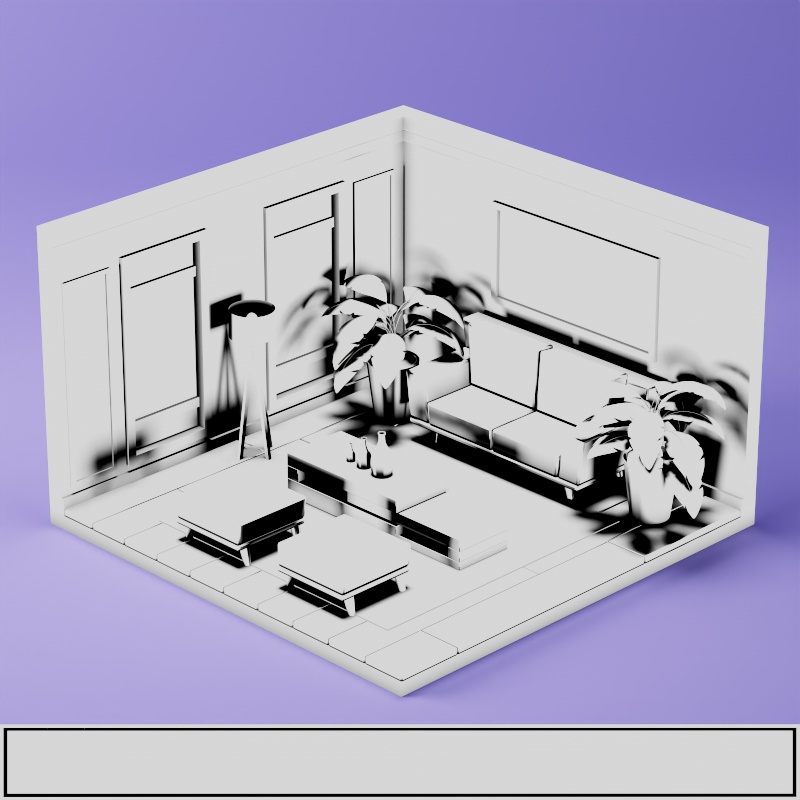
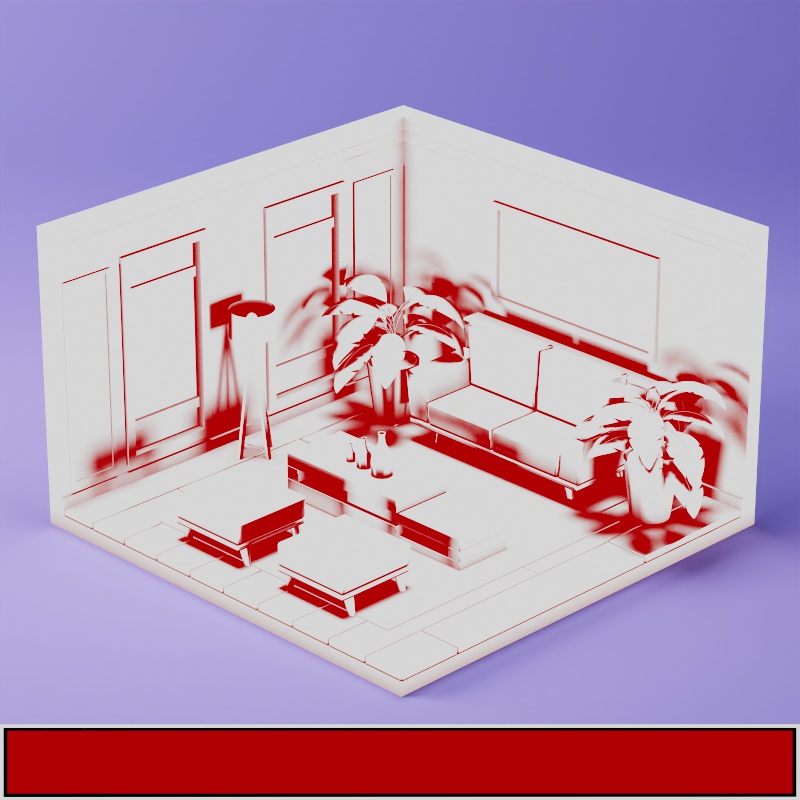
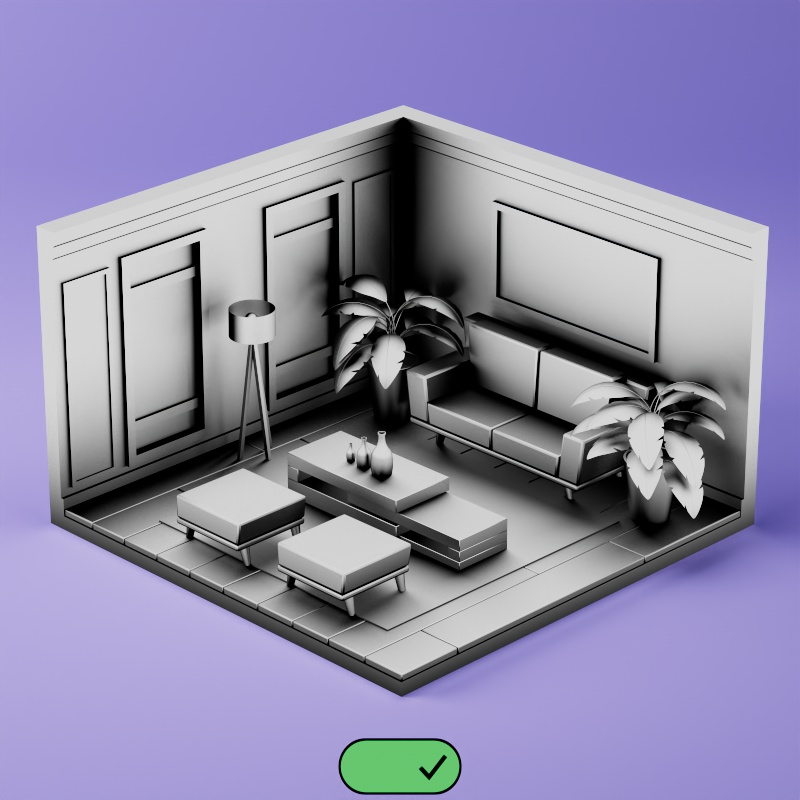
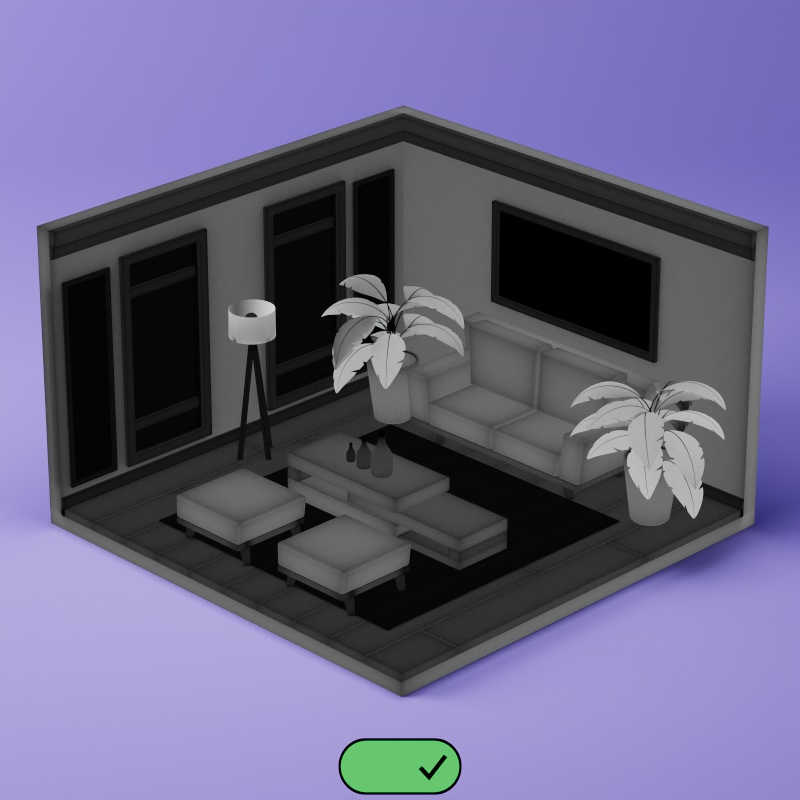
Consider Same Object Only
Controls whether the occluded result takes other objects into consideration.
By default this option is disabled, meaning all objects in the scene are considered for occlusion. When enabled, each object only considers itself for occlusion.
In the example below, note how much of the occlusion shading disappears when this option is enabled since most of the occlusion comes from different objects. The effect this has is very dependent on how your scene is built. For example, when enabled, the couch cushions occlude each other because they're part of the same object but when disabled the couch — and the other pieces of furniture — no longer occlude the floor.
|
|
| Consider Same Object Only: Disabled (default) | Enabled |
Bias Mode
This allows you to bias the occlusion in a custom direction, by default this is set to none.
- None (Default) - No occlusion biasing, occlusion is calculated equally in all directions.
- Object Space - Occlusion calculation is biased in object space toward a custom positive or negative X, Y, and Z coordinate.
- World Space - Occlusion calculation is biased in world space toward a custom positive or negative X, Y, and Z coordinate.
Bias
Bias Mode must be set to Object or World Space.
This allows you to bias the occlusion in a custom direction, by default this is set to none. Higher values result in a more intense bias.