Solaris Materials
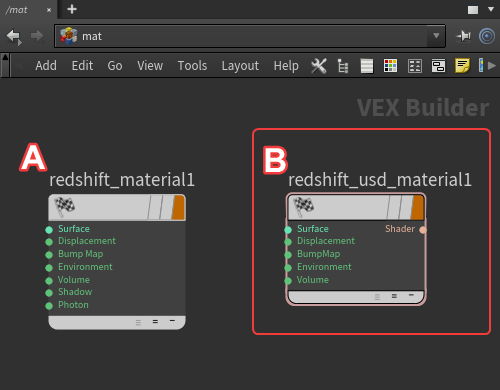
RS USD Material vs RS Material output
The standard "RS Material" (A) output VOP is not compatible with Solaris but a "RS USD Material" (B) output VOP was added that automatically works in both Houdini and Solaris.
|
| RS Material and RS USD Material output VOPs in Houdini MAT |
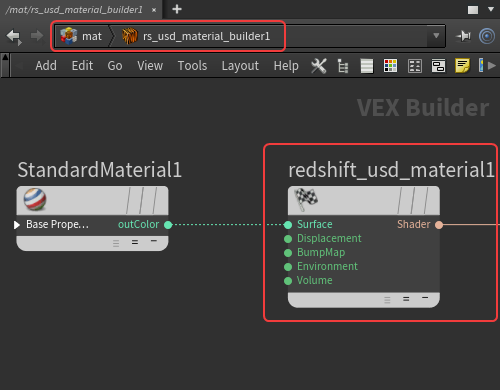
Additionally, a "RS USD Material Builder" was added that is preconfigured with this RS USD Material output VOP.
If planning to use both Houdini and Solaris it is recommended to use the RS USD Material Builder since it works in both contexts.
|
| RS USD Material output VOP in RS USD Material Builder |
Collect VOP
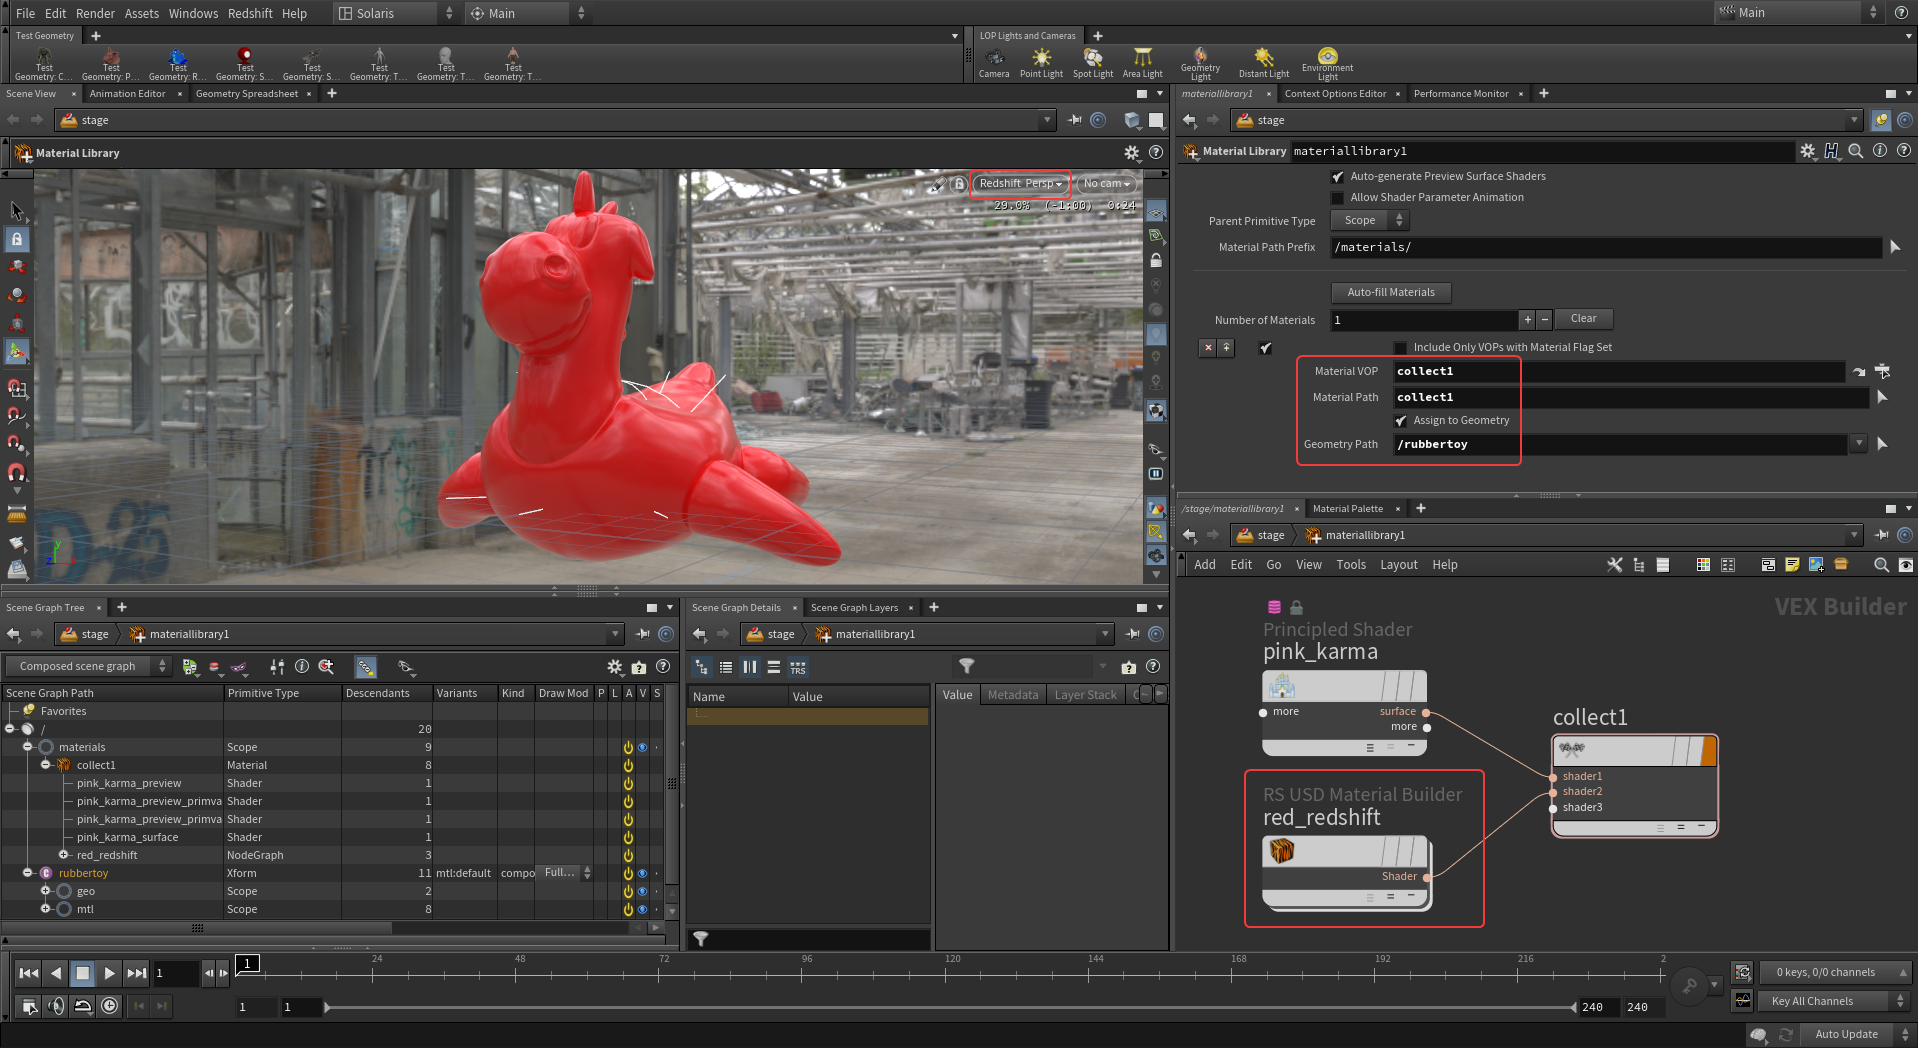
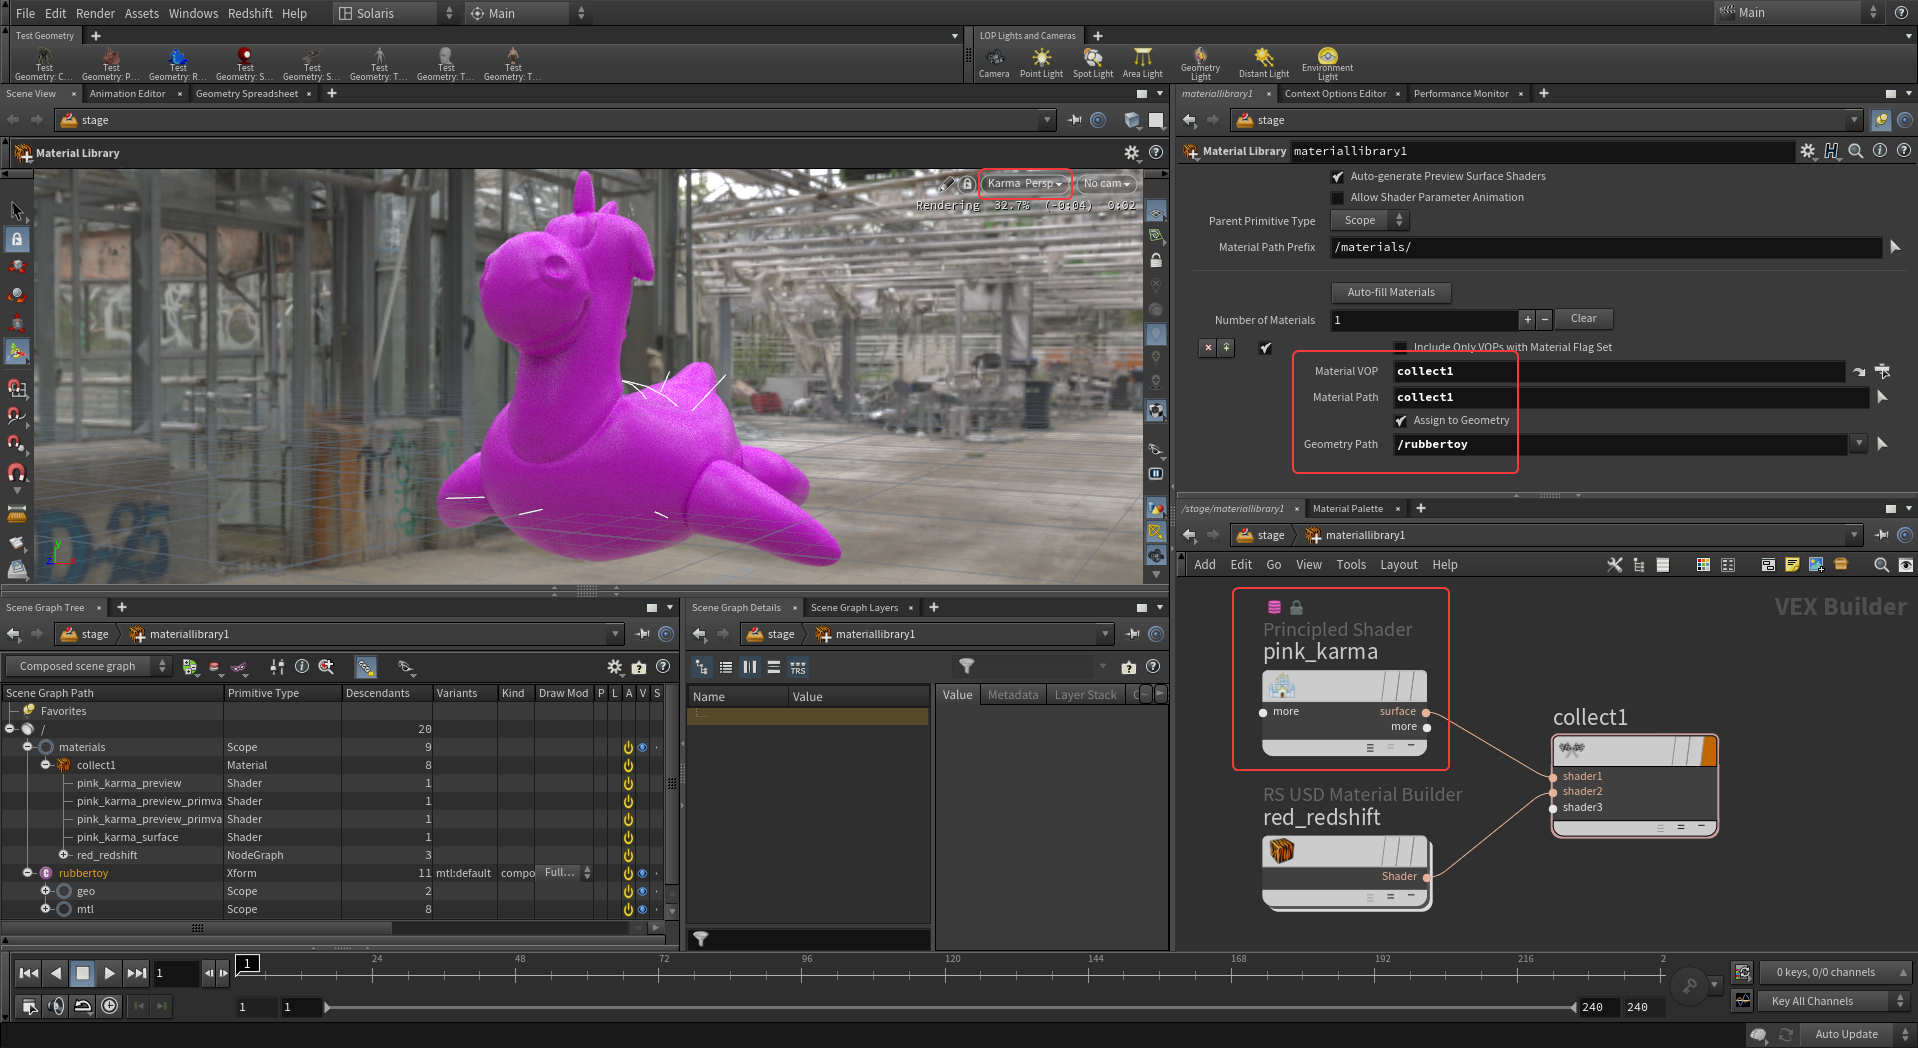
A Collect VOP can be used inside a Material Library LOP to automatically switch to a specific shader relevant to the active renderer. For example, a Principled Shader can be used when rendering with Karma while a Redshift material can be used only when rendering with Redshift. Solaris will automatically pick the correct shader depending on the active renderer.
In the example image below a pink Principled Shader and a red Redshift Standard material have been connected to the same Collect VOP. Note that the material flags have been disabled on the two individual shaders and only the Collect node has its material flag enabled since the Collect VOP is the only material that needs to be assigned to the rubbertoy. This also helps keep the Scene Graph Tree more organized so that each renderer's shader material does not need to be defined separately.
|
|
| Collect material with Redshift active | Collect material with Karma active |
Creating materials in Solaris
Material Library LOP
|
| Material Library LOP |
The Material Library LOP translates VOP shader nodes into USD materials, it is the primary method of creating material setups in Solaris. Shaders can be created and setup inside a Material Library in the same way as in the MAT context of Houdini.
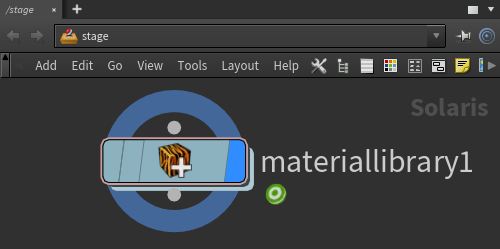
Start by creating a "RS USD Material Builder" inside a Material Library LOP.
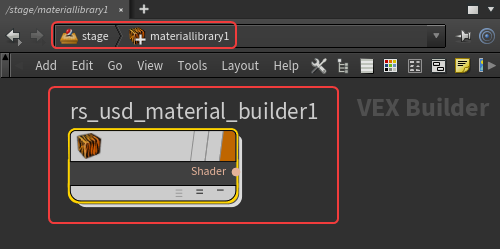
|
| Creating a RS USD Material Builder |
Then setup a Redshift shader network inside the "RS USD Material Builder" and connect the shader to the Surface port of the "RS USD Material." All Redshift VOP nodes are available for building shaders inside the Material Library.
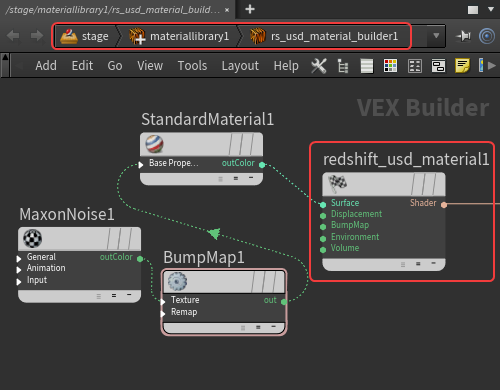
|
| Redshift shader setup inside RS USD Material Builder |
For more information on the Material Library LOP see the Houdini documentation: https://www.sidefx.com/docs/houdini/nodes/lop/materiallibrary.html
Converting Houdini shaders to Solaris
To convert a Redshift shader to Solaris that was previously set up in Houdini just copy the shader network to a "RS USD Material Builder" and link the relevant parameters to the "Redshift USD Material" output VOP.
Prerequisite: Define a material's path before assigning it
Before a material can be assigned to geometry in Solaris its path must have been previously defined in the Scene Graph Tree before assignment.
The most common method to define a material's path is to use a Material Library LOP, three methods are covered below.
Material Library LOP: Using the default settings
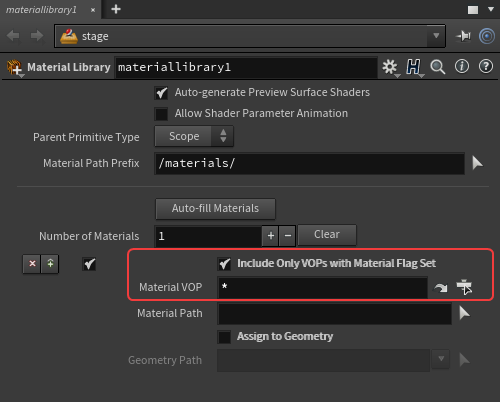
A Material Library's default settings are preconfigured to make defining a material path as easy as possible. This method makes it extremely easy to use a Material Library to create materials and define their paths and then assign those materials further on in the scene with an Assign Material LOP since an Assign Material requires a predefined material.
The "Material VOP" field is filled by default with a " * " which matches any string and results in any USD material created inside automatically having its path defined in the Scene Graph Tree.
|
| Material Library set to automatically define all material paths |
To demonstrate, in the example image below there are three RS USD Material Builders inside the Material Library LOP however the * has been removed from the "Material VOP" field so no materials have their paths defined as seen in the Scene Graph Tree in the bottom left.
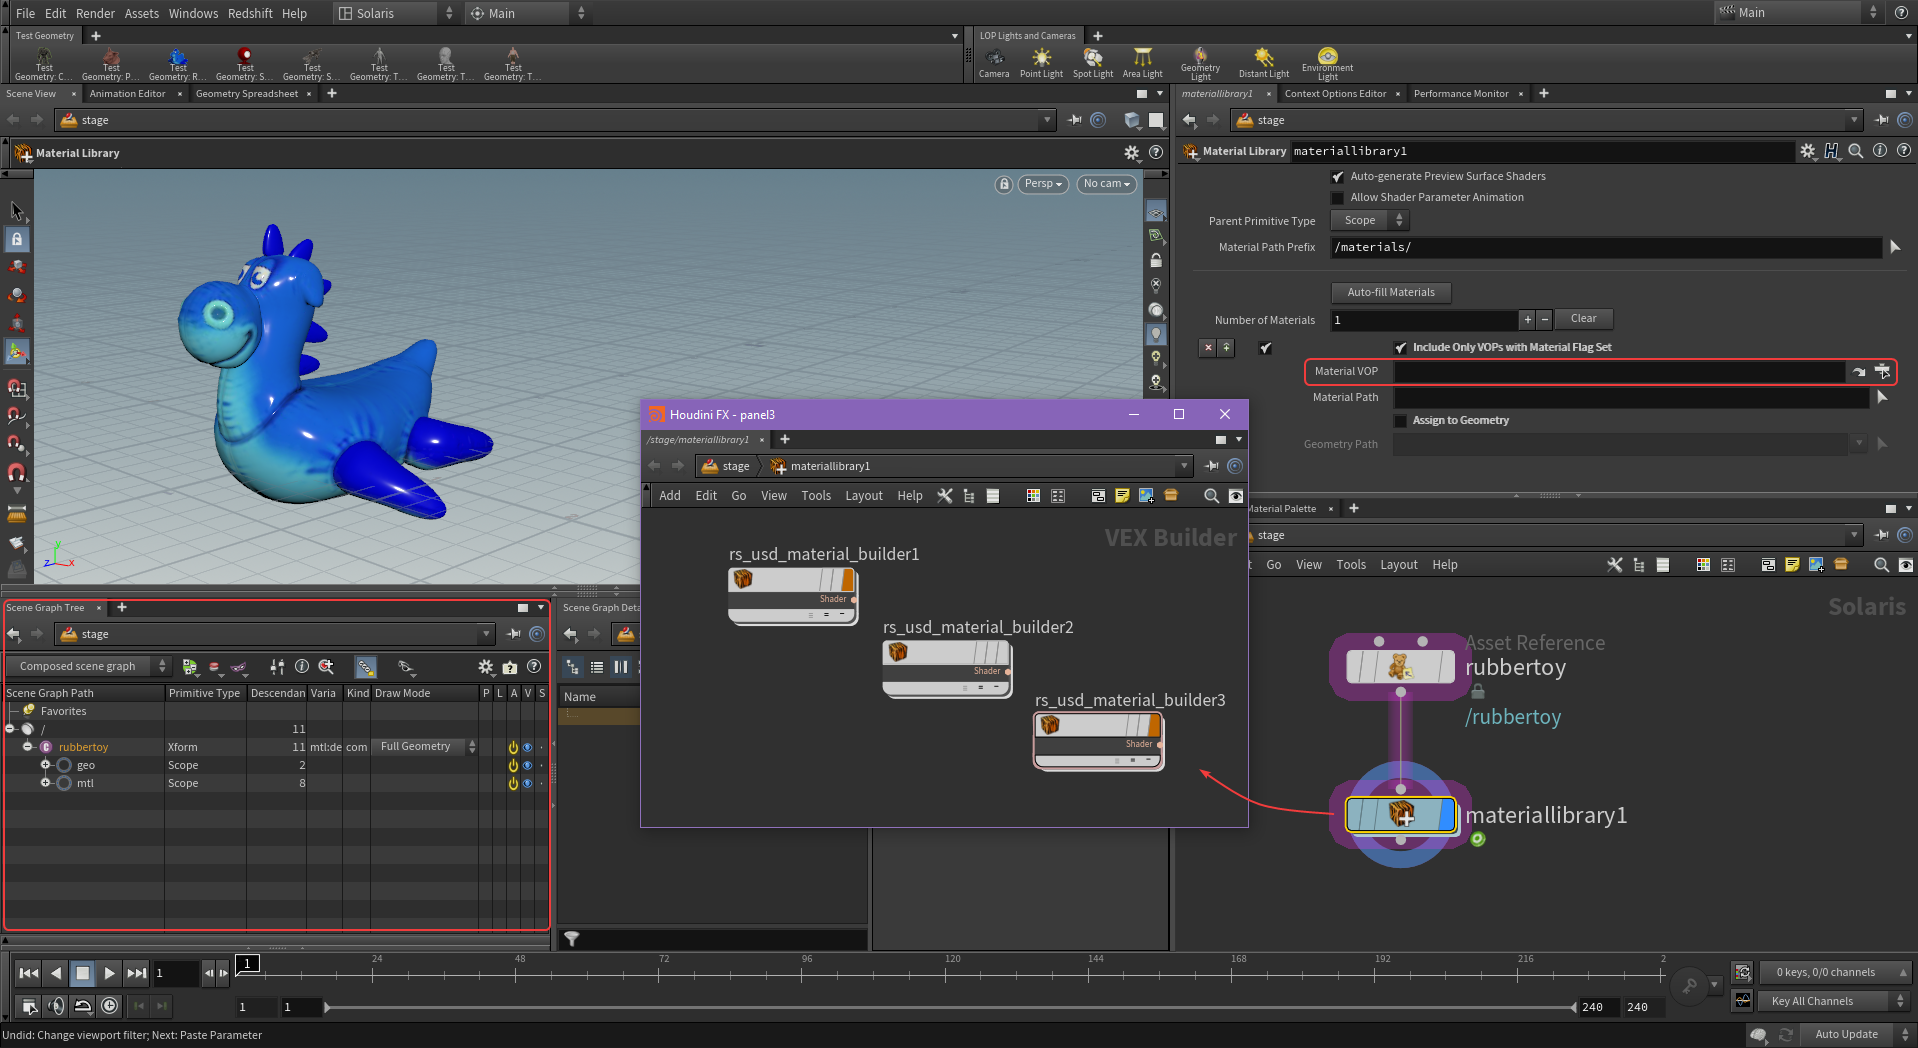
|
| Material VOP left blank |
With the default settings restored in the example image below each material automatically has its path defined in the Scene Graph Tree and is now ready for assignment in the scene with the exception of "rs_usd_material_builder2," this is because its material flag has been disabled and by default the Material Library LOP only sets a material path for VOPs when a material flag is enabled with the "Include Only VOPs with Material Flag Set" option.
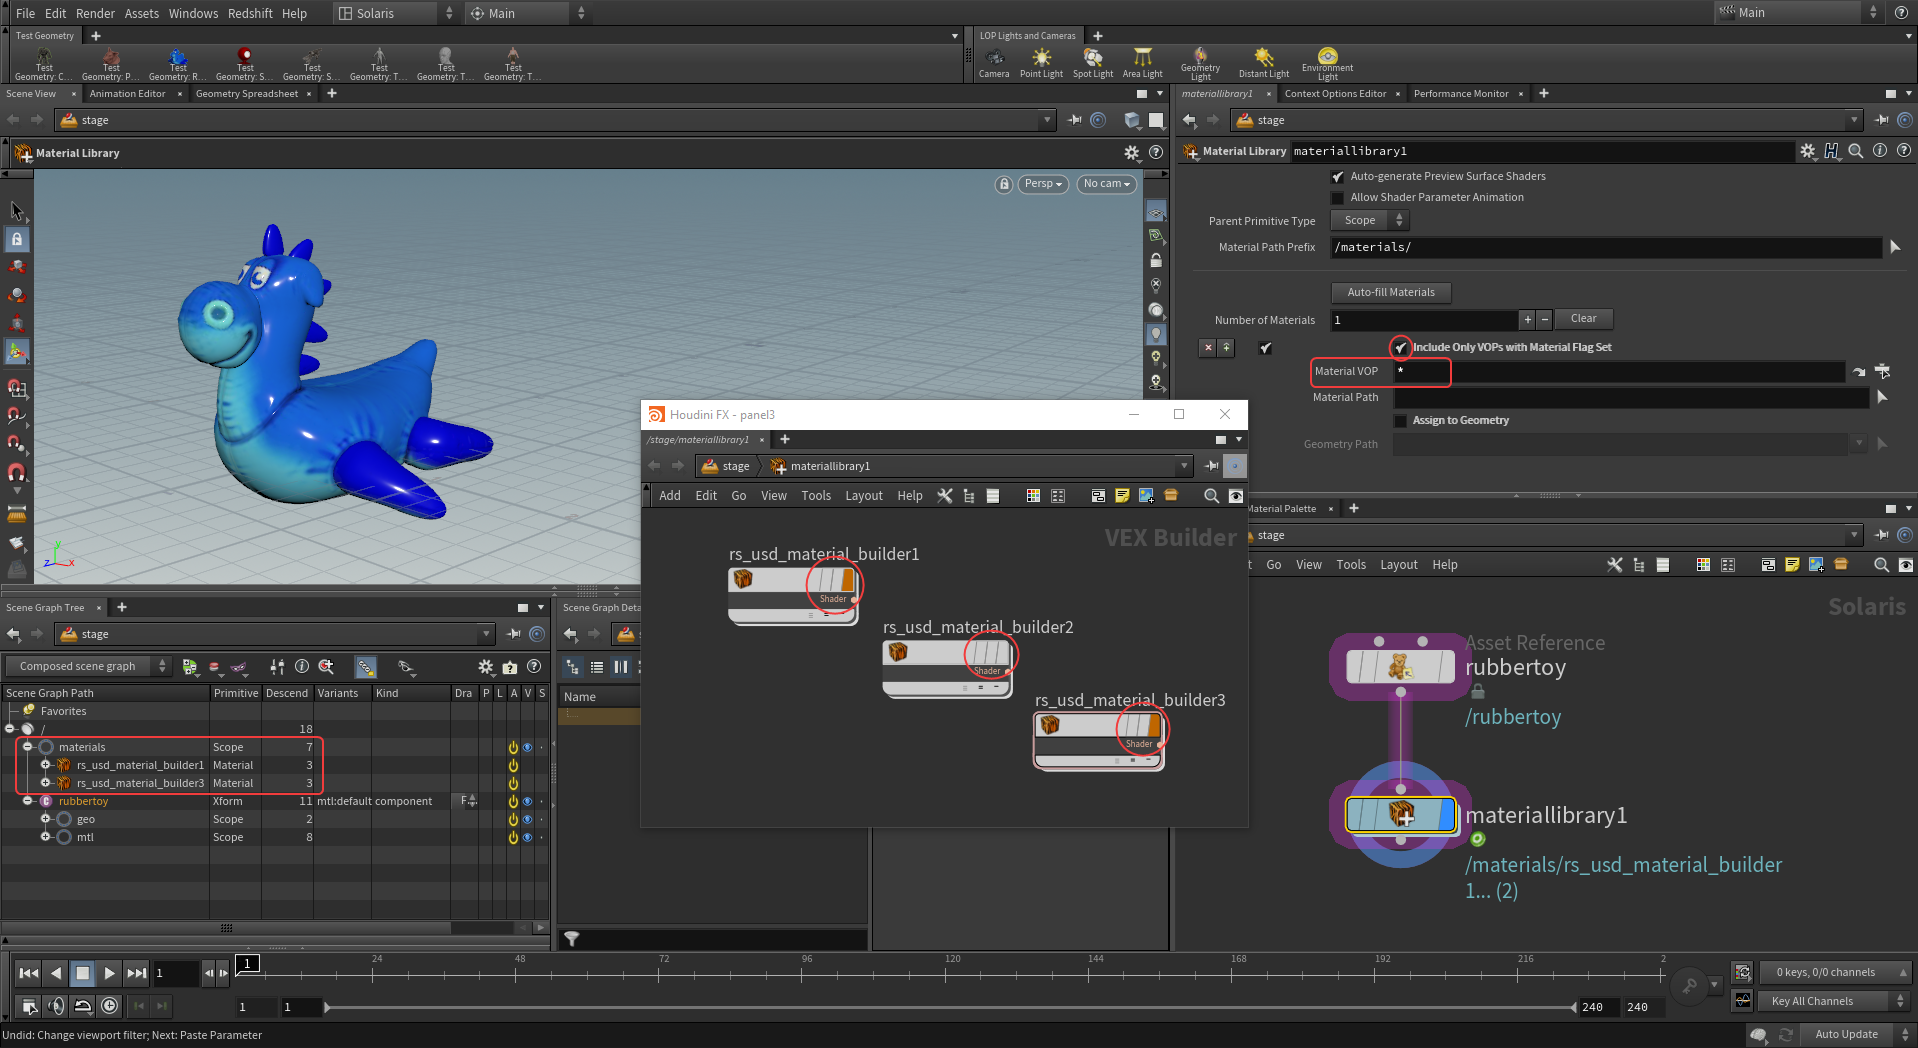
|
| Material VOP automatically defining relevant materials |
Material Library LOP: Using Auto-fill Materials
A Material Library LOP also has the ability to automatically define each material's paths individually by using the Auto-fill Materials function. The main benefit of this method compared to using the default settings is that the Material Library LOP itself can be used to assign materials to geometry in the scene instead of needing to use Assign Material nodes.
To make best use of the function first clear the default settings with the "Clear" button (1) and then press the "Auto-Fill Materials" button (2) as illustrated below.
|
|
| Clearing a Material Library |
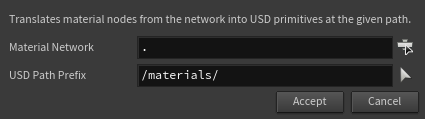
Then accept the default settings which will place any shaders under the "materials" USD path in the Scene Graph Tree.
|
| Auto-Fill Materials default settings |
From a material path perspective the result is the same as using the Material Library's default settings, two of the materials had their paths defined but the "rs_usd_material_builder2" was skipped because its material flag was disabled.

|
| Auto-Fill Materials results |
Material Library LOP: Manually defining a material's path
A material's path can also be manually defined with a Material Library LOP.
Set the "Number of Materials" and then open the floating operator chooser with the button to the right of the "Material VOP" field as outlined below.
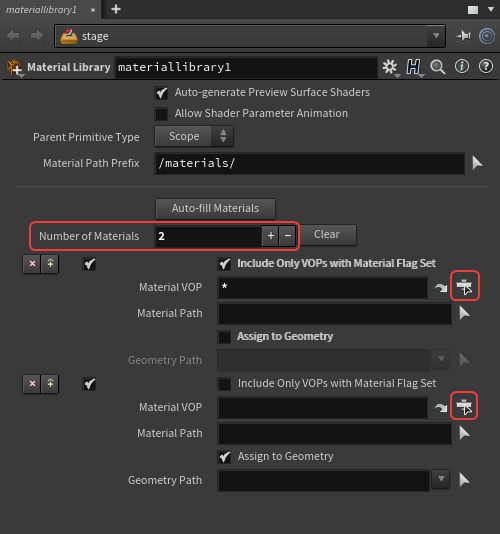
|
| Setting the number of materials and selecting a Material VOP |
Then select a material under the Material Library in the pop-up and repeat that step for all materials. Note that the "rs_usd_material_builder2" is not visible in the image below because its material flag is disabled.
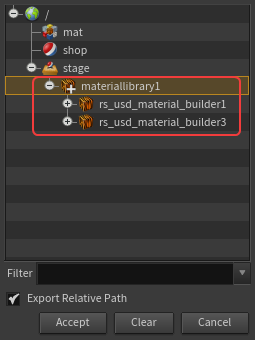
|
| Selecting a Material VOP |
Now both materials have had their paths defined.
|
| Defining a material's path manually |
Assigning Materials
There are two primary LOP nodes that can be used to apply shaders to geometry in Solaris.
-
Material Library LOP - Can create and assign shaders to objects.
-
Assign Material LOP - Only assigns shaders to objects but has more controls for overriding material assignments.
|
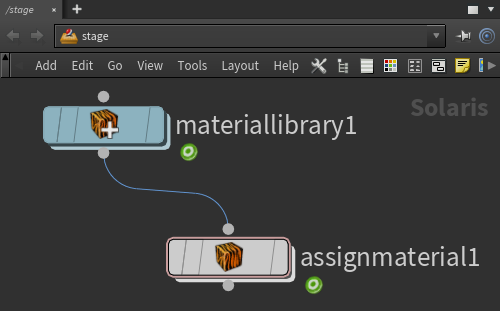
| Material Library creates materials that are applied with Assign Material |
Material Library LOP: Assigning materials
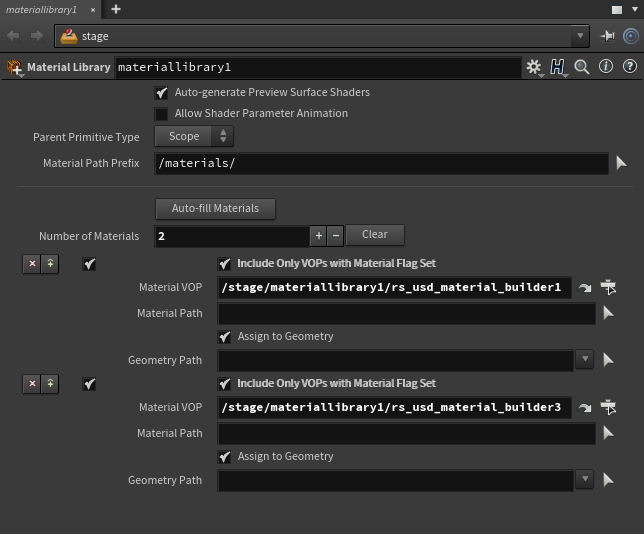
Once a material's path has been defined in a Material Library the "Assign to Geometry" option can be used for each material and the "Geometry Path" field can be linked to objects in the scene.
|
| Geometry Path in the Material Library LOP |
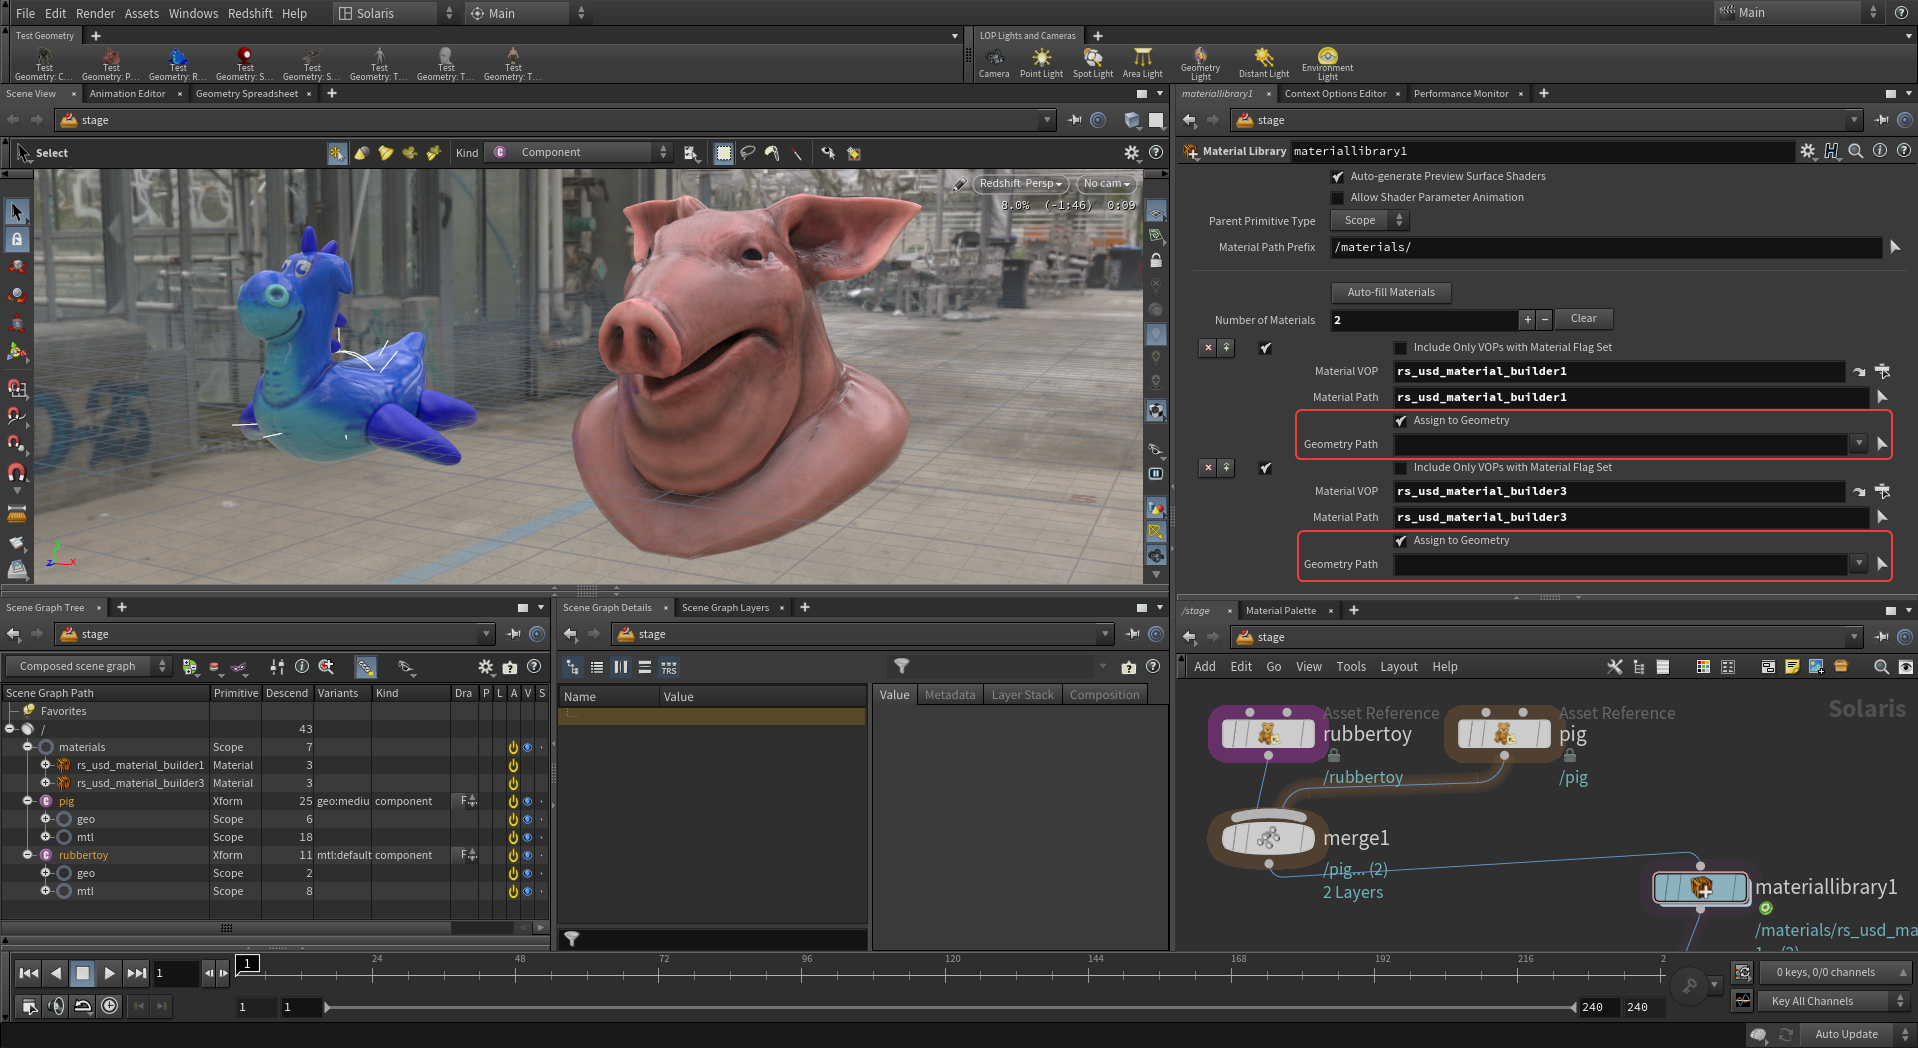
Geometry can be linked to materials by dragging and dropping objects in the scene to the "Geometry Path" field. In the image below the pig and rubbertoy have been dragged from the Scene Graph Tree to two different materials for assignment in the Material Library LOP.
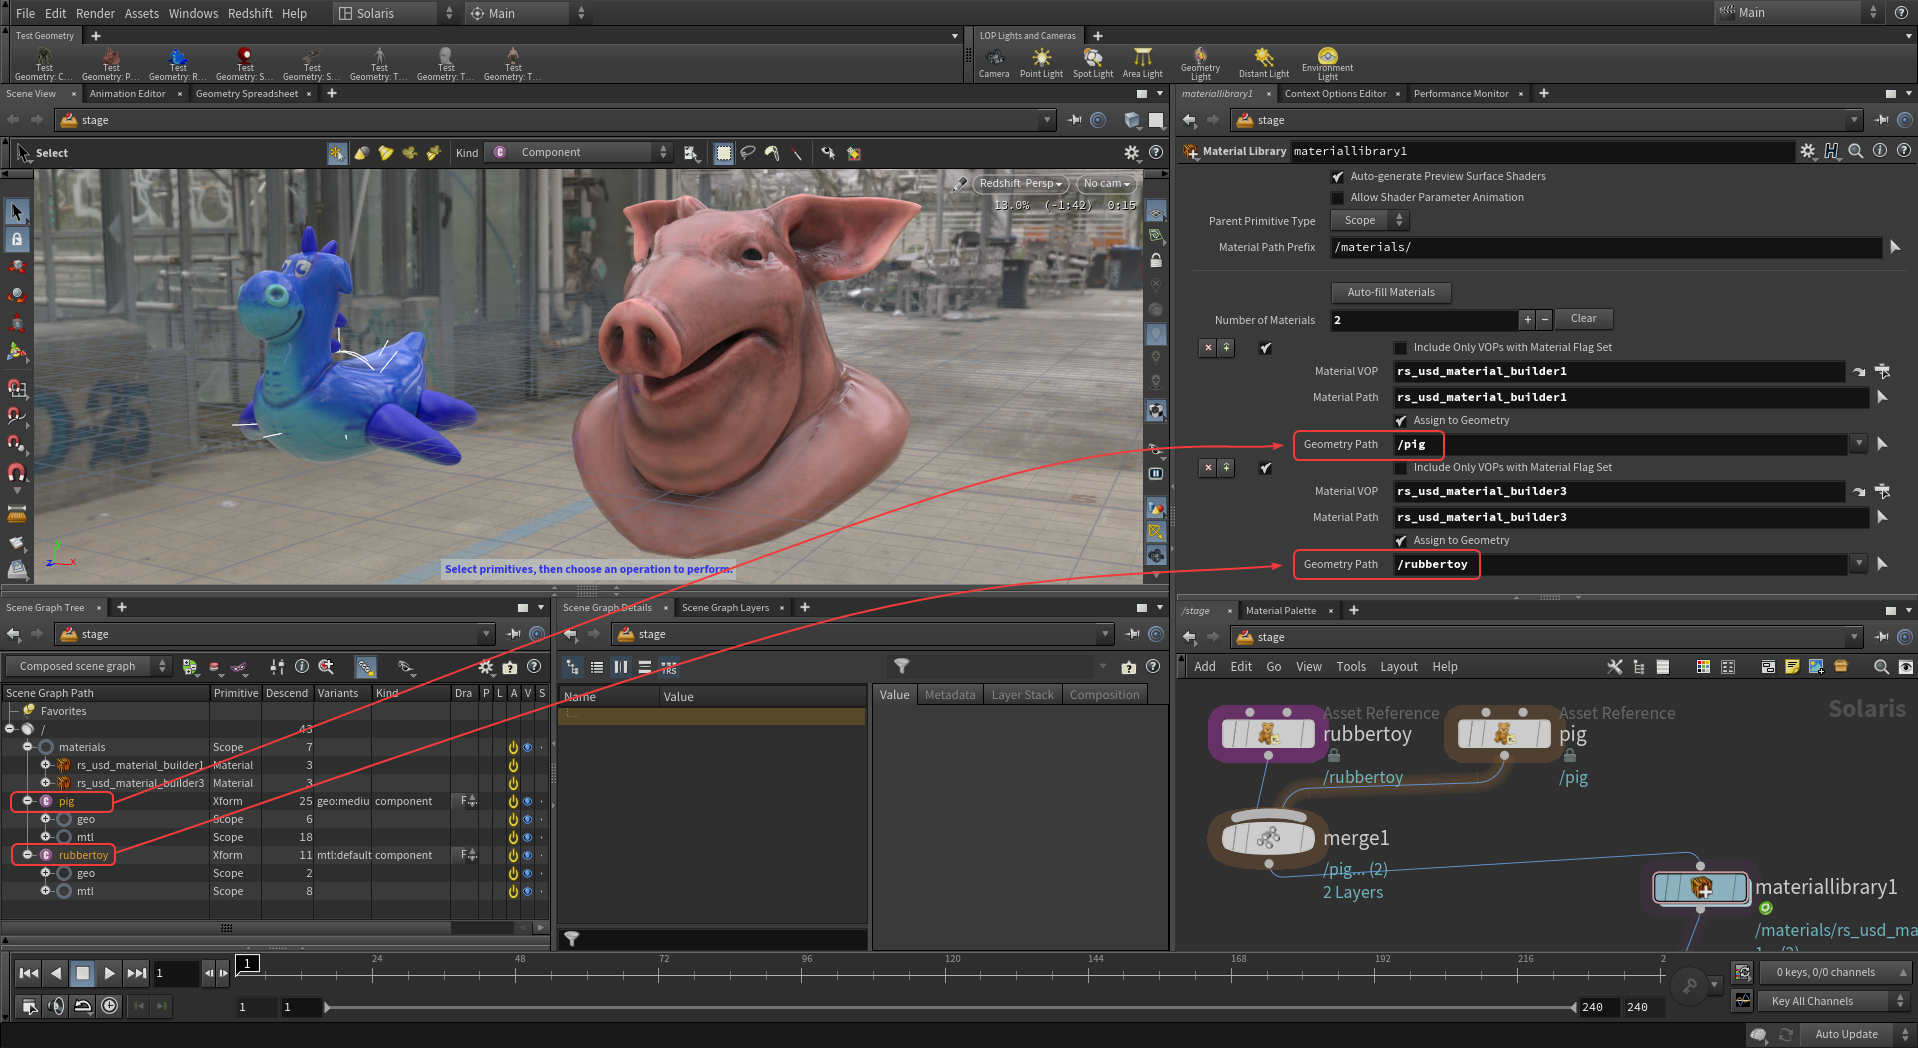
|
| Setting geometry to a material's Geometry Path |
Unfortunately this didn't work and nothing has changed because the default material for these objects is still taking precedence over the new material assignments. This kind of issue can be resolved with an Unassign Material LOP. In the image below the Unassign Material LOP was placed after both objects but before the Material Library LOP which removes their original material assignments which allows the new material assignments to take precedence.
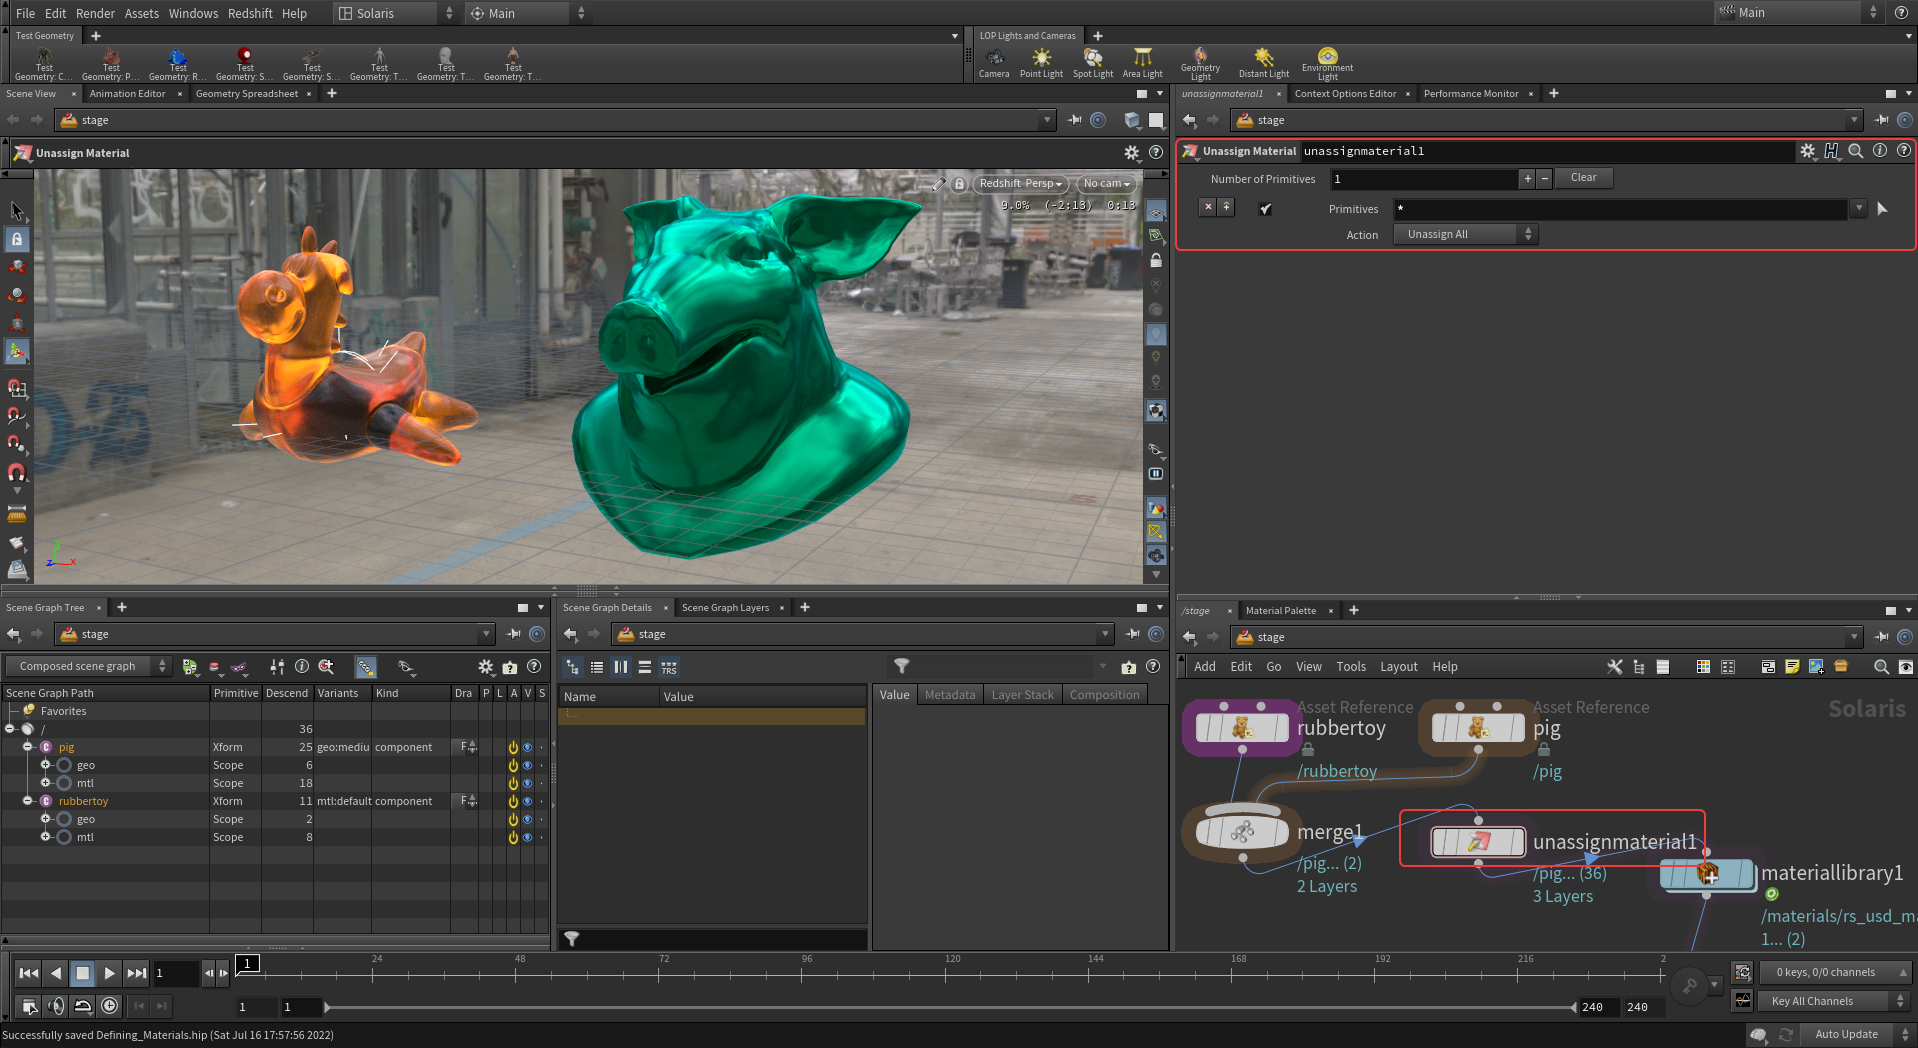
|
| Using an Unassign Material LOP to fix material assignments |
Assign Material LOP
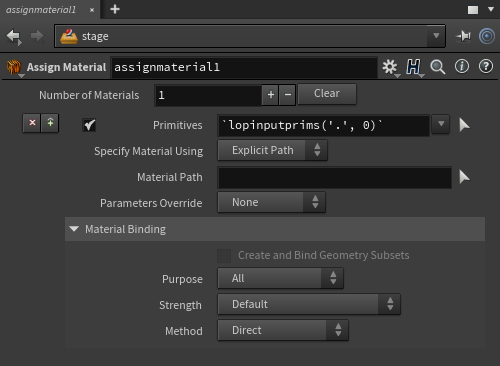
|
| Assign Material LOP |
The Assign Material LOP can be used to assign materials to geometry in the scene as well as control the material assignments strength over preceding material assignments. Multiple materials can be assigned with one Assign Material LOP by increasing the "Number of Materials" parameter.
The "Material Path" can be filled with a material from the Scene Graph Tree and the "Primitives" field can be filled with geometry in the scene. In the image below two different materials and objects were dragged from the Scene Graph Tree in the bottom left to the relevant fields of the Assign Material LOP.
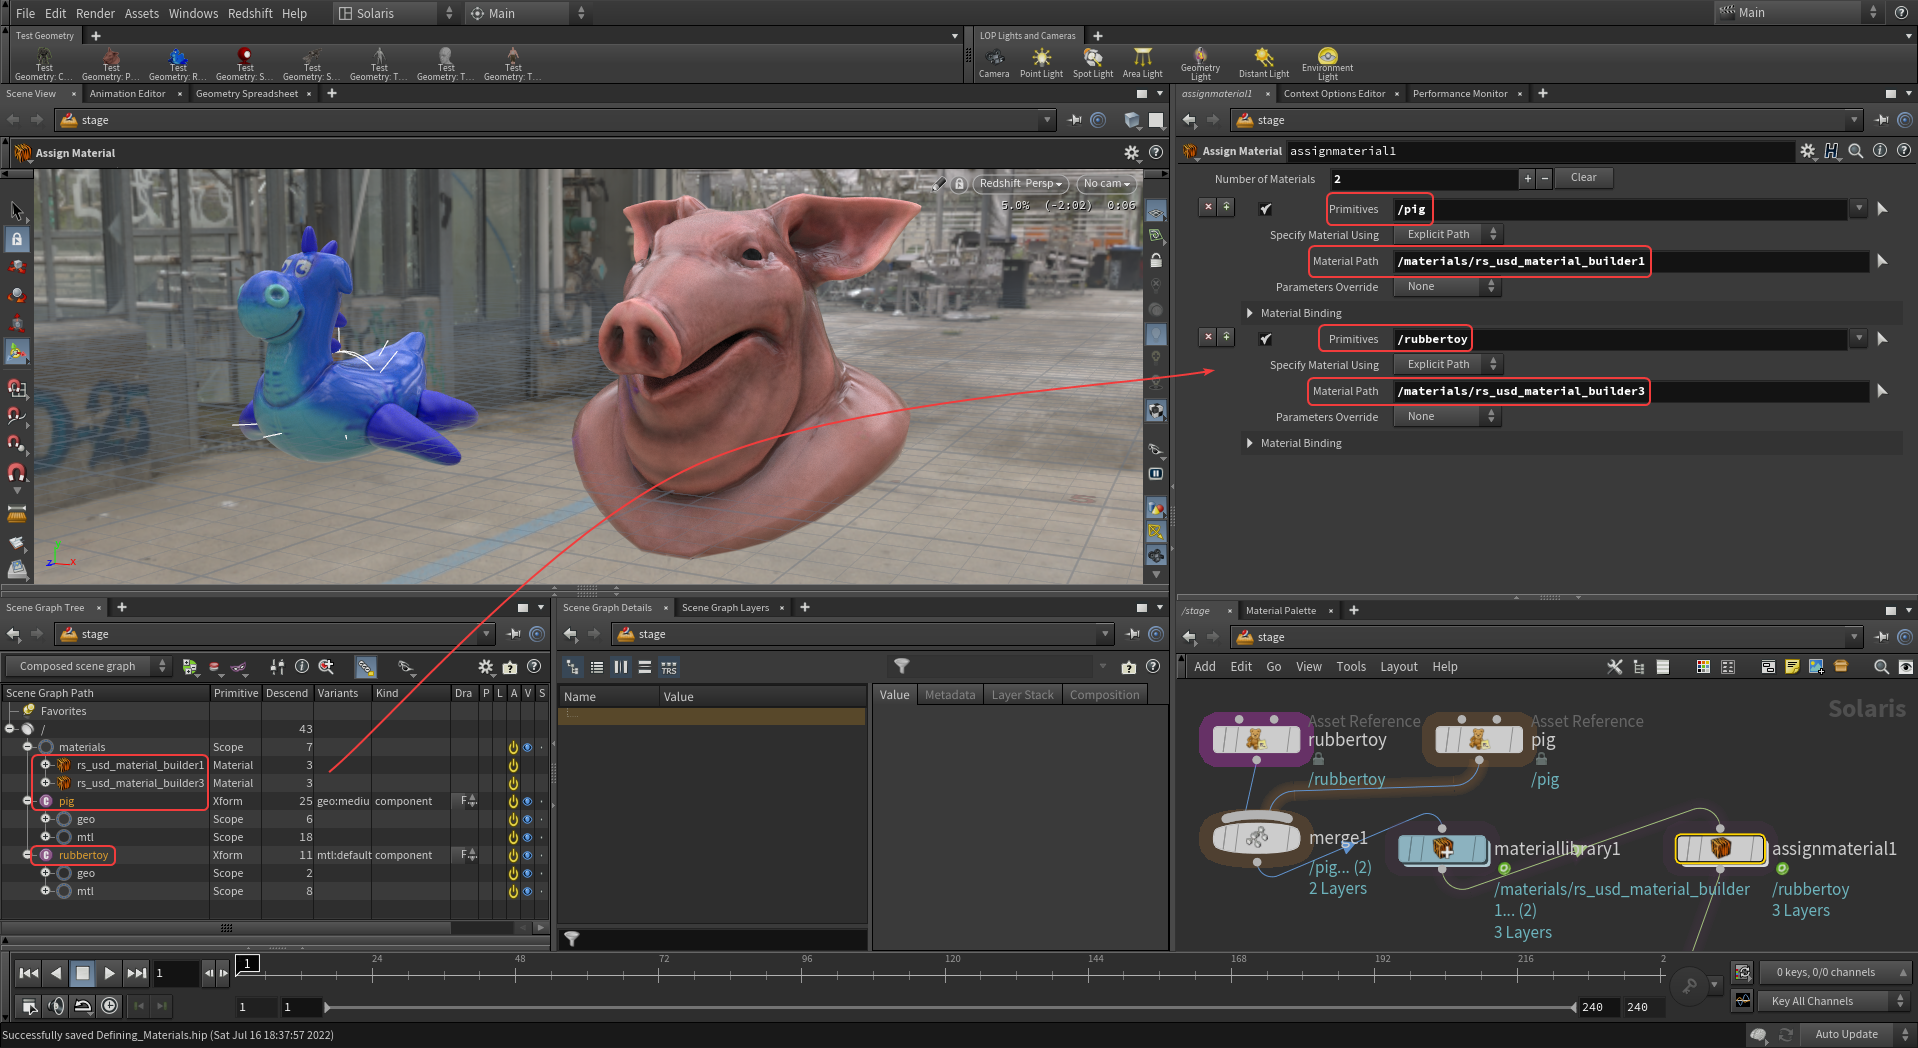
|
| Filling Assign Material paths from the Scene Graph Tree |
Unfortunately this didn't work and nothing has changed because the default material for these objects is still taking precedence over the new material assignments. This can be fixed by changing the "Strength" parameter of the Material Binding in the Assign Material LOP or with an Unassign Material LOP . In the example image below the "Strength" parameter is set to "Stronger than Descendants" for both materials which allows the new material assignments to take precedence.
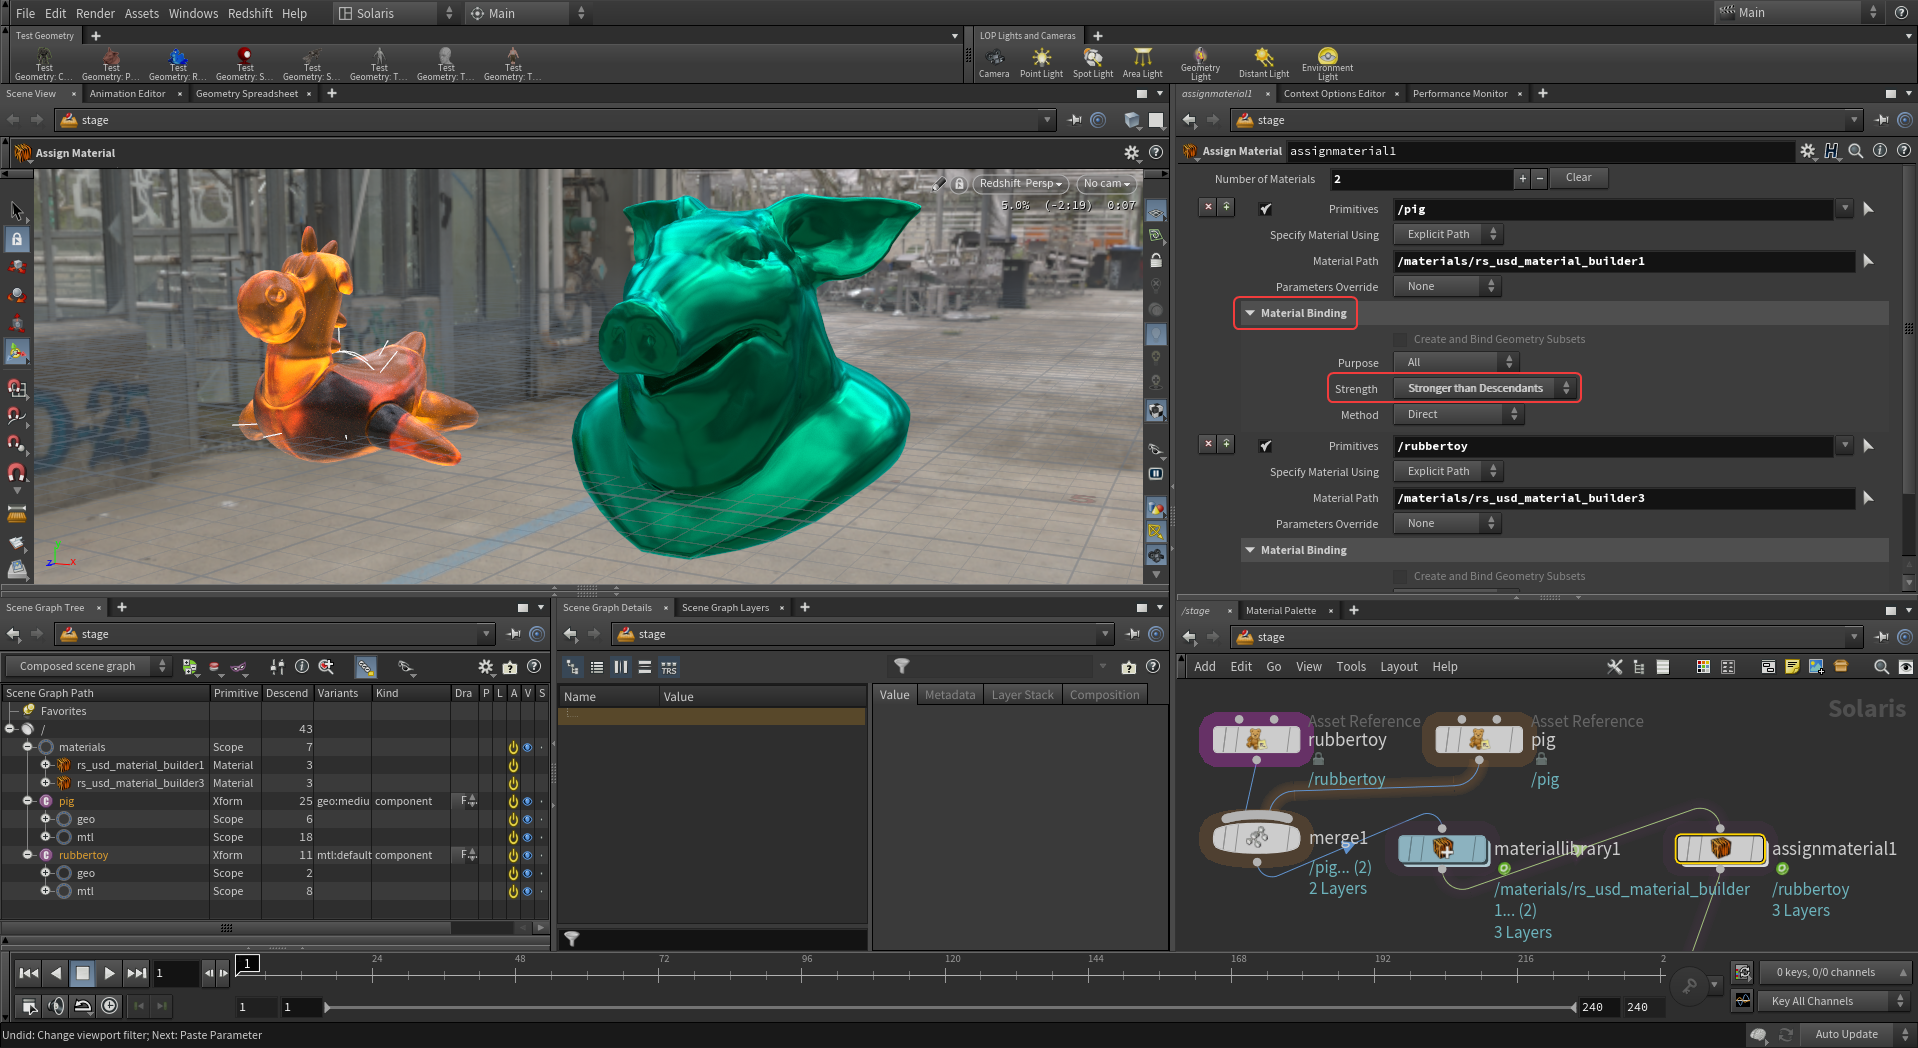
|
| Setting the Strength of a material assignment |
For more information on the Assign Material LOP see the Houdini documentation: https://www.sidefx.com/docs/houdini/nodes/lop/assignmaterial.html
Unassign Material LOP
The Unassign Material LOP can be used to remove material assignments from objects in a scene, this can be helpful when assigning materials with a Material Library LOP which lacks the ability to set the strength of new material assignments. Multiple primitives can have their materials removed by increasing the "Number of Primitives" parameter with a single Unassign Material LOP.
By using a * wildcard in the "Primitives" field of an Unassign Material LOP every single object in the scene before the Unassign Material LOP has had their materials removed as seen in the image below.
|
|
| Using an Unassign Material LOP to fix material assignments |
For more information on the Unassign Material LOP see the Houdini documentation: https://www.sidefx.com/docs/houdini/nodes/lop/unassignmaterial.html