Motion Blur - Production
Overview
|
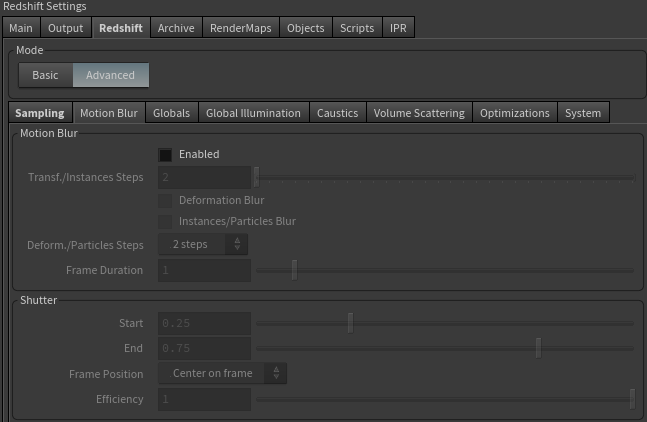
Motion Blur
|
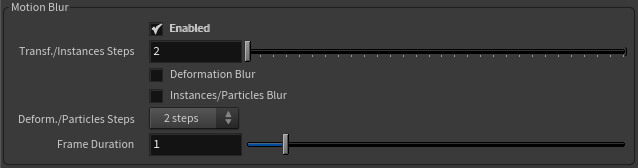
Enabled
Enables / Disables motion blur.
If a Motion Vector AOV is enabled in your scene all Redshift motion blur will automatically be disabled in the beauty render as this would be undesirable for a Motion Vector AOV.
For more information on AOVs, please see here.
Transformation Steps
This controls the number of linear steps that Redshift will use to represent the trajectory of cameras, lights and objects for motion blur.
More steps means the trajectories will be more accurate and the motion blur will look smoother but more memory will also be used.
In the example images below notice how the trajectory of the moving lantern is more appropriately rendered as the Transformation Steps are increased. All renders were taken from the same animation, the only thing changed were the Transformation Steps count.
|
|
|
|
|
| Motion Blur: Disabled Transformation Steps: N/A |
Enabled 2 |
Enabled 4 |
Enabled 10 |
Deformation Blur
Enables / Disables deformation motion blur, disabled by default.
Deformation Blur tracks the motion of individual vertices and can be memory-intensive especially for high-poly or displaced geometry, if your objects do not have animated deformation this parameter can be left disabled for increased performance. For more information please see this page.
If your objects do not have animated deformation (like skinned character animation) this parameter can be left disabled for increased performance. For more information please see this page.
Deformation Steps
This controls the number of linear steps that Redshift will use to represent the trajectory of moving vertices on deforming objects.
More steps means the trajectories will be more accurate and the motion blur will look smoother but more memory will also be used.
Frame Duration
Controls the number of frames for which the camera's virtual 'shutter' will stay open.
As in real-life, the larger this value the blurrier the motion blur results.
Since this parameter has to do with frame duration, it is affected by the animation frame rate set in your modeling program.
Shutter
|
|

|
Shutter Type
There are three different modes available to control the amount of motion blur:
- Still: The default setting and typical for digital cameras. The Shutter time is measured in fractions of a second.
- Movie: On traditional film cameras, the shutter is formed by a disc rotating in sync with the frame rate. Inside this disk is an opening whose size is specified by the 'Shutter Angle'. In this mode you can use angle values to control the exposure time relative to your fame rate.
- Custom: Here you can specify the exposure time relative to the frame duration given by the frame rate of your animation.
The Shutter settings in the Render Settings replace the Shutter settings of a Redshift camera object, if the 'Motion Blur' option at the camera object is set to 'Render Settings'. If you like to use the cameras own Motion Blur and Shutter settings instead, switch the 'Motion Blur' option at the camera to 'Override'.
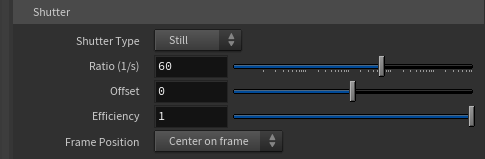
Shutter settings 'Still'
This is the classic behavior of digital still or movie cameras. The shutter speed is specified in fractions of a second ('Ratio 1/s'). The 'Offset' is also given as a fraction of a second and can be used to offset the exposure time.
Ratio (1/s)
Motion blur is defined by the duration of the exposure, which is measured here in fractions of a second. Smaller numbers result in longer exposure times and more motion blur.
Offset
Here you can enter a fraction of a second to shift the time of the shutter opening.
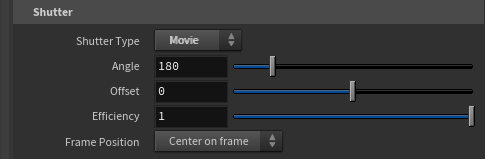
Shutter settings 'Movie'
The shutter behaves like a rotating disk. The rotation speed corresponds to the current frame rate (one 360° rotation per animation frame). Inside the disk is an opening through which the light is transmitted during the exposure. The size of this opening can be set with an angle value between 0° and 360°. An angle of 180° in combination with a frame rate of 30 frames per second would result in a shutter speed of 1.0 s/30 frames * 180°/360° = 1/60 seconds. Since unrealistic values above 360° can also be entered here, the strength of the motion blur can be increased even further.
Angle
This value sets the size of the opening in the rotating aperture disk. Larger values cause more light to pass through the shutter during exposure, resulting in more motion blur.
Offset
Here you can use an optional angle value to offset the position of the opening within the rotating disc
Shutter settings 'Custom'
The Shutter settings allow the user to fine-tune the time range of motion blur for the specified frame range (the total number of frames used for motion blur is controlled by the 'Frame Duration' setting).
Start
Sets the start point of the motion blur within the frame duration relative to the frame position.
This value can range from 0.0 to 1.0. A value of 0.0 corresponds to the very beginning of the frame duration and a value of 1.0 corresponds to the very end of the frame duration.
The smaller the difference between the shutter 'Start' and 'End', the shorter the blur - and vice-versa. For this reason, Start/End pair values of 0.0/0.5 and 0.5/1.0 would produce the same amount of blur because the difference between them is 0.5 in both cases. However, the motion blur will be 'offset' near the start and end of the frame range respectively.
Below are some example values and their resulting behaviors if you were rendering frame 10 of an animation with a Frame Position of Center and with an End value of 1.0.
| Start value |
Motion Blur Start Frame |
Behavior |
|---|---|---|
| 0.0 | Frame 9.5 | Motion blur begins at the very beginning of the frame duration, starting as early as possible and resulting in the most motion blur possible within the frame duration. |
| 0.5 | Frame 9.75 | Motion blur begins half way through the frame duration resulting in half as much motion blur possible within the frame duration. |
| 1.0 | Frame 10.5 | No motion blur because there is no difference between the start and end values. |
End
Sets the end point of the motion blur within the frame duration relative to the frame position.
This value can range from 0.0 to 1.0. A value of 0.0 corresponds to the very beginning of the frame duration and a value of 1.0 corresponds to the very end of the frame duration.
Below are some example values and their resulting behaviors if you were rendering frame 10 of an animation with a Frame Position of Center and with an Start value of 0.0.
| End value |
Motion Blur End Frame |
Behavior |
|---|---|---|
| 0.0 | Frame 9.5 |
No motion blur because there is no difference between the start and end values. |
| 0.5 | Frame 10.25 | Motion blur stops half way through the frame duration resulting in half as much motion blur possible within the frame duration. |
| 1.0 | Frame 10.5 |
Motion blur stops at the very end of the frame duration, ending as late as possible and resulting with the most motion blur possible within the frame duration. |
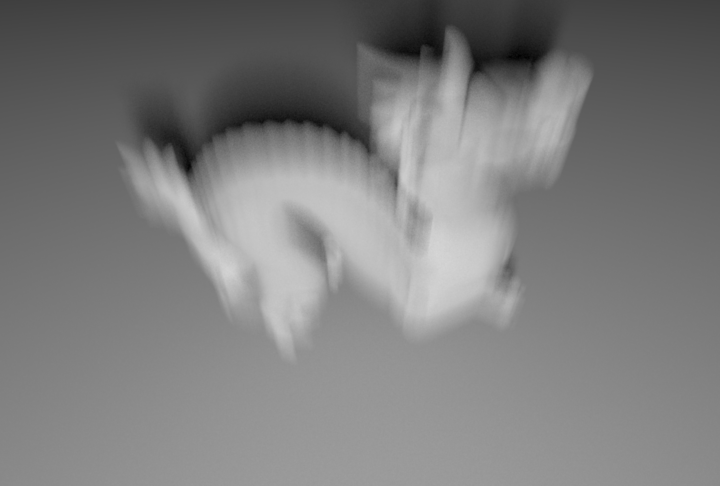
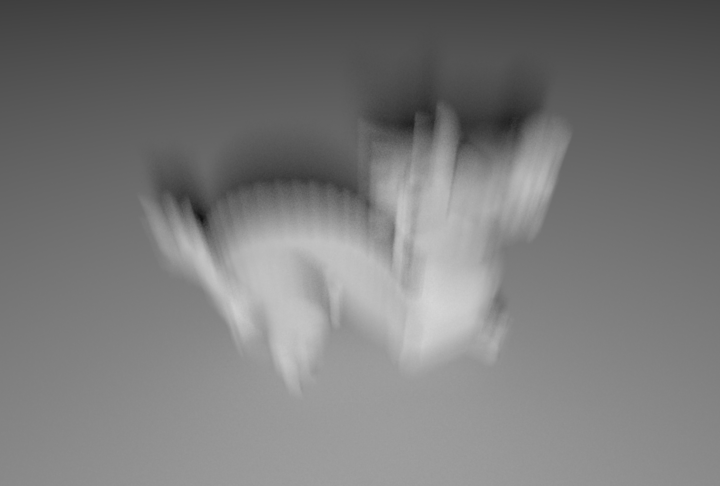
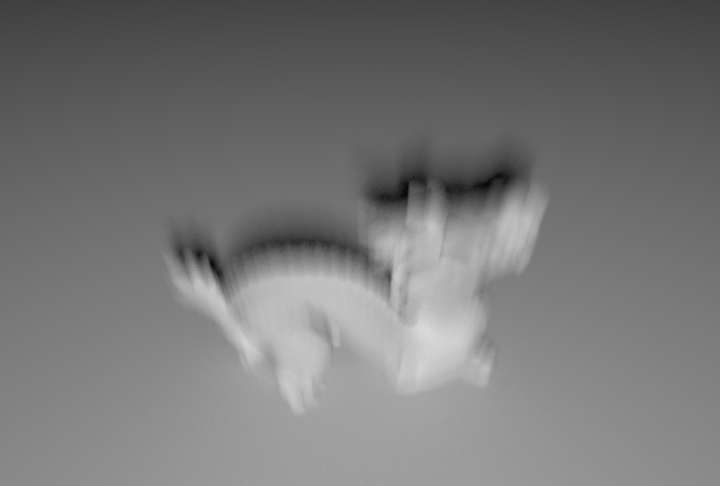
Frame Position
Controls the offset of the motion blur within the frame duration relative to the rendered frame.
- Start - Starts motion blur at the rendered frame.
- For example: No motion is visible from any frames prior to the rendered frame.
- Center - Centers the motion blur on the rendered frame.
- For example: Motion is visible both in front of and after the rendered frame.
- End - Ends motion blur at the rendered frame.
- For example: No motion blur is visible from any frames after the rendered frame.
In the example images below is a 100 frame animation and the rendered frame is frame 50. The dragon is moving upwards and the motion blur frame duration setting is set to 50 (i.e. 50 frames).
|
|
|
|
| Frame Position: Start | Center | End |
Efficiency
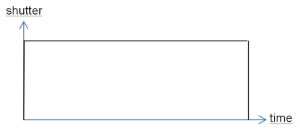
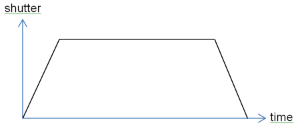
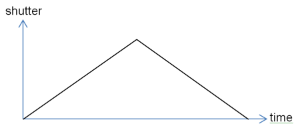
Controls how fast the shutter opens and closes.
Real-life camera shutters don't open instantaneously – they open gradually. A setting of 1.0 (the default) means the shutter will open instantly, while a setting of 0.0 means that it will open as gradually as possible.
The images below show how the shutter efficiency parameter efficiency affects the shutter opening speed.
|
|
|
|
| Efficiency 1.0 | Efficiency 0.3 | Efficiency 0.0 |
The shutter efficiency parameter affects the look of motion blur trails as shown in the example pictures below. Notice how the motion blur trails appear smoother when the Efficiency is set to 0.
|
|
|
|
| Efficiency 1.0 | Efficiency 0.7 | Efficiency 0.0 |