USD Procedural
Overview
The USD Procedural can be used to load a USD file, it works similarly to a Redshift proxy file and can be used in Houdini, Solaris, Maya, and Katana. The USD assets are only loaded at render time which allows the primary scene file to be lightweight and speeds up scene extraction time. If you are working in a USD environment where all DCCs use the same assets then Redshift can directly use these as well.
The USD procedural supports instancing as long as a DCC's instancing tools are used, at this time instancing is not automatic.
As of Redshift 2025.5, nested instancing is supported inside the USD Procedural. This allows for instancing of USD assets that already have instances inside themselves, including instances of RS Proxy objects.
Note, Redshift can only handle around 48 million instances (without motion blur) inside of the same scene.
The USD Procedural can be used in Katana but you must also have Houdini installed because it is compiled against the Solaris USD libs. The same installation steps covered below for Houdini also apply to Katana.
Installation
Before the USD Procedural can be used it must be manually installed, this is accomplished by moving the correct "RSProceduralUSD.dll" file into Redshift's "Procedurals" directory.
This process must be completed anytime you change your version of Redshift - upgrades or downgrades.
Step 1: Determine which USD version you are using
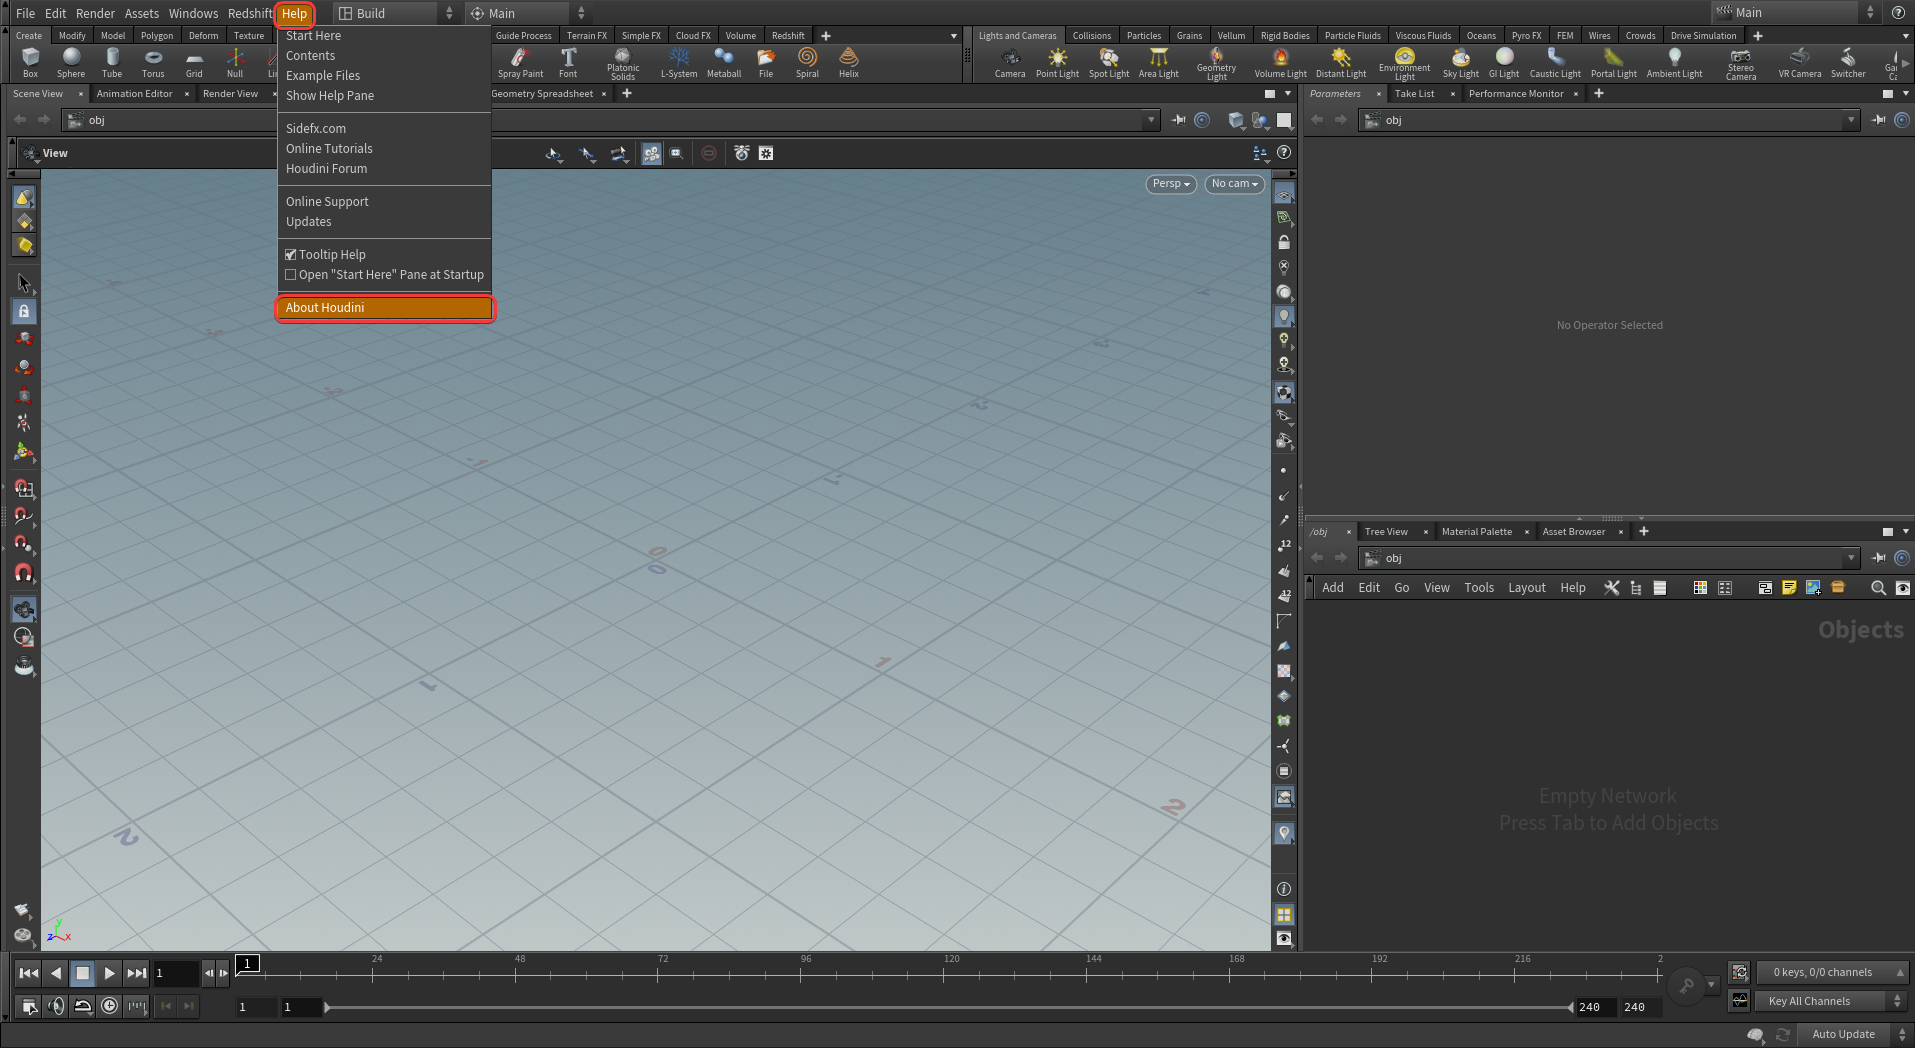
Each version of Houdini supports a different version of USD, to find out which USD version you are using open Houdini and click on the "About Houdini" option in the Help menu.
|
| Opening the About Houdini panel |
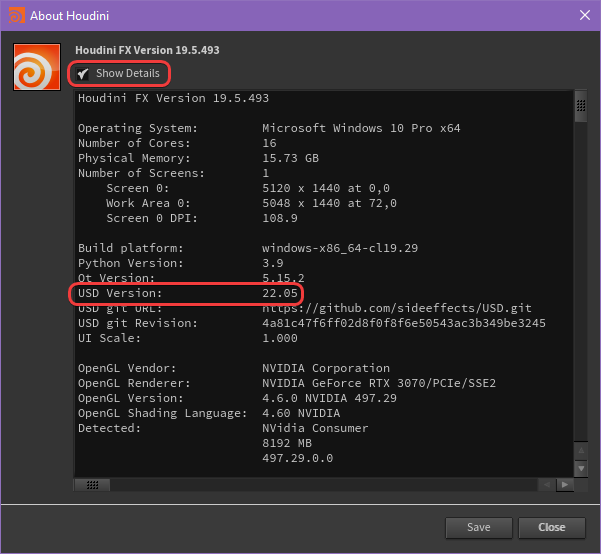
In the About Houdini panel enable the "Show Details" option to list the "USD Version" as pictured below, in this example it is USD Version 22.05, this version number is important for the next step.
|
| Houdini USD Information |
Step 2: Installing the USD Procedural
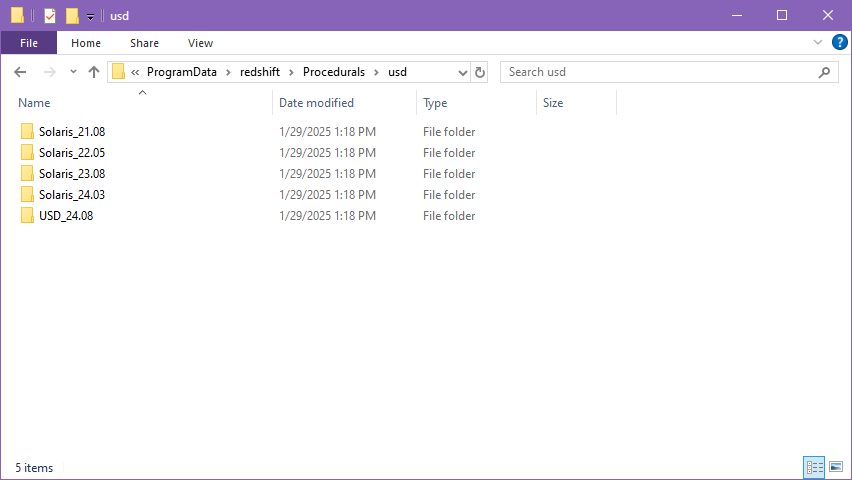
Close Houdini and navigate to the following location on your hard drive:
C:\Program Files\Maxon Redshift 20XX\Procedurals\usd
Here you will see multiple folders that correspond to different versions of USD and different DCCs. Houdini, Solaris, and Katana use the folders titled "Solaris_" and Maya uses the generic "USD_" folder.
|
| USD Version folders |
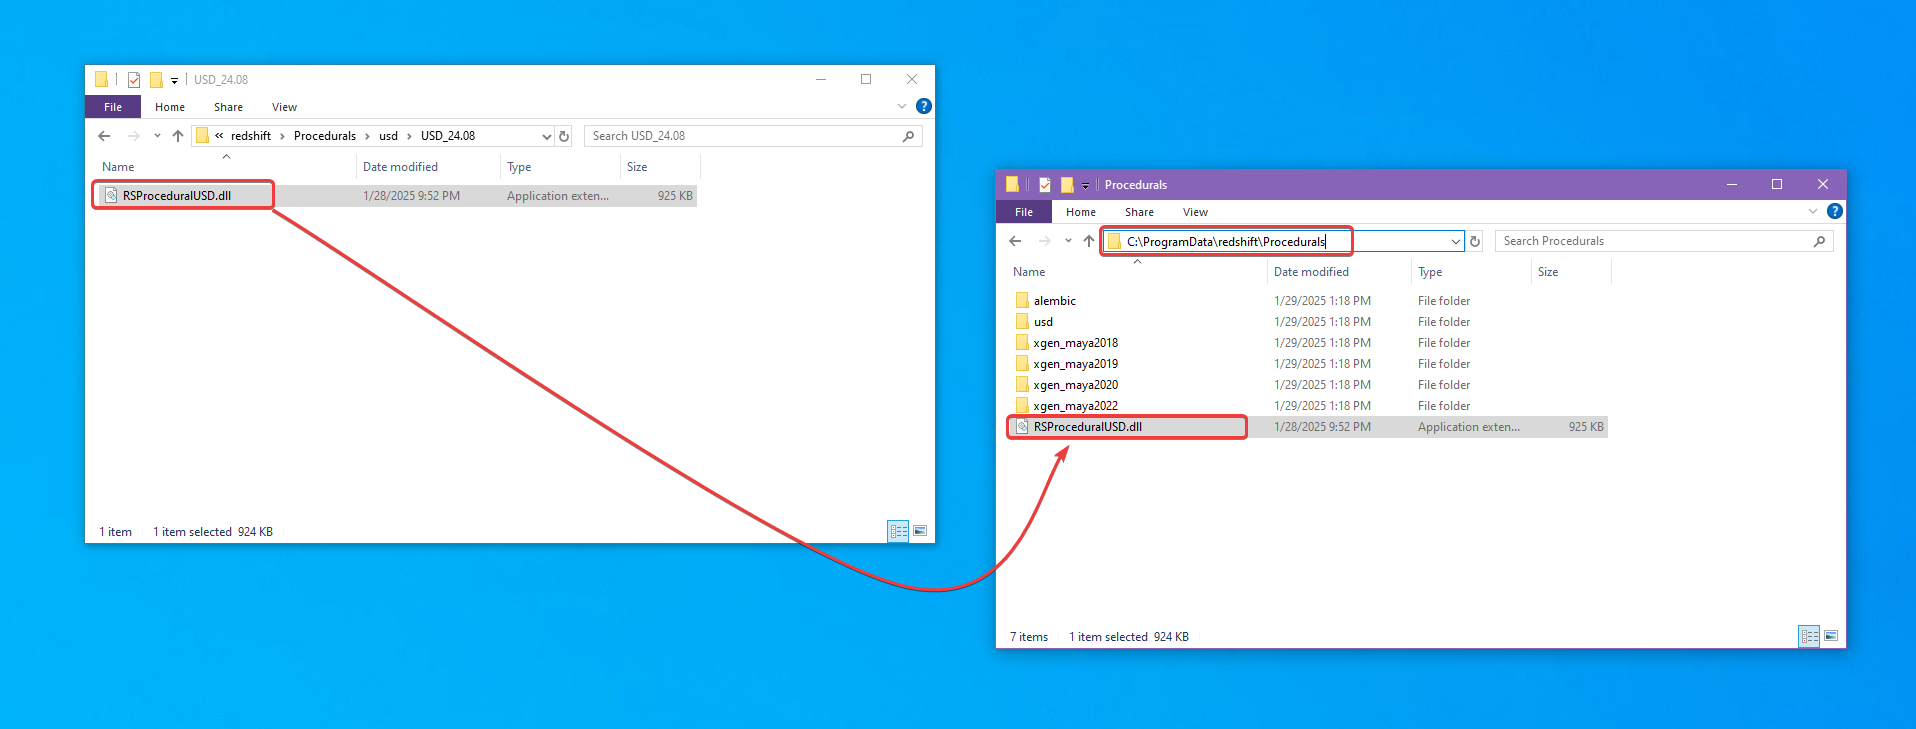
Open the folder that matches the USD Version you found in Step 1 and copy the "RSProceduralUSD.dll" file inside to the Procedurals folder located here:
C:\Program Files\Maxon Redshift 20XX\Procedurals
|
| Installing the RSProceduralUSD.dll file |
Now you can use the USD Procedural.
Example
Creating a USD Procedural
Houdini
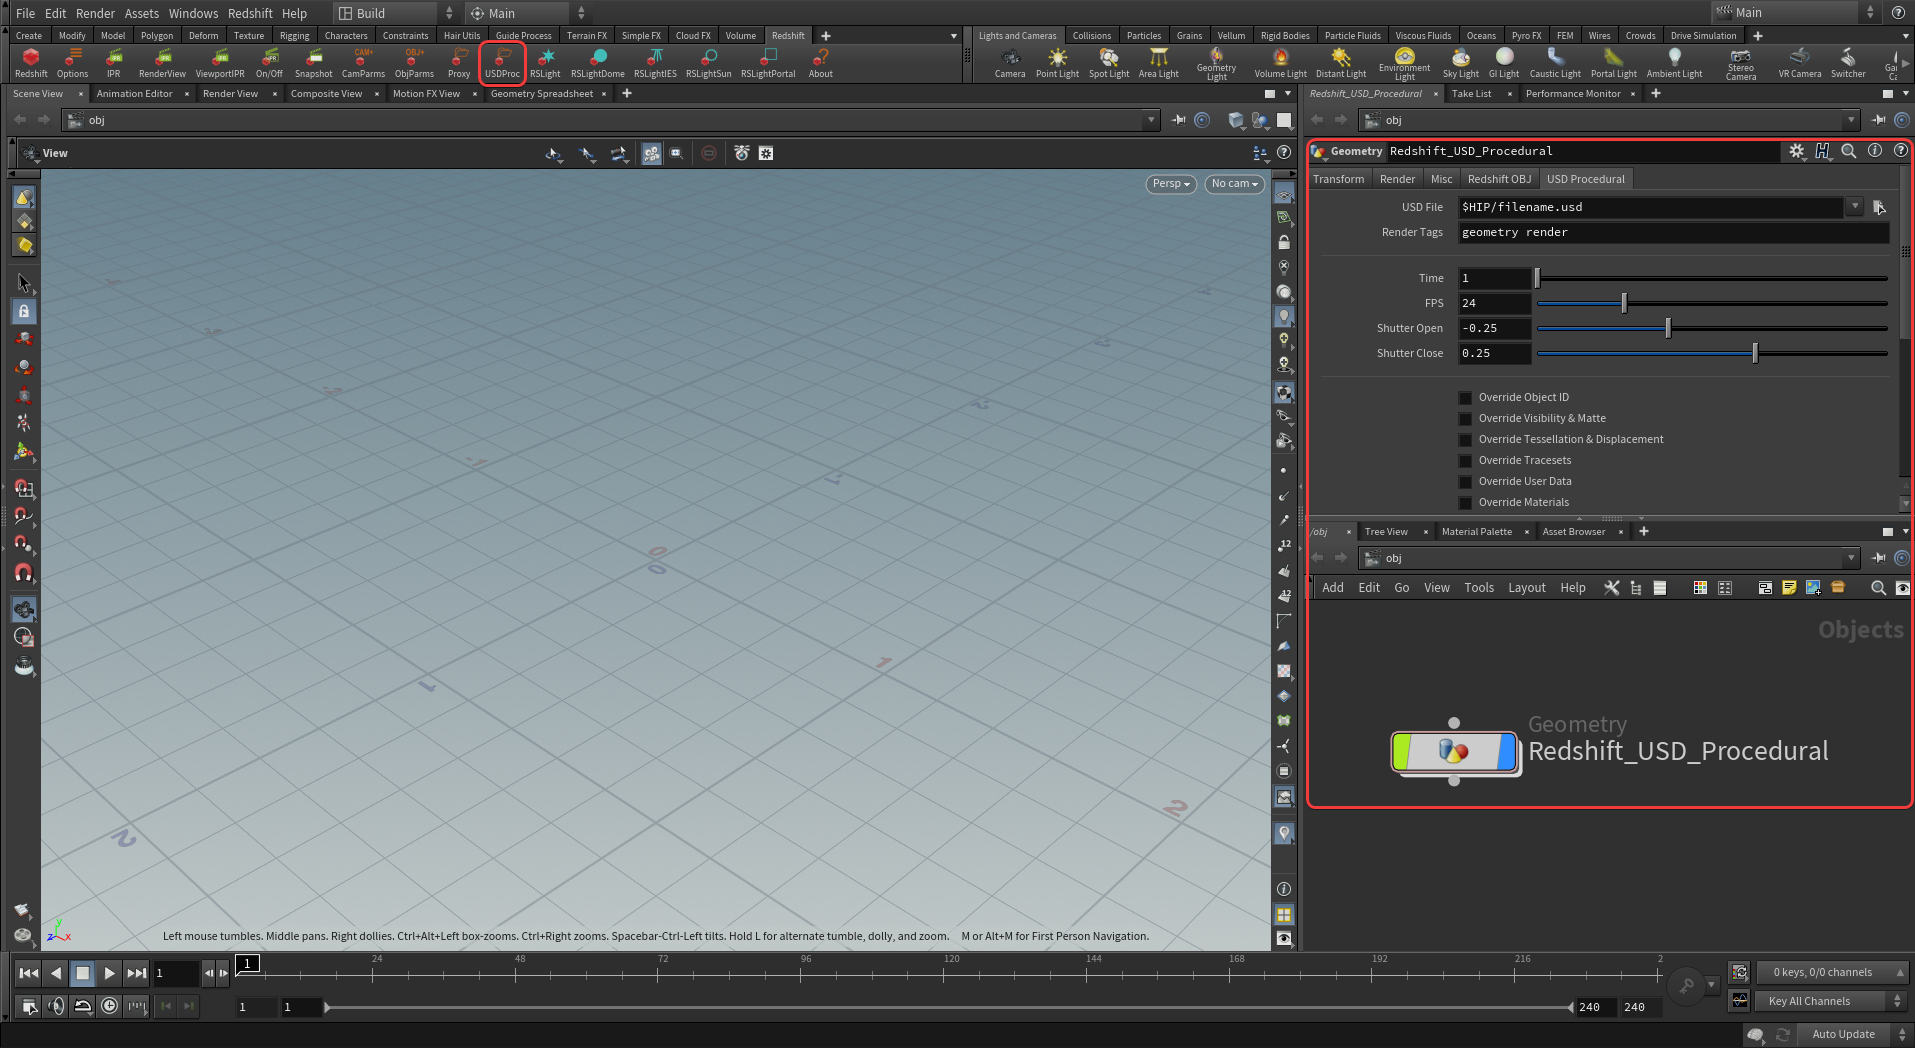
To create a USD Procedural in Houdini use the "USDProc" item in the Redshift shelf and select a file in the "USD File" field as pictured below.
|
| Creating a Redshift USD Procedural |
Solaris
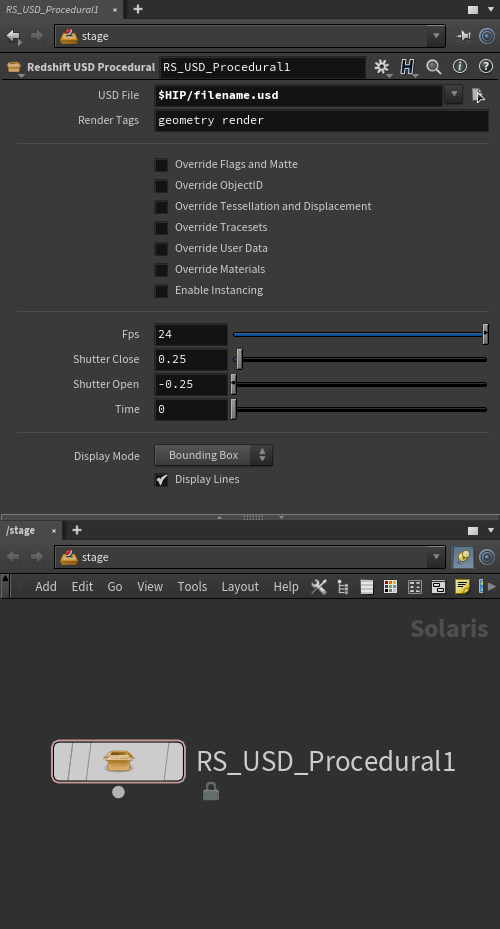
To create a USD Procedural in Solaris create a "Redshift USD Procedural" in the stage and select a file in the "USD File" field as pictured below.
|
| Creating a Redshift USD Procedural |
Creating Variants
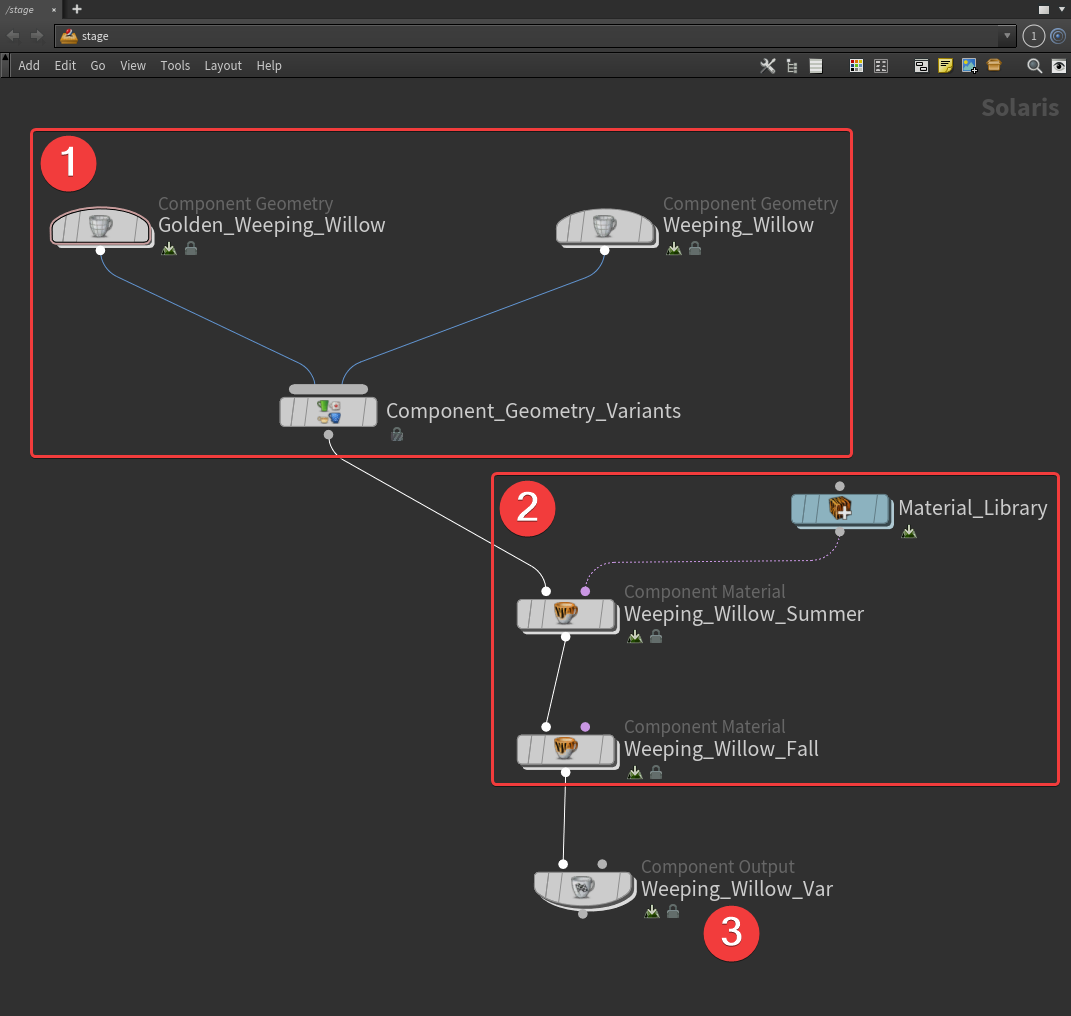
Adding variants to your USD files requires a specific order of operations and an attention to node naming.
Start by selecting any object variants using a Component Geometry LOP and adding them to a Component Geometry Variant LOP (1). The name of each Component Geometry node serves as the name for each geometry variant.
Next add material variations using a Component Material LOP with a Material Library LOP that contains your materials (2). Each Component Material defines the variation's name and the relevant material assignments.
Finally, a Component Output LOP is used to package it all together and save it to disk (3). A default geometry and material variant can be assigned here.
|
| Setting up USD variants |
Parameters

|
USD File
Load a USD file here.
Render Tags
USD tags used for controlling things like object visibility.
Variants
Lets you add and control USD variants on the loaded USD file.
Once a variant is added the following three fields are revealed:
- Primitive: Let's you target a specific object for the variant override, by default the variant targets whatever is set up in the USD file.
- Variant Set: Controls which type of variant override is used, either a geometry or material variant.
- Variant: Selects which variant is used from the embedded variants.
Time
This value can be changed to retime the USD file.
FPS
Controls the playback frame rate.
Shutter Open
For motion blur, controls when the shutter opens relative to the current frame.
Shutter Close
For motion blur, controls when the shutter closes relative to the current frame.
Override Object ID
When disabled, the object ID settings embedded in the USD file are used. When enabled, the object ID can be overridden in the scene.
Override Visibility & Matte
When disabled, the visibility and matte settings embedded in the USD file are used. When enabled, visibility and matte settings can be overridden in the scene.
Override Tessellation & Displacement
When disabled, the tessellation and displacement settings embedded in the USD file are used. When enabled, tessellation and displacement settings can be overridden in the scene.
Override Tracesets
When disabled, the traceset settings embedded in the USD file are used. When enabled, tracesets can be overridden in the scene.
Override User Data
When disabled, the user data values embedded in the USD file are used. When enabled, the user data can be overridden in the scene.
Override Materials
When disabled, materials embedded in the USD file are used. When enabled, materials can be overridden in the scene using the Material Override List.
Enable Instancing
When enabled, Houdini can instance the USD procedural.
Material Override List
Lists materials embedded in the USD file and lets you pick materials in the scene to replace them with.
USD Display Purpose
When enabled, Houdini can instance the USD procedural.
Display Mode
Controls how the USD object is displayed in the viewport from the following options:
- None: USD object is hidden in the viewport.
- Bounding Box: Displays a box around all contents of the USD file.
- Mesh: Displays the USD object as a polygon mesh.
- Points: Displays the USD object as points.
Display Lines
When enabled, Houdini can instance the USD procedural.