Sun & Sky
Overview
|
|
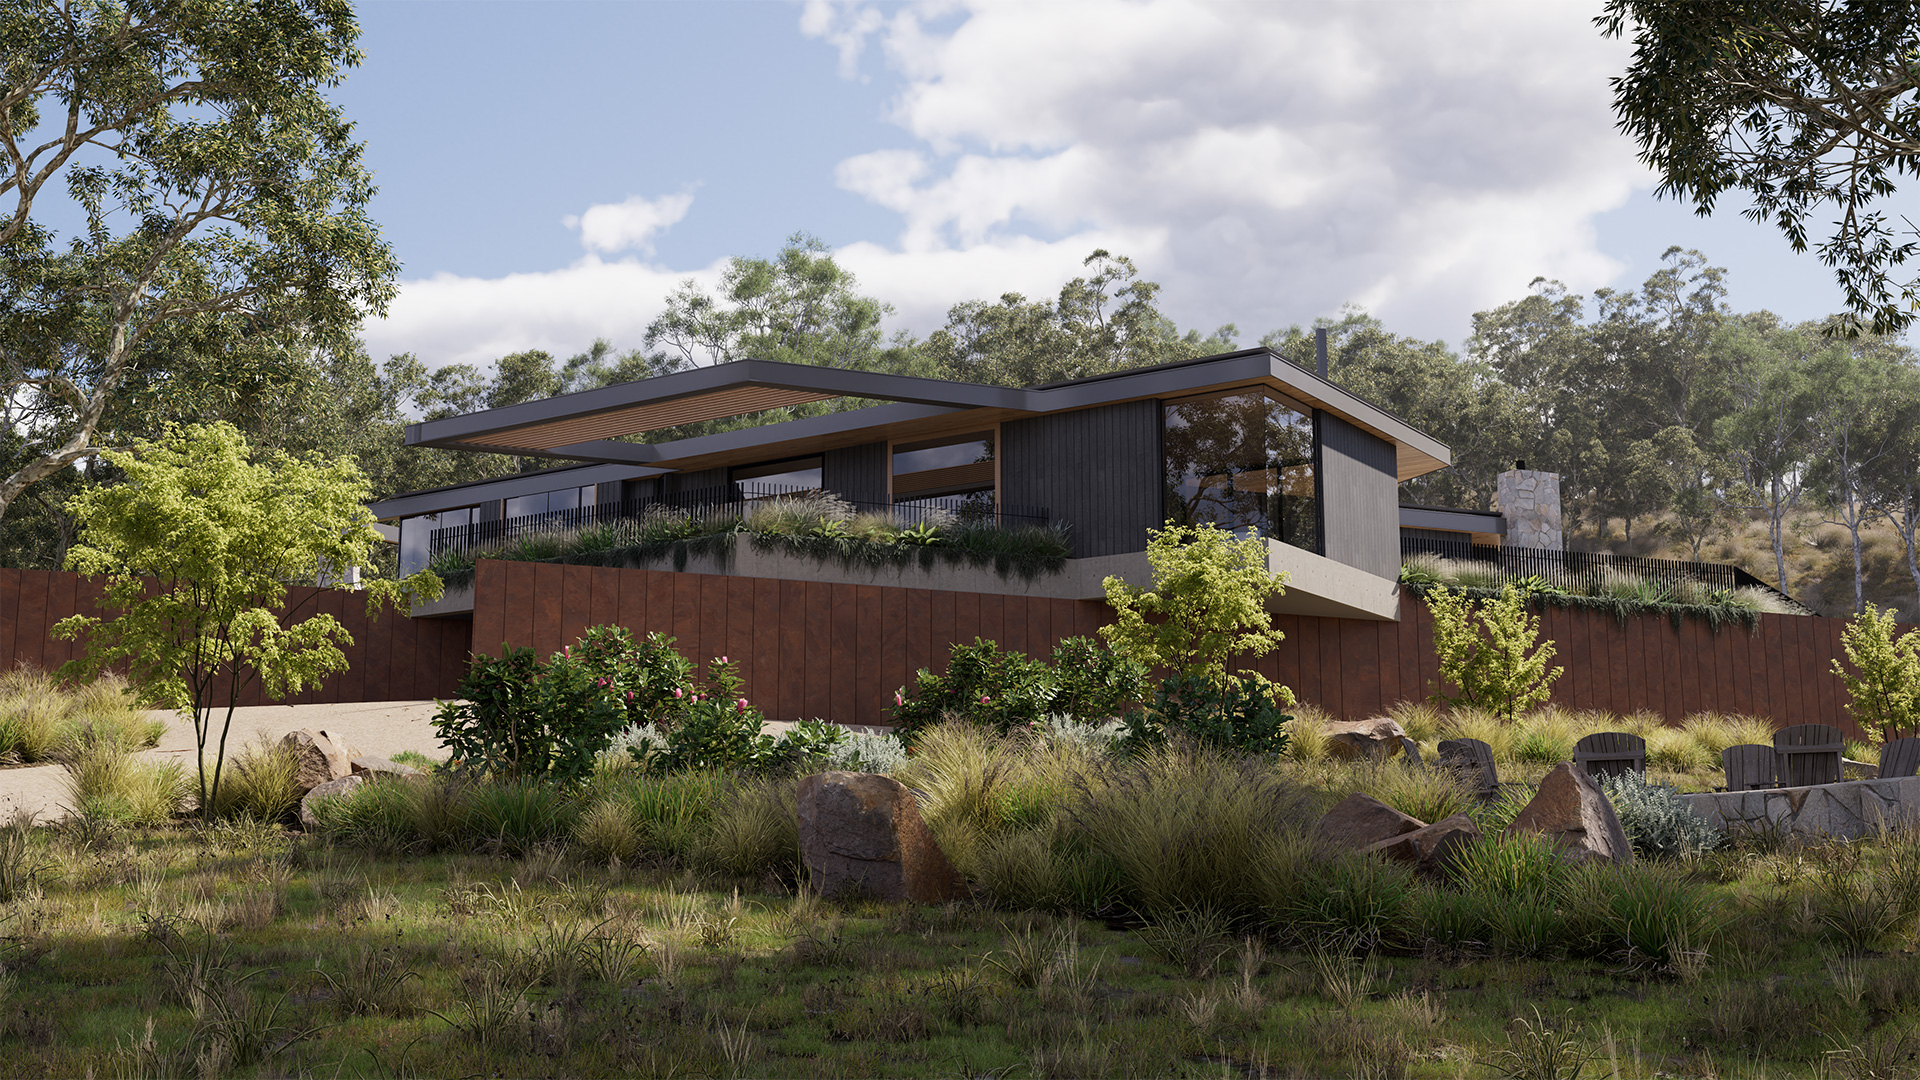
| Model by Brad Goldsworthy, Lighting and Rendering by Saul Espinosa | by Saul Espinosa |
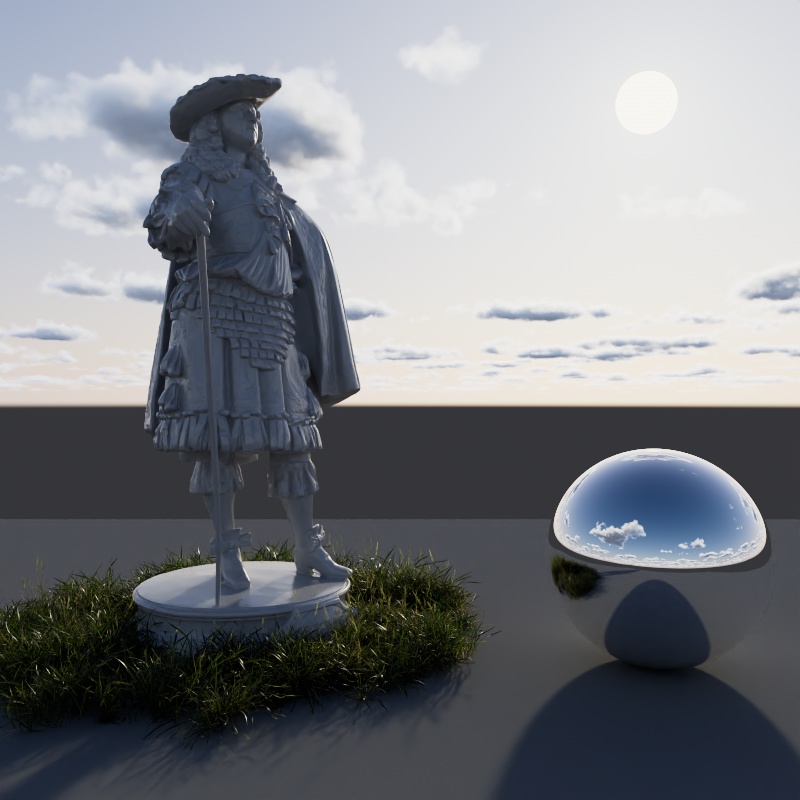
The Redshift Sun & Sky offers a quick and easy way to add realistic outdoor lighting from sun up to sun down and it pairs well with a Redshift Cloud object for added realism. Sun & Sky is based on the PRG Clear Sky model from the paper "A Fitted Radiance and Attenuation Model for Realistic Atmospheres" which improves upon the Hosek-Wilkie sky model. PRG Clear Sky is able to better represent scenarios where the sun is very near or below the horizon, allowing for much more accurate and aesthetically pleasing sunrises and sunsets.
Functionally the Sun & Sky is very similar to a Dome Light, offering the same familiar light parameters like contribution scale and light linking.
Physically Accurate Lighting
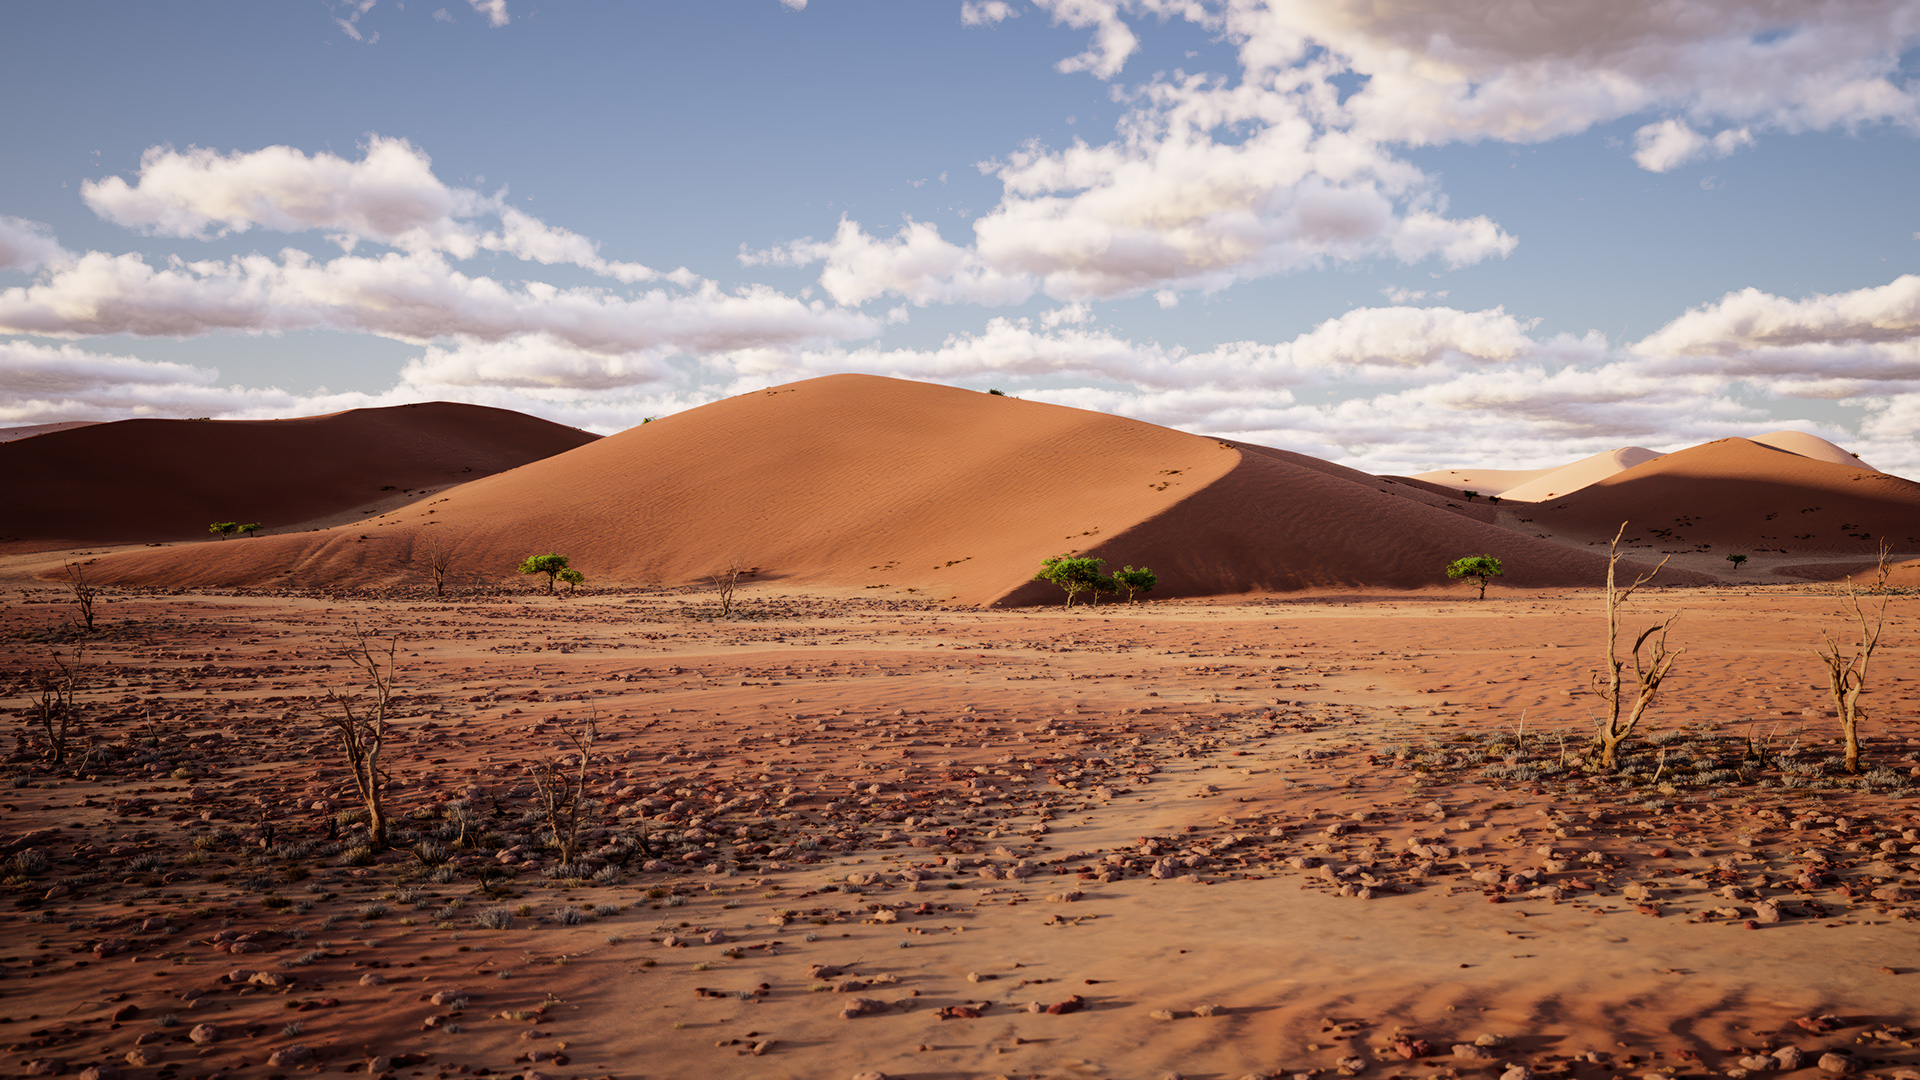
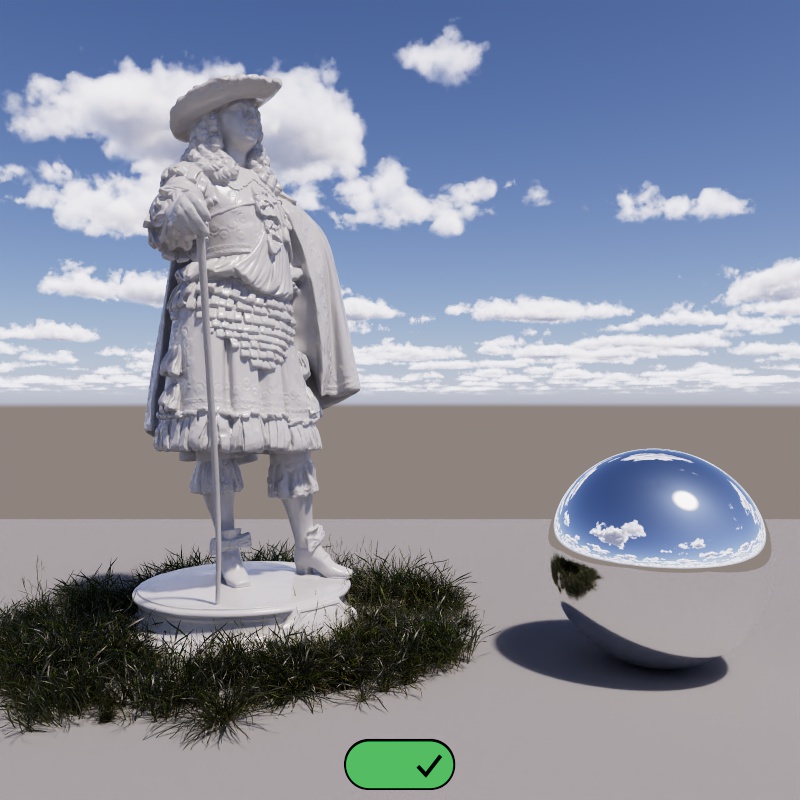
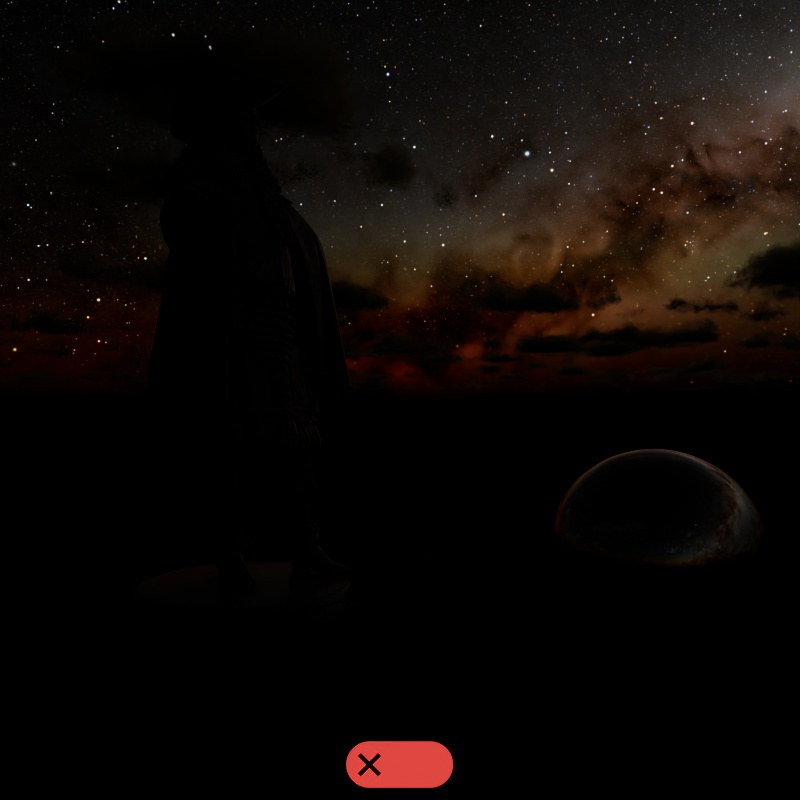
For best accuracy, the Sun & Sky uses a physically accurate light intensity by default, this is true for both day and night scenarios. During the day, cameras should use a lower exposure value to compensate because of the intense light of the sun at midday. At night, cameras should use a higher exposure because while a full moon may look bright in the sky it is not bright enough to adequately light up the ground.
| Namaqualand scene from PolyHaven.com |
Daytime
Camera Exposure
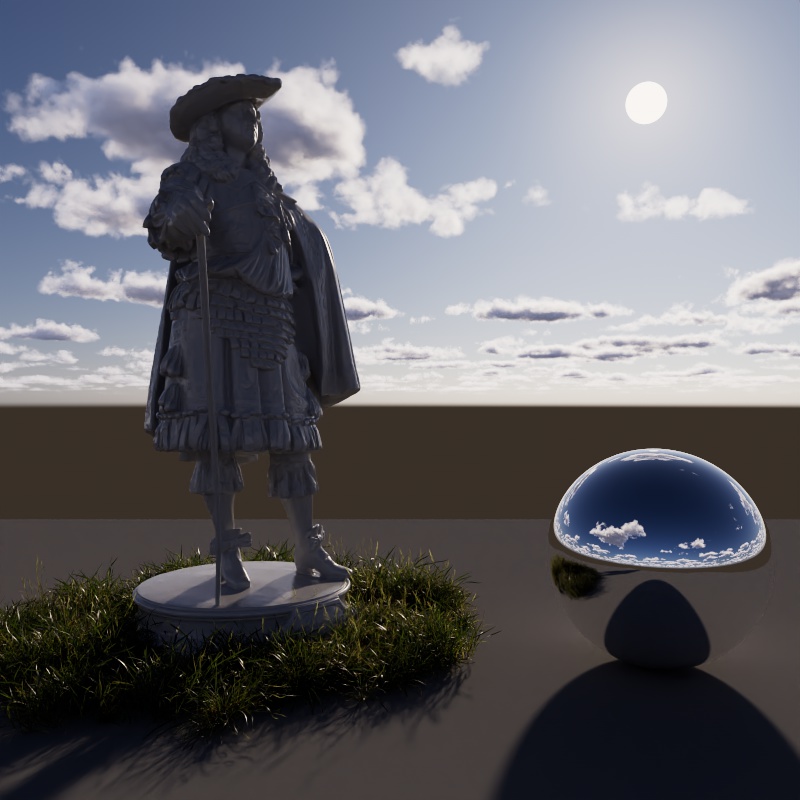
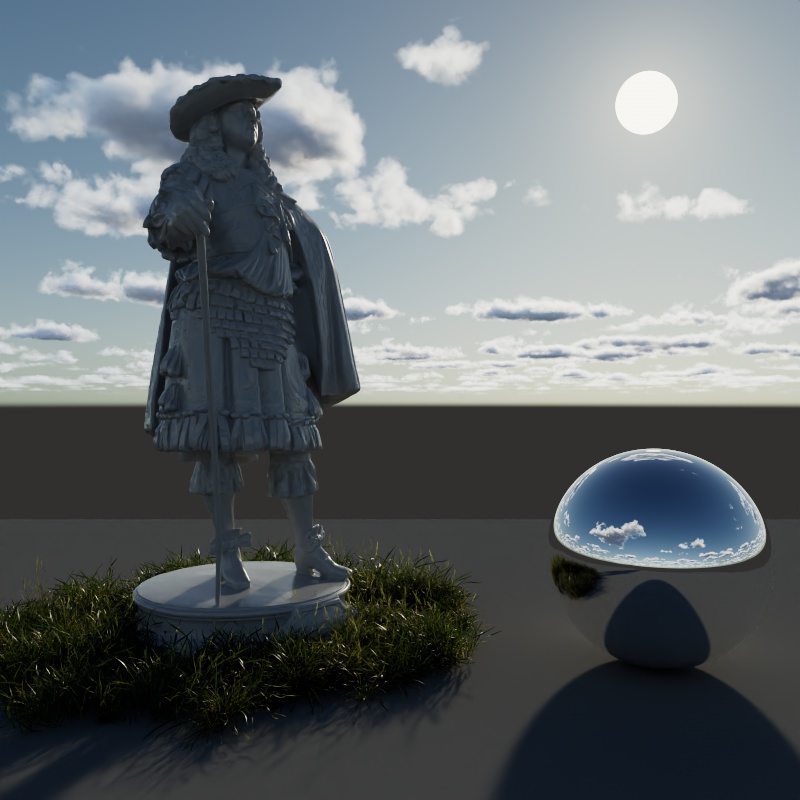
The simplest way to compensate for intense sun light is to reduce the Camera's "Exposure (EV)" value. At the default value of 0 the scene will be blown out, but an Exposure value of -5 closely matches the Sunny 16 rule described below while a value of -4 leaves things nice and bright. Set it to any value you prefer most.
|
|
|
| Camera Exposure 0 (default) | Camera Exposure -4 | Camera Exposure -5 |
Sunny 16 rule
This rule provides a good starting guideline for achieving pleasant exposure in daylight. Start with a Redshift camera and set the following parameters:
- Exposure Type: "Filmic"
- Aperture: 16
- ISO: 100
- Shutter Speed: 100
The examples below illustrate the change made with each adjustment, and remember, these are just a suggestion — feel free to adjust the settings to your liking. For more information, have a look at the Wikipedia entry.

|
|
|

|
| Filmic camera defaults | Setting Aperture to f /16 | Setting ISO to 100 | Setting Shutter Speed to 1/100 |
Non-Physical Intensity
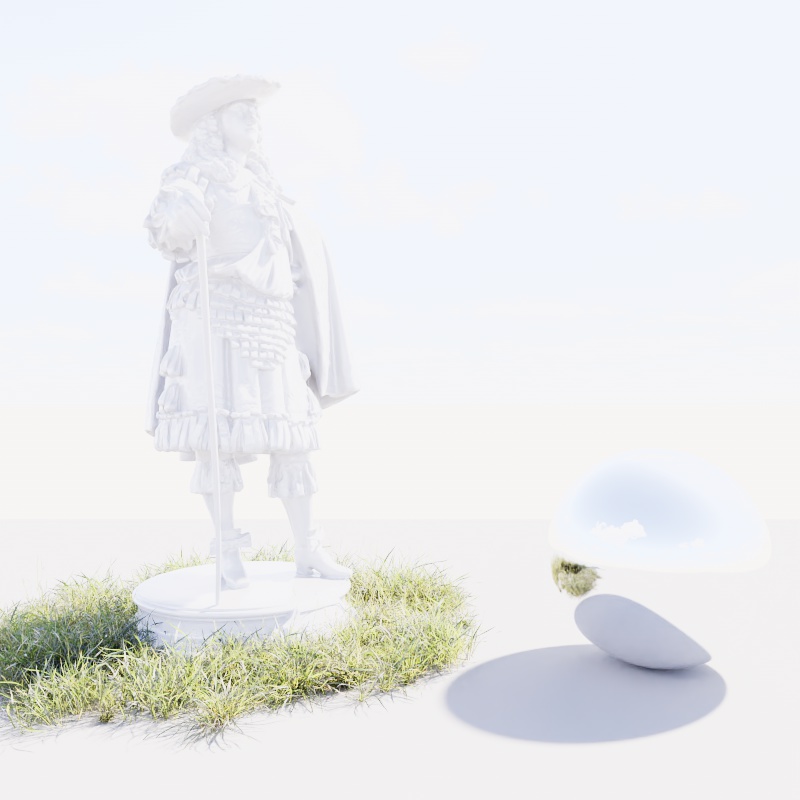
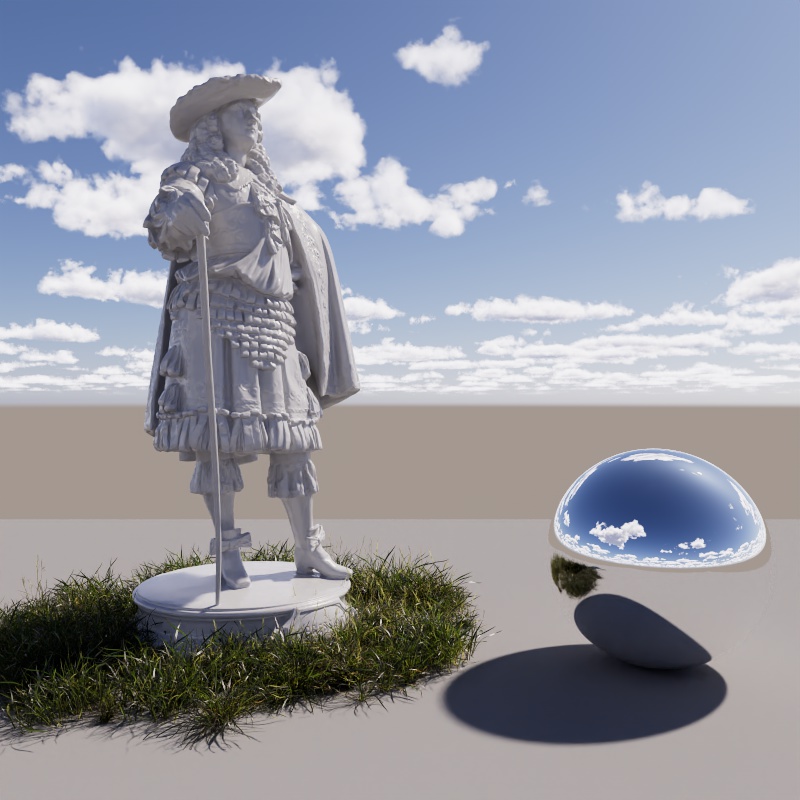
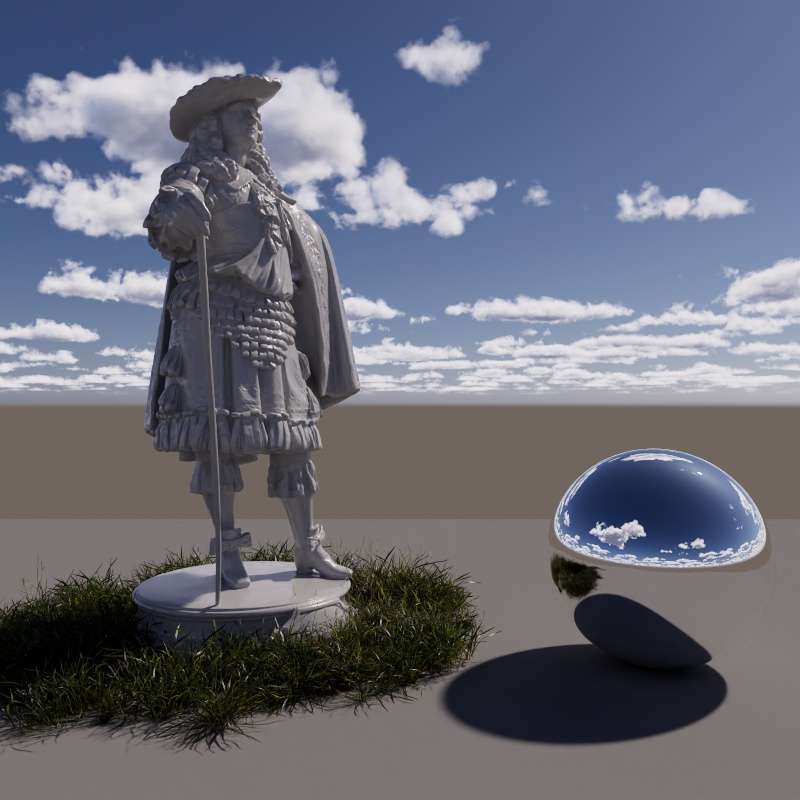
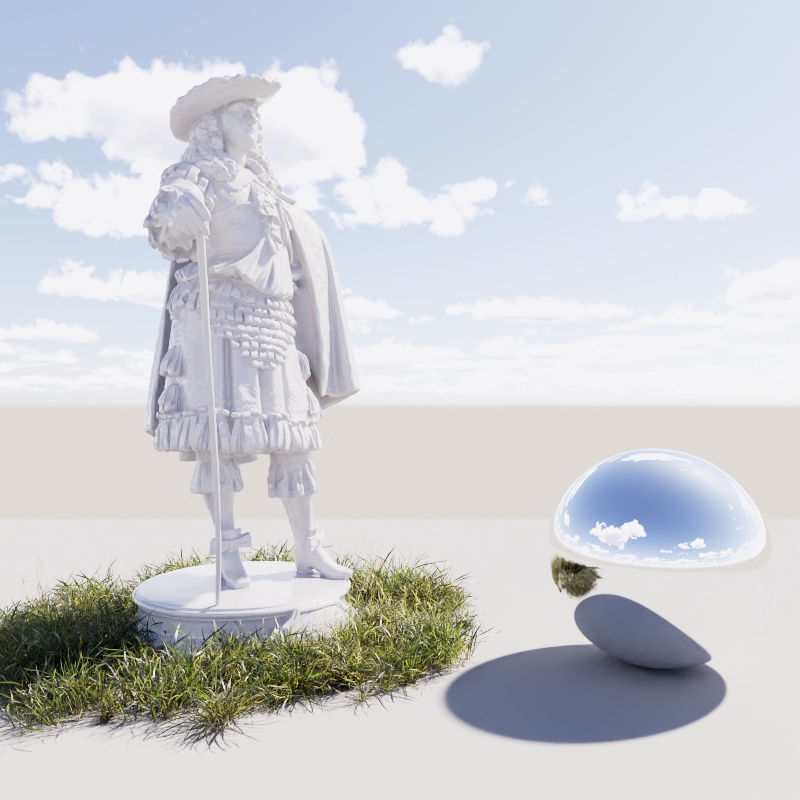
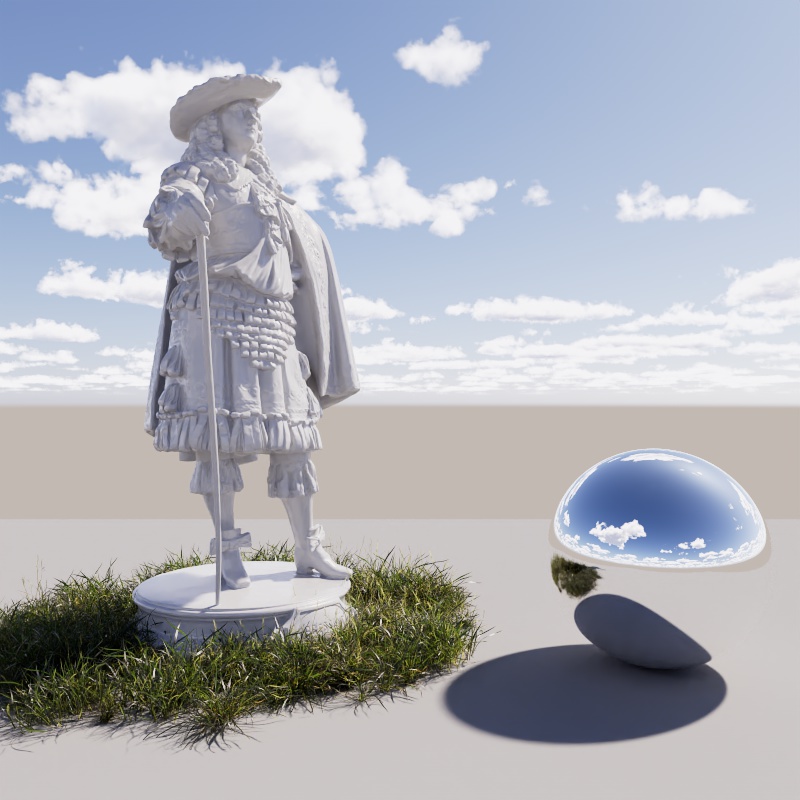
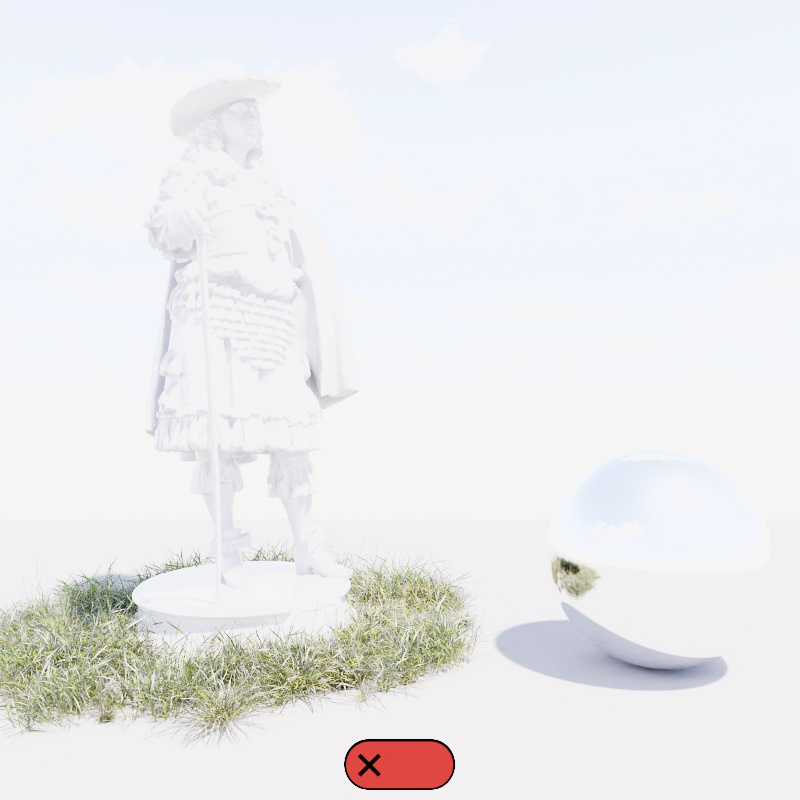
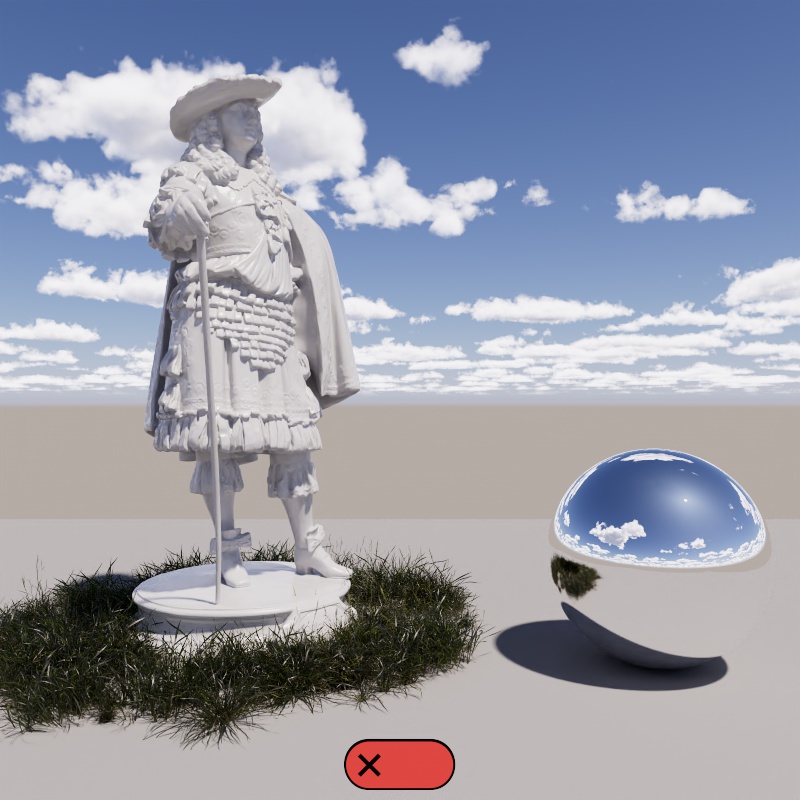
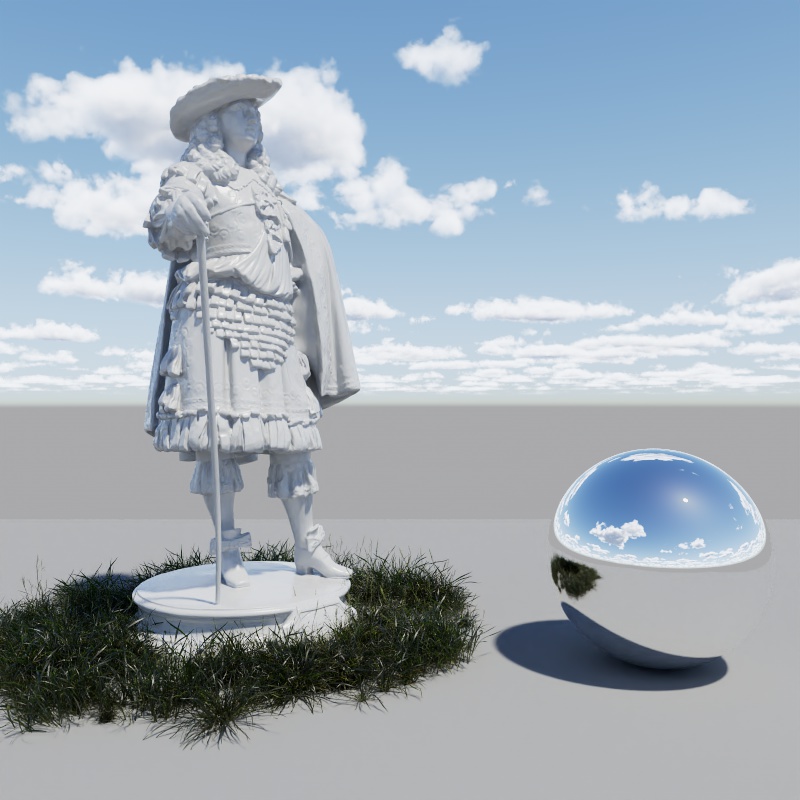
If physical accuracy is not important the Sun can quickly be brought down to a visually acceptable light intensity without the need to adjust any camera settings simply by enabling "Use Non-Physical Intensity."
The first image shows a brand new scene with no camera exposure adjustments, resulting in a blown out scene. In the second image Non-Physical Intensity is enabled — this brings the sun intensity into a range that is visually appealing without the need for further adjustment. Please note, using a non-physical intensity reduces the natural impact sunlight has on a scene, like reducing the intensity of global illumination bounce lighting, subsurface scattering, and overall contrast.
|
|
| Use Non-Physical Intensity: Disabled (default) Camera Exposure: 0 (default) |
Enabled 0 (default) |
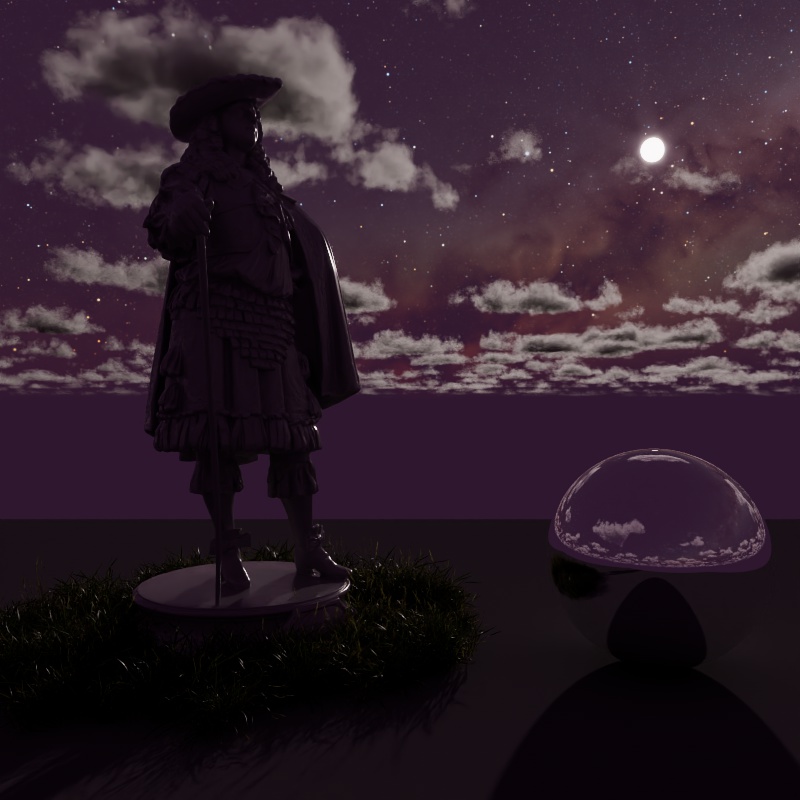
The Moon
Shape
Redshift's moon is lit by its sun, just like in real life, which helps ensure that the night sky looks believable and realistic. So changing the sun's position and intensity has a direct impact on how the moon appears in the sky and how it lights the scene.
For starters, adjusting the sun's altitude (vertical position in the sky) controls whether it is day or night. When the sun sets below the horizon the moon takes over as the brightest object in the sky.
| Changing the Sun's altitude |
Changing the sun's azimuth (horizontal position in the sky) primarily changes the shape of the moon. If you want a full moon then the sun should be placed opposite the moon, while a crescent moon should be lit more from the side. In the example below the sun does a full rotation along the horizon, changing the phase long the way.
| Changing the Sun's azimuth |
Even the size of the sun affects the moon, when the sun scale is increased the shadows on the moon become softer which adjusts the shadow terminator. This keeps the entire sky simulation unified.
| Changing the Sun Scale Moon lit from the side |
Changing the Sun Scale Moon lit from the front |
Exposure
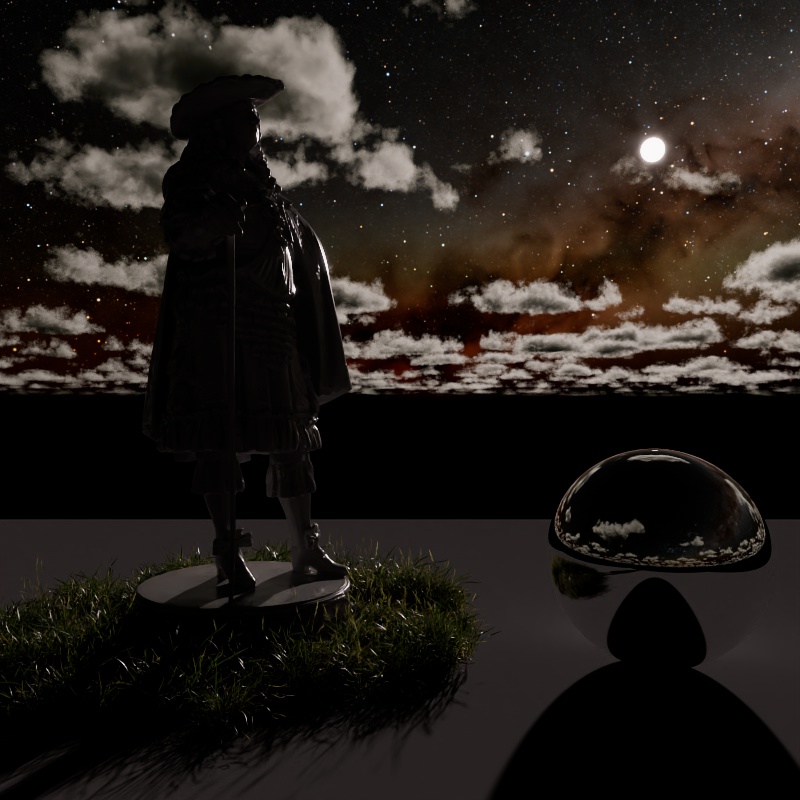
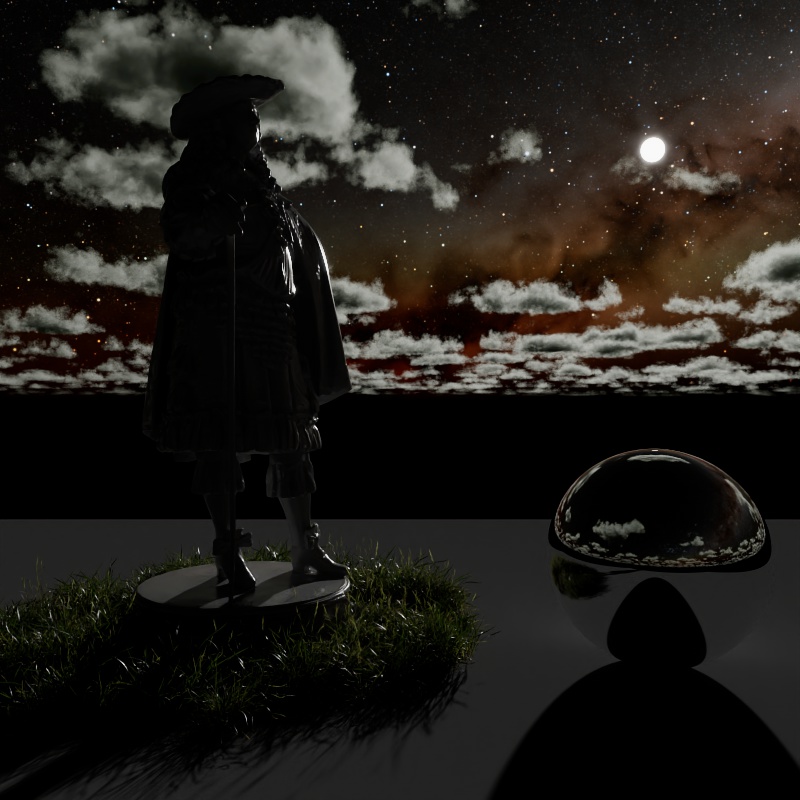
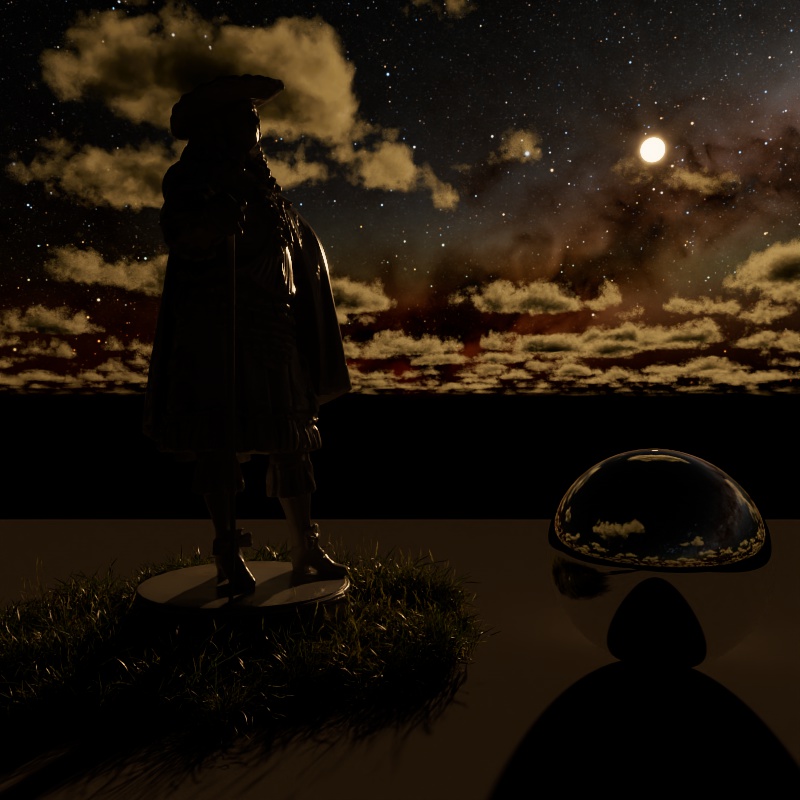
Just like the sun, the moon uses a physically based light intensity by default. In practice this means that you should adjust your camera's exposure to compensate. The moon may be bright in the sky but it is generally not bright enough to light up the ground in your scene. An exposure adjustment of -4 works well for the sun at midday but is far too dim for a moonlit scene at night, even the default value of EV 0 is not sufficient. In most examples of the night sky on this page the exposure is cranked all the way up to +11.
Keep in mind that the moon's phase has a big impact on total scene lighting, +11 is sufficient for a full moon but still not enough for a crescent.
Reminder, the moon isn't necessarily above the horizon for all hours of the night. Keep this in mind when using Time and Location to drive the position of the moon.
| Camera Exposure: -4 to +11 Full Moon |
-4 to +11 Crescent Moon |
Non-Physical Adjustments
The night sky offers the ability to break conservation of energy for artistic looks. For example, the moon has a beautiful texture but there's no way to see detail on its surface and light up the scene in the same photograph. Traditionally, you'd need to take two photographs, one exposed for the scene and another just exposed for the surface of the moon which is later composited onto the first image.
In Redshift the Night Sky Contribution sliders can be adjusted for to that end without the need to render twice. The Visibility slider controls how bright the moon (and stars) appear in the sky along with reflections and refractions while the Lighting slider controls everything else. This lets you tweak these effects separate from one another and dial in an artistic look that would otherwise only be possible by rendering twice.
As with most things in CG there are many ways to arrive at a similar destination, but one method is to:
- Raise the Camera Exposure until the moon adequately lights up your scene
- Camera Exposure Value: +11
- Drop the "Visibility" contribution until the moon's surface details become apparent
- Visibility: 0.03 in this example
| Increase the Camera Exposure until the scene is lit | Reduce "Visibility" to see surface detail |
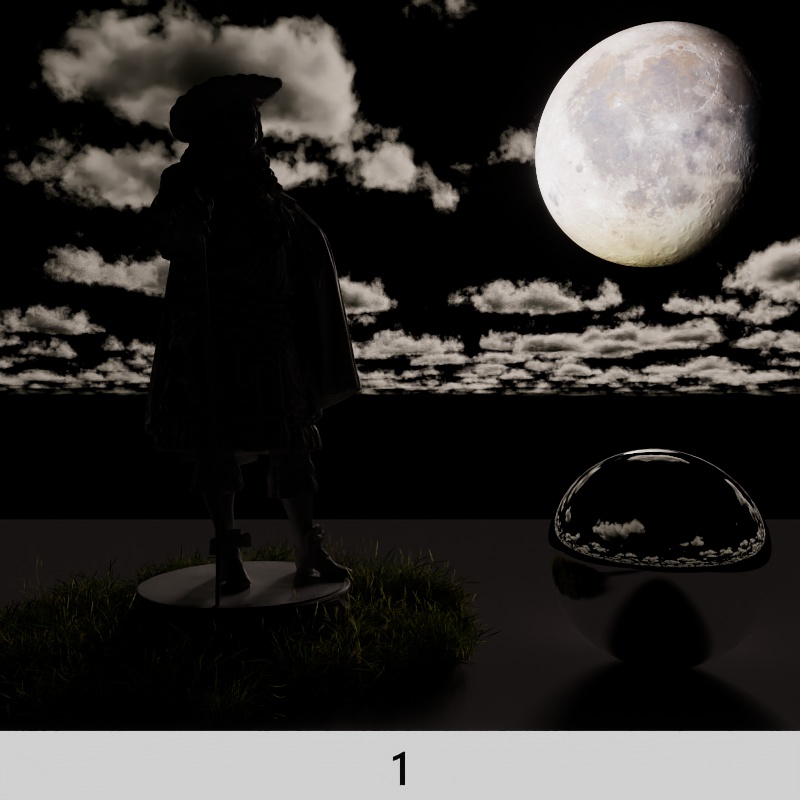
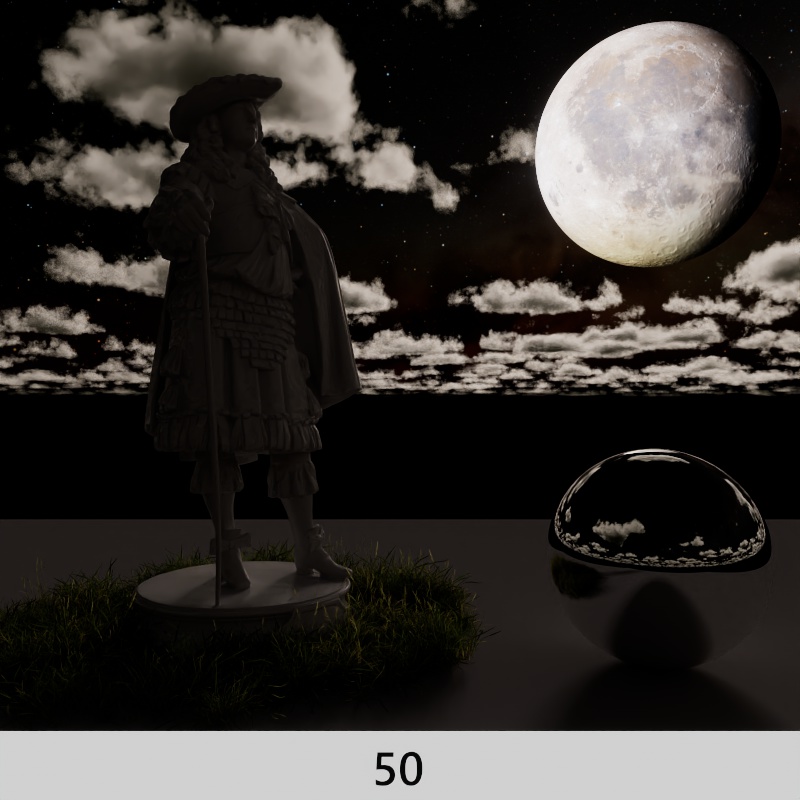
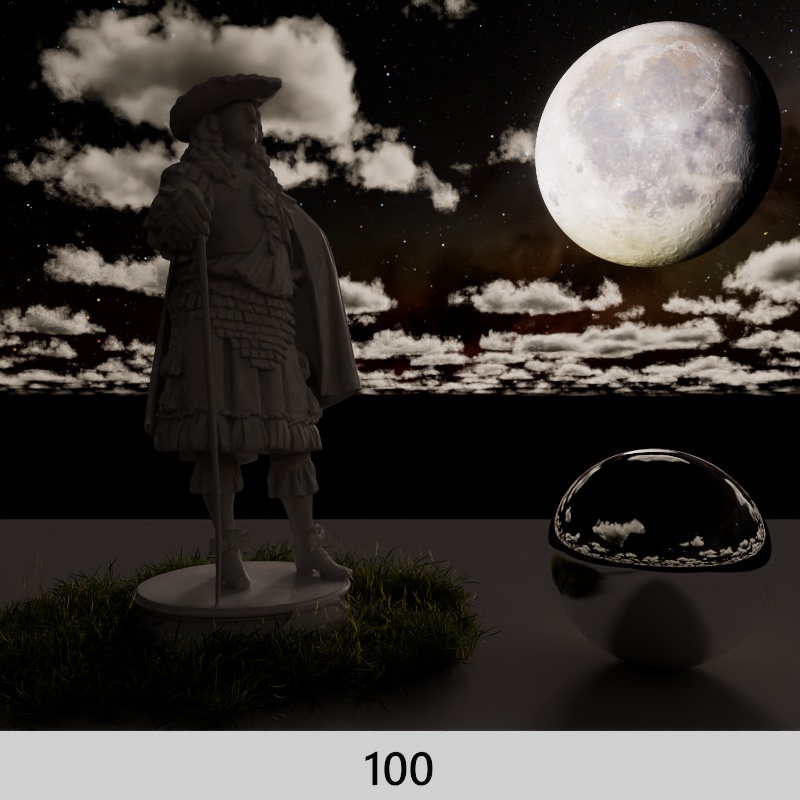
Since Visibility affects the entire Night Sky, you may want to boost the Star and Milky Way Intensity to compensate for the decreased Visibility. This should be done particularly carefully as the boosted diffuse contribution from the stars can brighten up the scene.
|
|
|
| Stars and Milky Way Intensity: 1 | 50 | 100 |
Sky
General
Intensity Multiplier
Scale the light intensity up or down. The default value of 1 uses a physically accurate sun intensity.
| Intensity Multiplier: 0 - 2 |
Use Non-Physical Intensity
When disabled, by default, the Sun & Sky uses a physically accurate light intensity to illuminate your scene. This will result in a blown out render unless you compensate for this by reducing the exposure on the camera or reducing the Intensity Multiplier.
However, if physical accuracy is not important the Sun & Sky can quickly be brought down to a visually acceptable light intensity without the need to adjust any camera settings simply by enabling "Use Non-Physical Intensity."
In the examples below the first two images have Non Physical Intensity disabled. The first image represents a brand new scene with no camera exposure adjustments, resulting in a blown out scene, in the second image the camera's Exposure parameter has been reduced by 4 stops (exposure of -4) to compensate, resulting in an appropriately sunny look. In the last image, the camera uses the same default settings as the first image but Non-Physical Intensity is enabled — this brings the sun intensity into a range that is visually appealing without the need for further adjustment.
|
|
|
|
| Use Non-Physical Intensity: Disabled (default) Camera Exposure: 0 (default) |
Disabled (default) - 4 |
Enabled 0 (default) |
Using a non-physical intensity reduces the natural impact sunlight has on a scene, like reducing the intensity of global illumination bounce lighting, overall contrast, and any shading elements based on physical units like subsurface scattering.
Model
This option lets you pick between three different sky models. In general PRG Clear Sky is the most modern and produces more realistic and appealing skies, especially at sunrise and sunset.
- PRG Clear Sky (newest)
- Hosek-Wilkie
- Preetham et Al (oldest)
| Video: Time of day Sky Comparison From top to bottom: PRG Clear Sky, Hosek-Wilkie, Preetham et Al |

|
|

|
|
|
|
|
|
|
| Model: PRG Clear Sky | Hosek-Wilkie | Preethem et Al |
Normalization Mode
Controls how the Sun, Sky, and Night Sky behave when the sun and moon are scaled. At default sizes you will not notice a difference, but if you adjust the scale of the moon or the sun the behavior changes between the following modes:
-
None: No normalization, when the sun/moon increase in size the lighting gets brighter and the visual intensity in the sky stays the same.
-
Lighting: (Legacy) Only the scene lighting is normalized, when the sun/moon increase in size the lighting does not change - only making the shadows softer/sharper. The visible sun/moon disk in the sky stays the same brightness no matter the scale, but reflections of the sun/moon may not match how they look in the sky.
-
Disk+Lighting: (Default) The lighting and the sun/moon disk are both normalized. This means the sun/moon actually get visibly dimmer when their scale is increased. With the sun this can be hard to see because it's so bright to begin with, but this becomes more apparent with the moon or when the sun uses a low intensities. In this mode, reflections match the visible intensity in the sky.
| Normalization Mode: Disk + Lighting | Lighting | None |
Atmosphere
Turbidity
Describes the haziness of the air to simulate dust and pollution. A value of 2 represents a very clear, blue sky, while higher values make the sky a dirty, orange color.
| Turbidity: 0 - 10 |
Ozone
Only works with Hosek-Wilkie and Preetham et Al sky models. Example uses Hosek-Wilkie.
Describes the amount of ozone in the atmosphere, with values ranging from 0.0 to 1.0. The default is 0.35 which is commonly used for the Earth's atmosphere. Smaller values increase the amount of orange in the sun disk and glow, while larger values will make it more blue. This is most clearly seen when the sun is at a low angle like sunset.
| Ozone: 0 - 1 |
Horizon Height
Adjusts the position of the horizon, useful if you want to represent a view from the top of a mountain. Positive values raise the horizon while negative values lower it.
| Horizon Height: -3 to +3 |
Horizon Blur
Blurs the ground with the sky as they meet at the horizon. The default is 0.1. A value of 0.0 means no blur, making the horizon appear as a hard line.
PRG Clear Sky's horizon blur results in a sort of mirage-like effect.
| Horizon Blur: 0 - 2 |
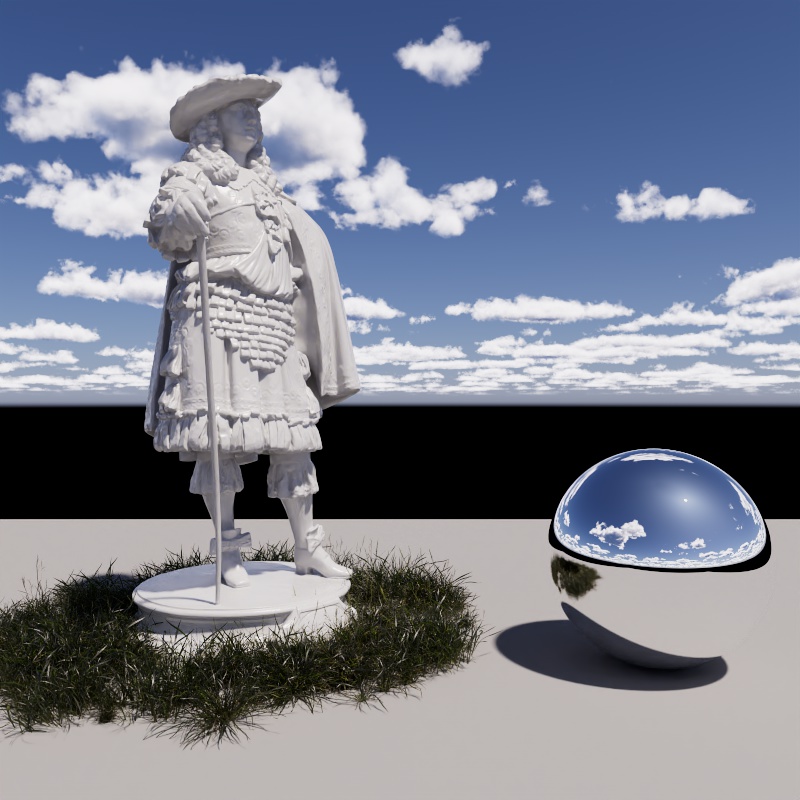
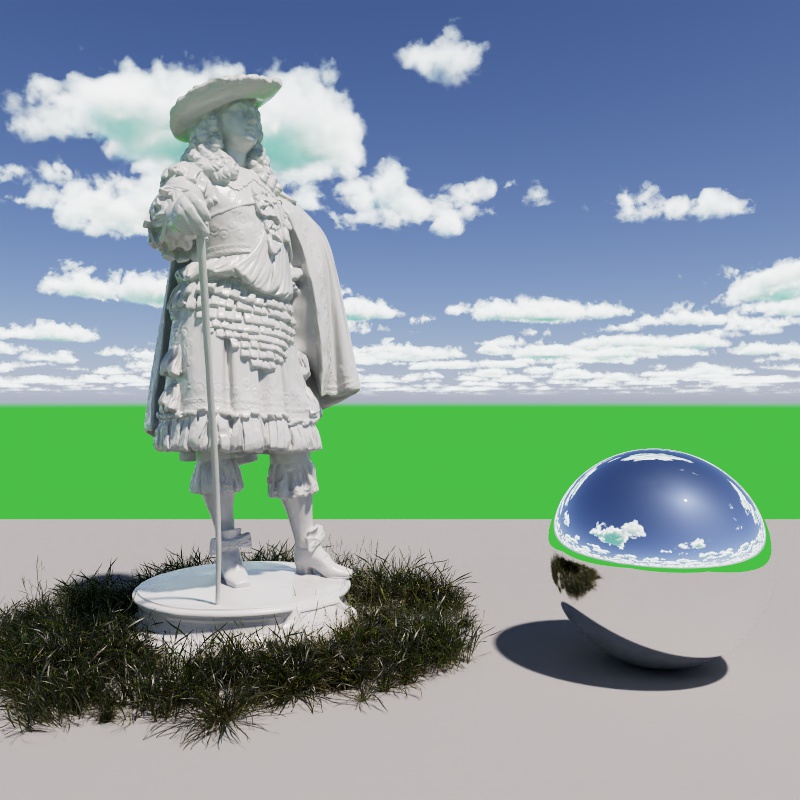
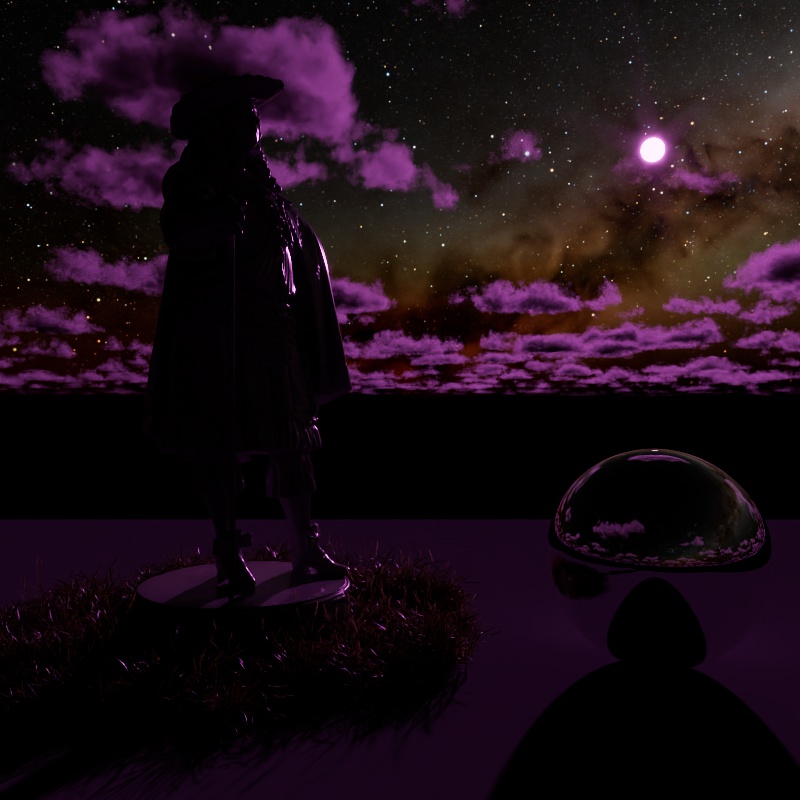
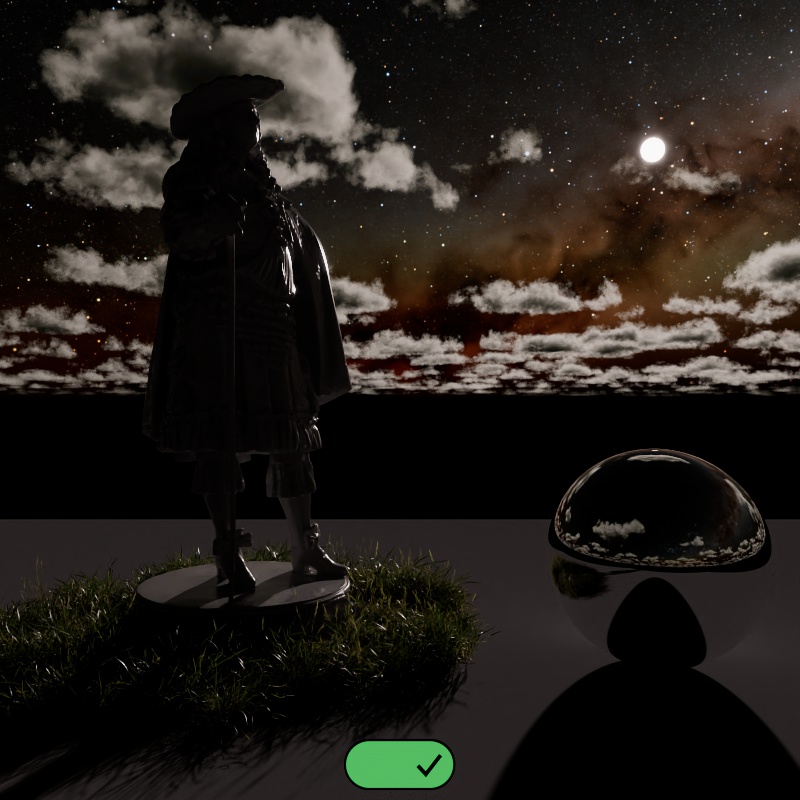
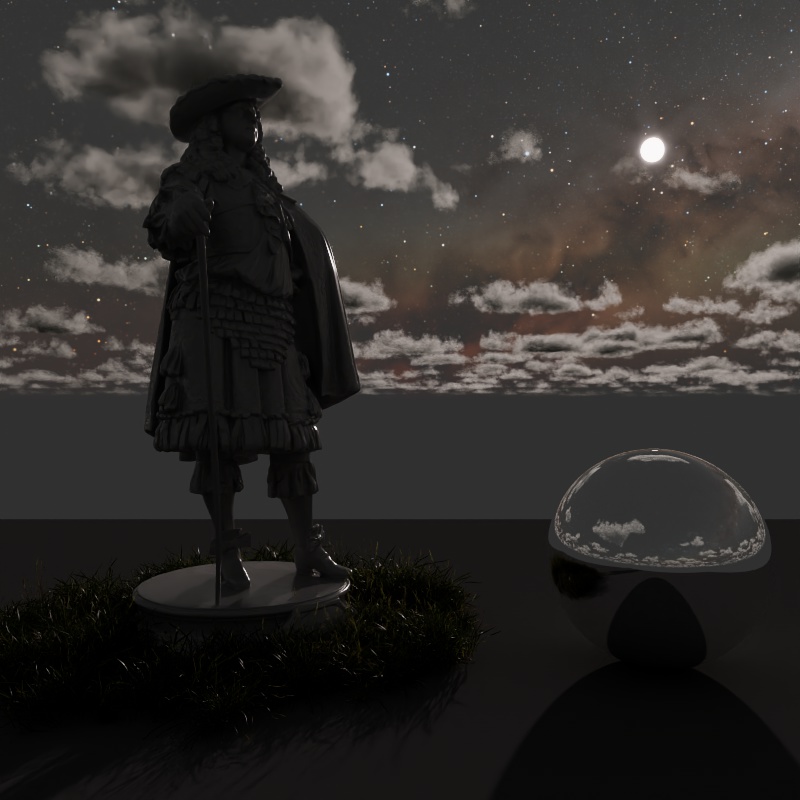
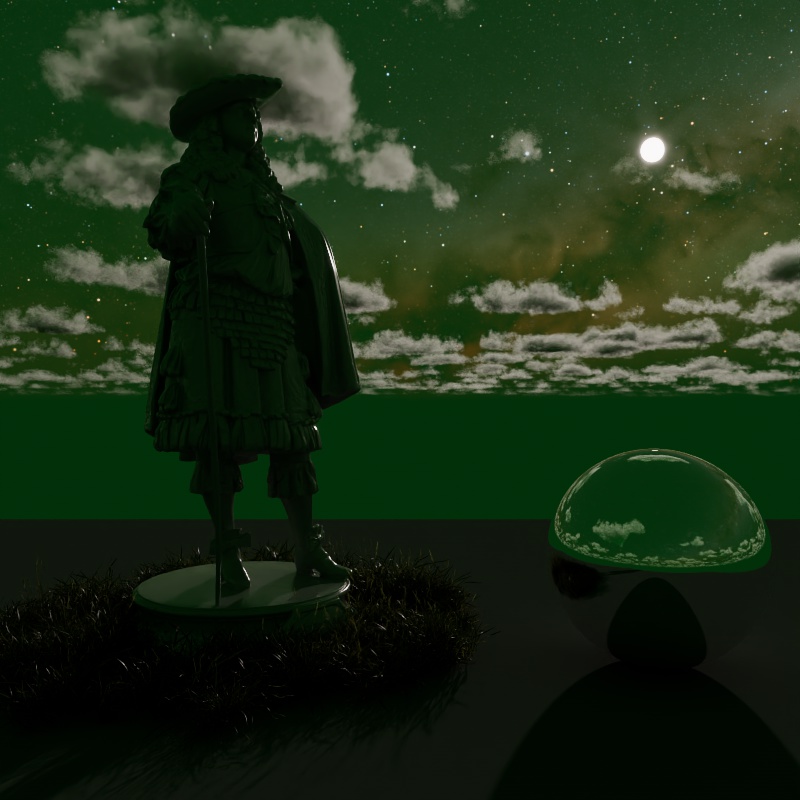
Ground Color
Controls the color of the ground. It is meant to be used as an albedo and does not physically exist in the scene, but it is affected by the atmospheric effects of the sun and contributes to Global Illumination. It illuminates the underside of clouds and other objects when not blocked by an object like a ground plane.
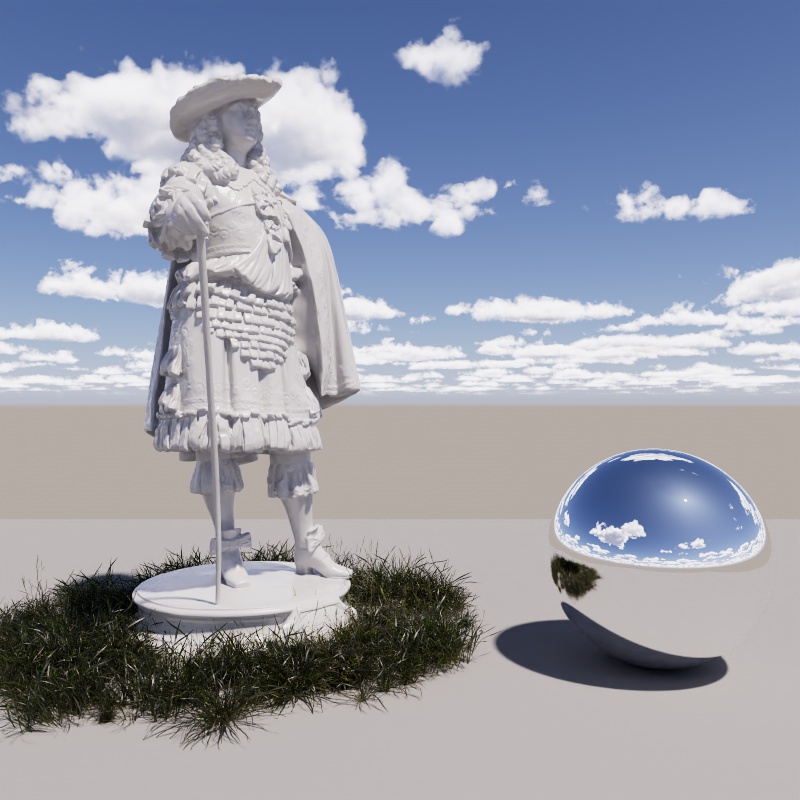
|
|
|
| Ground Color: Grey (default) | Black | Green |
Color Adjustment
Red-Blue Shift
Shifts the sky color and lighting toward warm or cool tones. For physically correct results this should be left at the default value 0. Negative values make the sky very cool while positive values make it warm.
| Red-Blue Shift: -1 to +1 |
Saturation
Adjusts the sun and sky's color saturation. The default value of 1 means full color, while 0 means no color.
| Saturation: 0 - 1 |
Saturation Affects Color Adjustments
When enabled, Saturation adjustments are applied after the following parameters:
- Red-Blue Shift
- Sun Tint.
When disabled, Saturation adjustments only affects the sky shader before other color adjustments. So any Sun Tint and Red-Blue Shift remain in effect even when Saturation is set to 0.
In the examples below, notice how when Saturation Affects Color Adjustment is disabled the pink tint still affects the scene even when saturation is at 0 — this is because the desaturation occurs before the Sun Tint.
| Saturation Affects Color Adjustments: Enabled (default) | Disabled |
Sun
Sun Disk Intensity
Scales the intensity of the sun disk which in turn scales the intensity of the light cast by the sun but does not affect the sky.
This is different than the overall Intensity Multiplier which scales the intensity of the sun and sky together.
| Sun Disk Intensity: 0 - 3 |
Sun Disk Scale
Controls the size of the sun disk and how blurry the shadows are. Higher values increase the size of the sun disk and result in more blurry shadows while lower values decrease its size and result in sharper shadows. At low values light intensity may differ between different sun angles due to sampling changes, a value of 0 causes the sun disk to disappear completely.
| Sun Disk Scale: 0 - 30 |
Sun Glow Intensity
A glow is rendered around the sun to add an atmospheric effect. This option scales the intensity of that glow.
| Sun Glow Intensity: 0 - 5 |
Sun Tint
Adds a color tint to the sun light and sky, by default, white results in no color tint. Please note that the brightness of the color tint affects the brightness of the sun, when black is used it blocks all light.

|

|
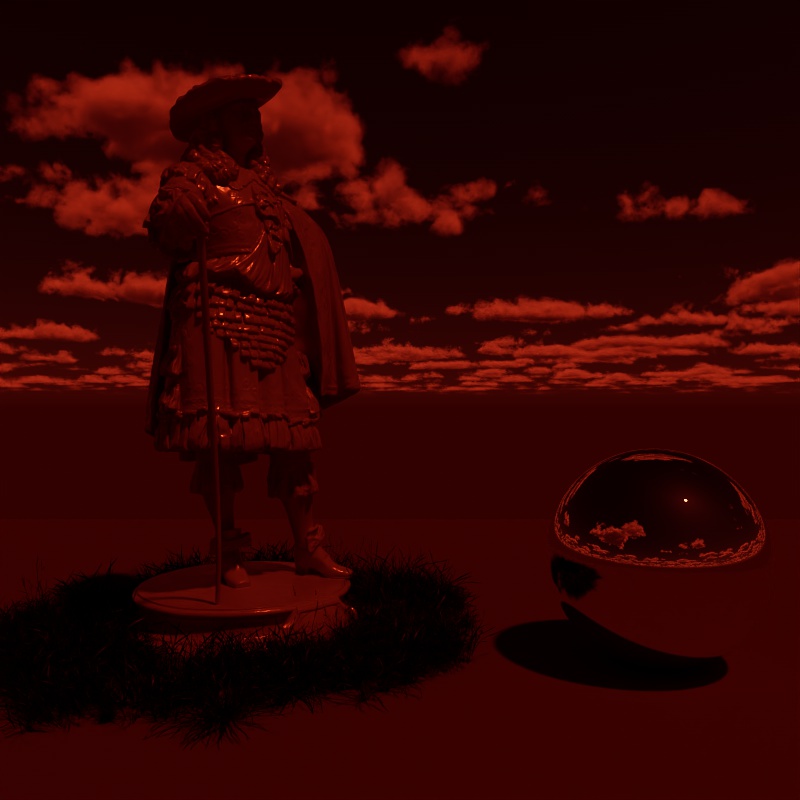
|
| Sun Tint: White (default) | Green | Dark Red |
Altitude
Only available when using the "Altitude and Azimuth" Position Mode.
Controls the vertical position of the sun in the sky using degrees. The horizon rests at 0°, positive values place the sun above the horizon while negative values place the sun below the horizon.
| Changing the Sun Altitude |
Azimuth
Only available when using the "Altitude and Azimuth" Position Mode.
Controls the horizontal position of the sun in the sky using degrees. True North is found at 0°, positive values move the sun East (90°) while negative values move the sun West (-90°), South is found at 180°.
True North defaults to the +Z direction in the scene and can be repositioned in the Time and Location section using the North Offset parameter.
| Changing the Sun Azimuth |
Night Sky
The example images for the Night Sky use the following adjustments for better clarity:
- Camera exposure: +11.5
- Moon Radius: 3
- Stars and Milky Way Intensity: 5
Moon
Enable Moon
Enables or disables the Moon.

|
|
| Enable Moon: Enabled | Disabled |
Position Mode
Sets how the angle of the Moon is controlled from the following modes:
-
Directional Vector- The angle of the moon is controlled by the moon "Direction" parameter.
-
Time and Location- The angle of the moon is controlled by the date, time, and location as configured in the "Time and Location" section.
-
Altitude and Azimuth- The angle of the moon is controlled by the moon's "Altitude" and "Azimuth" parameters.
Direction
Controls the angle of the moon when using the "Directional Vector" Position Mode.
Intensity
Controls the intensity of the moon. By default, using an Intensity of 1, the moon uses a physically based intensity but remember that the overall light output is highly dependent on the moon phase. A full moon gives off much more light than a crescent moon, the overall light intensity has a direct connection to the position of the sun relative to the moon as seen in the second example.
| Moon Intensity: 0 - 10 | Changing the Sun's position |
Radius
Controls the size of the moon and how defined the shadows are. A larger moon results in blurrier night time shadows.
| Moon Radius: 1 - 50 |
Tint
Adds a color tint to the moon and its lighting, white results in no color tint. Please note that the brightness of the color tint affects the brightness of the moon, when black is used it blocks all light.
|
|
|
|
| Moon Tint: White (default) | Light Blue | Light Yellow | Purple |
Altitude
Only available when using the "Altitude and Azimuth" Position Mode.
Controls the vertical position of the moon in the sky using degrees. The horizon rests at 0°, positive values place the moon above the horizon while negative values place the moon below the horizon.
| Changing the Moon Altitude |
Azimuth
Only available when using the "Altitude and Azimuth" Position Mode.
Controls the horizontal position of the moon in the sky using degrees. True North is found at 0°, positive values move the moon East (90°) while negative values move the moon West (-90°), South is found at 180°.
True North defaults to the +Z direction in the scene and can be repositioned in the Time and Location section using the North Offset parameter.
| Changing the Moon Azimuth |
Stars
Enable Stars
Enables or disables the stars and Milky Way.
The position of the stars and Milky Way are controlled by the Time and Location settings.
|

|
| Enable Stars: Enabled (default) | Disabled |
Fade With Sun Position
Controls the visibility of the stars and Milky Way based on the sun's position. When enabled, during the day time, the stars cannot be seen even if extremely bright. The stars fade in as the sun sets and reach full intensity at night time, the opposite happens at sunrise.
This is a helpful option for time lapse animations where you may prefer extremely bright stars at night that would also be visible during the day when Fade With Sun Position is disabled. You can just enable this option instead of needing to keyframe the star and Milky Way intensity.
Stars Intensity
Controls the intensity of the star texture.
| Stars Intensity: 0 - 50 |
Milky Way Intensity
Controls the intensity of the Milky Way texture that includes interstellar gas and dust.
| Milky Way Intensity: 0 - 50 |
Contribution
Visibility
Scales the intensity of the camera, reflection, transmission, and toon reflection lighting contribution.
| Night Sky Visibility: 0 - 10 |
Lighting
Scales the intensity of the diffuse, single scattering, multiple scattering, and toon diffuse lighting contribution.
| Night Sky Lighting: 0 - 10 |
Volume
Scales the intensity of the volume contribution.
| Night Sky Volume: 0 - 2 |
Night Color
Controls the color of the night sky, subtle changes in color can lead to large differences in ambient night lighting. As the sun gets closer to the horizon its influence on the sky color fades and only the night sky remains.

|
|
|
|
| Night Color: Black (default) | Dark Grey | Dark Green | Dark Pink |
Time and Location
Day/Month/Year Hour/Minute/Second
Sets the starting date and time to control the position of the following objects when:
- Sun uses the "Time and Location" position mode
- Moon uses the "Time and Location" position mode
- Always controls the position of the Stars and Milky Way
When using the Time Offset feature, the date and time set here serves as the start time for all time lapse animation and adjustments.
Reminder, the moon isn't necessarily above the horizon for all hours of the night. Keep this in mind when using Time and Location to drive the position of the moon.
| 24 hour time lapse |
Time Zone Offset
Defines the Time Zone in UTC.
| Time Zone Offset: -6 to +6 |
Latitude
Sets the latitudinal coordinates for the location of the sky simulation.
Longitude
Sets the longitudinal coordinates for the location of the sky simulation.
North Offset
By default the +Z direction is used to define True North for the Time and Location settings but this can be changed by using North Offset. This parameter is useful for adjusting True North for your scene's sky without rotating the actual scene geometry.
During the daytime this might look like a redundant parameter for adjusting the azimuth of the sun, but please remember that this affects the sun, moon, stars, and milky way all at the same time.
| North Offset: -60 to +60 | -60 to +60 |
Unit of Time
Controls the unit of time used by the Time Offset parameter.
Choose the unit that makes the most sense for your animation.
- If you need a time lapse across from sunset to sunrise you could choose "Hours" since you won't need a full 24 hour cycle.
- If you need a longer time lapse it may make more sense to use "Days" or even "Months."
Be careful with large units of time and how that syncs up with the frames of your animation. For example, if you use "Months" and keyframe
Time Offset
Controls how much time has passed from the set starting time. Keyframe the Time Offset value for time lapse animations.
Use the "Unit of Time" parameter to control which unit is used by Time Offset.
For example:
- When using Hours
- Time Offset of +1 is equivalent to 1 hour of time passing from the start time
- Time Offset of +0.5 is equivalent to 30 minutes of time passing from the start time
- When using Days
- Time Offset of -1 is equivalent to time reversing by one day from the start time
Environment
Replace Alpha Channel
When enabled you can override the sky's alpha value.
By default, when disabled, the sky uses an alpha of 1.
Alpha
Sets the alpha value that is used when "Alpha Channel Replace" is enabled.
Common Light Parameters
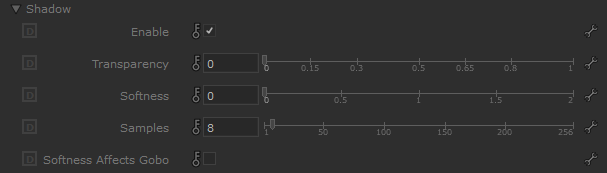
Shadow
|
Cast Shadow
Enable or disable shadow casting.
|
|
| Cast Shadows: Enabled (default) | Disabled |
Transparency
Specifies the transparency of the shadows cast by the light.
A value of 0, by default, results in a completely opaque shadow up to a value of 1 where the shadow is completely transparent.
| Shadow Transparency: 0 - 1 |
Softness
Specifies edge softness for non-area light shadows. A value of 0 means no softness and will yield sharp shadows. Values above 0 will produce softer shadow edges.
Only available for Point, Spot, Directional, and IES lights. (Lights with no area)
The shadow softness of an Area light is controlled by the light's size itself.
| Shadow Softness: 0 - 1 |
Softness Affects Gobo
When enabled, Shadow Softness affects the sharpness of the projection when a texture is used as the light color. When Shadow Softness is high then the texture projection is blurrier. When disabled, Shadow Softness has no effect on the texture.
Softness Affects Gobo is only available for non-Area Physical lights and IES lights.
|
|
| Softness Affects Gobo: Disabled (default) | Enabled |
Light Group

|
AOV Light Group
This is the name of the AOV light group this light is associated with.
For more information on Light Groups and how to set them up and use them please see here.
Contribution

|
Matte Shadow Illuminator
Specifies whether the light can illuminate 'Matte Shadow' surfaces (see Matte Shadow Catcher shader).
Matte Shadow Illuminator is only available for Redshift Physical and Redshift IES lights.
Affected by Refraction
This option allows you to control how specular reflections are affected by rough/refractive objects that block the light and whether or not the light rays bend as they pass through. Prior to 2.6.10 this option was not available and the light rays would never bend. Specular ray bending is an important effect for rendering realistic-looking glass and lenses.
- Never - Specular rays do not bend. This is the legacy lighting behavior.
- Auto - Specular rays bend through refractions if they are not too rough and bias towards not bending if they are rough.
- Always - Specular rays bend through refractions regardless of ray roughness.
This effect is available only for area lights and dome lights. Spot and IES lights can not be seen through bent rays because their source is infinitesimally small.
Care must be taken when using 'Always', as this can disable Multiple Importance Sampling, which is a crucial technique for getting clean renders for rough surfaces.
Light/Shadow linking is not available for specular rays that have been bent.
GI Max Trace Depth
This option lets you override the maximum trace depth for GI rays on a per-light basis.
Light Sampling Parameters
The following parameters are only visible and relevant when Automatic Sampling is disabled.

|
Light Samples
Specifies the number of ray samples to use for the light. Higher sample values will produce smoother lighting and shadows. Generally, the larger and more intense a light is, the more samples it needs to produce noise-free results.
Sampling values can range anywhere from smaller numbers like 32 to 4096 or higher all depending on your scene and lights. Values like 4096 or higher will not necessarily lead to the kind of slow-down you may be used to in other renders so don't hesitate to prioritize image quality and push this value until your scene looks smooth enough. For more information, see the Unified Sampling page.
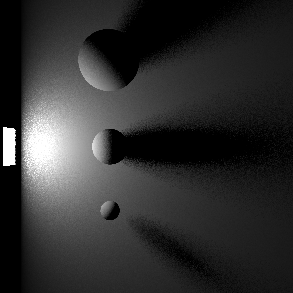
|

|

|
| Samples: 2 | 16 | 128 |
Volume Samples
Specifies the number of ray samples for the light to use for volume shading. Higher sample values will result in less volume noise.
Contribution Scale Parameters
|
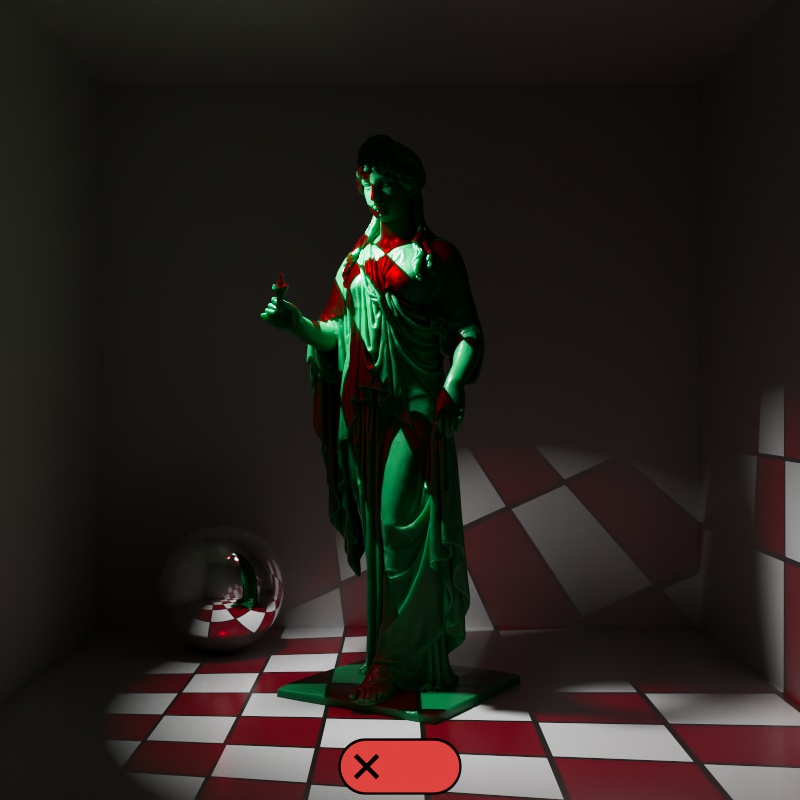
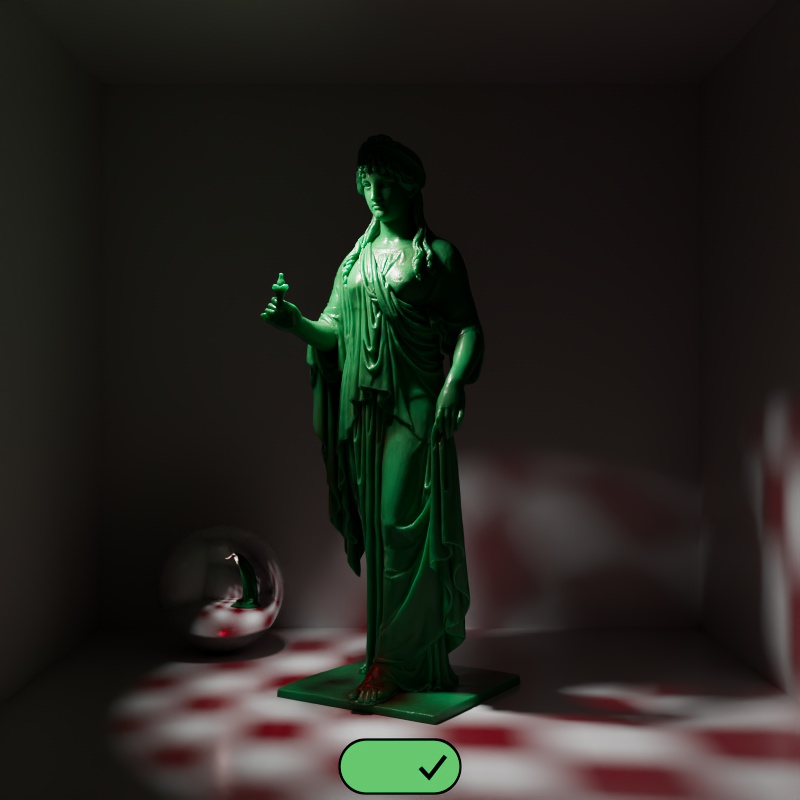
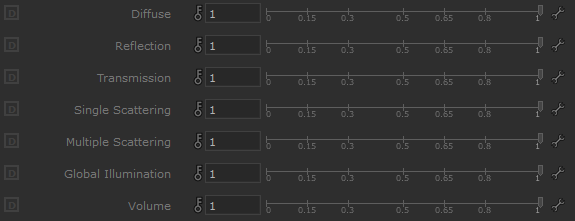
The contribution parameters covered below control how much a light is able to affect each shading component. The ability to control the intensity of each component offers creative flexibility, each can be raised or lowered and even completely disabled.
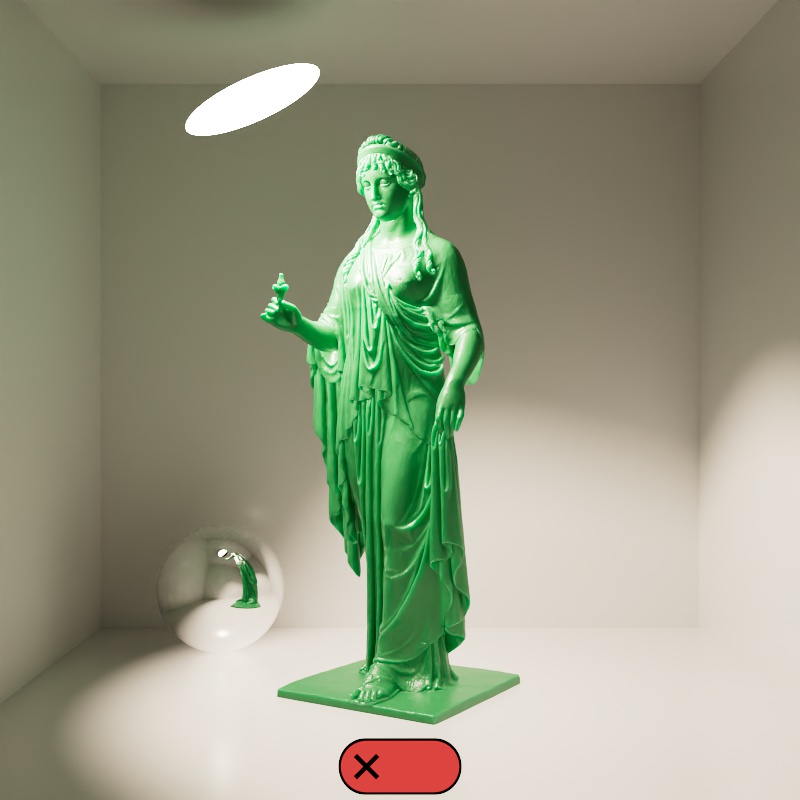
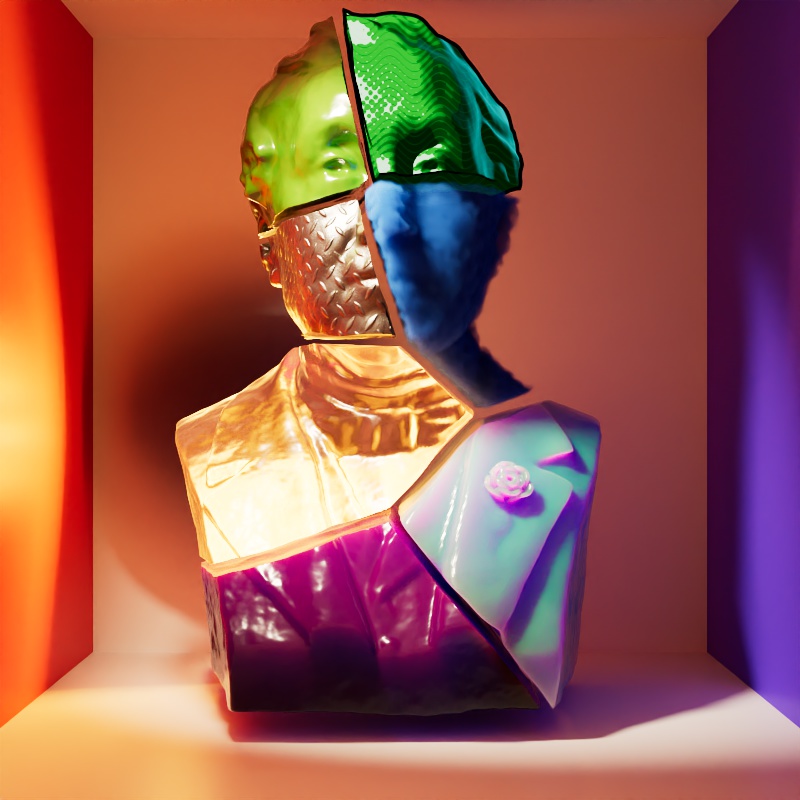
For physically correct results all contribution values should be left at 1 so the contribution of each shading component is equal and it matches a light's overall intensity. A value of 1 is indicated by a blue pole at the center of the bar in the examples below, when the bar is to the left of the pole then the output is lower than physically accurate and when the bar is to the right the output is greater than physically accurate.
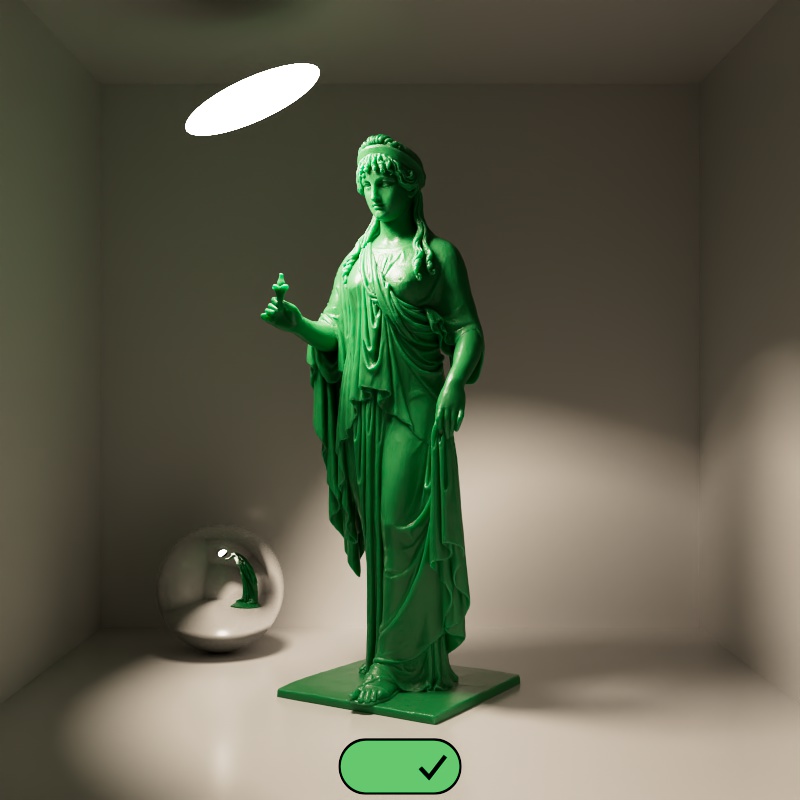
The example scene in this section features a Cornell Box with a bust from Three D Scans that is separated into pieces with different materials to illustrate the impact a light has on each shading component. The components and materials used in the scene are:
-
Camera: An additional light used to demonstrate camera visibility and transmissive effects where relevant.
-
This light uses an HDRI texture from AmbientCG.com.
-
-
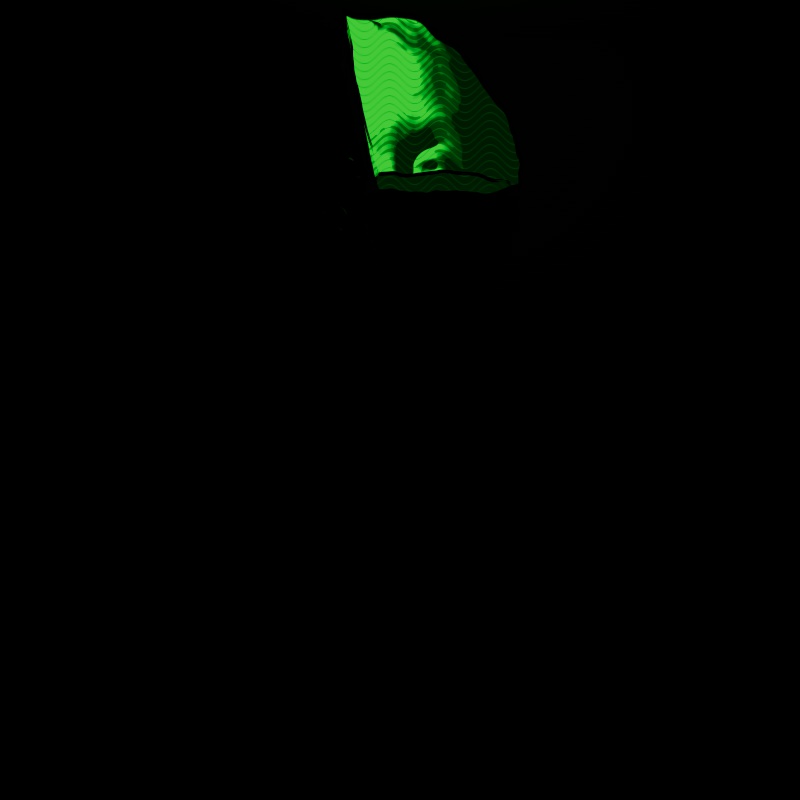
Diffuse: A green Standard material with reflections.
-
Reflection: A fully metallic Standard material with diamond plate bump mapping and no diffuse component.
-
Transmission: A fully transmissive Standard material with reflections.
-
Single Scattering: A pink transmissive Standard material with single scattering and reflections.
-
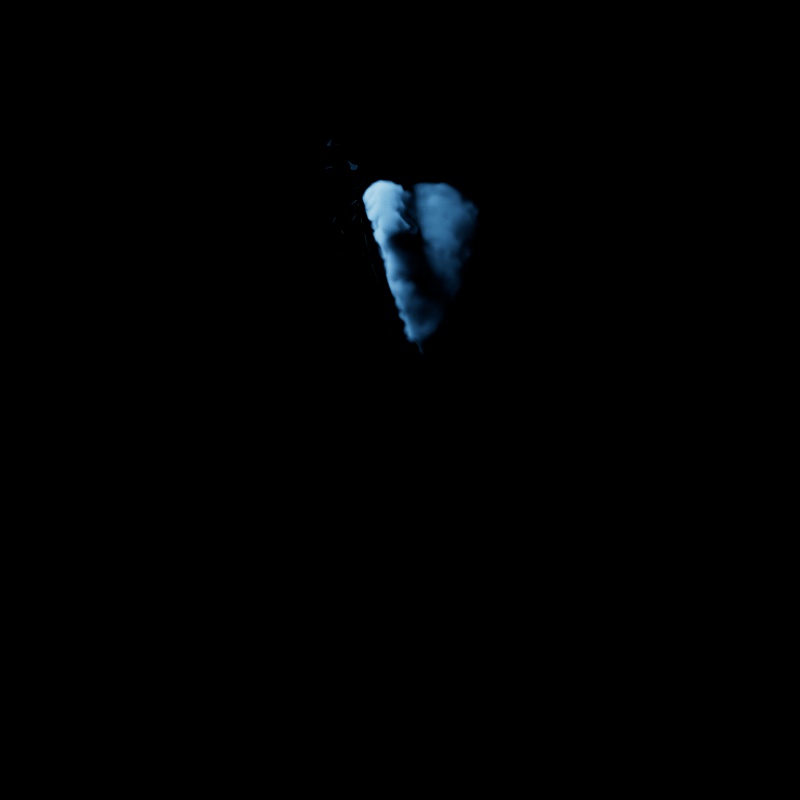
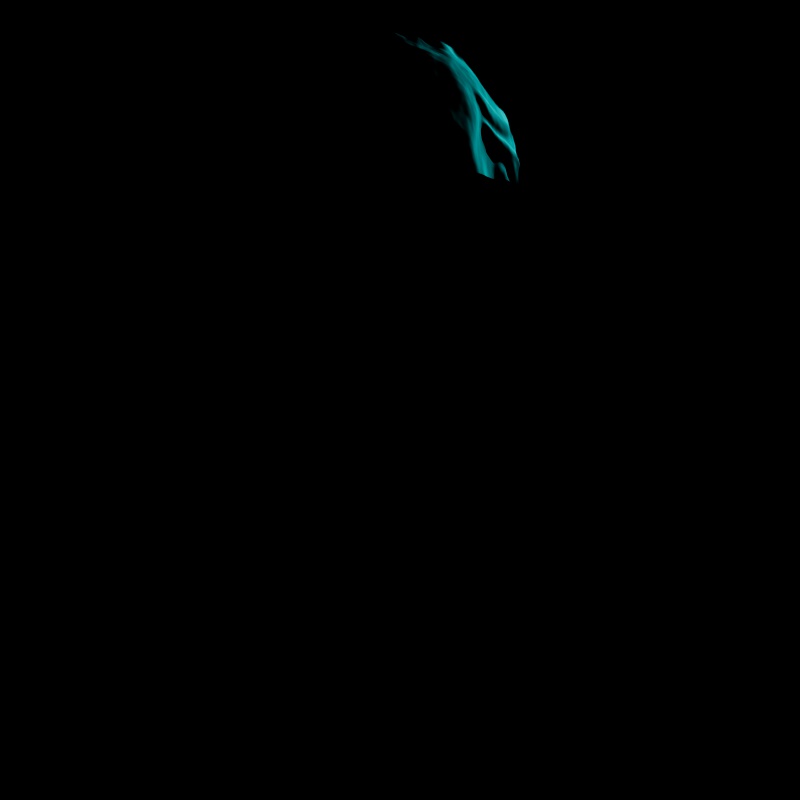
Multiple Scattering: A teal sub surface scattering Standard material with reflections and a very subtle diffuse component.
-
Volume: A blue Standard Volume material with no emission.
-
Global Illumination: The Cornell box demonstrates bounce lighting in shadow regions where no direct lighting is cast.
-
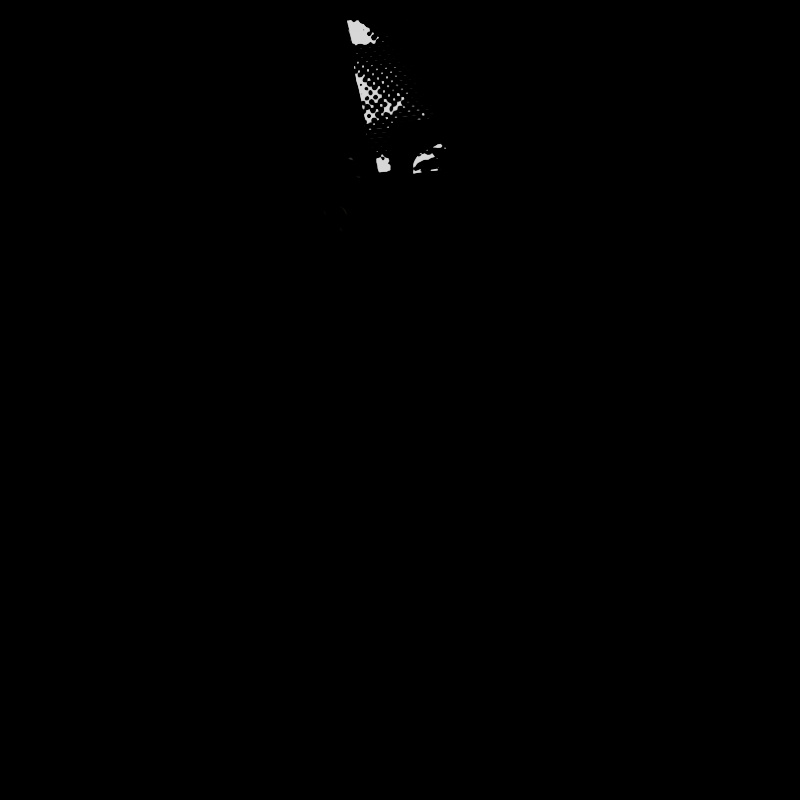
Toon Diffuse, Toon Reflection, Toon Rim: A toon material with a green diffuse component and a sine wave pattern, a white reflection component with a half tone dot pattern, and a light blue rim component.
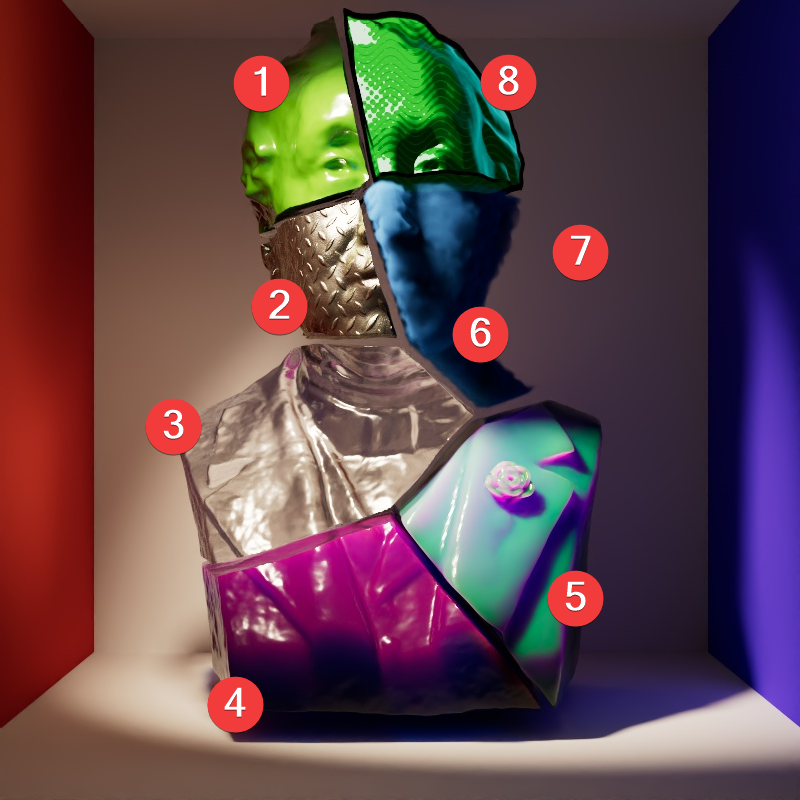
|
| Contribution Sections |
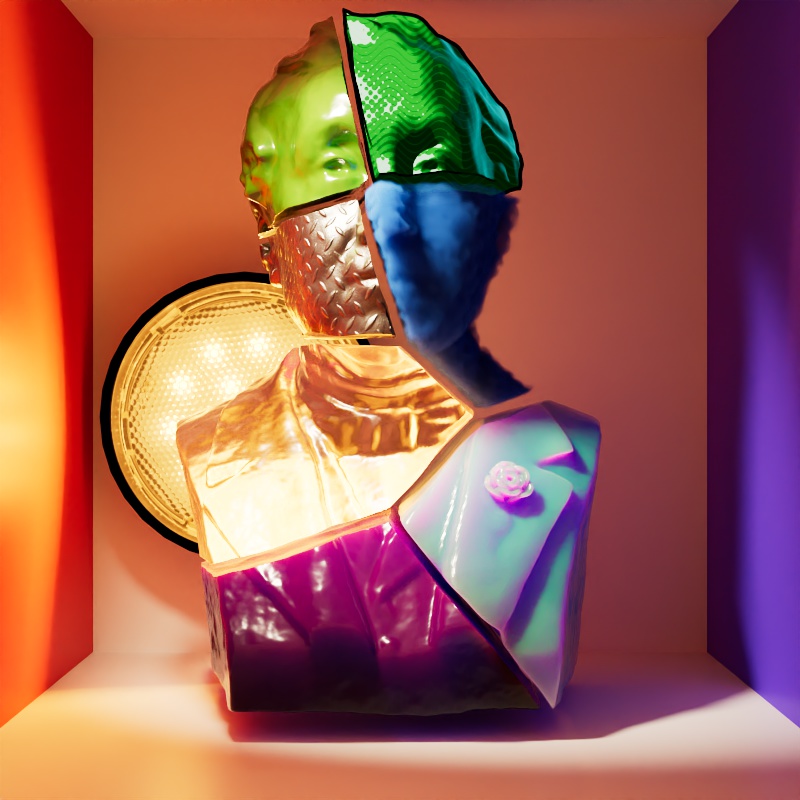
Camera
Only available for area lights and dome lights.
Scales the visibility of the light to camera rays. Lower values dim the visible appearance of the light to the camera while higher values make the light appear brighter. A value of 0 makes the light appear invisible to the camera.
Note that this does not affect the contribution of a light on any materials or objects in the scene, it only affects the direct visibility to the camera.
|
||
| Camera: 0 - 2 Other Contribution Types: 1 Blocked Rays: Enabled |
Camera: 0 - 2 Other Contribution Types: 1 Blocked Rays: Disabled |
1 0 (Isolated for Reference) |
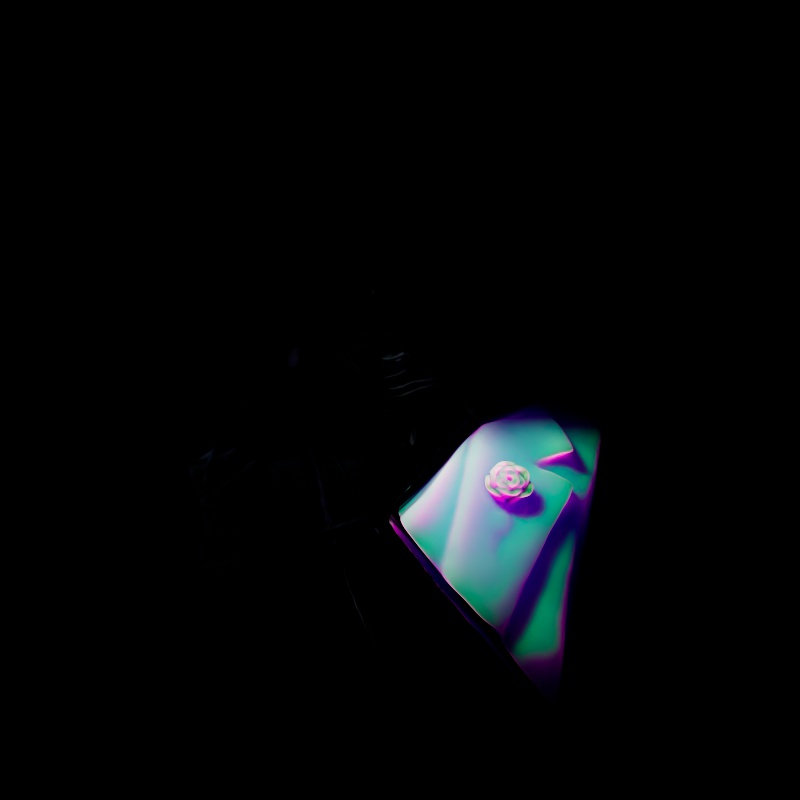
Diffuse
Scales the intensity of light for diffuse shading. Diffuse shading is generally responsible for the base color shading of most materials.
Note that this affects global illumination intensity as well.
|
|
| Diffuse: 0 - 2 Other Contribution Types: 1 |
1 0 (Isolated for Reference with GI disabled) |
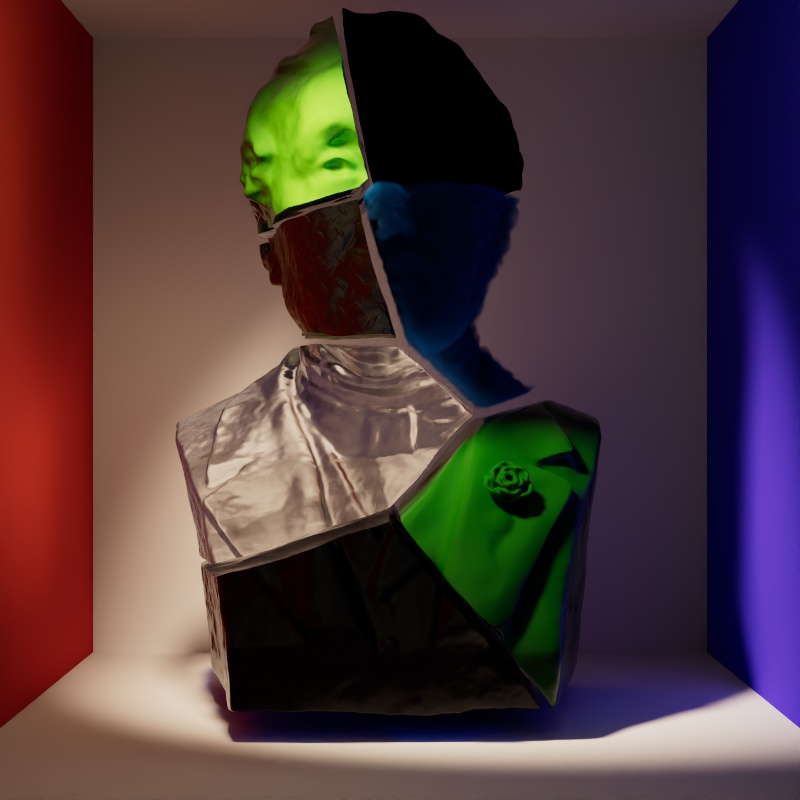
Reflection
Scales the intensity of light for specular reflections, the direct reflections of a light source.
Note that reflections of other objects are still seen in reflective materials even with a reflection contribution value of 0. In the example below, the metallic material with diamond plating is mostly heavily affected because it has no other shading component besides reflection, however, the specular highlights on the diffuse material, transmissive material, single scattering material, and multiple subsurface scattering material are affected as well.
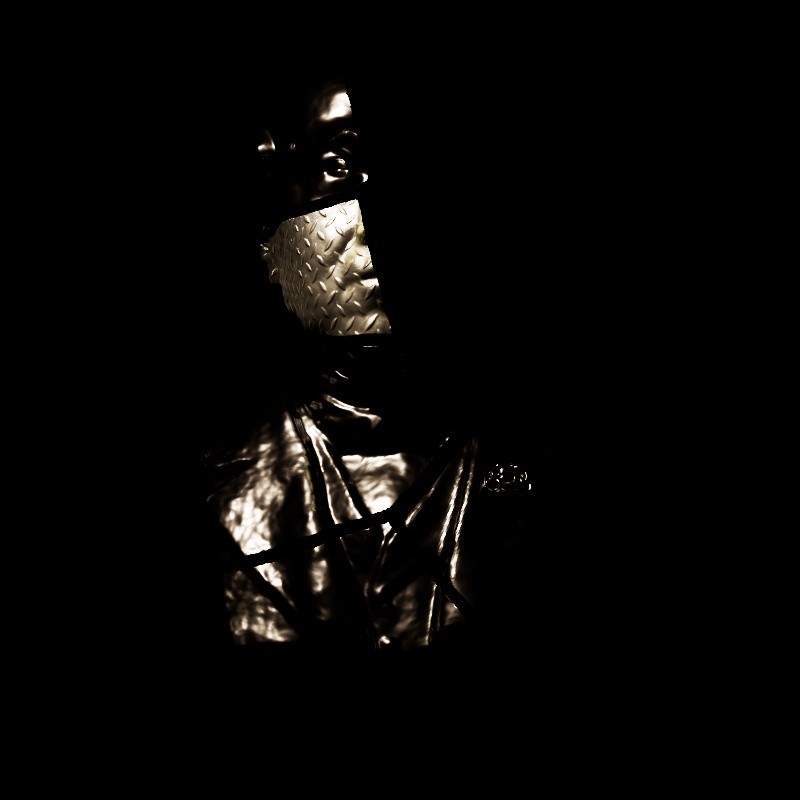
|
|
| Reflection: 0 - 2 Other Contribution Types: 1 |
1 0 (Isolated for Reference) |
Transmission
Scales the intensity of a light as seen through a transmissive / refractive material. This can be thought of as the visibility of a light in a transmissive material.
|
|
||
| Transmission: 0 - 2 Other Contribution Types: 1 Block Rays: Enabled |
0 - 2 1 Disabled |
1 0 (Isolated for Reference) |
Note that a light can be visible in transmissive materials even when the Camera contribution is set to 0 — making the light appear invisible to the camera but still visible in transmissive materials. In this example the light has Block Rays enabled so the light casts shadows even when Camera is set to 0.
|
|
| Transmission: 1 Camera: 0 |
1 1 |
Single Scattering
Scales the intensity of light for single scattering. Single scattering simulates microscopic particulate suspended in a medium and is part of the Transmission controls of a Standard Material — this is similar to multiple subsurface scattering but is better suited to thinner volumes.

|
|
| Single Scattering: 0 - 2 Other Contribution Types: 1 |
1 0 (Isolated for Reference) |
Multiple Scattering
Scales the intensity of the light when seen through sub-surface multiple scattered materials.
|
|
| Multiple Scattering: 0 - 2 Other Contribution Types: 1 |
1 0 (Isolated for Reference) |
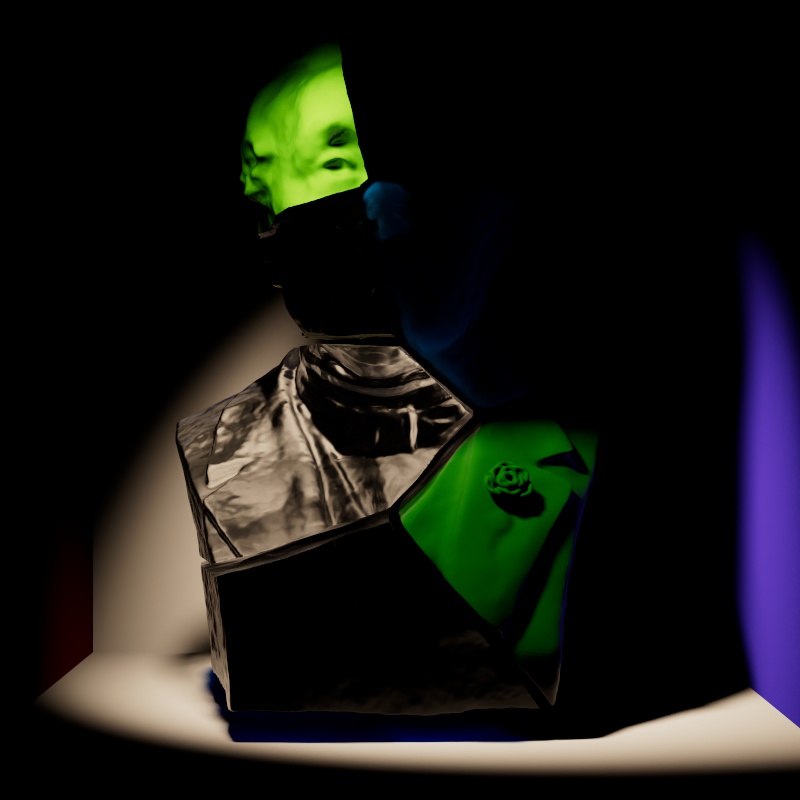
Global Illumination
Scales the intensity of a light's global illumination contribution.
Global Illumination requires Diffuse contribution, this is because global illumination simulates the secondary bounces that only occur after the first bounce of light which is what diffuse contribution represents.
|
|
| Global Illumination: 0 - 2 Diffuse: 1 Other Contribution Types: 1 |
1 1 0 (Isolated for Reference) |
Volume
Scales the intensity of a light's volume contribution, this affects the scattering component of a volume material and environmental fog. A value of 0 disables volume contribution.
In the example below, a blue volume is illuminated by the light and the scene is demoed with and without environment fog.
|
||
| Volume: 0 - 2 Other Contribution Types: 1 Without Environment Fog |
1 0 (Isolated for Reference) |
0 - 2 1 With Environment Fog |
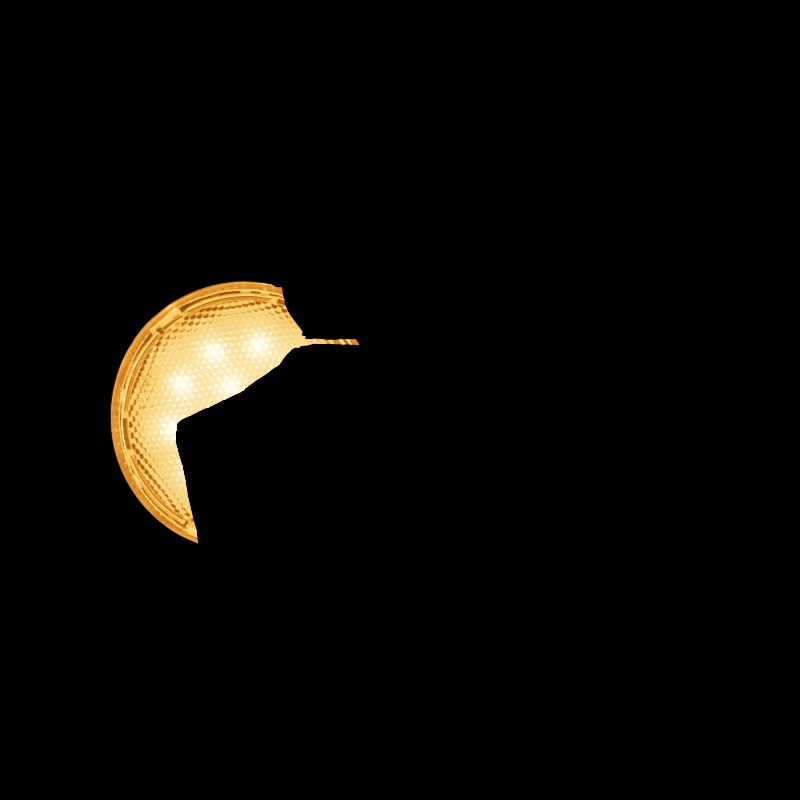
Toon Diffuse
Scales the intensity of a light's Toon Diffuse contribution. A value of 0 disables the effect.
|
|
| Toon Diffuse: 0 - 2 1 |
1 0 (Isolated for Reference) |
Toon Reflection
Scales the intensity of a light's Toon Reflection contribution. A value of 0 disables the effect.
|
|
| Toon Reflection: 0 - 2 Other Contribution Types: 1 |
1 0 (Isolated for Reference) |
Toon Rim
Only available for point, spot, and directional lights.
Scales the intensity of a light's Toon Rim contribution. A value of 0 disables the effect.
|
|
| Toon Rim: 0 - 2 Other Contribution Types: 1 |
1 0 (Isolated for Reference) |
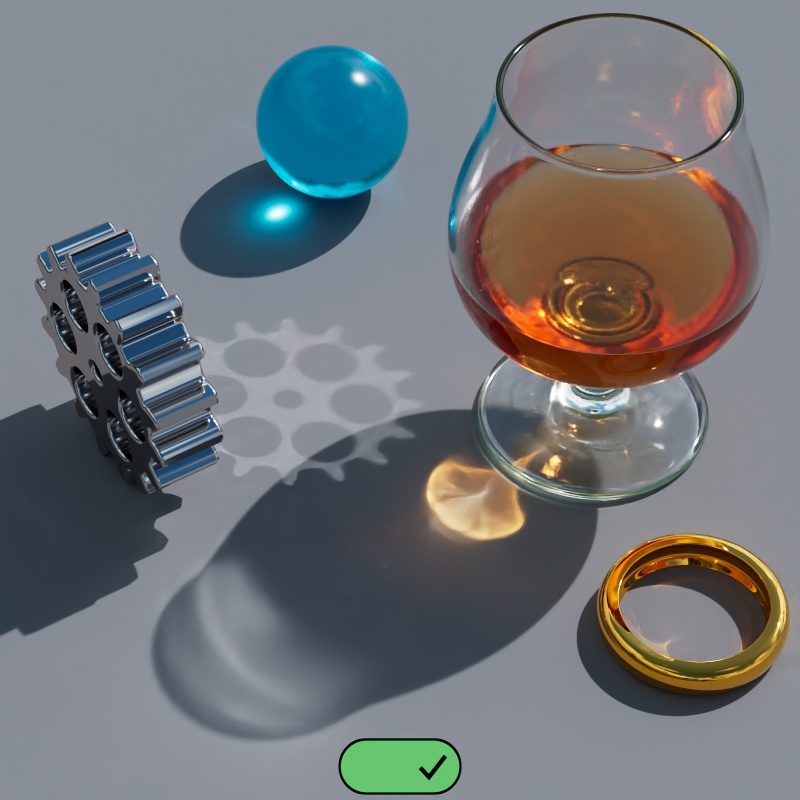
Caustics

|
Casts Caustics
By default, all Redshift lights start in a Casts Caustics mode called "Render Settings". In this mode, a light's caustic capabilities are controlled by the "Light Casts Caustics" parameter found in the Caustics tab of the Render Settings. This allows you to easily control all lights in a scene from the Render Settings, making caustics much more simple to set up and control.
When Casts Caustics is set to "Render Settings" the default behavior of lights is:
- The light cast caustics
- Override Refraction Shadows is enabled
When Casts Caustics is set to "On":
- The light casts caustics
- Override Refraction Shadows is enabled by default but can be manually disabled.
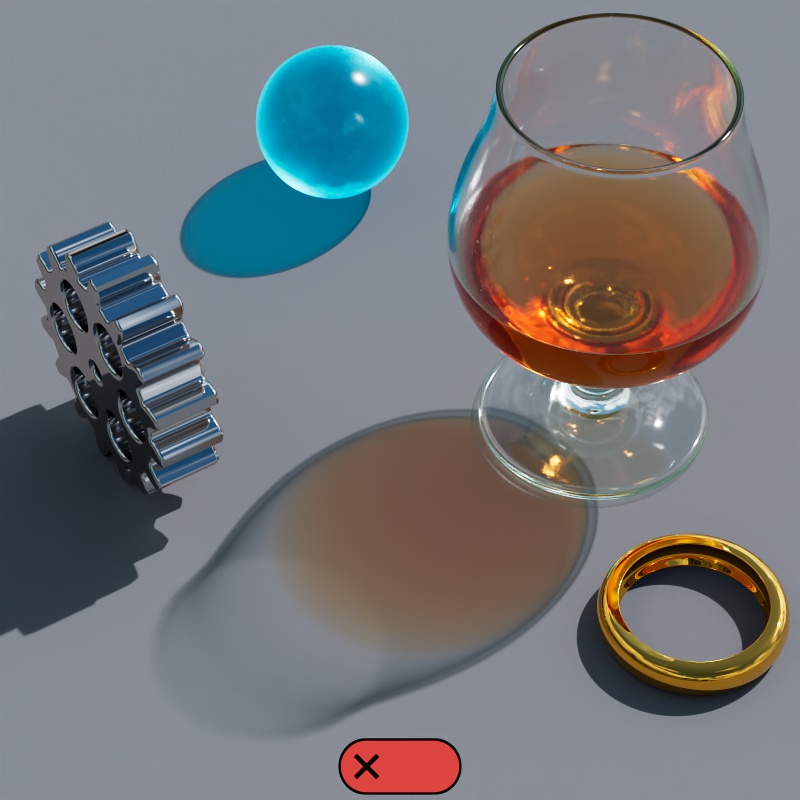
When Casts Caustics is set to "Off":
- The light does not cast caustics
- Override Refraction Shadows is disabled
|
|
| Casts Caustics: On | Off |
Override Refraction Shadows
Only editable when Casts Caustic is set to "On."
Casts Refraction Caustics must be enabled on an object for this option to have any effect.
When enabled, Transmission Shadow Opacity is set to 1 for Standard Materials that are lit by any light with this option enabled. This ensures that a transmissive object's shadow is appropriately dark so that it can be lit up by the more realistic caustics.
Intensity
Controls the brightness of the caustics as a multiplier relative to the intensity of the light. For the most realistic look use a value of 1 for caustics that match the intensity of the light. Increasing this value results in brighter caustics. A value of 0 can be used to effectively disable caustics for the light but Override Refraction Shadows will remain in effect, resulting in opaque shadows for transmissive materials.
Photon Multiplier
Controls the number of photons cast for the light. This is determined by multiplying the Photon Multiplier value by the "Num Photons" value found in the Photon Caustics Render Settings.
For example, if Num Photons is 10,000 and the Photon Multiplier is set to 1.5 then the light will cast 15,000 photons. If the Photon Multiplier were set to 3 then it would cast 30,000 photons.