
Table Of Contents

|

|
| Beauty Render | Cryptomatte AOV Example |
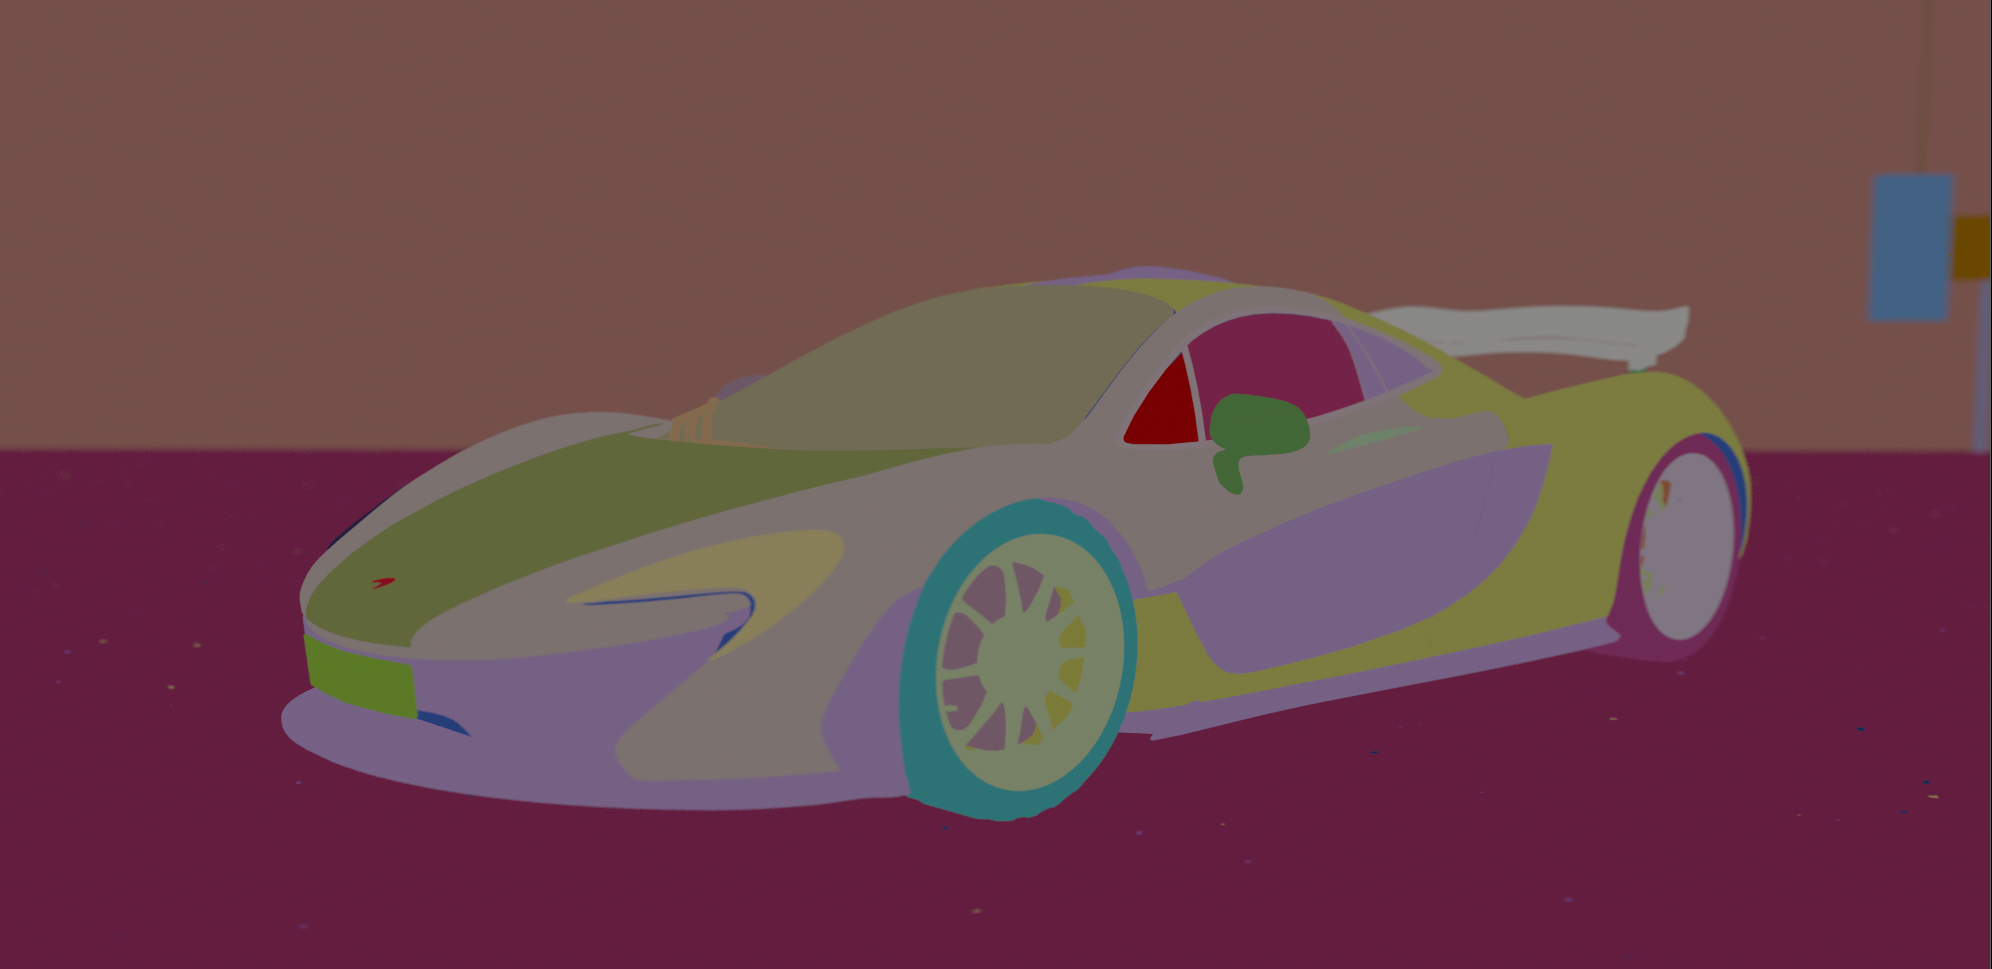
Cryptomatte is a system developed by Psyop to deliver a robust matte solution for compositing packages. The Cryptomatte solution encodes EXR images with special image data which automatically generates mattes for several of the commonly needed mattes during post production. This saves time having to generate the matte AOV's manually especially when there are a lot of objects and materials in your scene. Using the Cryptomatte plugin for NUKE or Fusion, mattes can be quickly and easily extracted through picking objects or materials or by entering object names. Cryptomatte in Redshift currently supports several automatic ID Types based on Node Name, Material Name, Redshift Object ID, or Custom User Attributes.
Cryptomatte rendering will automatically force a bucket size of 128 when a render device does not have enough memory.
The Cryptomatte plug-in can be downloaded at the Psyop Github page. https://github.com/Psyop/Cryptomatte
To create a Cryptomatte file with Redshift you need to go into the render options and look inside the AOV tab. The AOVs listing the available AOVs will now be exposed with the option to choose Cryptomatte. Adding a Cryptomatte AOV to your scenes Active AOV list will enable Redshift to write out Cryptomatte AOVs to disk.
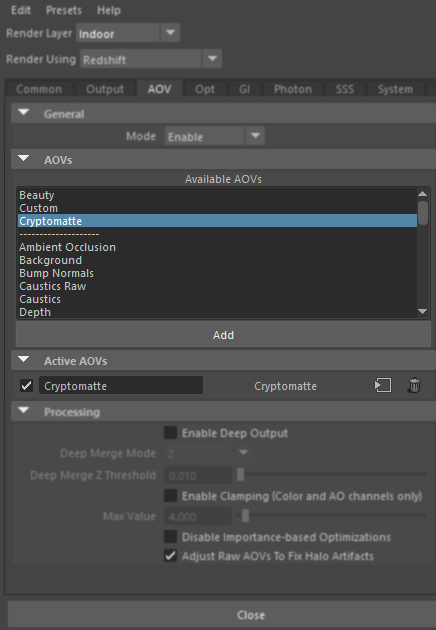
Available AOVs menu with Cryptomatte listed as an option
Once a Cryptomatte AOV has been created you can then adjust the ID Type by using the dropdown menu found in the Attribute Editor when the Cryptomatte AOV is selected. Inside the Cryptomatte section you have an "ID Type" dropdown menu which lists the four available Cryptomatte options. There is also "Cryptomatte Depth" which controls how many objects can intersect on a single pixel and still be considered as separate mattes. Typically the default value of 8 is more than enough for most scenarios. The General AOV options also includes AOV name and file name prefix options.
|
|
|
|
Cryptomatte options in the Attribute Editor. |
Cryptomatte ID Type options in the dropdown menu. |
The "Node Name" ID Type uses the object node naming conventions to build individual unique mattes based on object node names.
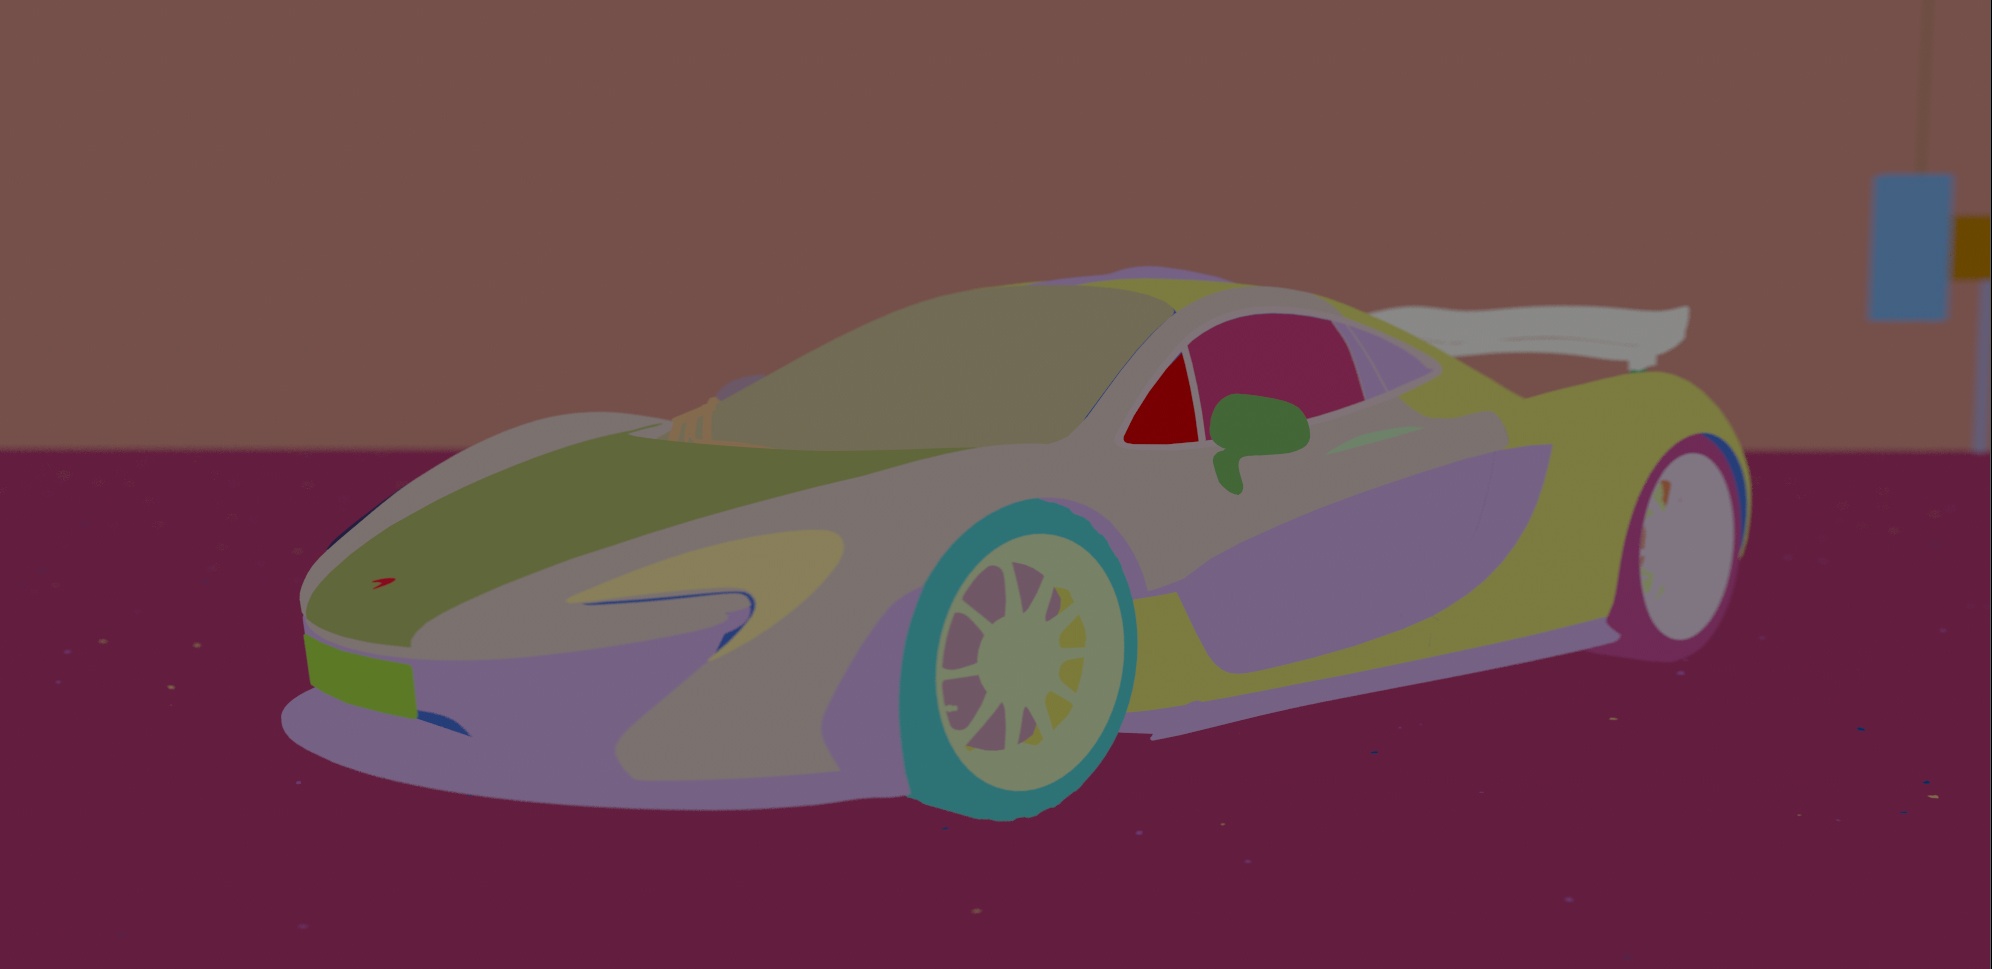
In this example Cryptomatte is using Node Name based mattes to isolate mattes for each object node in the scene.
The "Material Name" ID Type uses the materials in the scene to build unique mattes for each material.
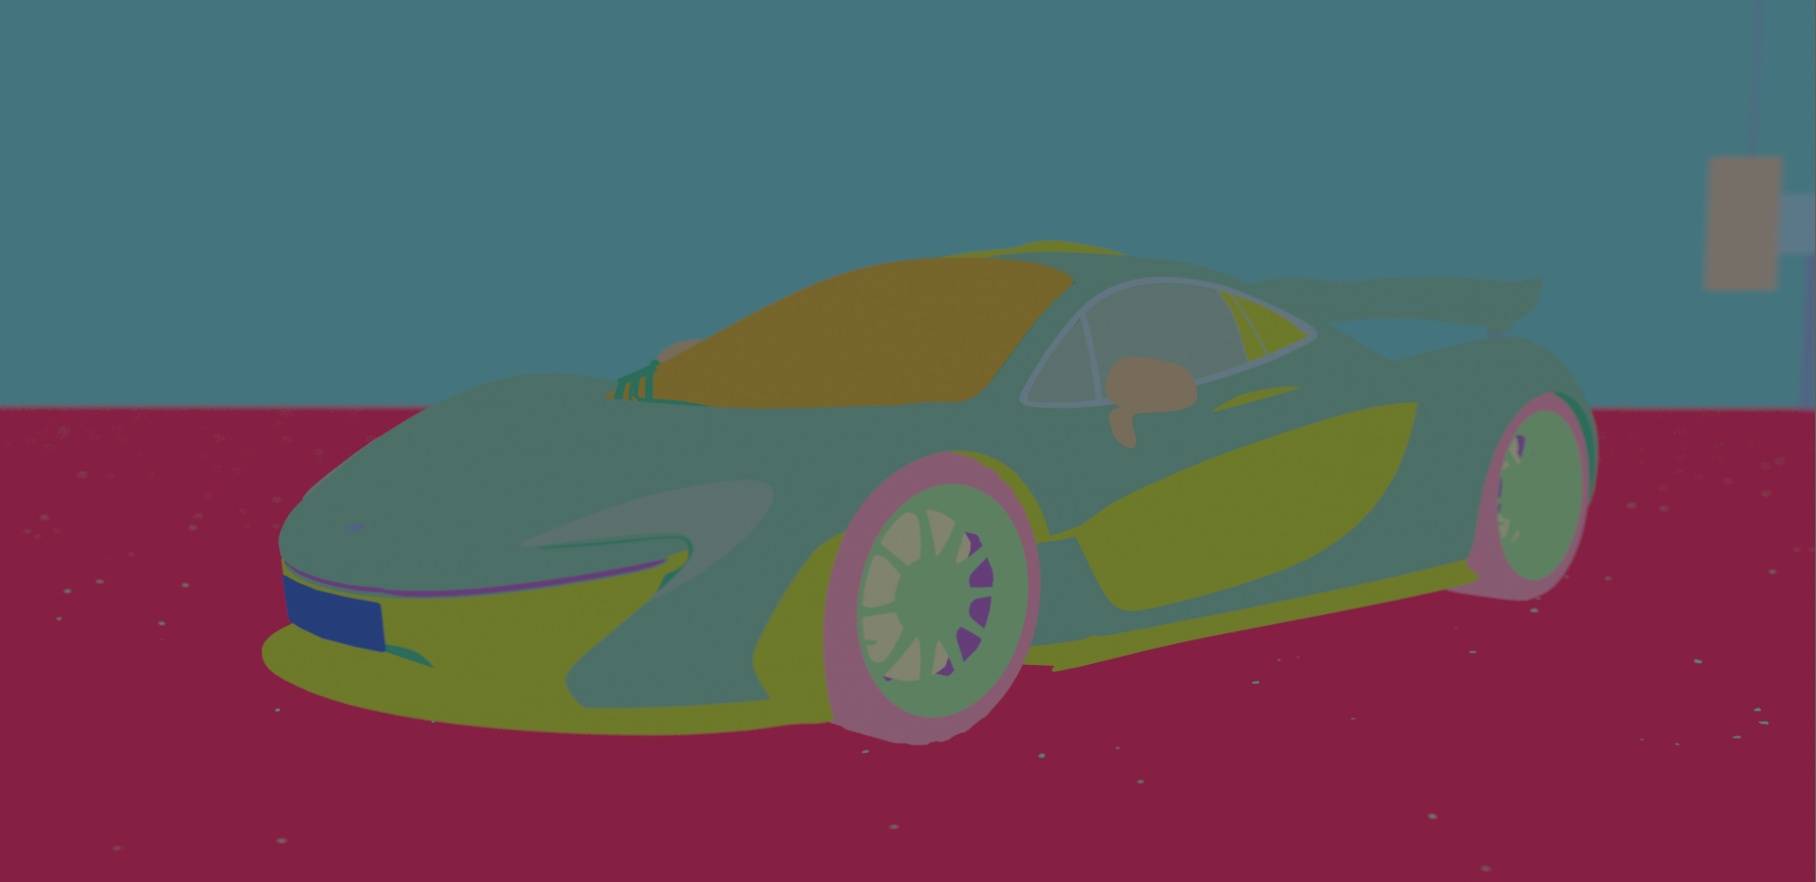
In this example Cryptomatte is using Material Name based mattes to isolate mattes for each material assigned in the scene.
The "Redshift Object ID" ID Type uses the Object ID parameters on the objects you specify in a similar fashion to the Object ID AOV and Puzzle Matte AOV. This Attribute can be found in the Attribute Editor when selecting an object inside of the Redshift properties or by assigning a Redshift Object ID node to objects.
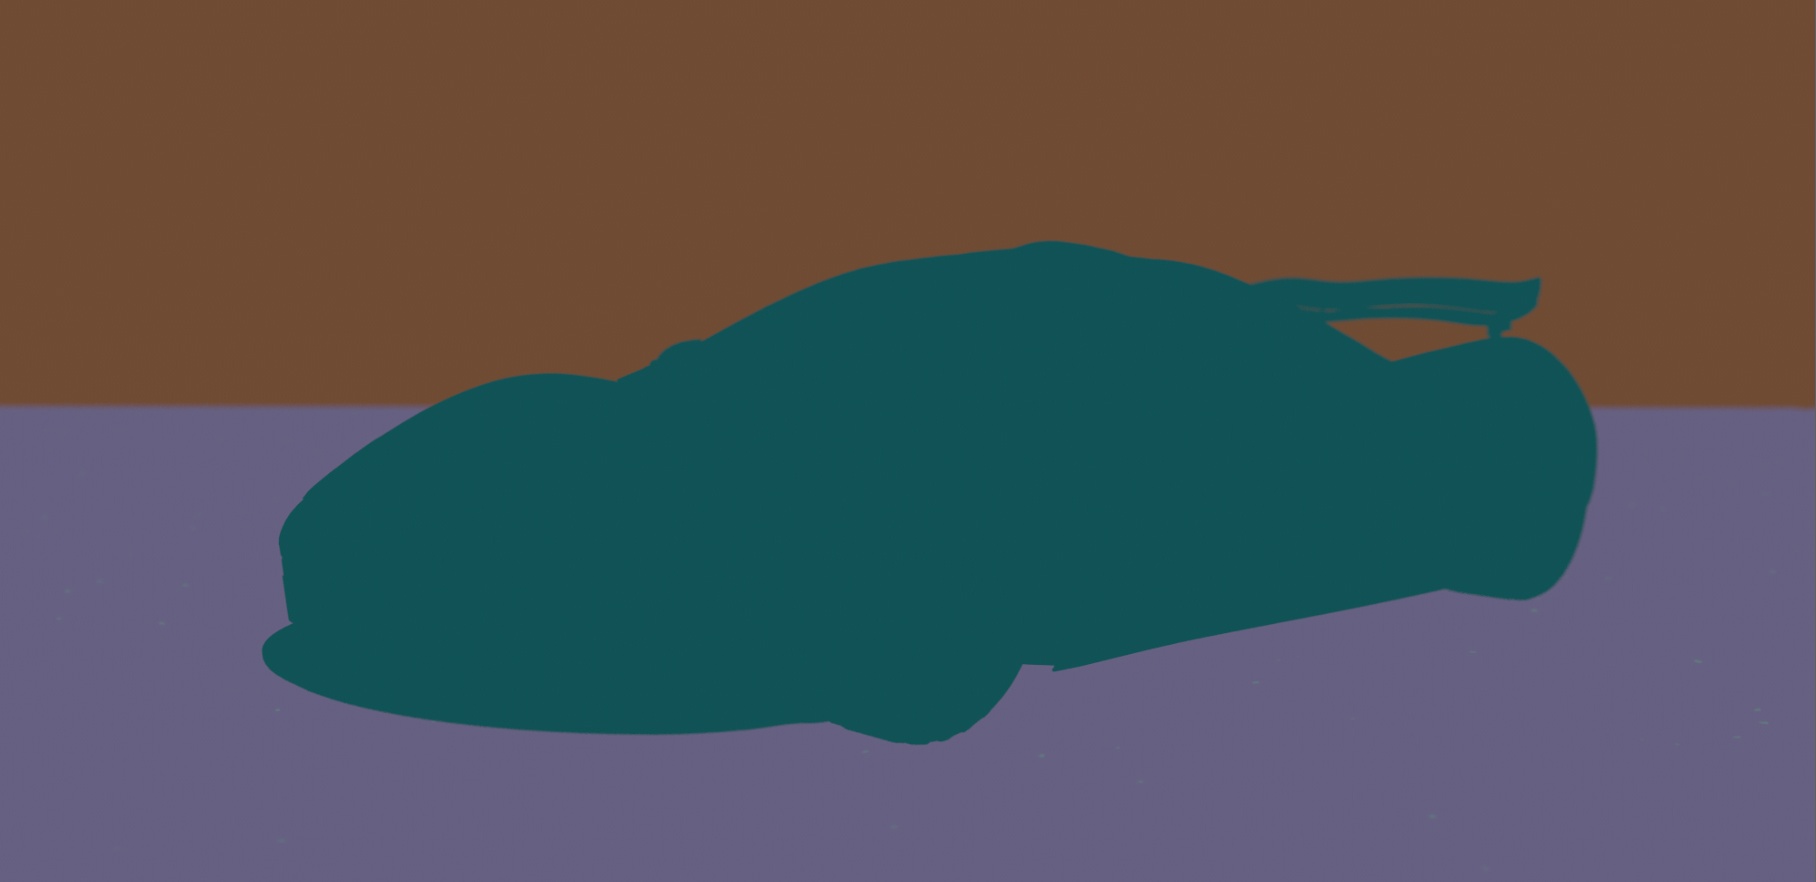
In this example Cryptomatte is using the Redshift Object ID attribute. We assigned them to specific objects allowing us to selectively control the mattes.
Redshift allows you to assign the Redshift Object ID parameter different ways. One method can be found in the Object Shape node in the Redshift attributes section of the attribute editor. There you will find the Object ID parameter which lets you assign the object node any ID number.
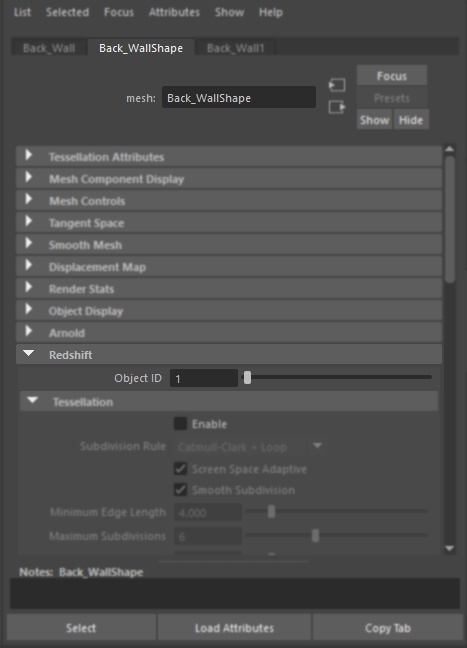
Redshift Object ID controls inside of the Attribute Editor when selecting an object node.
You can also create a
separate Redshift Object ID Node which lets you
easily manage multiple objects in the Redshift Object ID Node. This
node will appear in the Outliner when created. This node allows you
to drag and drop objects into the Redshift Object ID node allowing
you to assign multiple objects to the same Object ID and quickly
include or exclude them from the Redshift Object ID
Node. You can also create multiple Redshift Object ID nodes
which include their own separate objects.
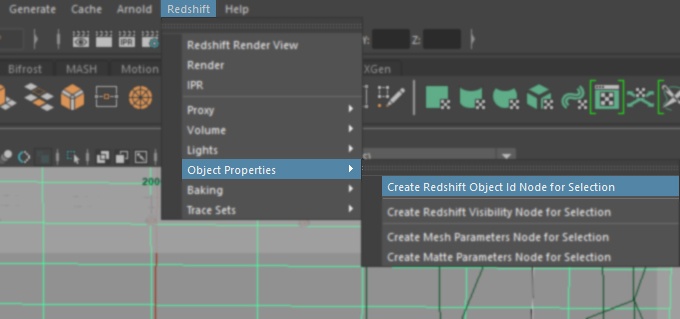
Object ID's can also be created using the "Create Redshift Object ID node for Selection" option in the Redshift menu.
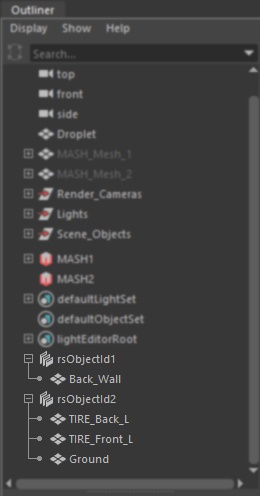
Example of two ObjectID's groups inside the Outliner
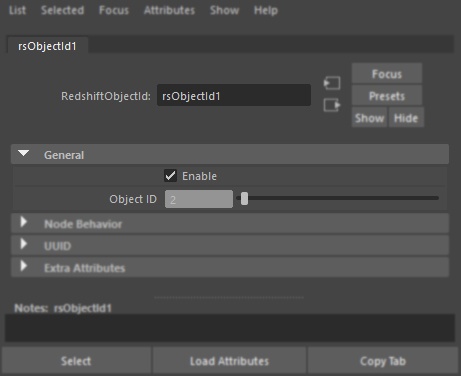
Options found in the Attribute Editor for the Object ID Node. Here you can change the Object ID number parameter.
Multiple objects can share the same Redshift Object ID number if you want to group objects together into a single matte.
The
In the example below User Attributes were applied to specific objects and each object that we wanted to have its own matte was also given an appropriate individual string name to group the objects by. Here we have the tires, floor, wall, license plate, and front windshield & front light in their own matte groups. This allows us to easily customize the objects and names for our mattes using custom attributes.
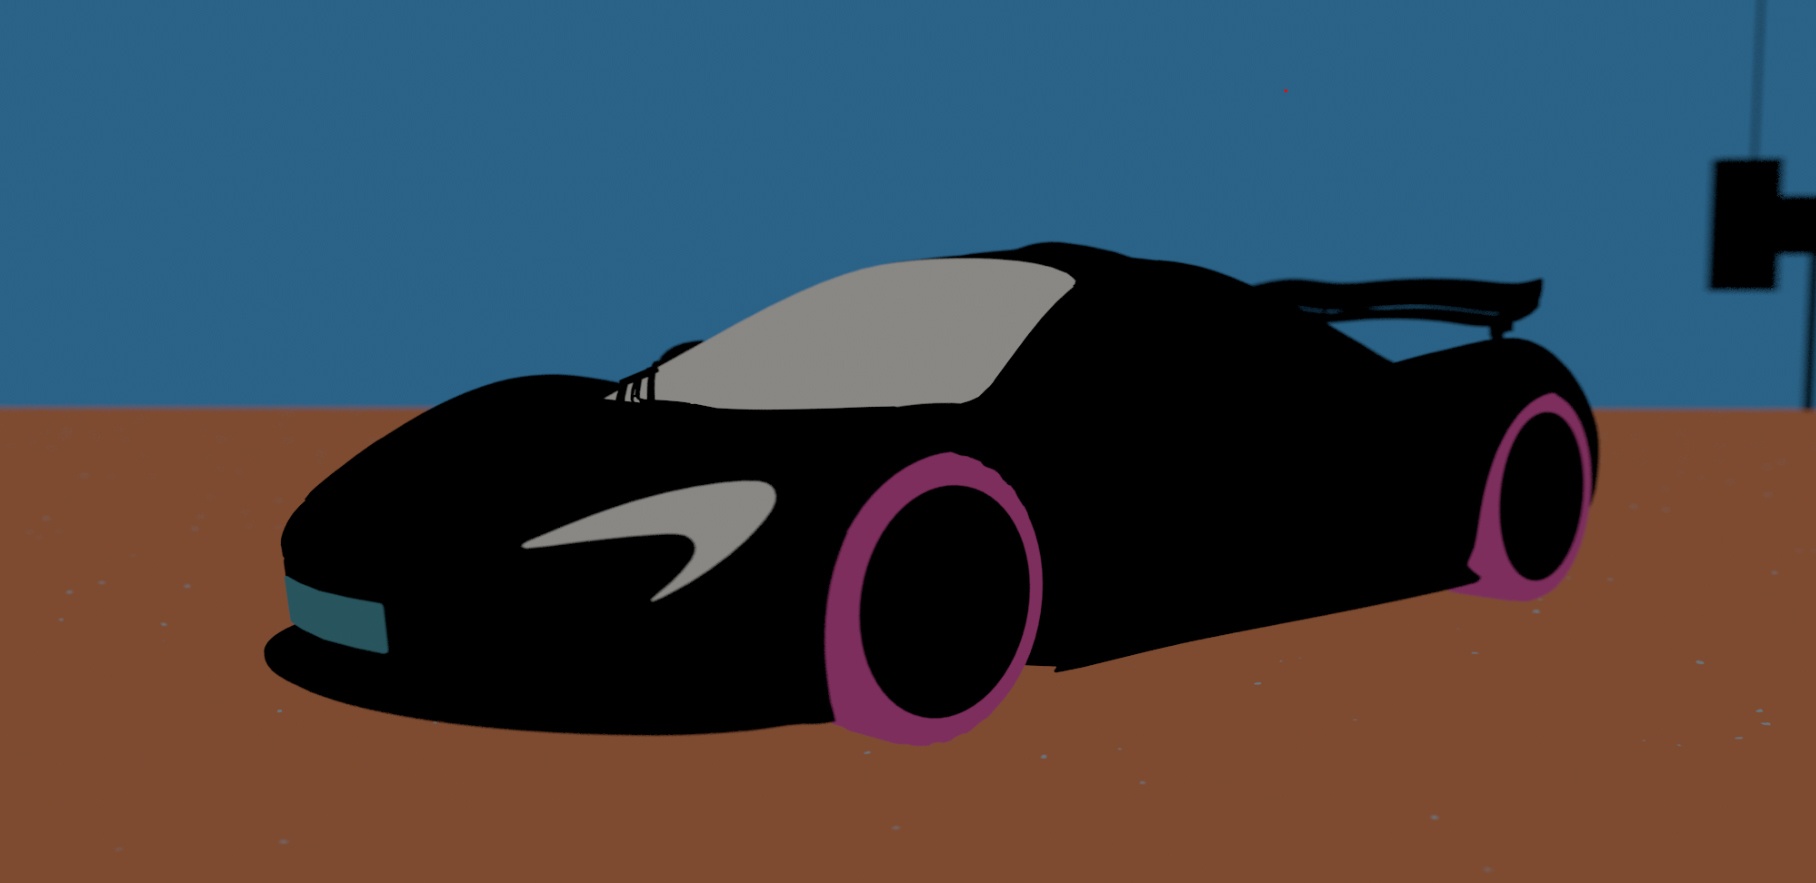
Specific objects grouped together into their own respective mattes based on the User Attributes we created.
To setup our User Attribute Cryptomatte we first change the ID Type to "User Attribute" in the Cryptomatte options and then we give it an attribute name. This name will help Cryptomatte generate the matte data. In our example we chose to name our attribute "matte".
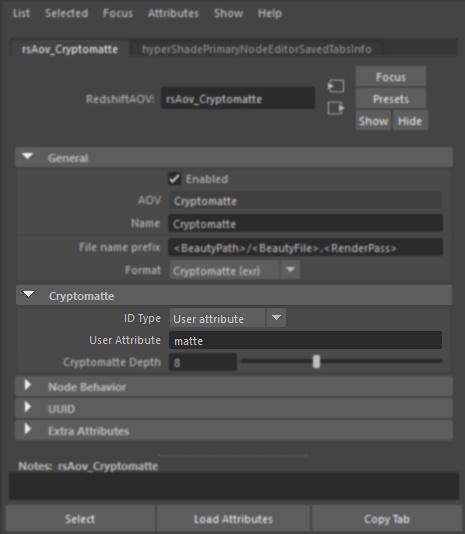
Cryptomatte Options displaying ID Type in "User Attribute" mode and using the custom attribute named "matte".
Now we assign the attribute "matte" to all the objects we want to generate cryptomattes for. This can be done by selecting either the object shape node or transform node and then assigning a new attribute in the attribute editor by clicking the Attributes menu and selecting the Add Attributes option.
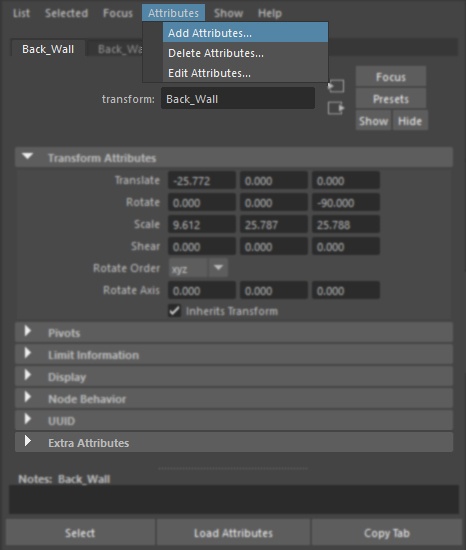
In this example we are adding an attribute to the transform node of the Back_Wall object.
Clicking the Add Attribute window will open up a new window which lets you create the new custom attribute. In this window for our example we will choose matte for the long name to match the attribute our Cryptomatte AOV is going to be look for. User Attribute ID Type only works with String attribute data types so we will select String and then hit the ok button. This will now create our custom matte attribute in the Extra Attributes section of our Back_Wall object.
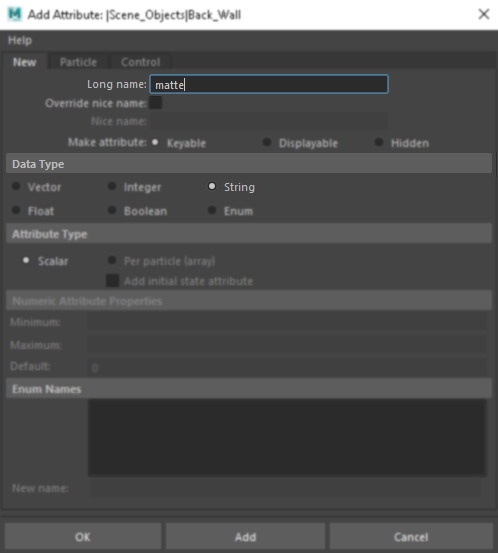
In our example we used the attribute name "matte" and the data type must be in "String" for Cryptomatte to read our attribute.
Now that we have created our new custom attribute you can see that the Extra Attributes section of our Back_Wall object has now expanded to include a new Matte attribute. This new String attribute also provides us with a space to type in any name we want. The name we enter here will be used by Cryptomatte to distinguish between the mattes it generates. For our example we chose to use the name wall to generate a matte specifically for our Back_Wall object.
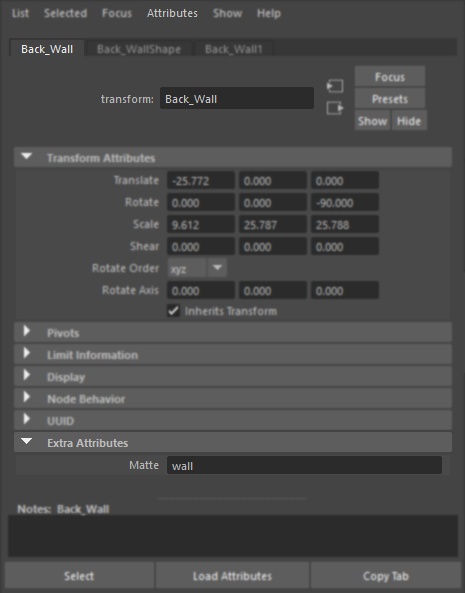
This new custom attribute we created can now be found inside the Extra Attributes section.
Multiple objects can share the same name if you want to group objects together into a single matte.
Finally after rendering our scene and adding a few more User Attributes to more objects we end up with a finished Cryptomatte which we can open in a compositing package and select the custom attribute based mattes we created. The names we used will carry over into the Cryptomatte data and be available for us to use in our compositing application.
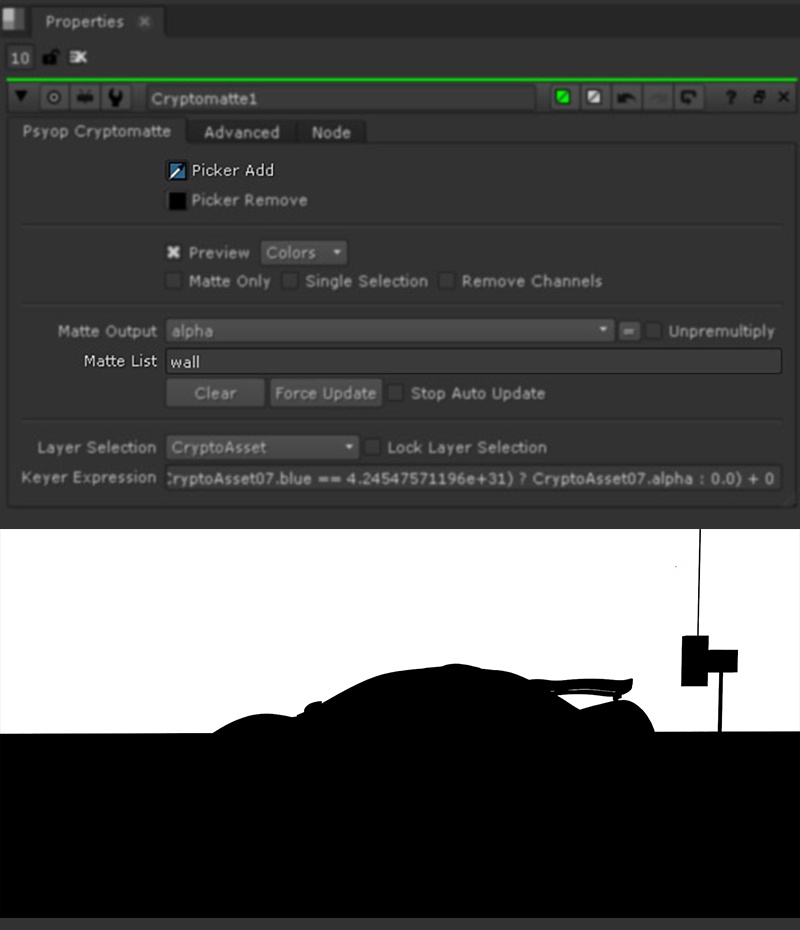
Our example Cryptomatte inside of Nuke. Using the picker to select the Back Wall you will notice that the name we used earlier "wall" is now added to our Matte List. Using this system you can easily create custom names & group objects into specific mattes using attributes.
The "Cryptomatte Depth" value specifies how many objects can exist per-pixel due to overlapping for things like motion blur and depth of field.
Nuke 12 or older does not come with Cryptomatte installed. To use Cryptomatte in older versions of Nuke you will need to install the plug-in.