EXR Topics
Layered EXRs
Typically each AOV is written to its own image file. When working with animations, this can create file management issues. If each frame produces (say) 5 AOV images and there are thousands of frames, then there will be that many more image files on disk.
Layered EXRs alleviate file management issues by allowing the combination of multiple EXRs into one.
Creating layered EXRs is very easy in Redshift. All you need to do is make your AOVs point to the same file. Redshift will detect this and automatically produce a single layered EXR containing all the participating AOVs.
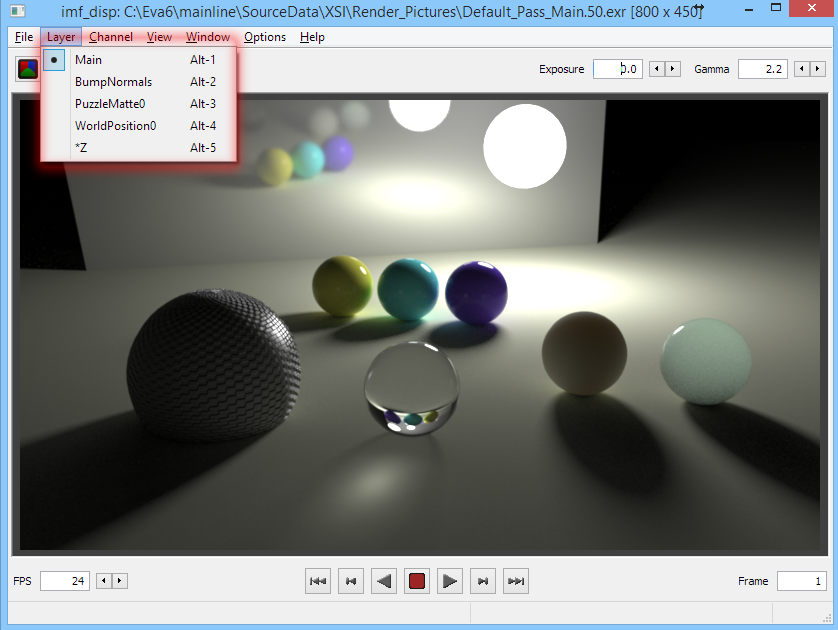
Once rendered, you can ensure your EXR contains all the necessary layers using utilities like imf_disp:

…or in your comp package (Nuke shown here)
Deep EXRs
Introduction
While AOVs can be powerful tools for compositing, they suffer from the fact that each pixel in a typical image can only store a single value.
This introduces a variety of issues such as:
- Object silhouettes can produce pixelated artifacts during the comp process. This is because the silhouette pixels are shared between multiple objects (the current object and any objects behind it).
- Depth of field and motion blur produce compositing issues because the blurred pixels are shared between multiple objects (the blurred object and any objects behind it)
- Transparencies produce issues because the final pixel is a combination of all the transparencies that contributed to that pixel. So, once again, it's a problem of multiple objects/depths contributing to the same pixel.
As it can be seen, the main issue with all these problematic cases is the fact that multiple different objects (or depths) are all affecting the same pixel. And, because non-deep images can only store a single value per pixel, significant information is lost because of this limitation.
Traditionally, artists solve these issues by rendering the frame in different passes in order to generate multiple images at different depth or transparency levels. This requires advance knowledge about how these passes will be used/combined and can be both laborious and wasteful in terms of rendering resources.
Deep EXRs were introduced in the industry-standard EXR 2.0 specification and were designed to hold multiple values at each pixel. They, therefore, allow a wide variety of compoperations without worrying about usage of depth of field, motion blur and transparency or issues around object silhouettes.
The main drawback with deep EXRs is their increased file size and subsequent storage needs. The increased file size stems from the fact that multiple values ("samples") are stored for each pixel. Redshift tries to keep deep EXR files sizes as small as possible via a small set of controls discussed below.
Volume rendering is only supported with Deep output in Redshift version 3.0.32 and higher.
Currently, Redshift can only store beauty, depth and objectID in deep EXR files. The remaining AOV types will be supported at a later stage. Because of this limitation, when rendering with Deep Output enabled, any AOVs (other than ObjectID) will be disabled.
Enabling Deep Output
To enable Deep Output rendering in Maya, you need to enable the "Enable Deep Output" option in the AOV tab. The remaining Deep Merge options will then become available.

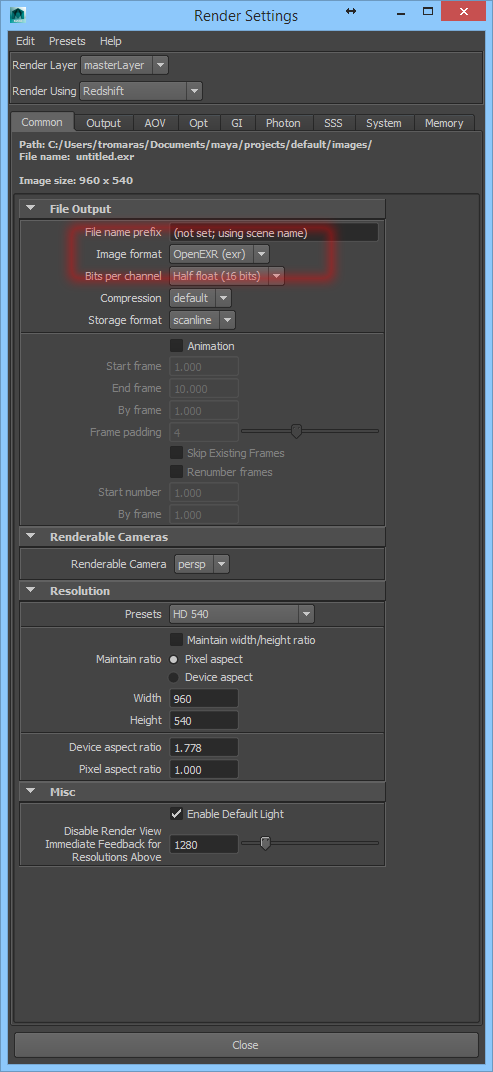
Then, ensure that your beauty pass is using the EXR image format
The Merge Sample Options
As mentioned above, deep EXRs can produce large files. For this reason, most renderers contain options for merging together the multiple values of each pixel so that the file sizes can be reduced.
The following options explain the different merging modes supported by Redshift and how they could be used in your scene.
Please note that too much merging means that not enough information will be preserved on the final pixels and the benefits of deep EXRs will be lost. On the other hand, too little merging means that the deep EXR files can be very large, especially for scenes using high geometrical complexity, transparency, depth of field or motion blur. Learning how to effectively use these parameters is very important in order to bring the EXR file sizes under control!
Redshift currently supports two Deep Merge modes: Z and ObjectID.
Z Mode
The "Z" mode means that, for each pixel, depth samples that are close to each other will be merged together. The "Deep Merge Z Threshold" parameter controls how close the samples will need to be in order for them to be merged together.
To explain how this works, let's look at this simple scene containing a few motion blurred spheres.

The following image shows how samples are collected by Redshift as rays are shot for a pixel. The arrow denotes a single ray shot from the camera (a 'primary ray') and the X's are the gathered samples. Each sample has its own Z which denotes how far away it is from the camera. The samples of the red sphere are the closest to the camera while the blue sphere samples are the farthest ones.
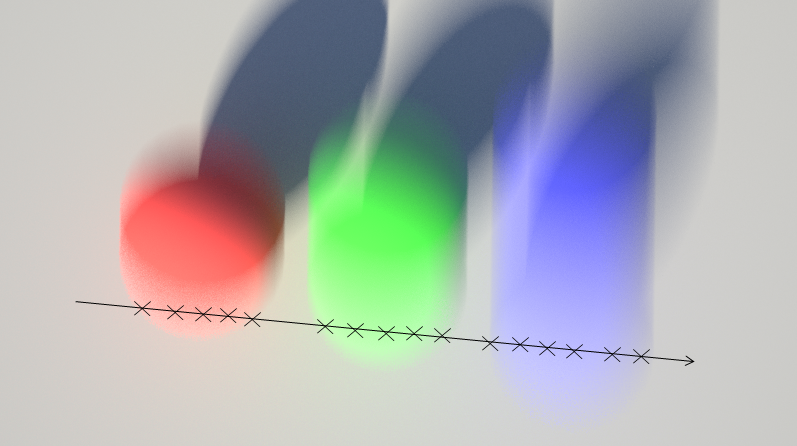
As the ray goes through the motion-blurred trails, it gathers several samples

Using the Z Deep Merge mode, samples that are close to each other (in Z) are merged together. This reduces the total number of samples stored for that pixel and, subsequently, reduces the final EXR file size.
The smaller the "Deep Merge Z Threshold", the fewer samples will get merged together. In this case, each pixel will have to store lots of individual samples and the final EXR file will be large.
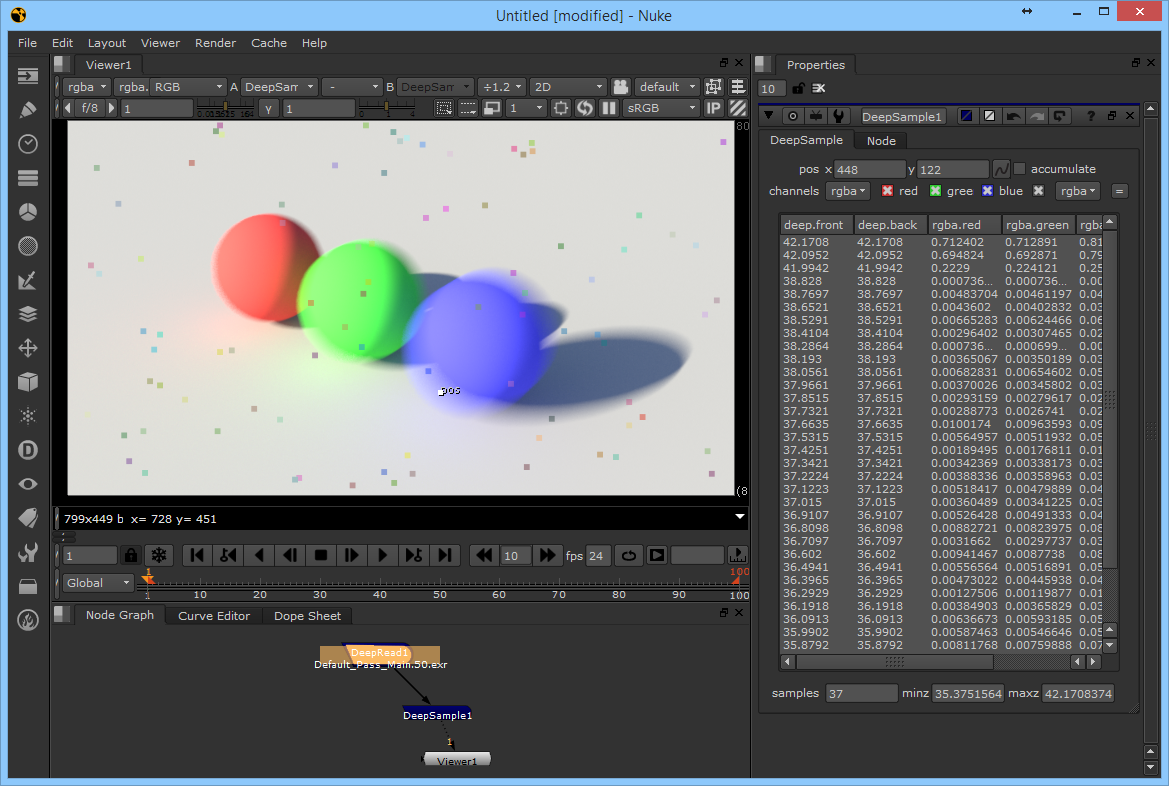
To see this effect in a more practical manner, let's inspect an actual deep EXR image in Nuke. We'll use the "DeepSample" Nuke node to inspect one of the pixels.
Looking at the deep data in Nuke, we realize that some pixels contain many samples in them! This is because, for this scene, the default "Deep Merge Z threshold" (0.01) was too small.

If we increase the Z threshold to 0.1 and re-render, we get fewer samples per pixel and the EXR file size is reduced considerably: 37 samples instead of 218 for the chosen pixel.
An even larger Z threshold would have reduced the stored samples further.
ObjectID Mode
The ObjectID mode will merge all samples that belong to the same objectID without caring about whether they are close to each other in Z or not. This means that, by default, the ObjectID mode performs more sample merging than the Z mode, which in turn produces significantly smaller EXR files.
The following image shows how the Z mode works for our example scene. As it can be seen, each object with a different ObjectID gets a single sample.

For the ObjectID Deep Merge mode to be effective, objects need to be assigned different ObjectIDs.
To see this effect in a more practical manner, let's render the image from a lower vantage point where the sphere blurred trails overlap for a given pixel.
Inspecting the actual deep EXR image in Nuke reveals that the pixel in question only contains 3 samples. That is indeed what we expected since each sphere has its own ObjectID.

While the ObjectIDDeep Merge mode produces significantly smaller EXR files, it has a few drawbacks.
If you try to composite together multiple deep EXRs (containing different objects), you could get visual artifacts if the objects in the different EXRs intersect each other in Z, as shown below.
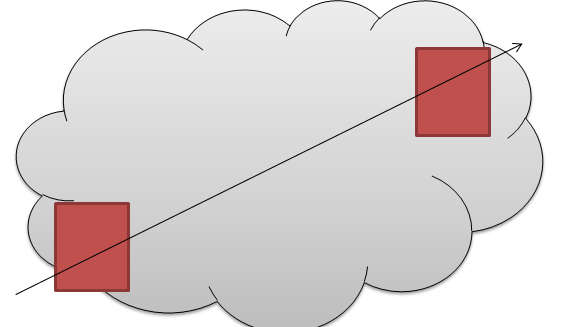
Say you're compositing a Houdini particle system (the gray cloud in the image) stored in a deep EXR with some redshift geometry (the red boxes in the image) stored in another deep EXR. If the particle system intersects the Redshift geometry, the ObjectID Deep Merge mode will generate insufficient Z information and produce visual artifacts around the intersection areas during comp
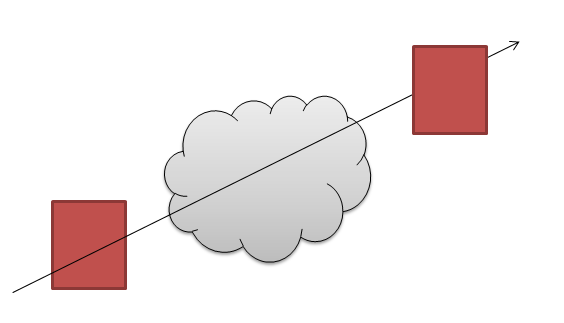
On the other hand, if the particle system is clearly separated from the objects, fewer or no issues will arise.
MeshID Mode
The MeshID mode will merge all samples that belong to the same meshID without caring about whether they are close to each other in Z or not. "MeshID" here refers to the unique ID Redshift internally assigns to each individual mesh in the scene. This means that, in contrast to the ObjectID mode, you don't have to manually assign IDs to object to "keep them seperate" in the deep data.
Except for this difference, the MeshID mode behaves exactly like the ObjectID mode and with the same pros and cons.