Open topic with navigation
Intro to Proxies
Table Of Contents
Introduction
Redshift Proxies allow you to place previously exported Redshift Proxy Files (.rs) files in your scenes without actually loading the geometry until it is actually needed at render time. You can think of a Redshift Proxy as an actual Redshift scene all on its own, they can even contain other Redshift Proxies.
Using Redshift Proxies in your scene is a 2 step process. First you export a Redshift Proxy File, then you import and place a Redshift Proxy in your scene and associate it with the exported file.
Using proxies has several advantages over in-scene objects, namely:
- Proxies are loaded by Redshift on demand and will therefore only use resources when they are needed (when a ray intersects the proxy's bounding box).
- Proxies have almost no time cost during scene translation. Extracting large amounts of geometry can be slow and using proxies means you pay that cost only once, when you first export the Redshift Proxy File.
- Proxies are stored in an optimized format on disk so that the renderer can immediately use the data after loading from disk without additional processing or memory overhead.
- Support for object types including animated and deforming meshes, hair, strands, instances, volume containers, lights and any materials/shaders applied to these objects.
The main disadvantages of using proxies:
- Making edits to the proxy can be more time consuming than if the original data is part of the scene (as it requires making changes in another file and re-exporting the Redshift Proxy File)
- After export Redshift Proxy geometry cannot be deformed or otherwise modified aside from adjusting tessellation settings. For example, you cannot animate components inside a proxy after export, but you
can animate the position, rotation and scale of the proxy as a whole rigid object.
- Animated proxies can be heavyweight because they are per-frame caches.
Redshift Proxies provide the option to use either the materials embedded in the Redshift Proxy File, or to replace those materials with materials from the scene where the proxy is placed.
Redshift Proxy Files are DCC-independent, so for example you can export a Redshift Proxy File from Maya and import it as a proxy in Houdini, or vice-versa.
There are currently some important limitations in sharing Redshift Proxy Files between DCCs:
- The embedded shaders in a Redshift Proxy File from one DCC may not be available in another DCC. For example a Redshift Proxy File containing a Softimage Lambert material will not render correctly when placed as a proxy in Maya.
- Certain light types native to a particular DCC may cause errors when rendered in another DCC.
To avoid this issue, we recommend always using one of the From Scene material modes when sharing Redshift Proxy Files between DCCs until we resolve this limitation.
Important Considerations
When working with Redshift Proxies, it is helpful to keep the following things in mind:
- You cannot retrieve the original Maya, 3ds Max or Softimage mesh from a Redshift Proxy File, so it is advisable to keep the original source data that was used to export the Redshift Proxy.
- When placing multiple copies of a Redshift Proxy in a scene, it is much more efficient for memory and performance to create a single Redshift Proxy and then create multiple instances of this proxy and place them as desired.
The data exported with your Redshift Proxy is determined by your Render Settings at the time of export, by default Redshift will try to discard as much unnecessary data as possible to achieve the most efficient file size.
UVs, Vertex Color, & Other Per-Vertex Attributes
When exporting a set of objects as a Redshift Proxy File, only the vertex attributes used by the currently assigned shaders are included in the exported data. This is an important optimization to prevent file bloat. When a proxy file will be used as-is, without overriding materials, this is not an issue. However, when using proxy material overrides, this can cause unexpected behavior if the overriding material requires vertex data that was stripped at export time because it was unused. So if you need certain attributes for your proxies at any point down the line, make sure that a shader attached to your proxy object is making use of those attributes. For example, if you have a sphere with a spherical texture projection and an untextured simple material assigned, the texture projection will be stripped at proxy file export time because it is not used by the currently assigned material. If this proxy is then placed in another scene and the material is overridden by a material that does use UVs, it will render incorrectly due to the missing UVs.
Motion Blur
In order for Redshift Proxies to render with
Motion Blur you must make sure that motion blur is enabled in your
Render Settings at the time of export.
Motion blur can be disabled on proxies after export but individual motion blur settings like frame duration cannot be changed after the fact, you must re-export your proxy if you wish to change its motion blur settings.
Instancing & Tessellation
If you are planning on instancing your Redshift Proxies please keep in mind that you can only use fixed tessellation.
Adaptive tessellation cannot be used when instancing in Redshift.
Creating & Exporting Proxies
To export a Redshift Proxy File select what you want to export and you can either use Maya's normal File > Export Selection and choose "Redshift Proxy" as the file type or you can use Redshift's toolbar menu directly with
Redshift > Proxy > Export as pictured below:
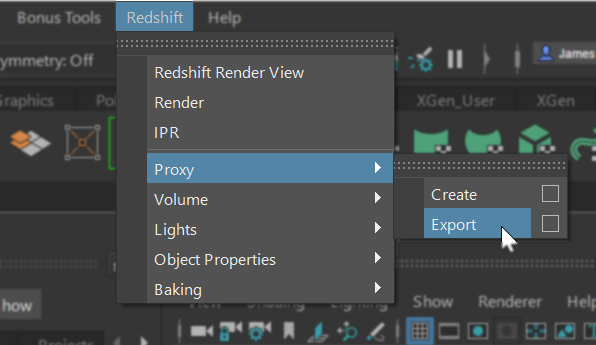
Exporting a Redshift Proxy
Export Parameters
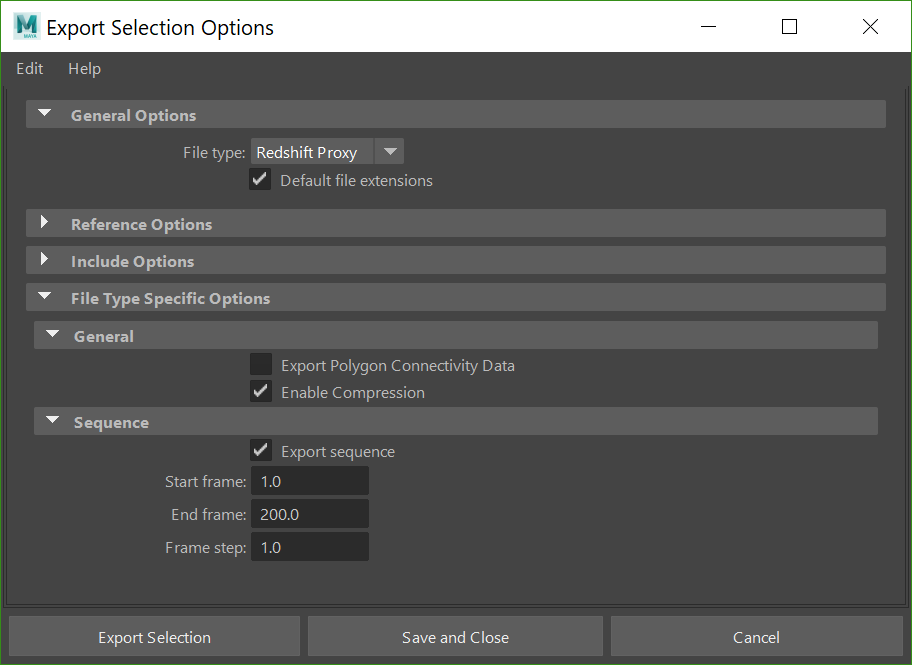
Redshift Proxy Export Options
General
Export Polygon Connectivity Data
Enabling this option is only necessary if you need to apply tessellation & displacement to the proxy after you’ve placed it in a scene and the original mesh does not have tessellation or displacement applied. Enabling this option increases the size of the proxy file, so it should only be used if necessary.
Enable Compression
This option enables file compression to reduce file size for exported Redshift Proxies. In some cases, the compression can reduce the file size by 50% or more.
In general compression will lead to slower export and load times.
However, if a bottleneck in your pipeline is slow data transfer performance like a slow storage drive or network then enabling file compression could lead to a performance
improvement due to the smaller file sizes. If you have a fast network and fast storage drive like an SSD then performance might be slower due to the processing time needed to decompress the proxy files. These are the sorts of things to consider when determining whether to enable or disable compression.
Sequence
Export sequence
When enabled this option specifies whether to export a sequence of Redshift Proxy Files for the frame sequence specified by Start frame, End frame and Frame step. When disabled Redshift will export a single Redshift Proxy File for the current frame.
Export Selection / Export All
This button proceeds with the export process in which you will be prompted to specify a file name.
Using Proxies
To place a previously exported Redshift Proxy in your scene, you create a Redshift Proxy object and set the proxy to point to the exported Redshift Proxy File.
To create the nodes representing a Redshift Proxy, from the main menu choose:
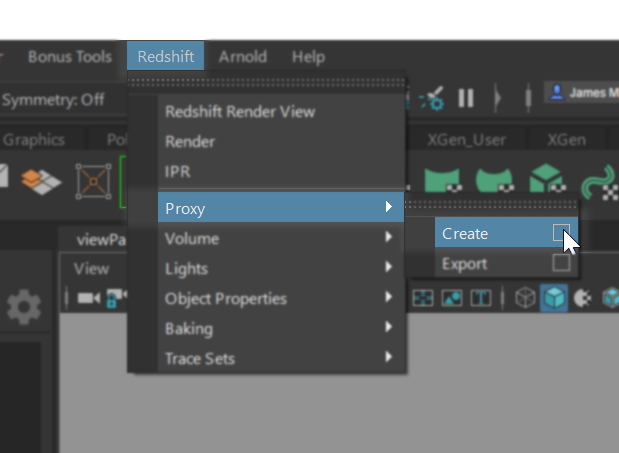
Creating a Redshift Proxy Object
This creates an empty Redshift Proxy at the origin, with the placeholder mesh selected.
A Redshift Proxy object is composed of at least 3 nodes with a 4th optional 'linked' mesh:
-
A transform node to place, scale, and orient the proxy in the scene (redshiftProxyPlaceholder1).
-
A standard Maya mesh node (the placeholder mesh) to represent the proxy in the DAG and the viewport (redshiftProxyPlaceholderShape1).
-
A RedshiftProxyMesh node that encapsulates the attributes of the Redshift Proxy and defines the shape of the mesh (redshiftProxy1).
-
[Optional] A standard Maya mesh node (the linked mesh) to customize the viewport representation of the proxy, connected to the inMesh attribute of the RedshiftProxyMesh node.
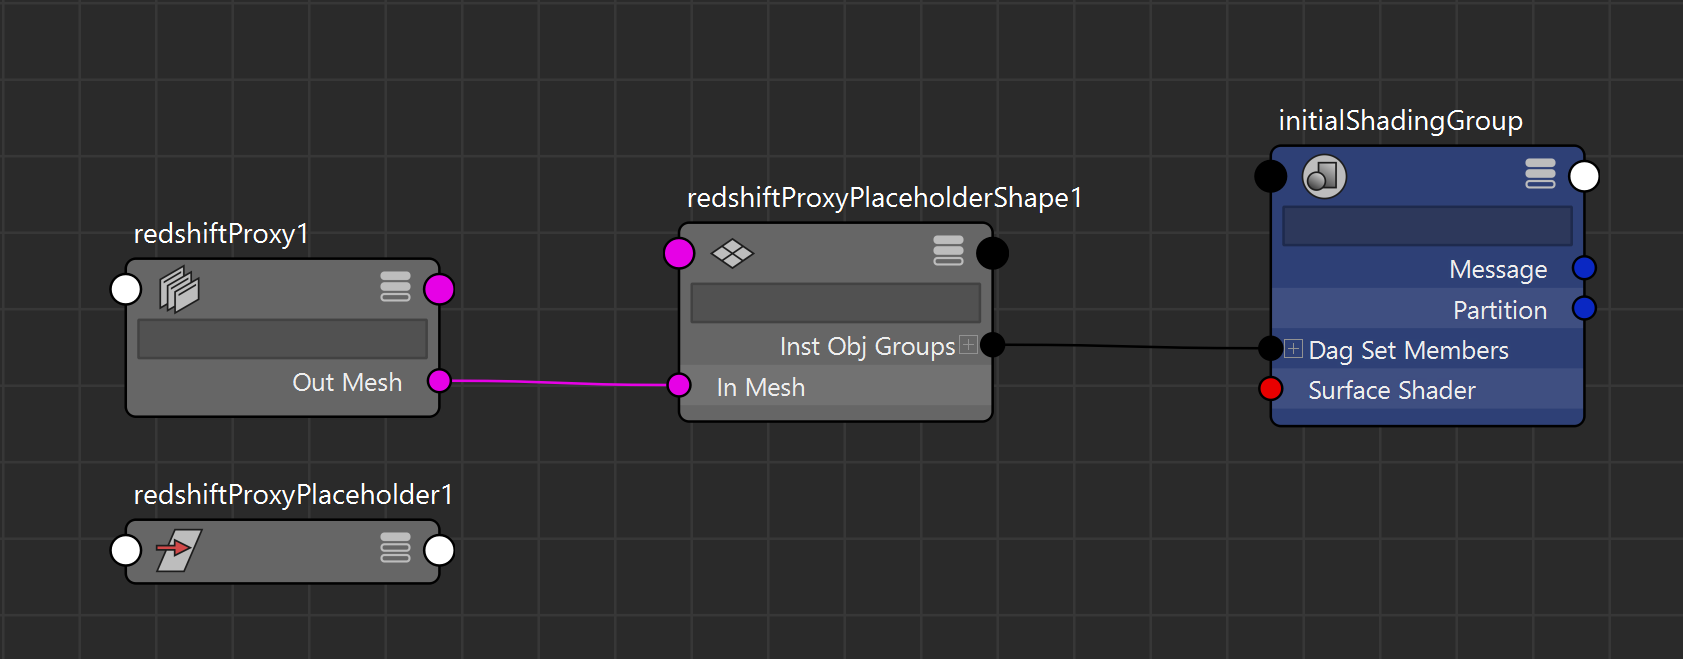
Hypergraph showing the nodes and connections which make up a Redshift Proxy. In this example, the 'initialShadingGroup' material is assigned to the proxy.
The diagram below depicts a Redshift Proxy Placeholder that includes a linked mesh.
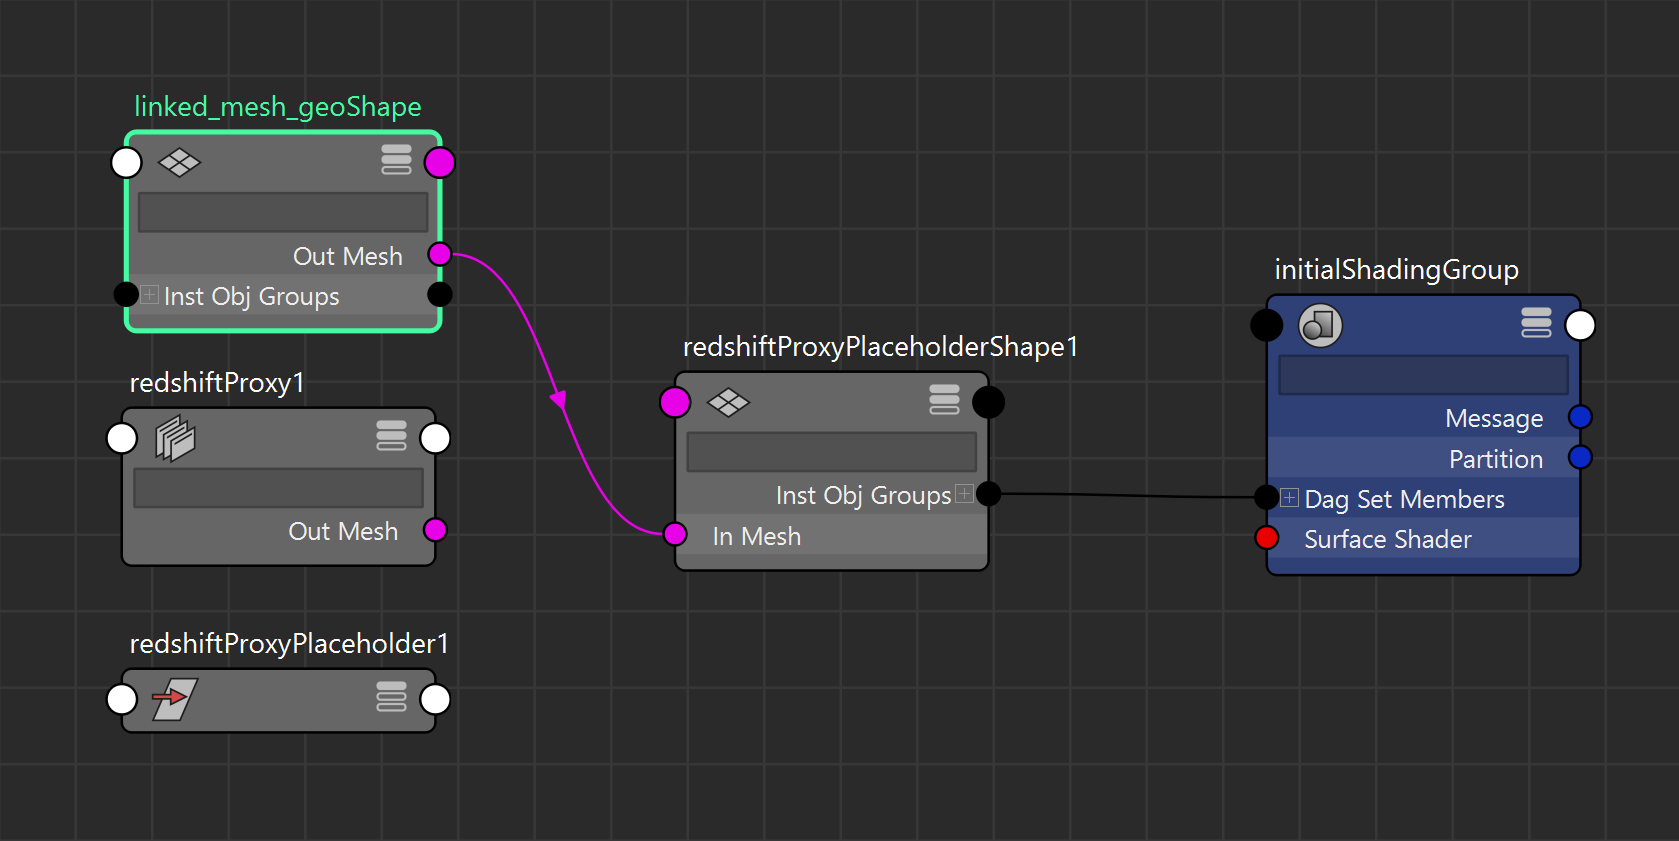
Connecting a Linked Mesh's "Out Mesh" attribute to the redshiftProxyPlaceholderShape's "In Mesh"
Because Redshift proxies are represented by a network of nodes, Maya considers the RedshiftProxyMesh node to be part of the history of the placeholder mesh. DO NOT DELETE THE HISTORY ON PROXY PLACEHOLDER MESHES. Doing so will make them no longer operate as proxies and Redshift will instead simply render the visible geometry. Similarly, duplicating a proxy requires duplicating the input graph of the placeholder shape in addition to the shape itself.
To associate a Redshift Proxy File with the proxy, switch to the RedshiftProxyMesh node in the Attribute Editor, click the file browser button next to the Filename field and browse to the Redshift Proxy File you wish to associate with the proxy. Note that when creating a proxy, clicking the option box (Redshift > Proxy > Create) will immediately bring up the file dialog to select a Redshift Proxy file.
Proxy Object Parameters
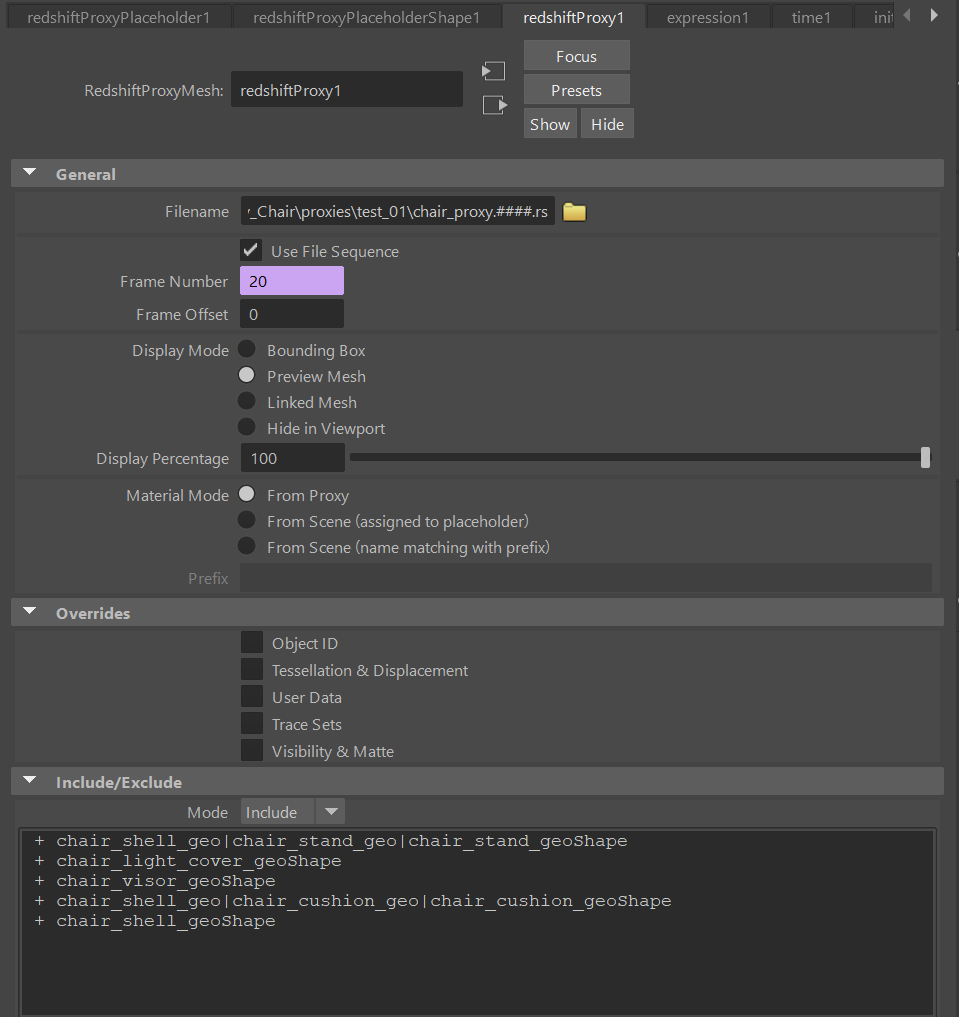
Redshift Proxy Mesh
General
Filename
This field specifies the Redshift Proxy File that will be rendered in place of the proxy object. You can navigate to and select the proxy file by using the folder icon to the right of this field.
Use File Sequence
This option enables the use of a proxy file sequence.
Frame Number
This value represents the frame number used from a Redshift Proxy file sequence. This attribute can be keyframed.
Frame Offset
To offset the frame number, enter the desired offset value here. Both positive and negative values work.
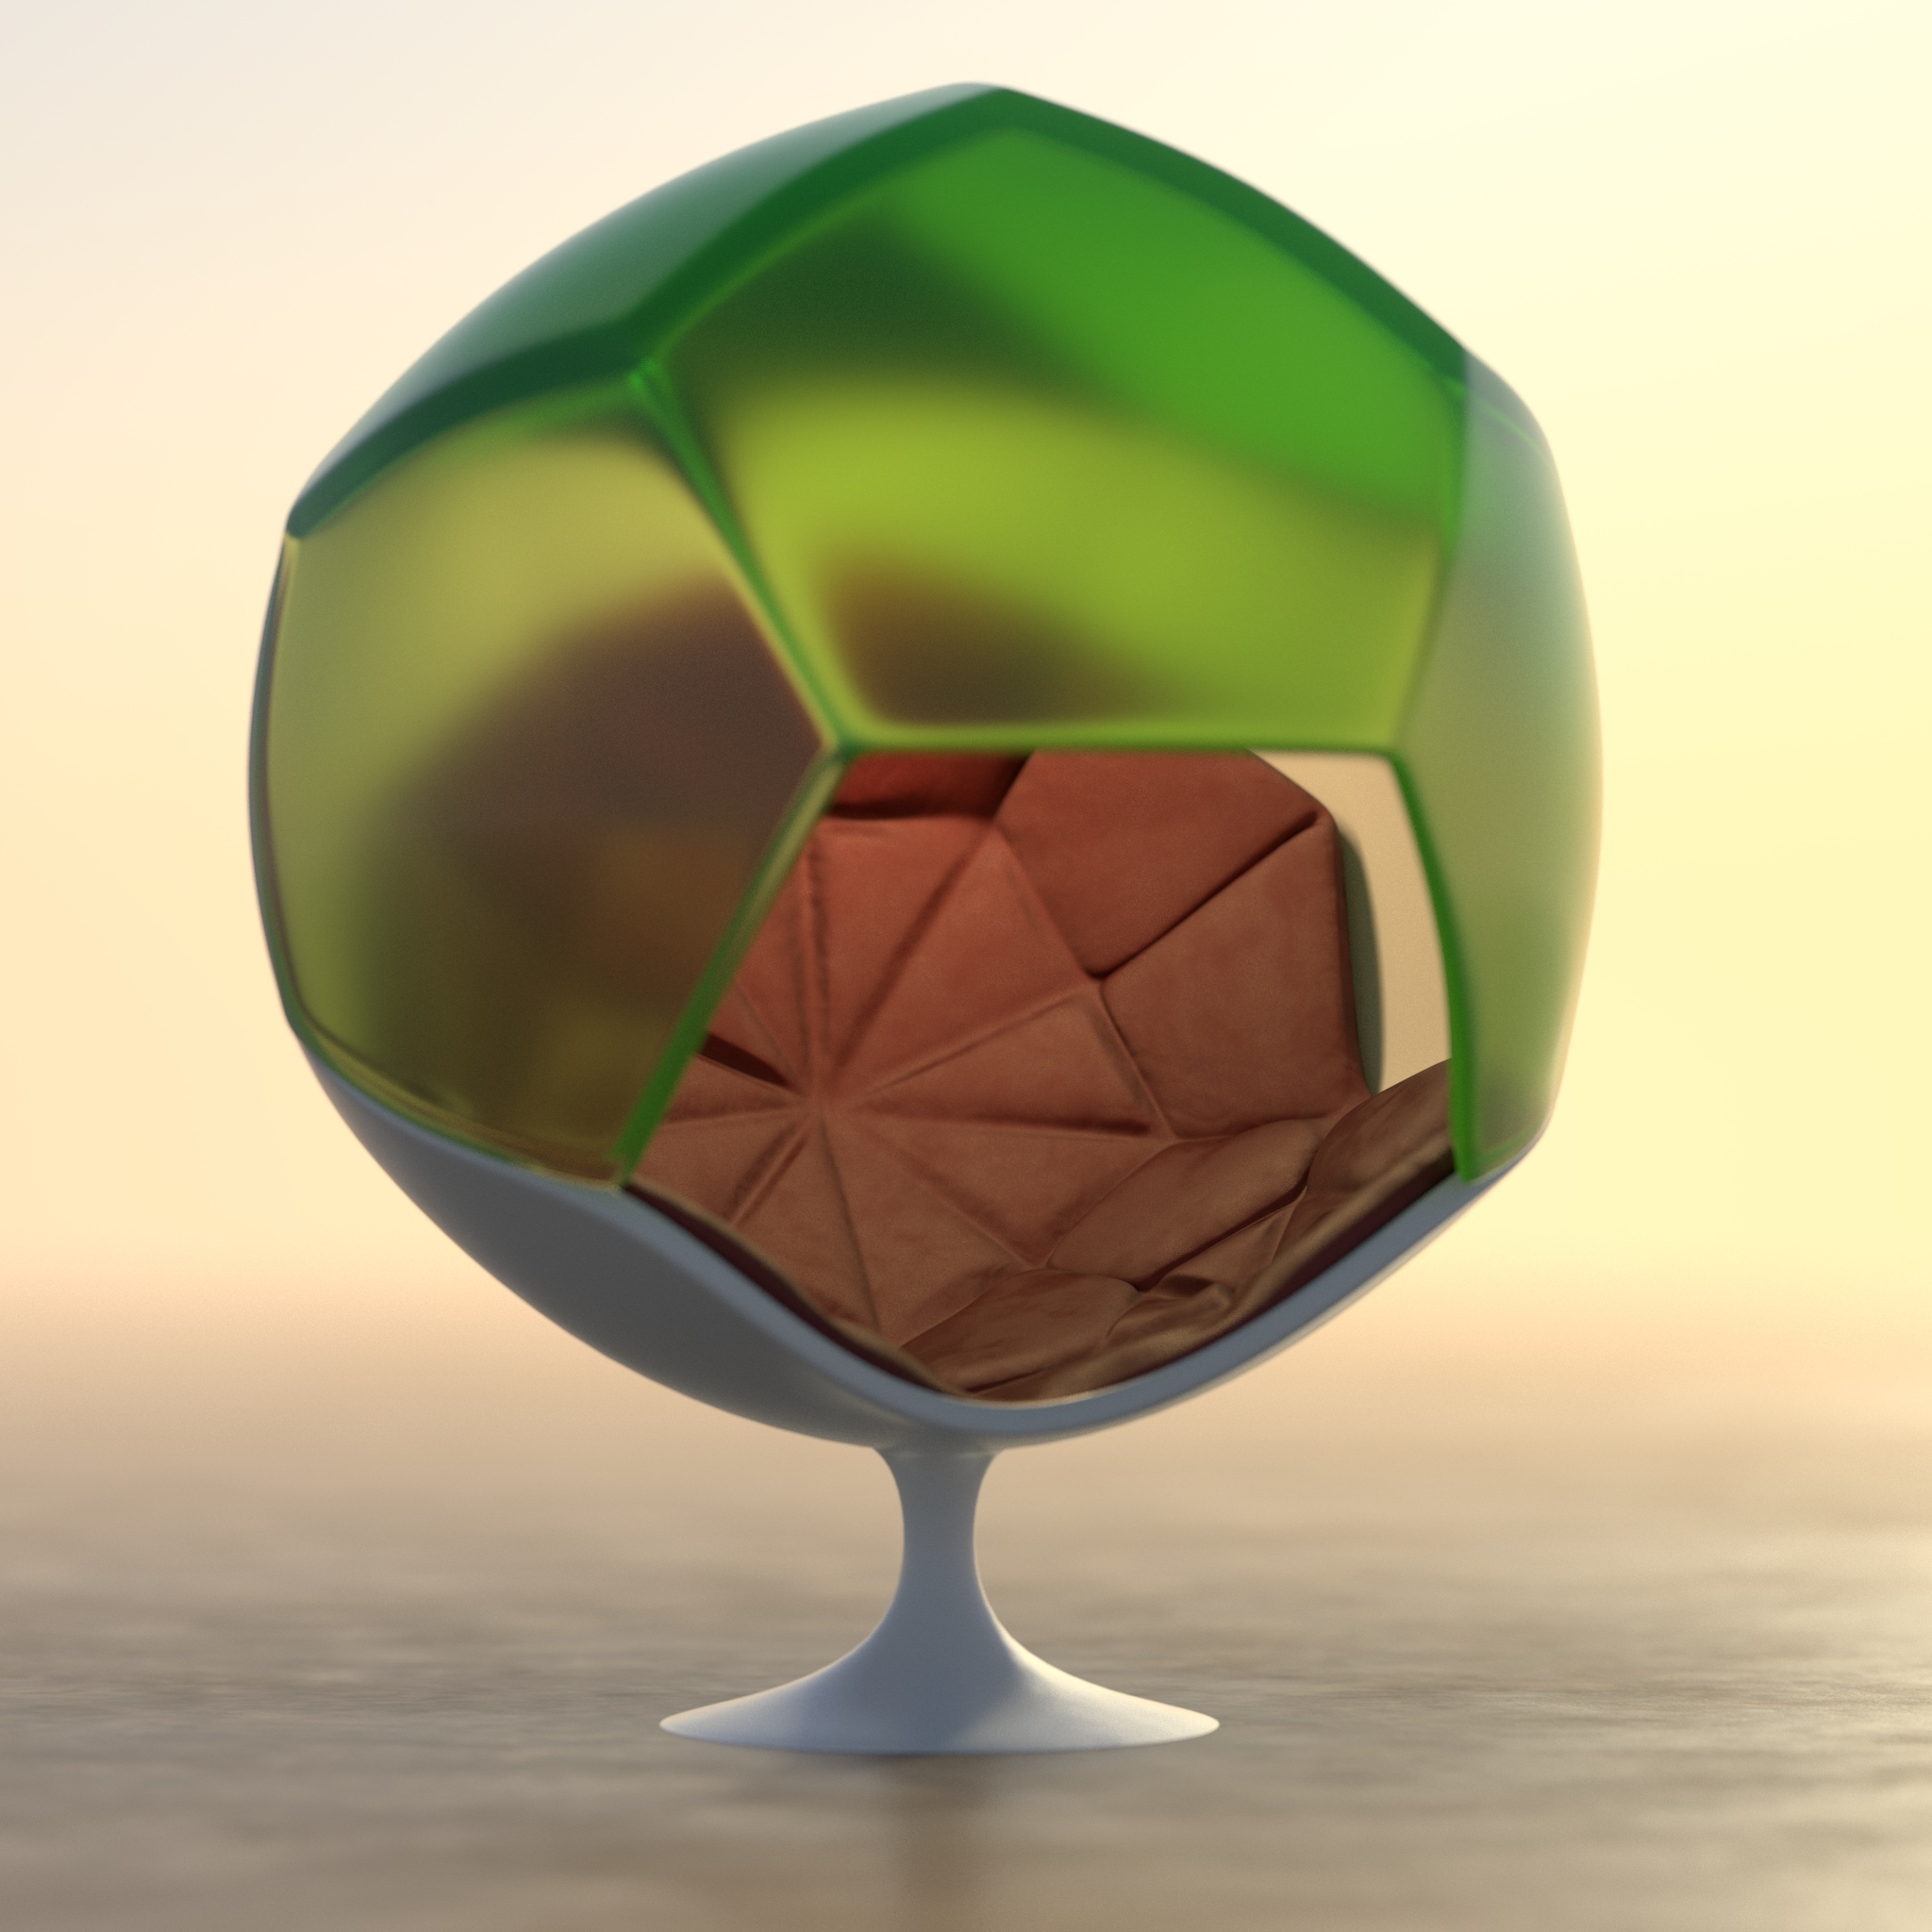
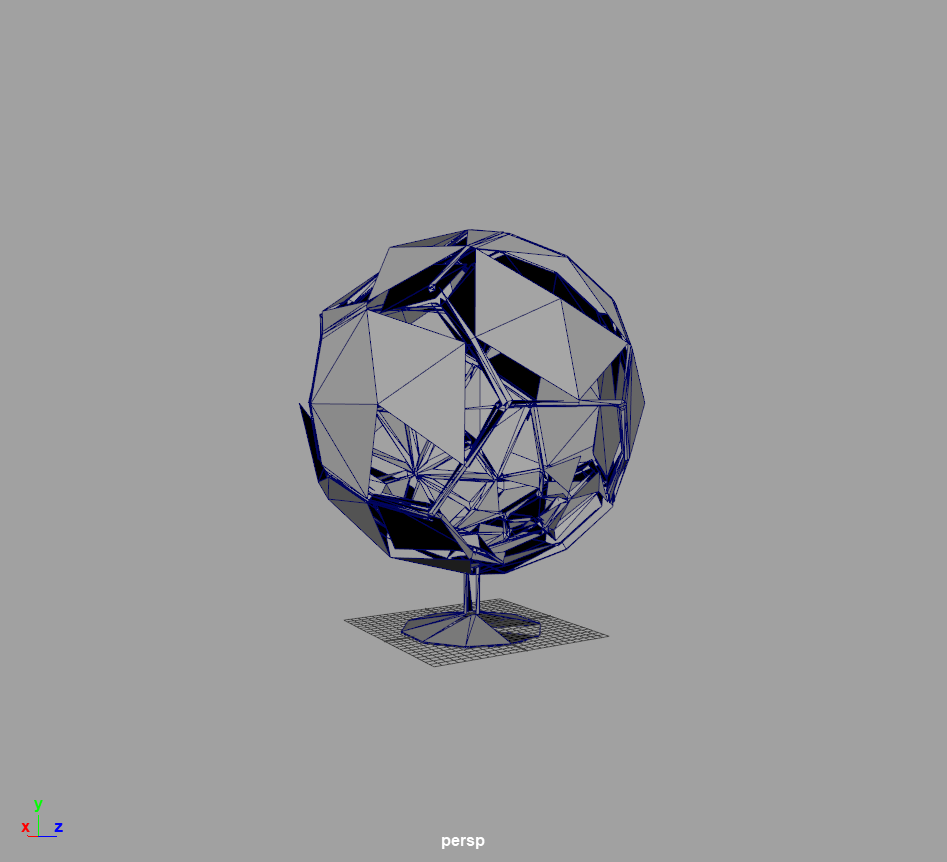
Display Mode
These options determine how the proxy will be displayed in the viewport.
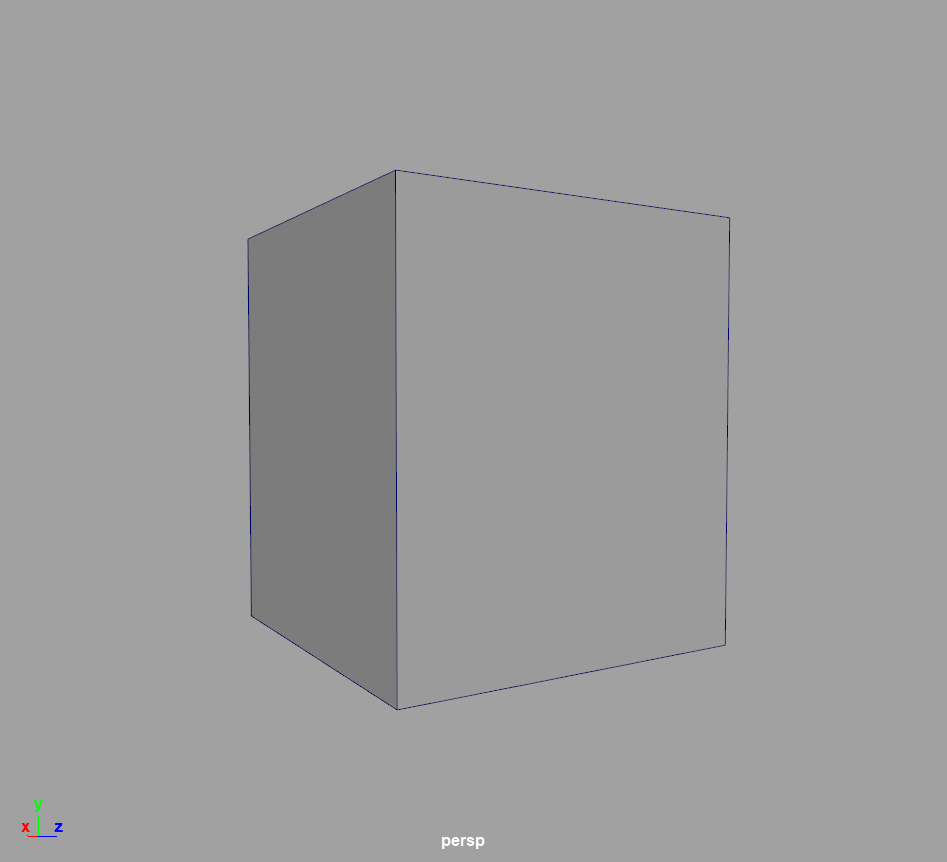
- Bounding Box: Displays a simple axis-aligned bounding box encompassing all the objects in the associated file.
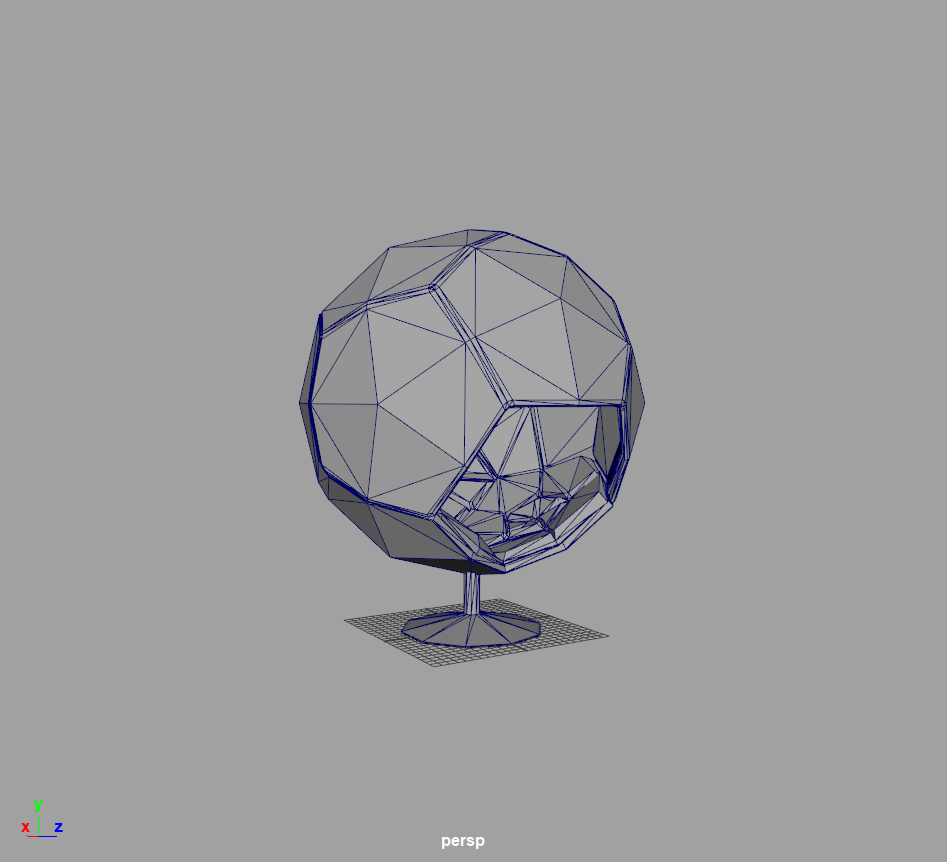
- Preview Mesh: Uses the geometry data directly from the file.
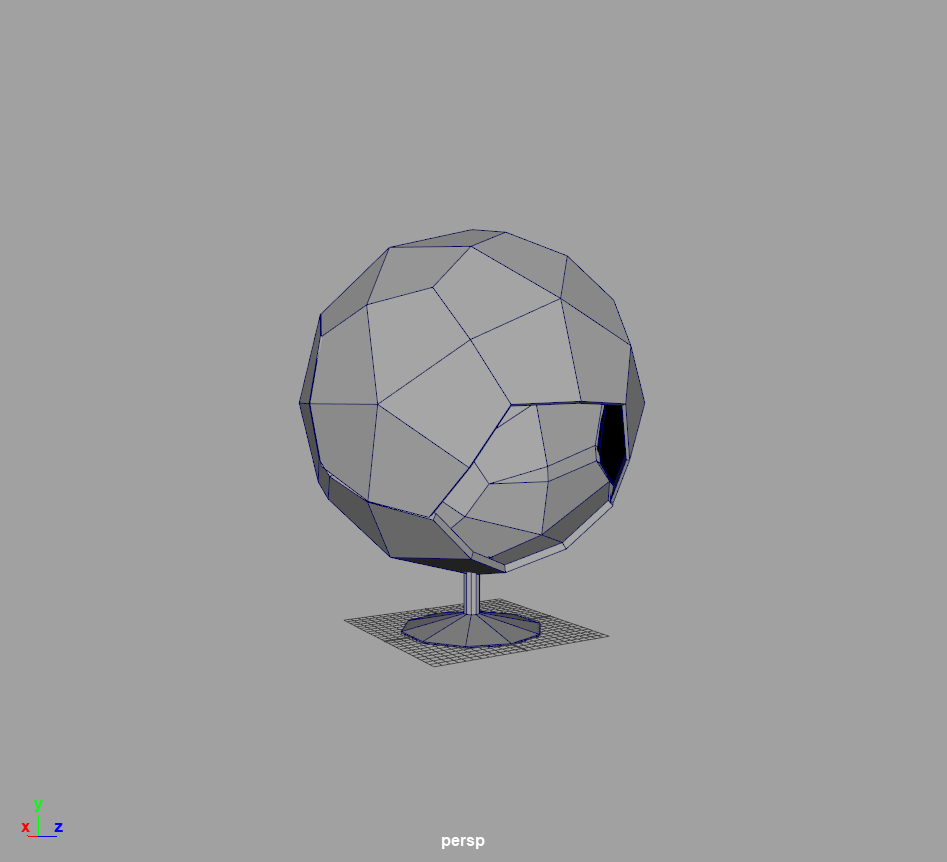
- Linked Mesh: Uses the geometry from the connected mesh or the proxy file's bounding box if no mesh is linked.
- Hide in Viewport: Completely hides the proxy from the viewport but the proxy will still render.
|
|
|
|
|
| Bounding Box
|
Preview Mesh
|
Linked Mesh
|
Hide in Viewport
|
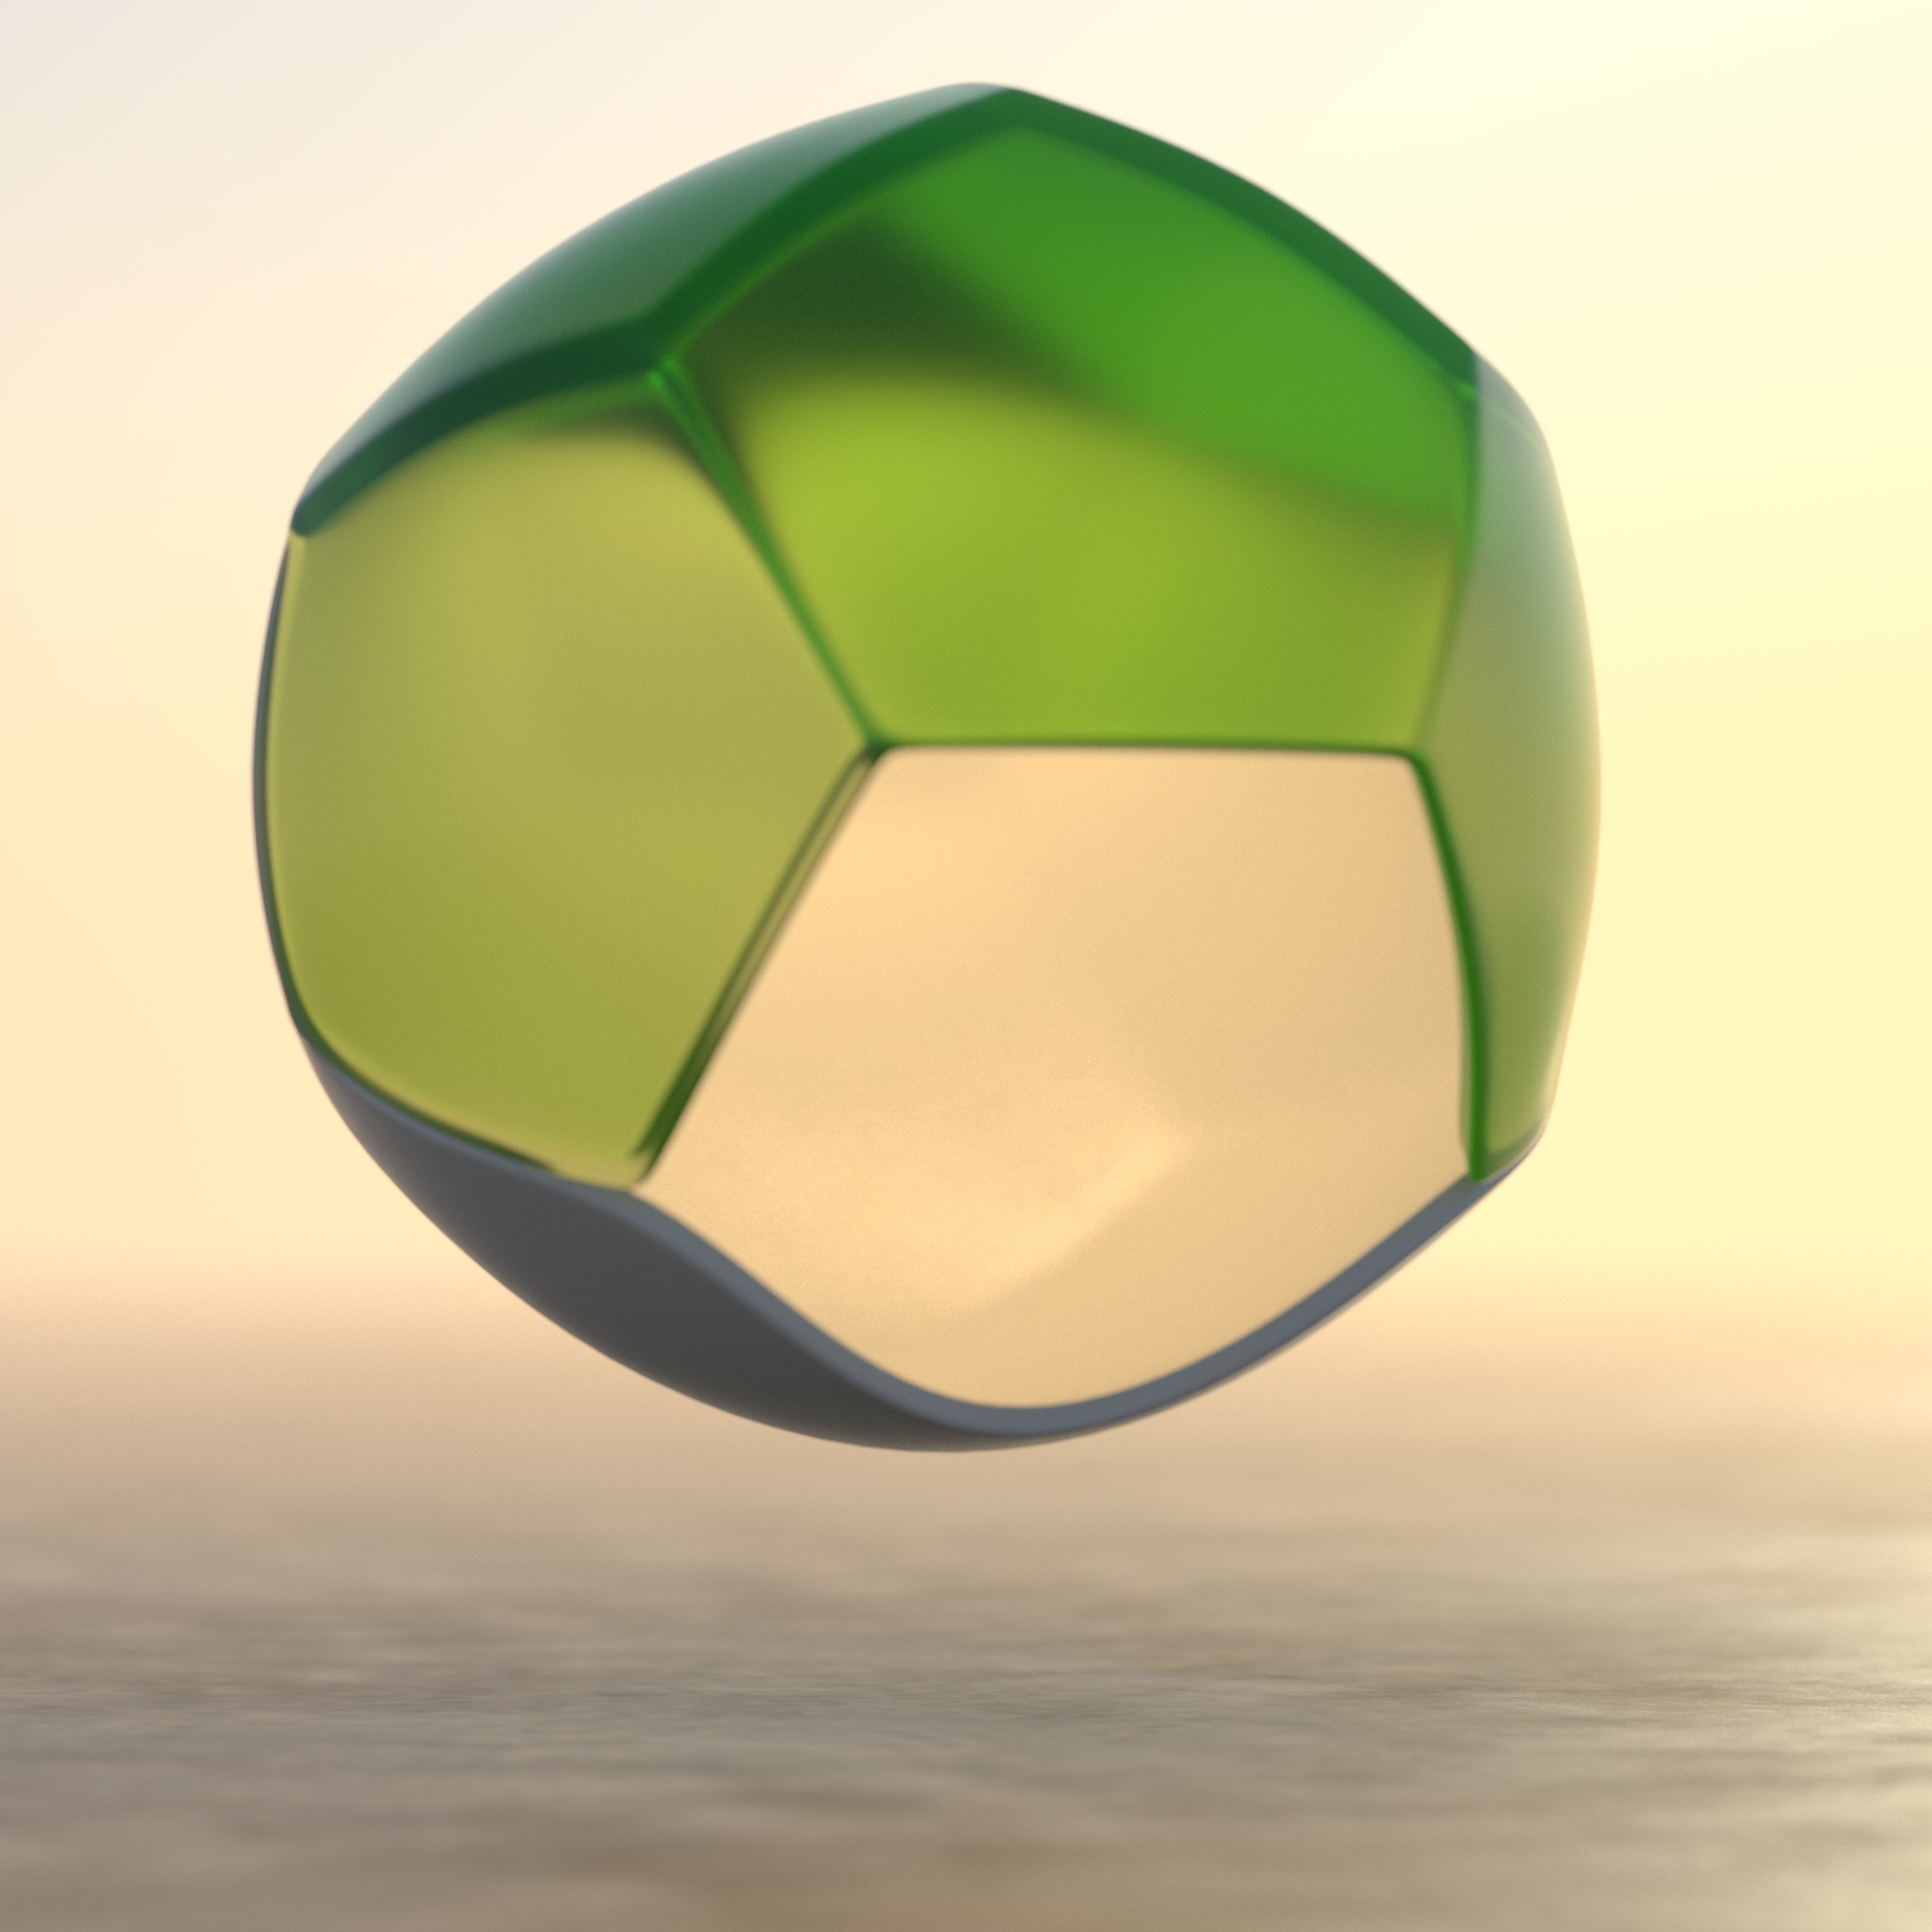
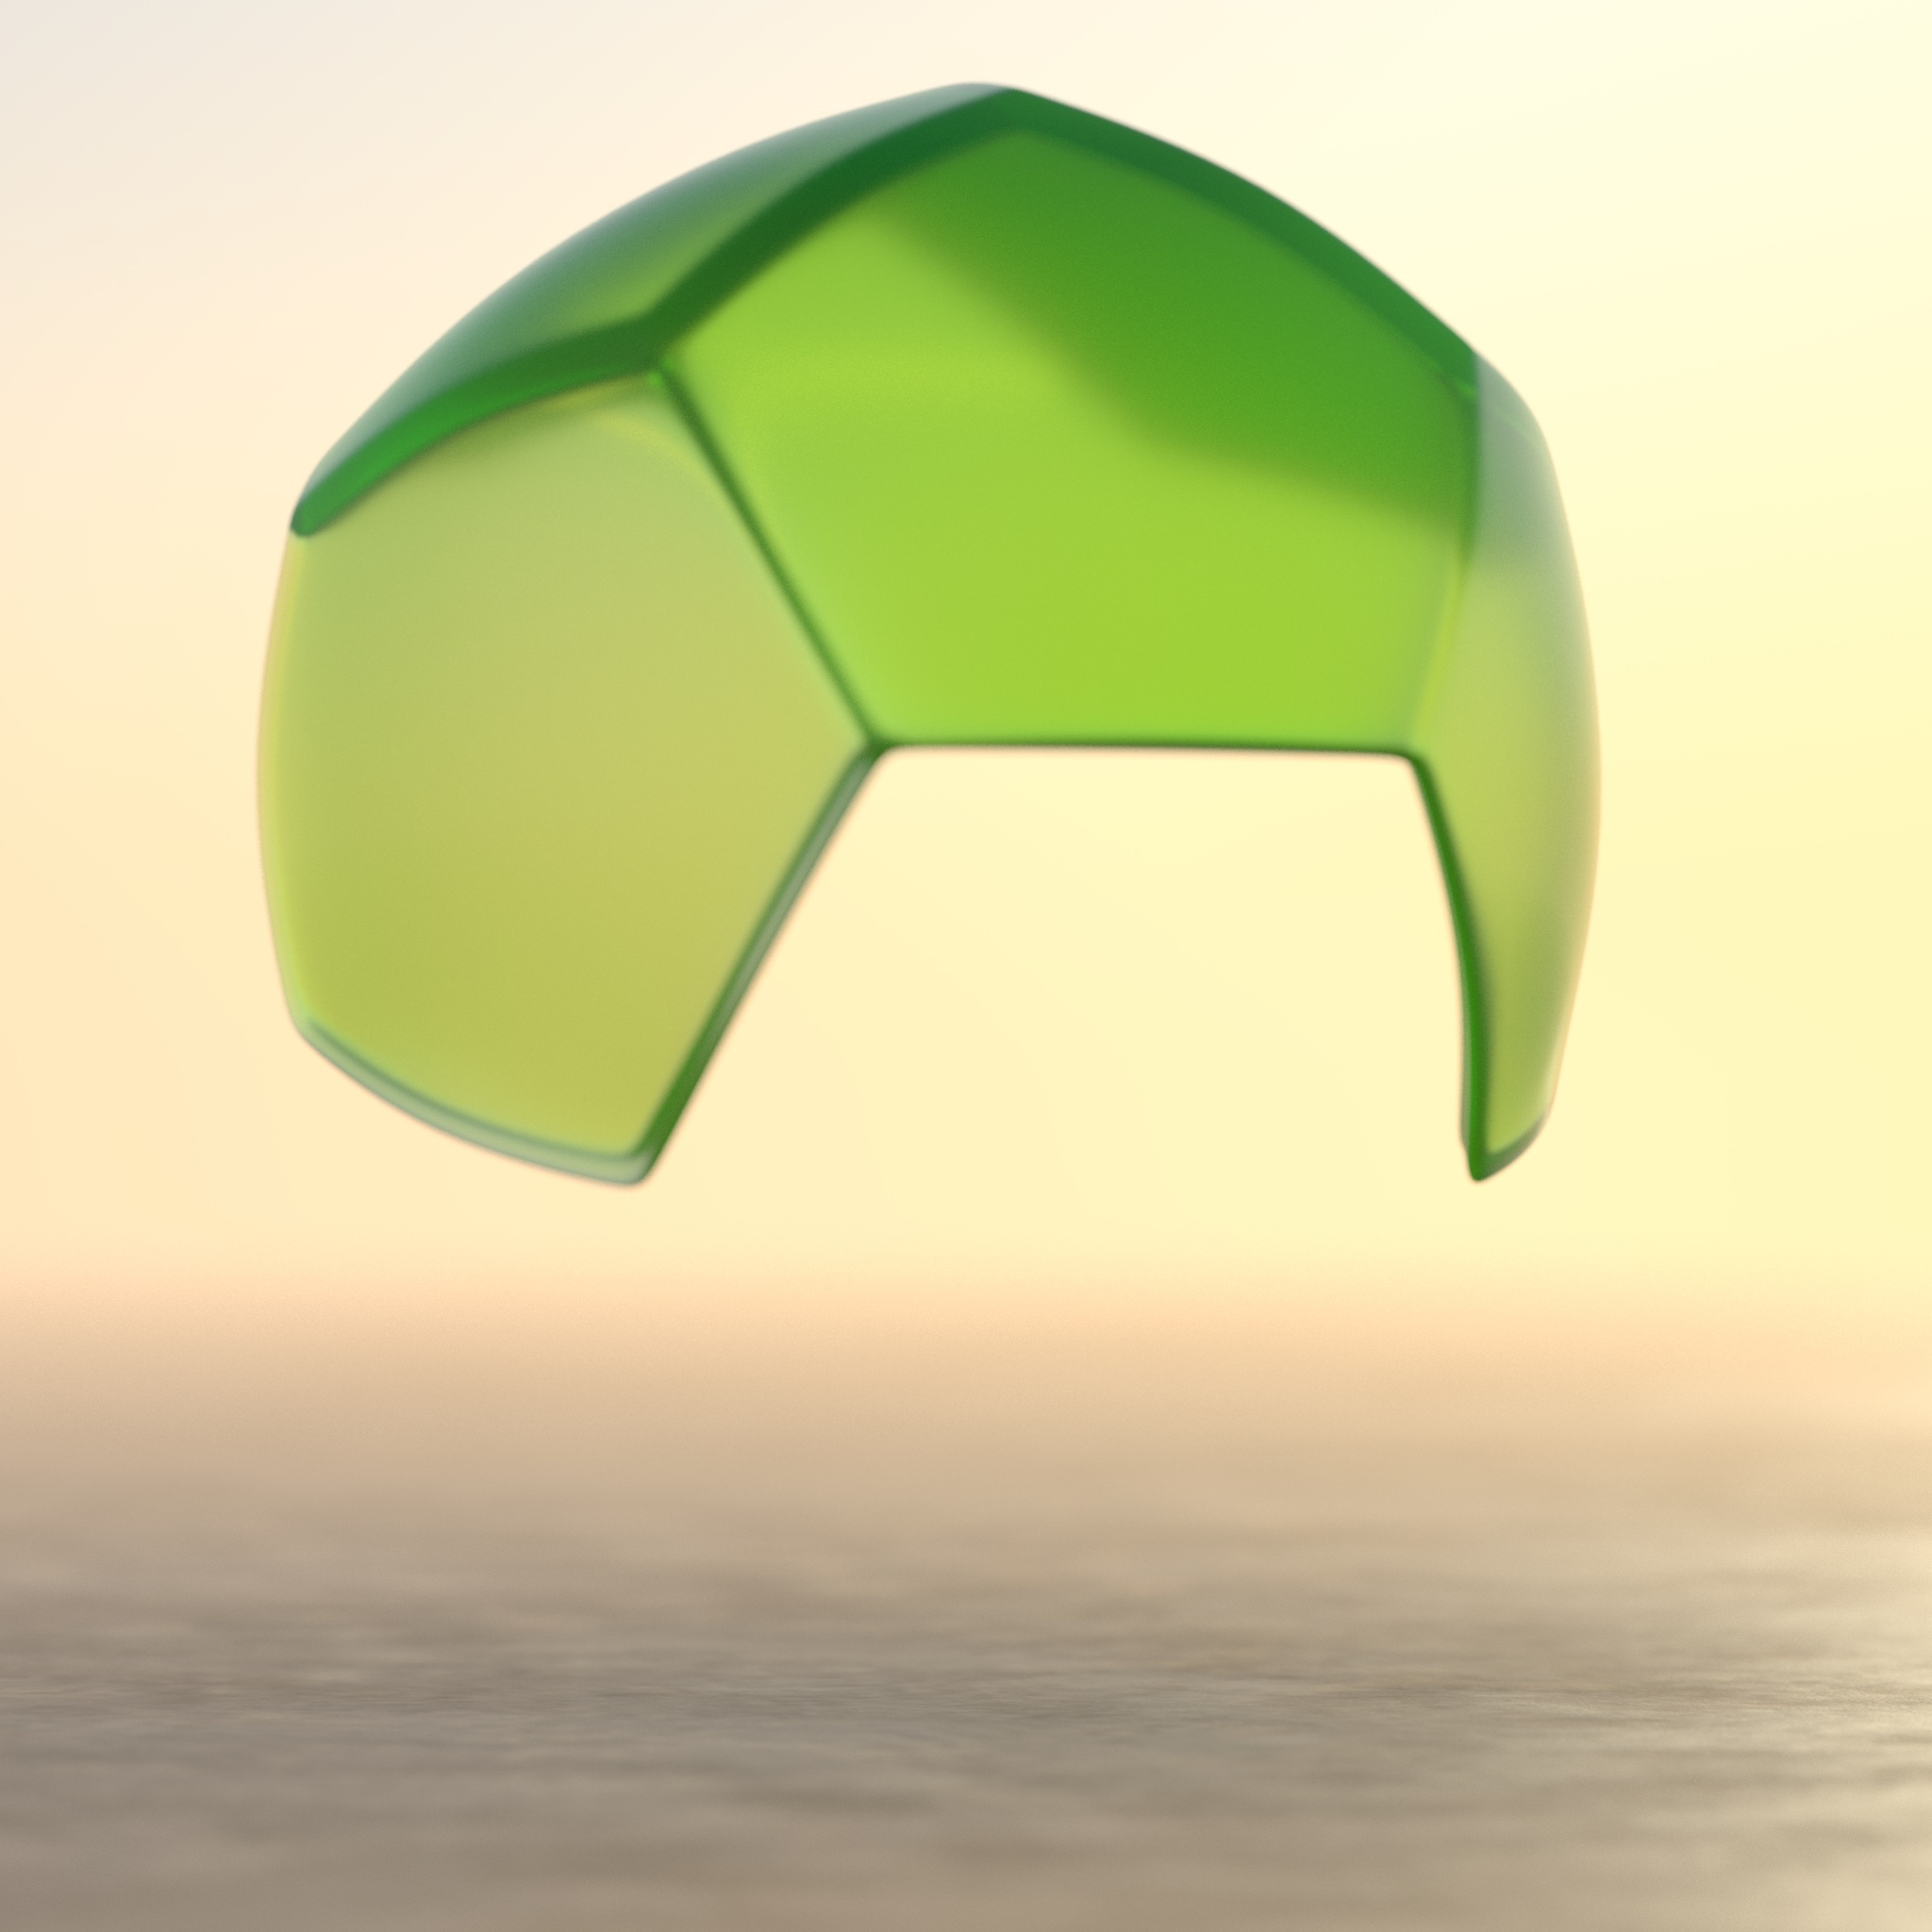
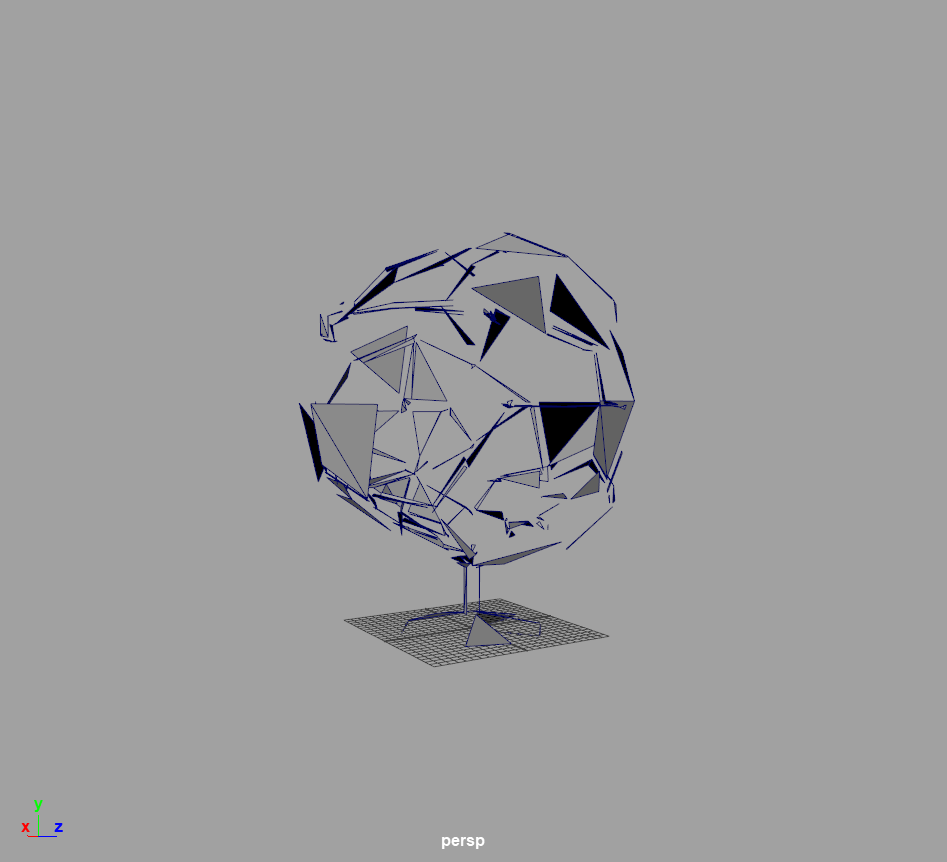
Display Percentage
This option controls the percentage of the geometry data to display in the viewport when Display Mode is set to Preview Mesh.
|
|
|
|
|
Display Percentage: 100
Display Mode: Preview Mesh
|
50
|
10
|
Material Mode
These options control how materials are handled for this proxy and allows from materials within the proxy file to be overridden with materials defined in the current scene.
- From Proxy: uses the materials and shaders that were assigned to objects when the proxy file was exported as-is.
- From Scene (assigned to placeholder): overrides all material assignments in the proxy file with the scene material assigned to the placeholder mesh.
- From Scene (name matching with prefix): allows individual materials in the proxy file to be overridden with scene materials by looking for matching names. See the section Overriding Proxies for additional details.
Prefix
This field specifies the prefix to look for when using the "From Scene (name matching with prefix)" material replacement mode.
Overrides
These checkboxes control whether the corresponding attributes of the objects inside the proxy file should be overridden by the same attributes of the proxy placeholder object. For example, if you want to assign an Object ID of 5 to the contents of a proxy file, you would set the Object ID of the placeholder object to 5 and enable the Object ID override.
- Object ID
- Visibility & Matte
- Tessellation & Displacement
- Trace Sets
- User Data
- Distance Units
- Custom Units
Unit Overrides
In Redshift 2026 and later, scene units are tracked for proxies at export and import. By default, Redshift automatically manages unit conversion when importing a proxy from a scene built at a different scale. For example, if a model was built and exported from C4D in centimeters but imported and rendered with a scene working in meters in Houdini, the proxy object is automatically scaled and rendered appropriately.
For added flexibility, the proxy object's unit can be overridden per-proxy allowing you to change the unit and scale so it's handled exactly how you want it. This scale can also be overridden for proxies created before Redshift 2026.
Parameters that used fixed units are not scaled with a unit scale change.
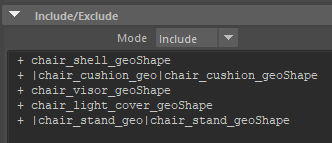
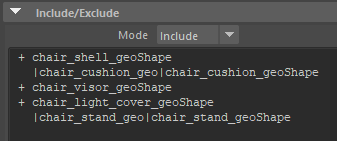
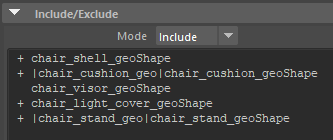
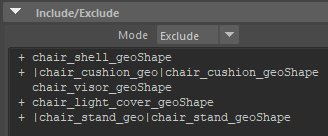
Include / Exclude
This section lets you select the objects contained inside the Redshift Proxy File and choose to include or exclude them on a per-object basis.
Mode
- Include: When set to Include only objects with a "+" next to them will be included and rendered.
- Exclude: When set to Exclude only objects with a "+" next to them will be excluded and they will not be rendered.
External Proxy References / How To Transfer Proxies
Given that Redshift proxies can contain anything in a Redshift scene, this means that they can externally reference image files (such as EXR, PNG, etc), volume grids (like OpenVDB) and even other proxy files!
These external file references are stored in Redshift proxies both as absolute paths and as relative paths. Let's look at that with an example.
Let's say that a proxy file
proxy.rs is exported in folder
C:\MyProxies and it contains a shader that references texture
mytexture.png which is under
C:\MyProxies\Textures
The folder structre would look like this
|
- [MyProxies]
|
--- proxy.rs
|
--- [Textures]
|
---- mytexture.png
Within the proxy.rs file, the reference to mytexture.png will be saved both as:
- An absolute path filename, i.e
C:\MyProxies\Textures\mytexture.png
- A relative path, i.e
.\Textures\mytexture.png
Redshift contains file paths both as absolute and relative in order to facilitate the "transporting" of proxy files and their external references.
To explain with an example: let's say that the above proxy and texture (and their folder structure) were to be copy/pasted on folder
C:\MyOtherProxies and the original
C:\MyProxies folder was deleted.
The absolute path would no longer work because there's no
C:\MyProxies\Textures\mytexture.png file anymore! (we deleted the folder!)
But the relative path would still work! Because, relative to
C:\MyOtherProxies\proxy.rs there would still be a
.\Textures\mytexture.png path.
Now let's consider a proxy file that references a texture folder on a completely different drive! For example:
[C:]
 |
 - [MyProxies]
 |
 --- proxy.rs


[D:]
 |
 - [Textures]
 |
 ---- mytexture.png
Unfortunately, in such a case it's no longer possible to construct a relative path because path
C:\MyProxies\proxy.rs and path D:\Textures\mytexture.png have no common "root"
So, using this folder layout, if the textures were to be moved to a new drive (say, E:\), then the proxy would no longer be able to find them.
In such cases, we recommend using Redshift's path override environment variables
If your texture folder used to be D:\Textures and now it's E:\Textures, you can use the REDSHIFT_PATHOVERRIDE_FILE or REDSHIFT_PATHOVERRIDE_STRING to tell Redshift to turn E:\Textures.
The online documentation page explains how to do that with an example.
If you don't know what external references a proxy might contain, you can use redshiftCmdLine's -printdependencies switch (followed by the proxy's filename) to list these.