Table Of Contents
Intro
|
|
|
|
| Scene with all lights affecting all objects | Same scene demonstrating light linking | Same scene demonstrating shadow linking |
By default every light in a scene illuminates and casts a shadow of every object in a scene. However there are times when you want specific lights to only affect certain objects. Even further than that you might want a certain light to illuminate an object without casting a shadow.
Light linking lets you control the affect a light has on your scene objects on a per-object basis.
Shadow linking allows you to break the casting of shadows from lights on a per-object basis.
Each of these methods is covered in detail below.
Volume objects are not compatible with light linking.
Light Linking
The example scene below has a simple lighting setup with only 3 lights: a visible red, green, and blue light that are currently affecting all the objects in the scene.
Example scene with all lights affecting all objects
This all white scene is helpful in interpreting what is happening further down the road when we start introducing some light linking into the scene. As you can see in the image above every object is white due to the red, green, and blue light mixing together. The slight color shifts here and there are simply due to the slightly different light positions. It is important to remember that in all the examples below all 3 lights are always linked to the ground object.
In Maya there are several ways to control which lights affect which objects. You can use a GUI with Maya's Light-Centric or Object-Centric Relationship Editors. Alternatively you can quickly make or break light links by selecting lights and objects and then clicking the corresponding menu option "Make Light Links" or "Break Light Links" as pictured below. You can also quickly select the objects or lights affecting each other when you have one of them selected with "Select Objects Illuminated by Light" or "Select Lights Illuminating Object."
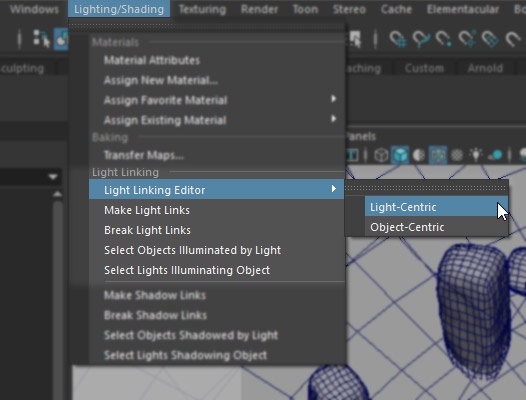
Maya's Light Linking options
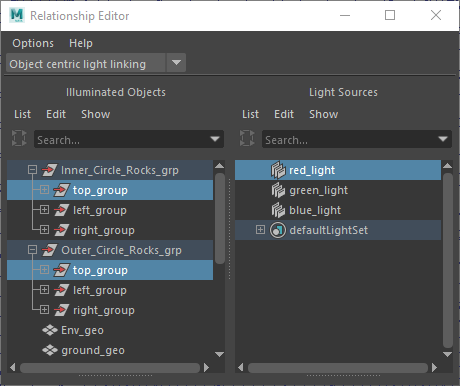
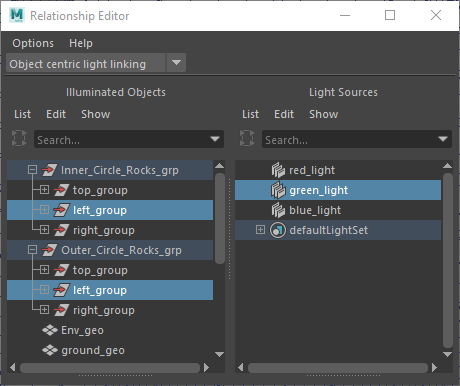
The examples below will be demonstrated by using the Object-Centric Light Linking Editor, however the Light-Centric editor is functionally the same.
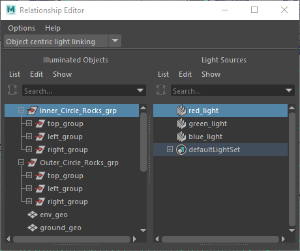
Using the Object-Centric Light Linking Editor the standing rocks in the example scene have now been linked to the 3 different lights as pictured below:
|
|
|
|
| Red light linking setup | Green light linking setup | Blue light linking setup |

Example scene with the light linking setup above
As you can see above, the rocks have been split up into thirds each with their own light exclusively affecting each third. The ground object remains affected by all 3 lights which is why the shadow color of each rock section is the additive result of the remaining lights still casting in this area. For example, the red rocks at the top of the image are receiving light and casting shadows from the red light alone, however, the blue and green lights are still casting light in this shadowed region resulting in cyan colored shadows.
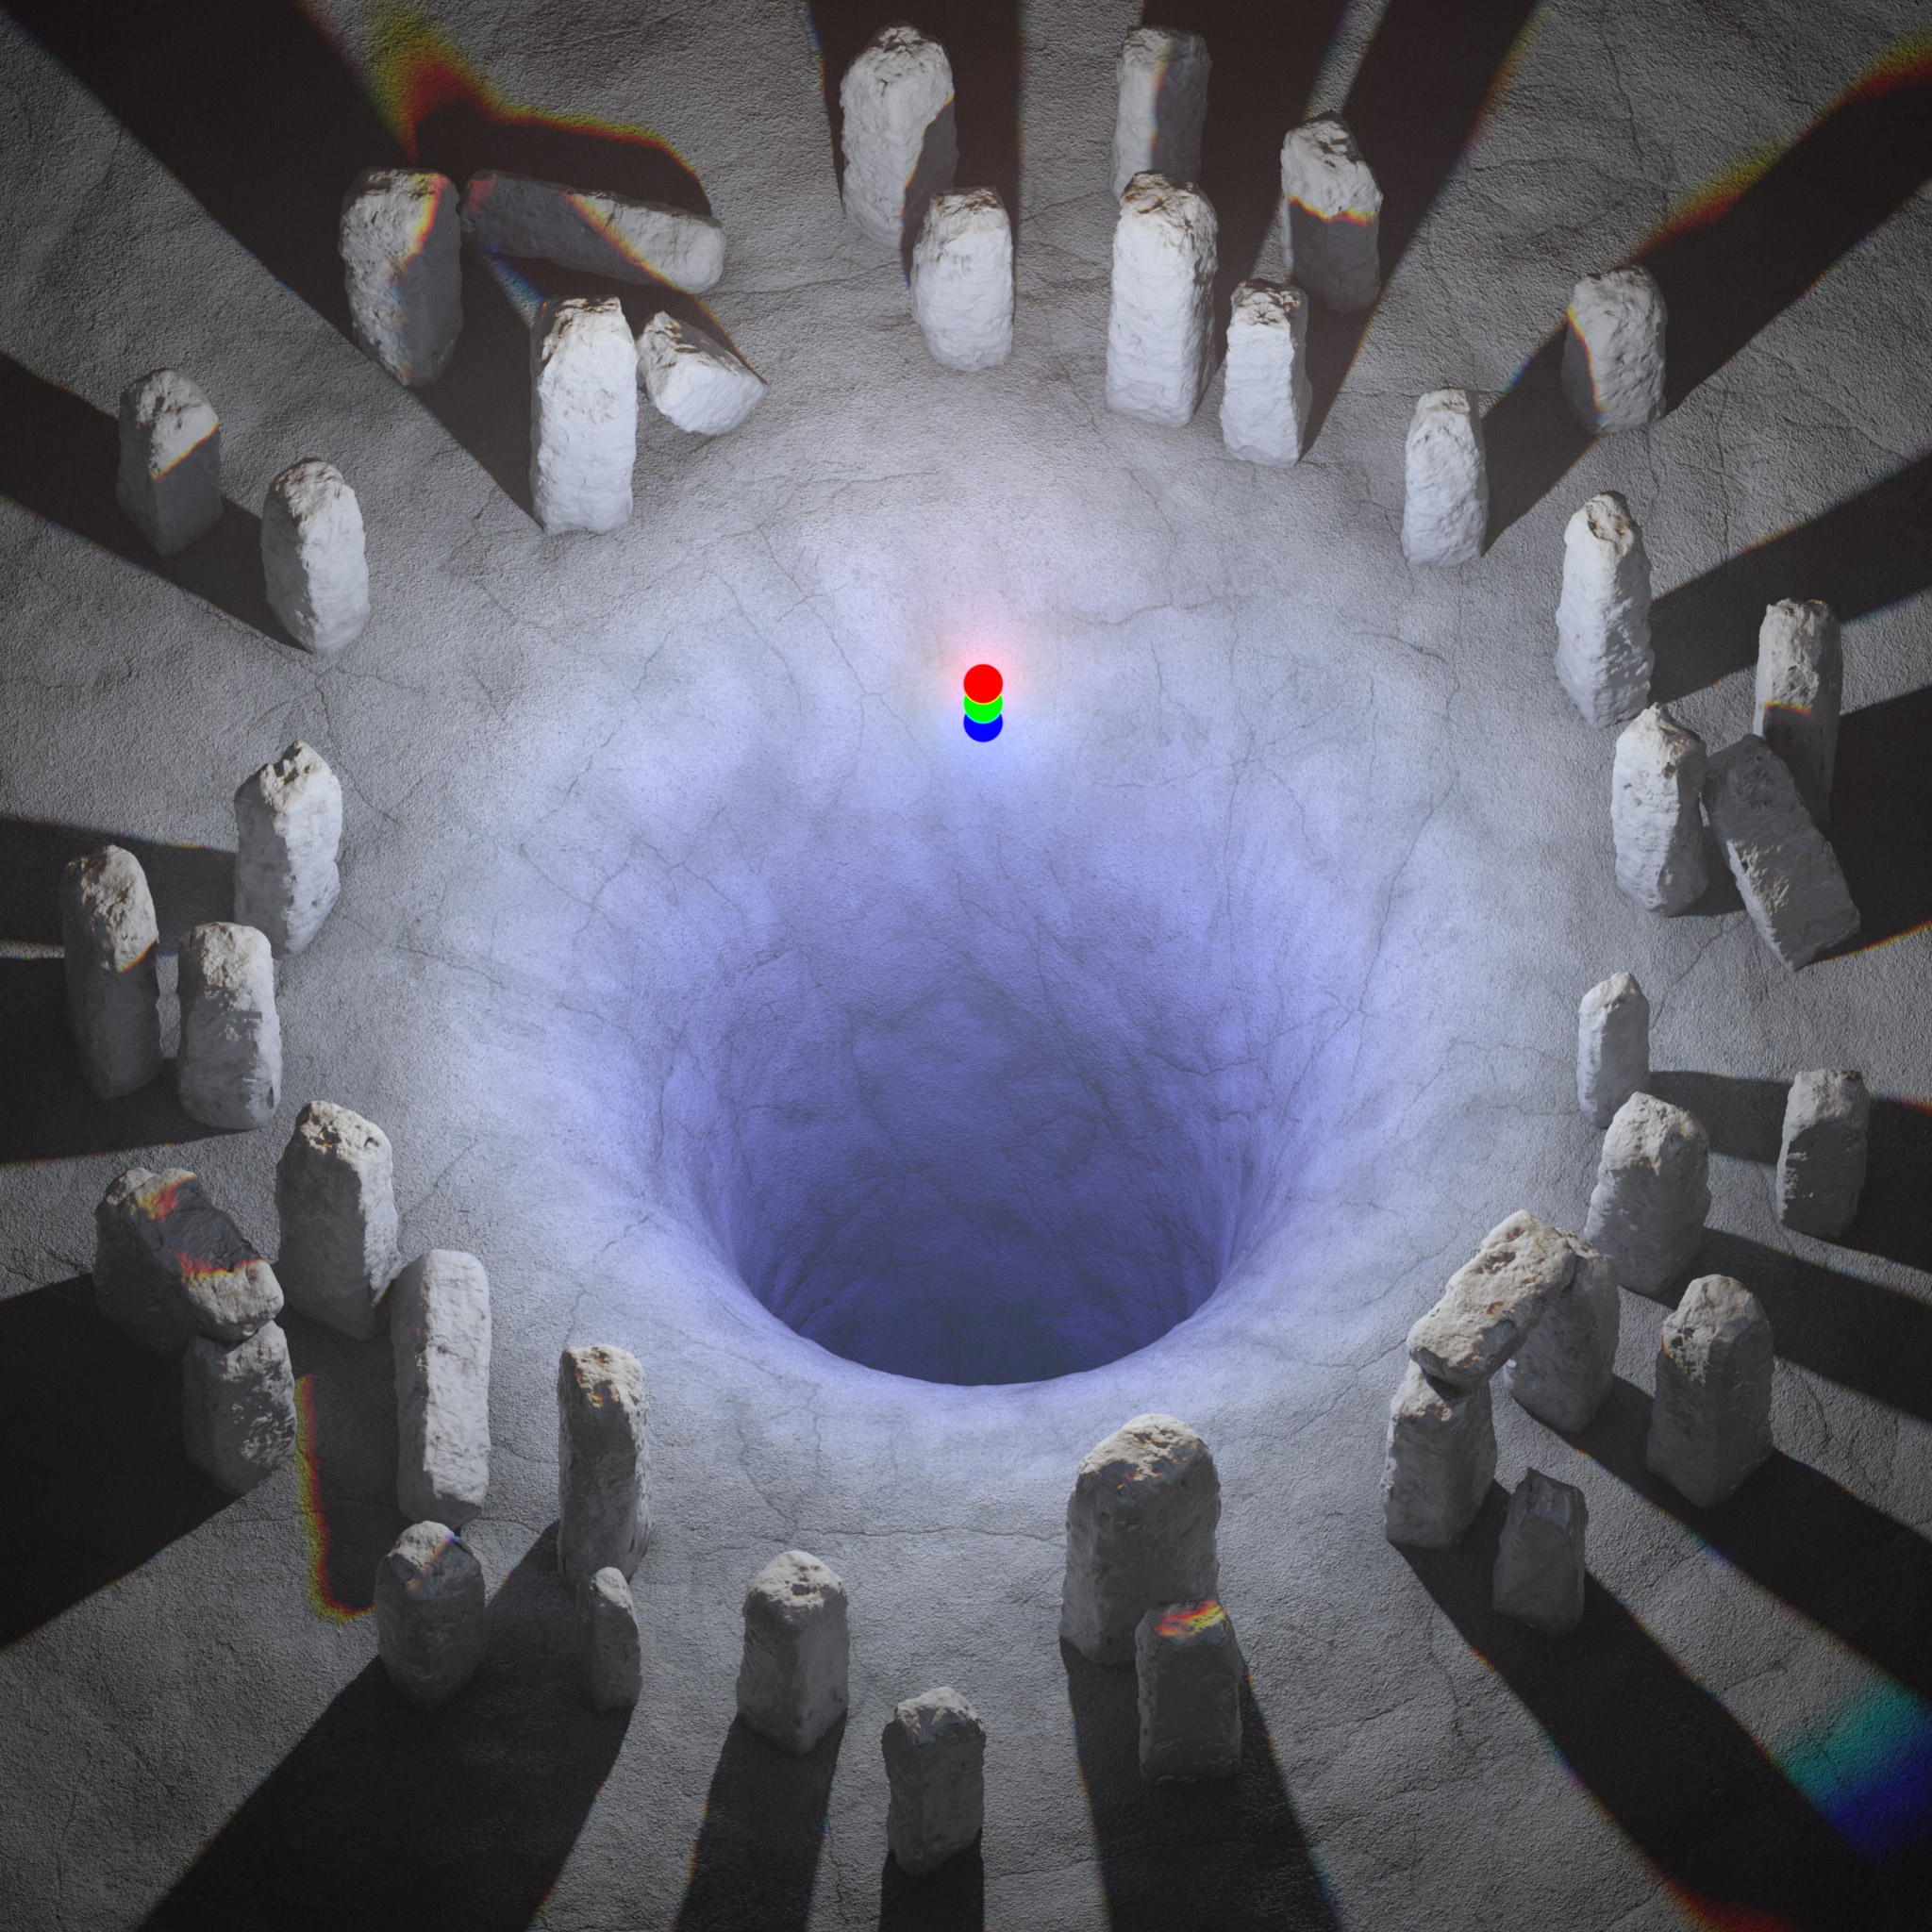
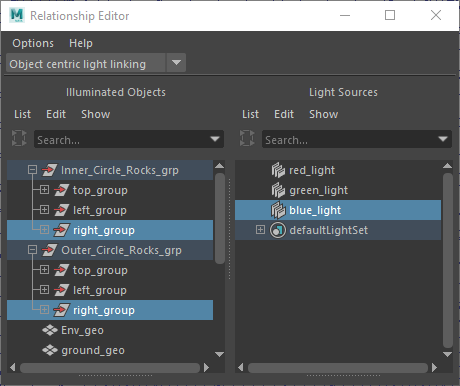
For another example, the inner circle of rocks and outer circle of rocks will be linked to completely separate lights to demonstrate another potential side effect of light linking. The inner circle of rocks is linked to the red light and the outer circle is linked to the green light as pictured below while the blue light excludes all the rocks as pictured below:
|
|
|
| Red light linking setup | Green light linking setup |

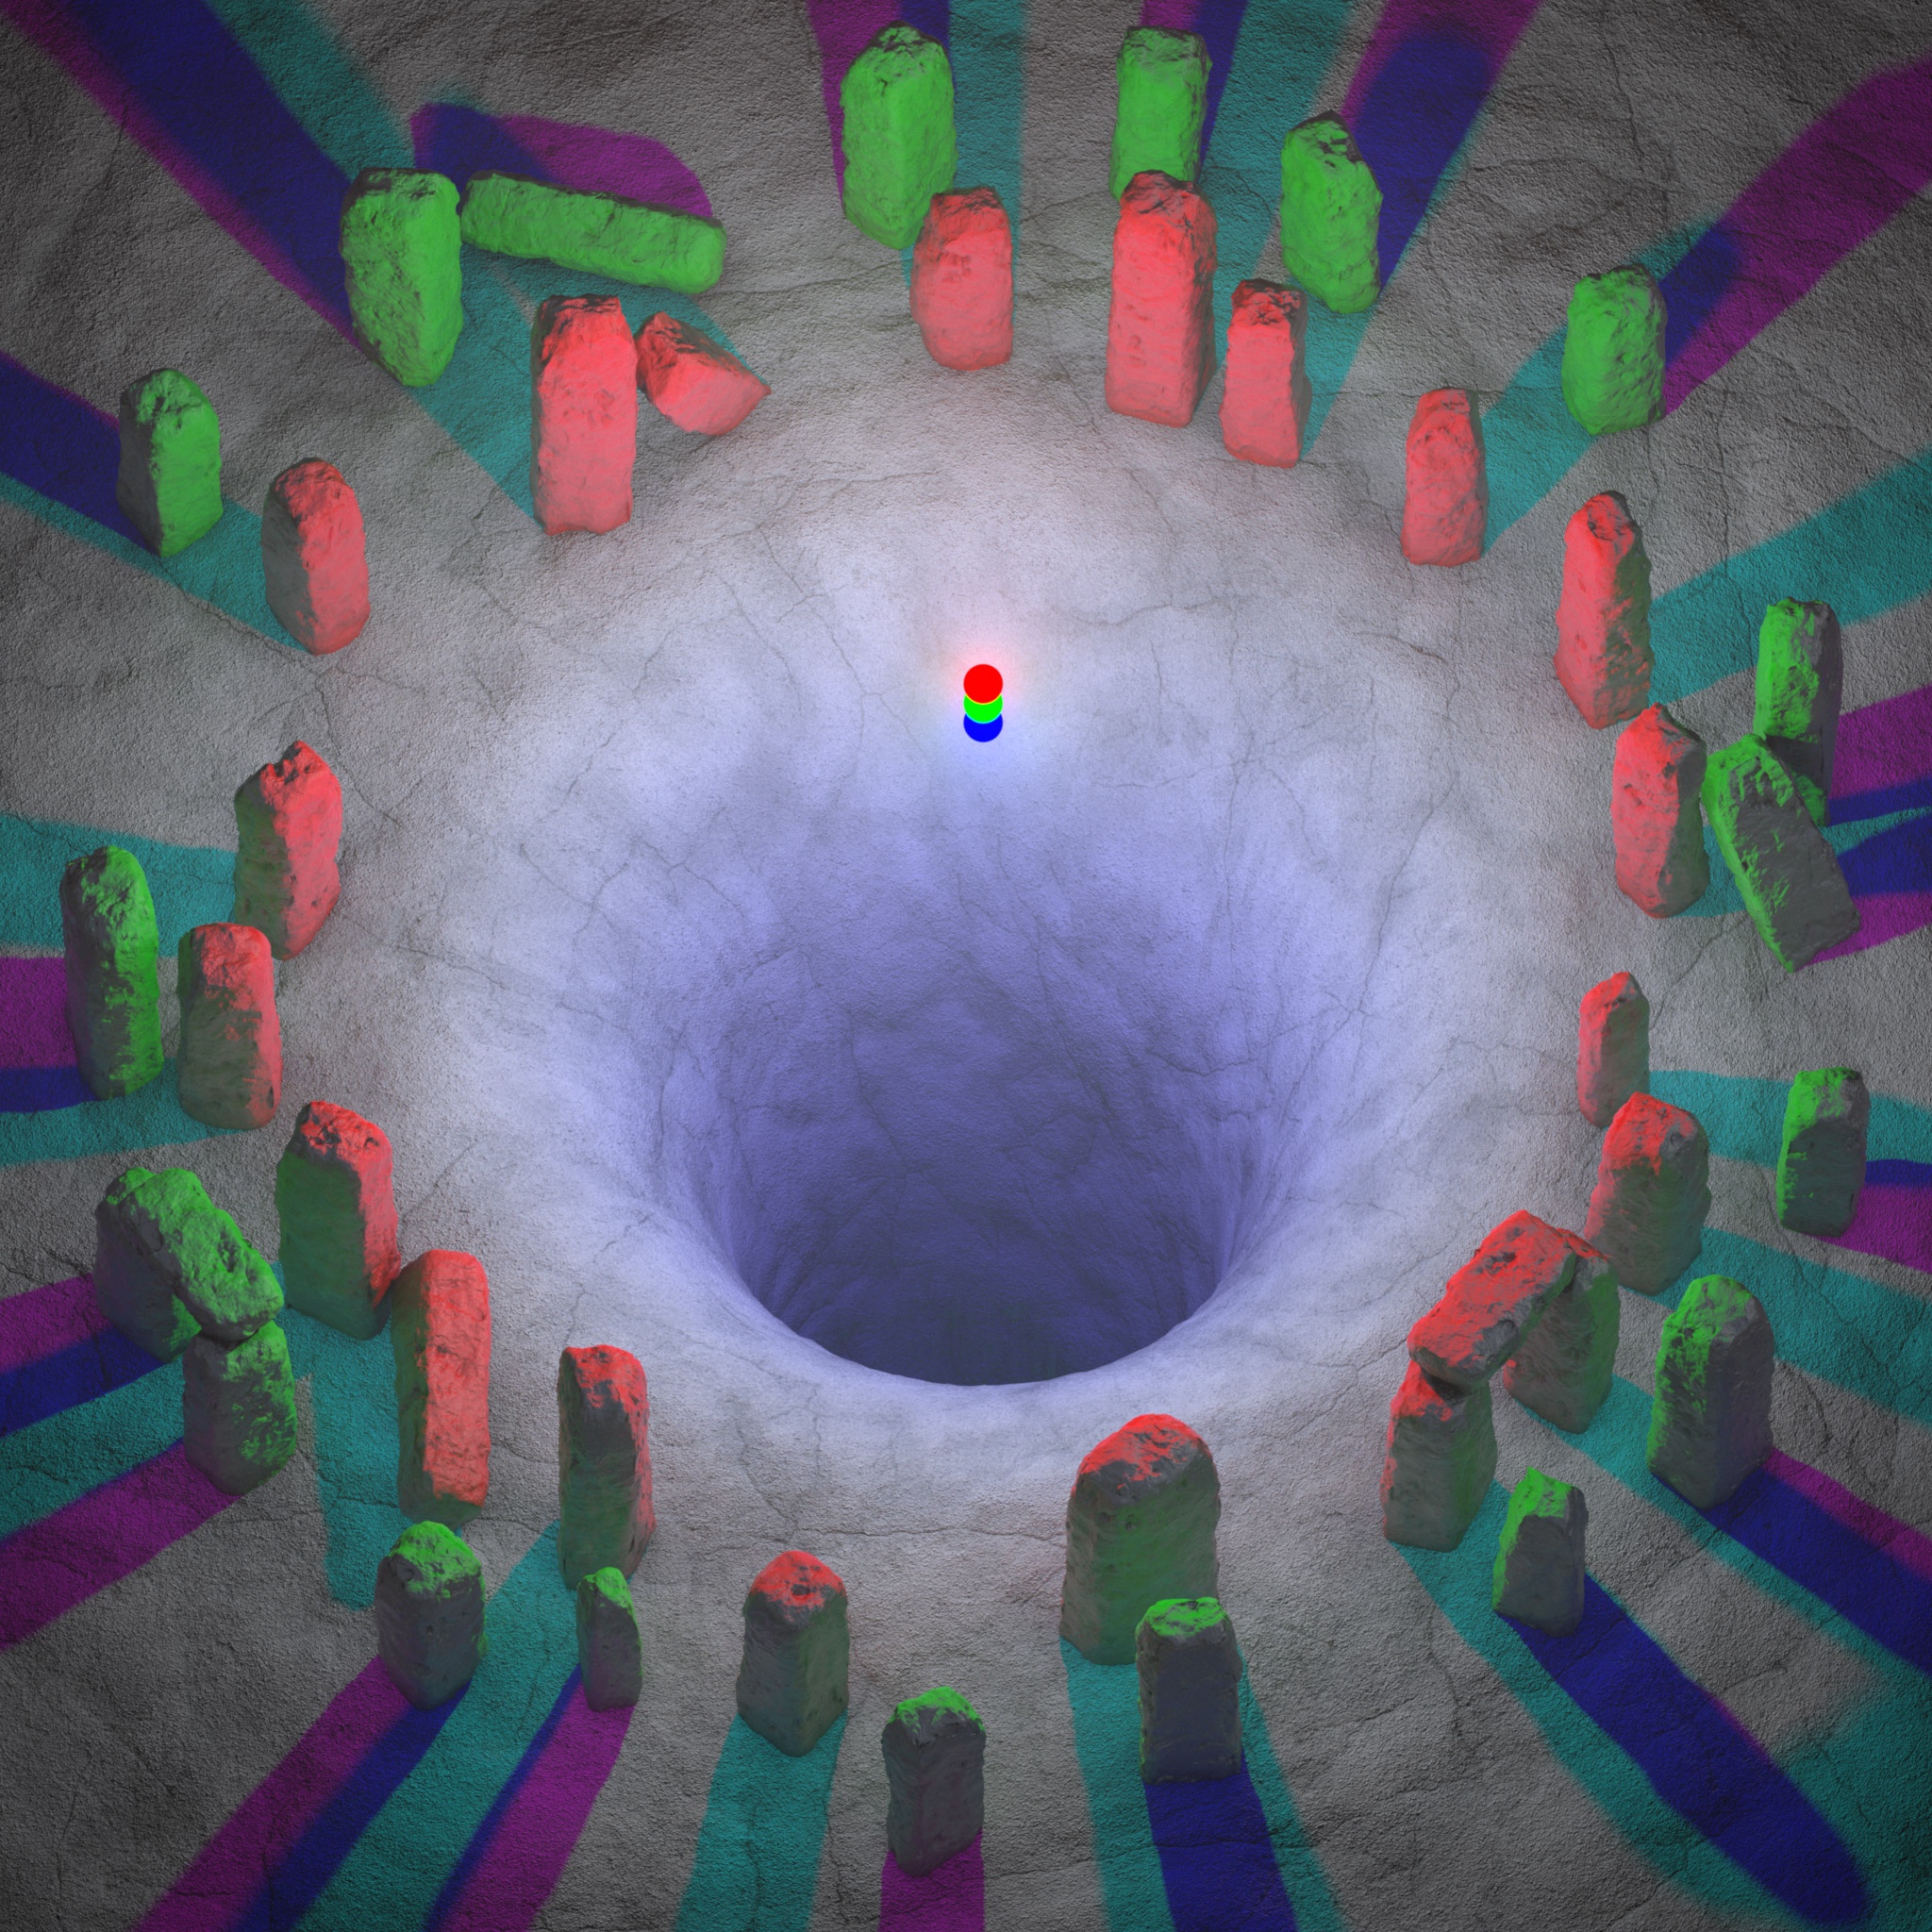
Example scene with the light linking setup above
Now with this light linking setup you can see we are getting double shadows and surreal lighting with these rocks. This is due to the fact that the green light is completely ignoring the inner circle of rocks and only illuminating and casting shadows of the outer circle of rocks. You can see that the green light hitting the outer rocks is even bouncing onto the backside of the inner rocks due to global illumination. The double shadows occur when the shadows from the inner red rocks and the shadows cast by the green light coincide with one another, resulting in the darker blue shadow seen in the picture above.
Shadow Linking
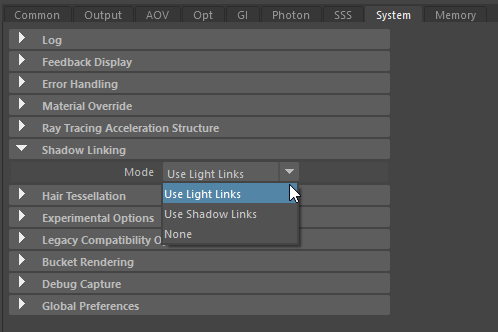
Shadow linking takes light linking a step further by being able to decouple light links from shadow links, allowing for even more custom control over your scenes. Shadow links can be controlled by the "Shadow Linking" option found in the Redshift Render Settings > System tab as pictured below:
Maya Shadow Linking options
Shadow Linking Mode
- Use Light Links: The default setting, lights cast shadows according to scene light linking.
- Use Shadow Links: Lights cast shadows according to shadow linking that is made or broken between lights and objects. By default lights casts shadows unless the shadow link is broken.
- None: All lights in a scene cast shadows on all objects by ignoring all light and shadow linking.
To compare the different Shadow Linking Modes we are going to start off with a baseline example to compare each result to. In the examples below, the only thing that will change is the Shadow Linking Mode, the light linking will remain the same.
The baseline scene makes use of light linking to split the rocks into thirds, each third is linked to one light exactly like the example used in the Light Linking section above.
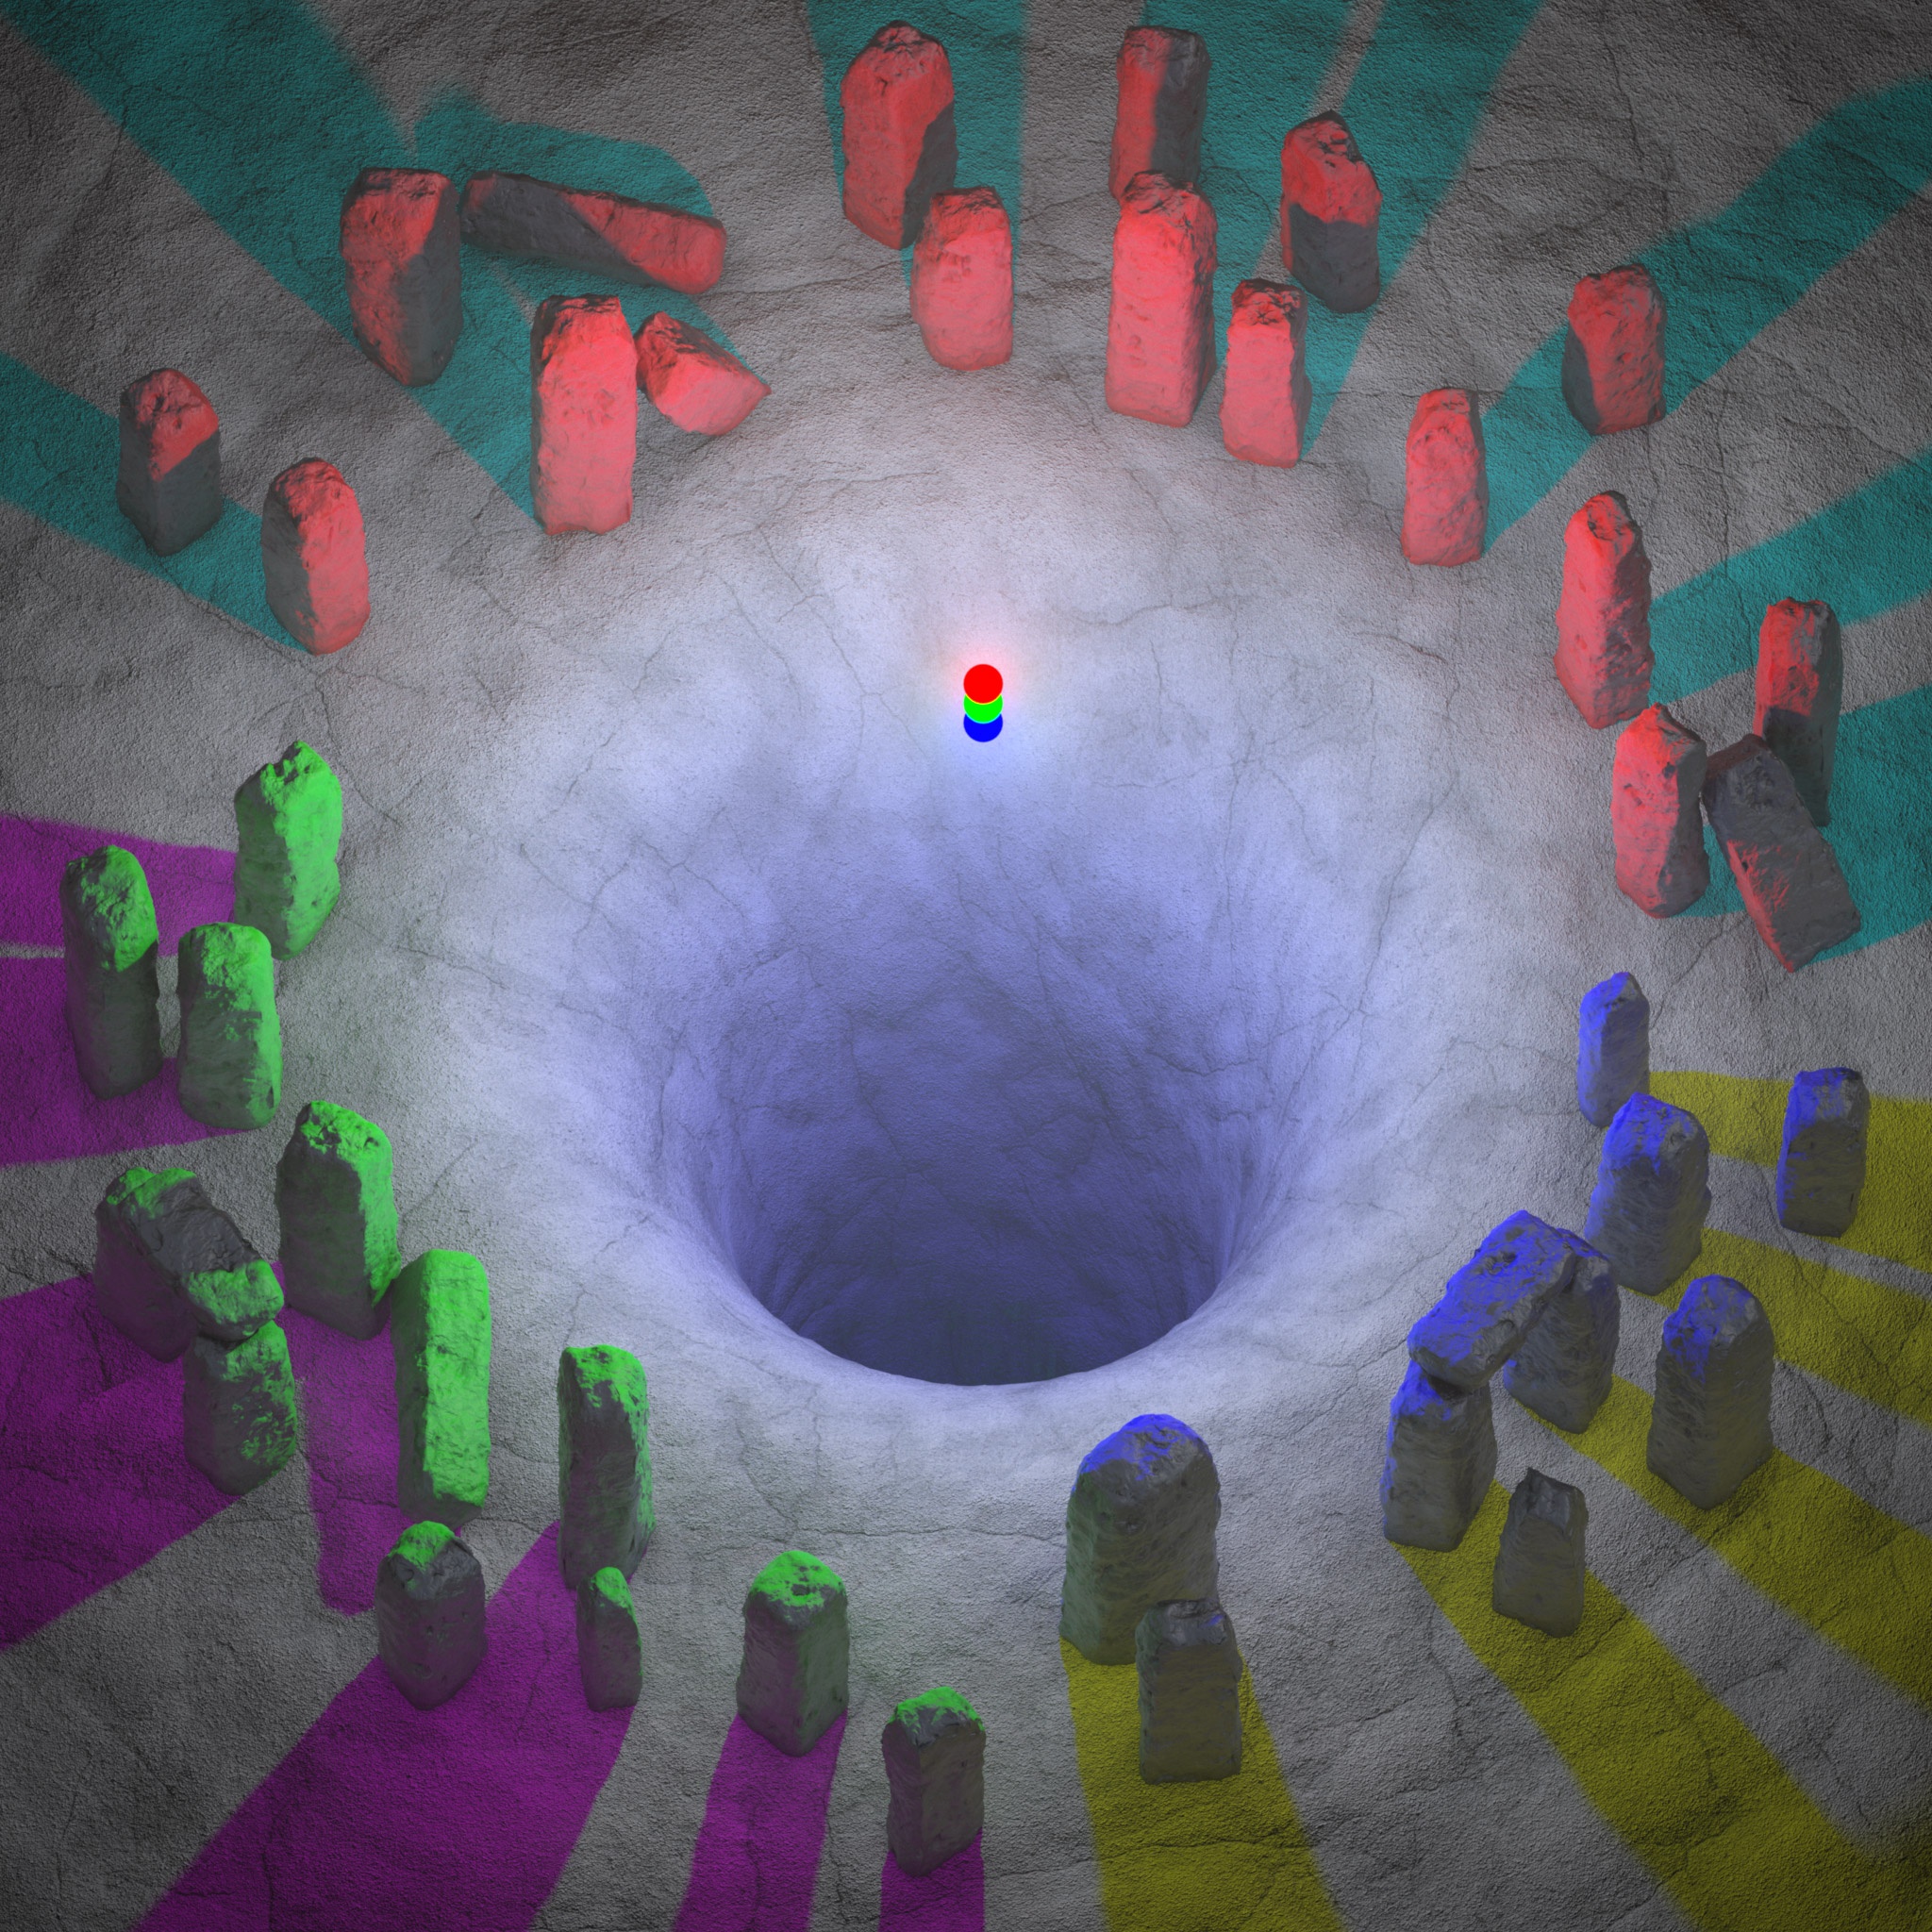
Baseline example scene using shadow linking mode: "Use Light Links"
In the next example we will start breaking shadow links from the existing light linking.
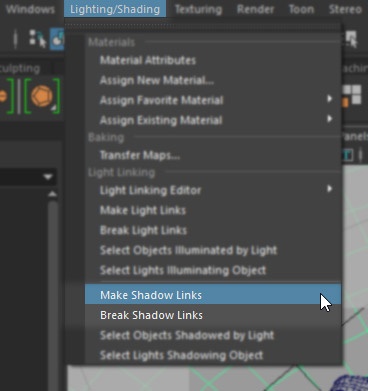
First we need to change the Shadow Linking Mode to "Use Shadow Links" and then we need to actually break the shadow links for the specific lights. To do so in Maya you have to select the relevant objects and the lights that you want to make or break connections and go to the Lighting/Shading menu and use the appropriate Shadow Linking options pictured below:
Maya Shadow Linking options
In the example scene below the shadow links have been broken for only the light that provides illumination for that group of rocks. The light and shadow linking for each group of rocks is as follows:
Top Rocks
- Light Link: Red Light
- Shadow Link: Green & Blue Lights
Left Rocks
- Light Link: Green Light
- Shadow Link: Red & Blue Lights
Right Rocks
- Light Link: Blue Light
- Shadow Link: Red & Green Lights
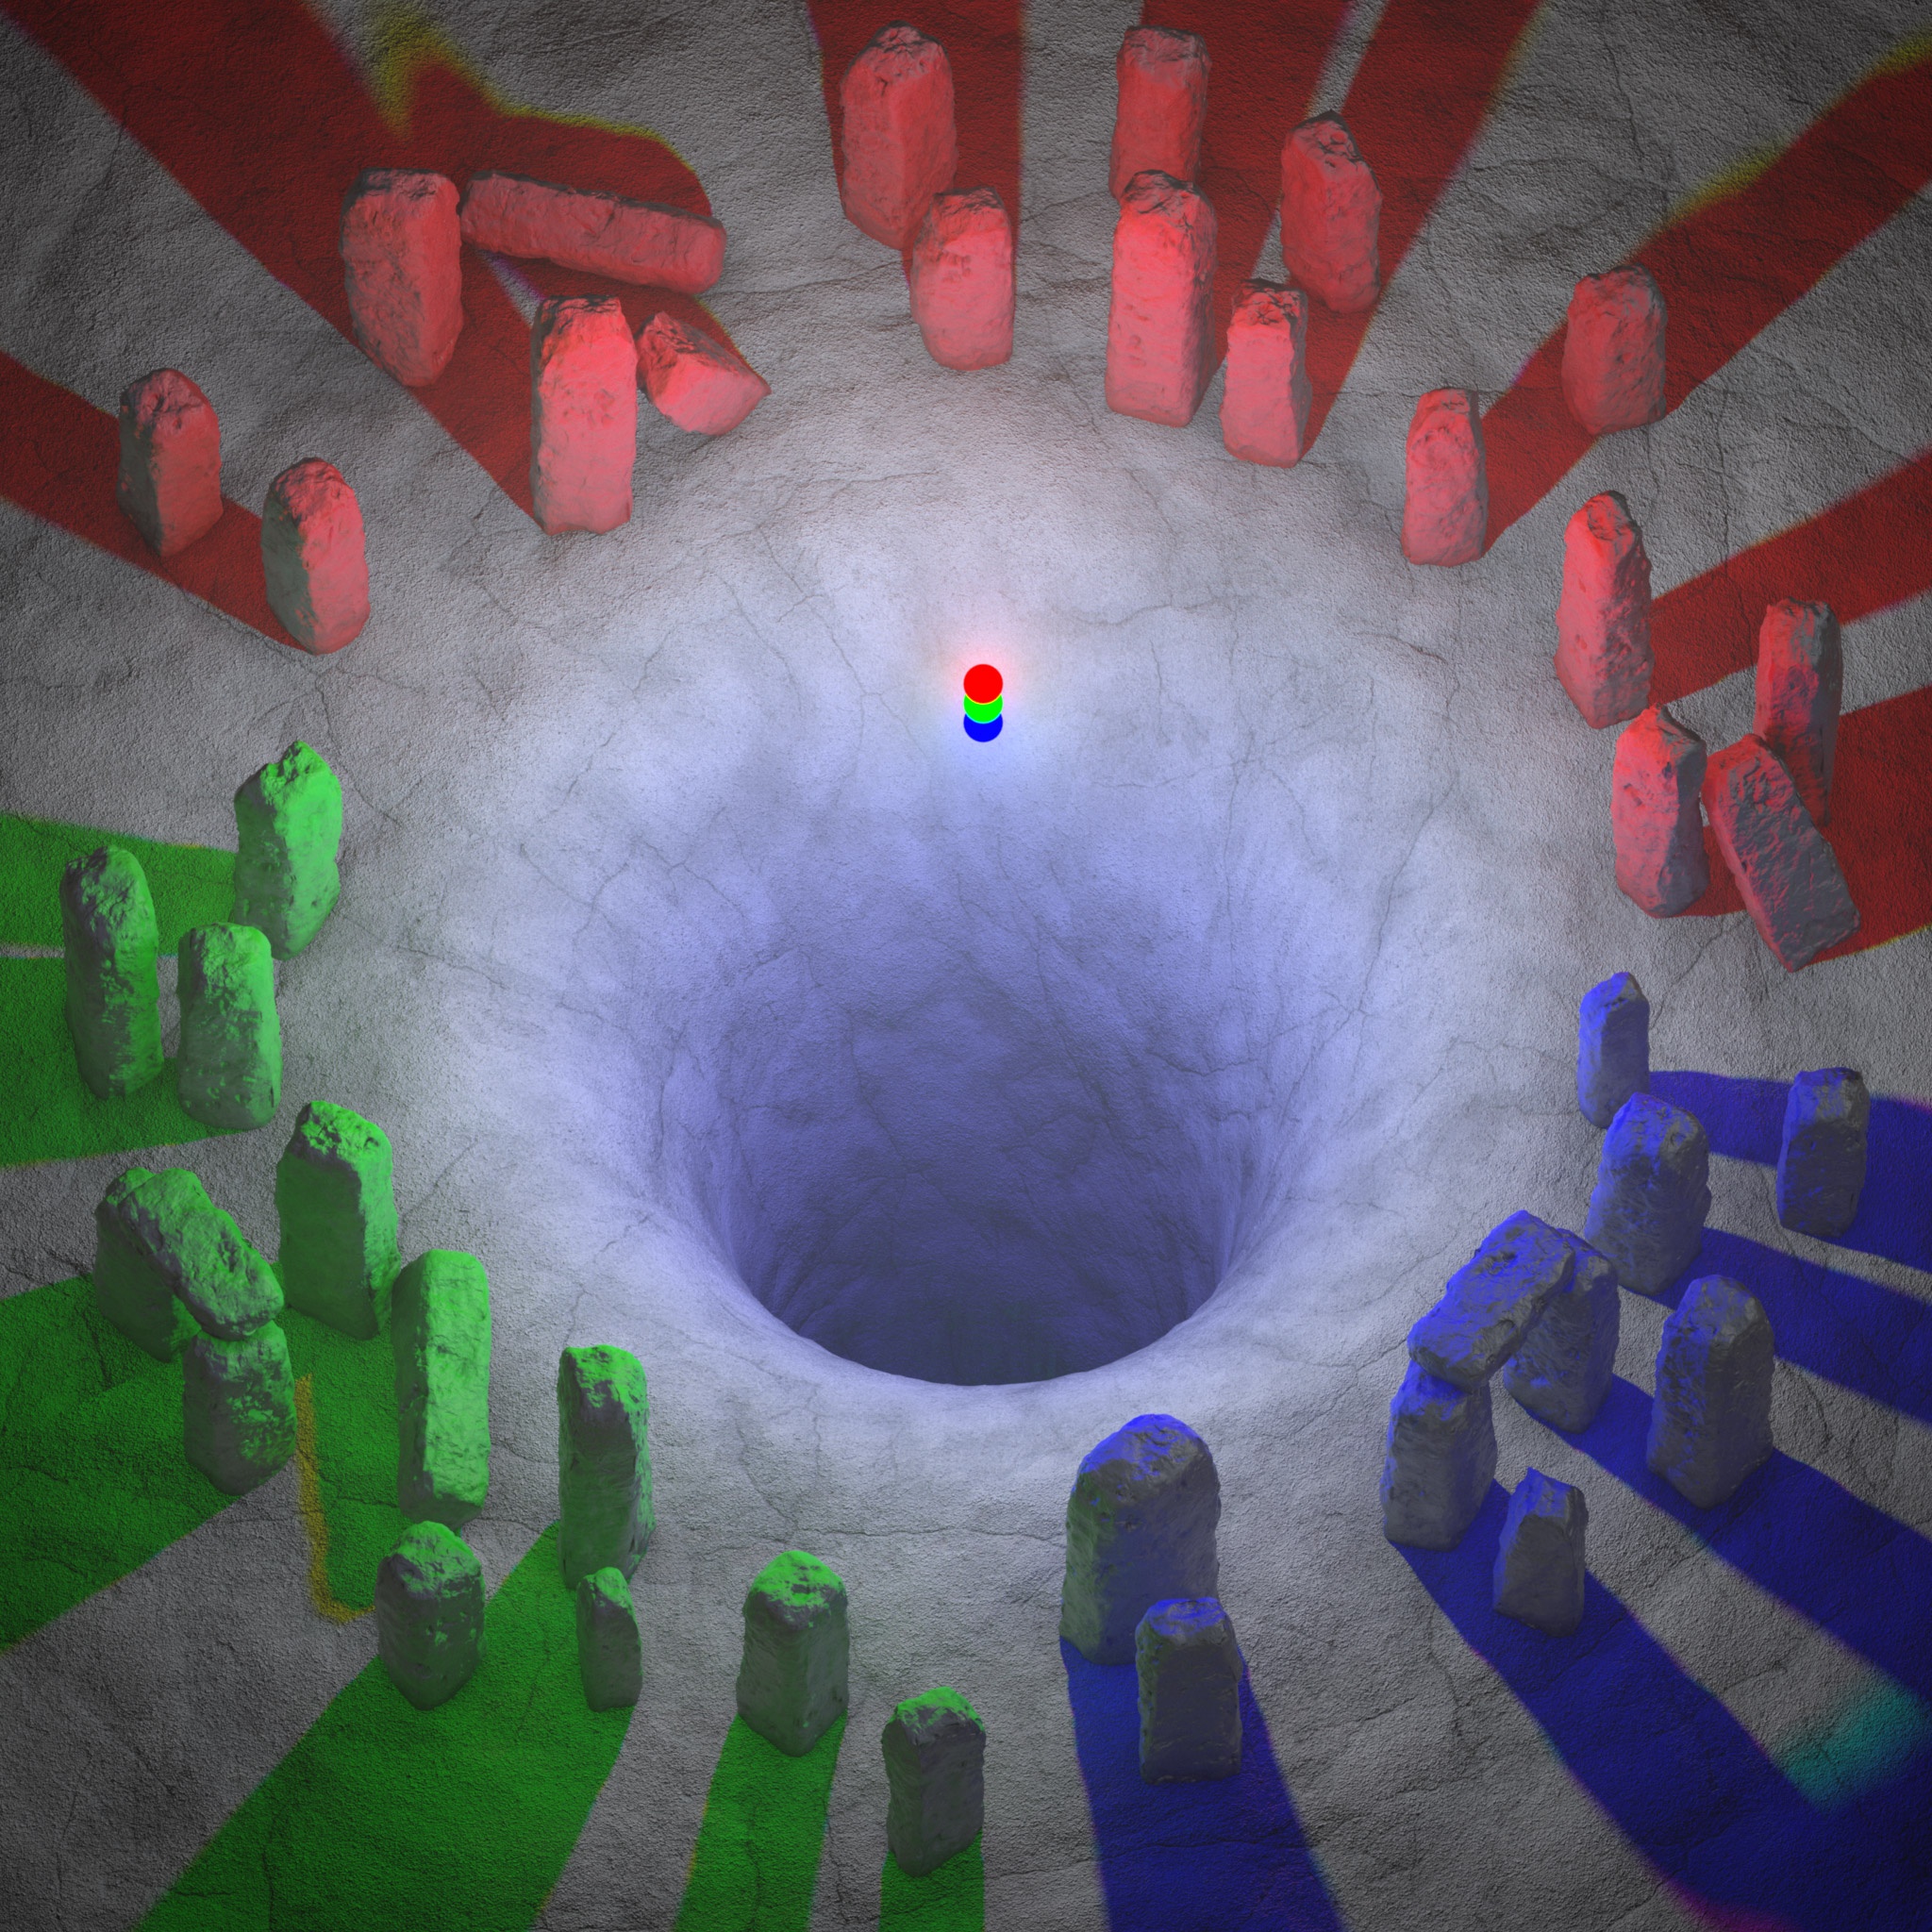
Example scene using shadow linking mode "Use Shadow Links"
Since the primary light source for these rocks has had its shadow link broken the shadow color result for these objects is the same color as its diffuse lighting.
For example, the top group of rocks is being lit just by the red light. However the red light has had its shadow link broken with the red light and since we are using the "Use Shadow Links" Shadow Linking Mode then any light linking is completely ignored when it comes to shadow contribution, this means that both the green and blue lights are still casting shadows for these rocks even though they are not illuminating them. Since the shadow color of a green light is magenta and the shadow color of a blue light is yellow (as scene in the baseline example) they are added together, resulting in the red shadow above.
Now in the final example we will completely disable any kind of Shadow Linking by setting the Shadow Linking Mode to "None." This results in the example image below:
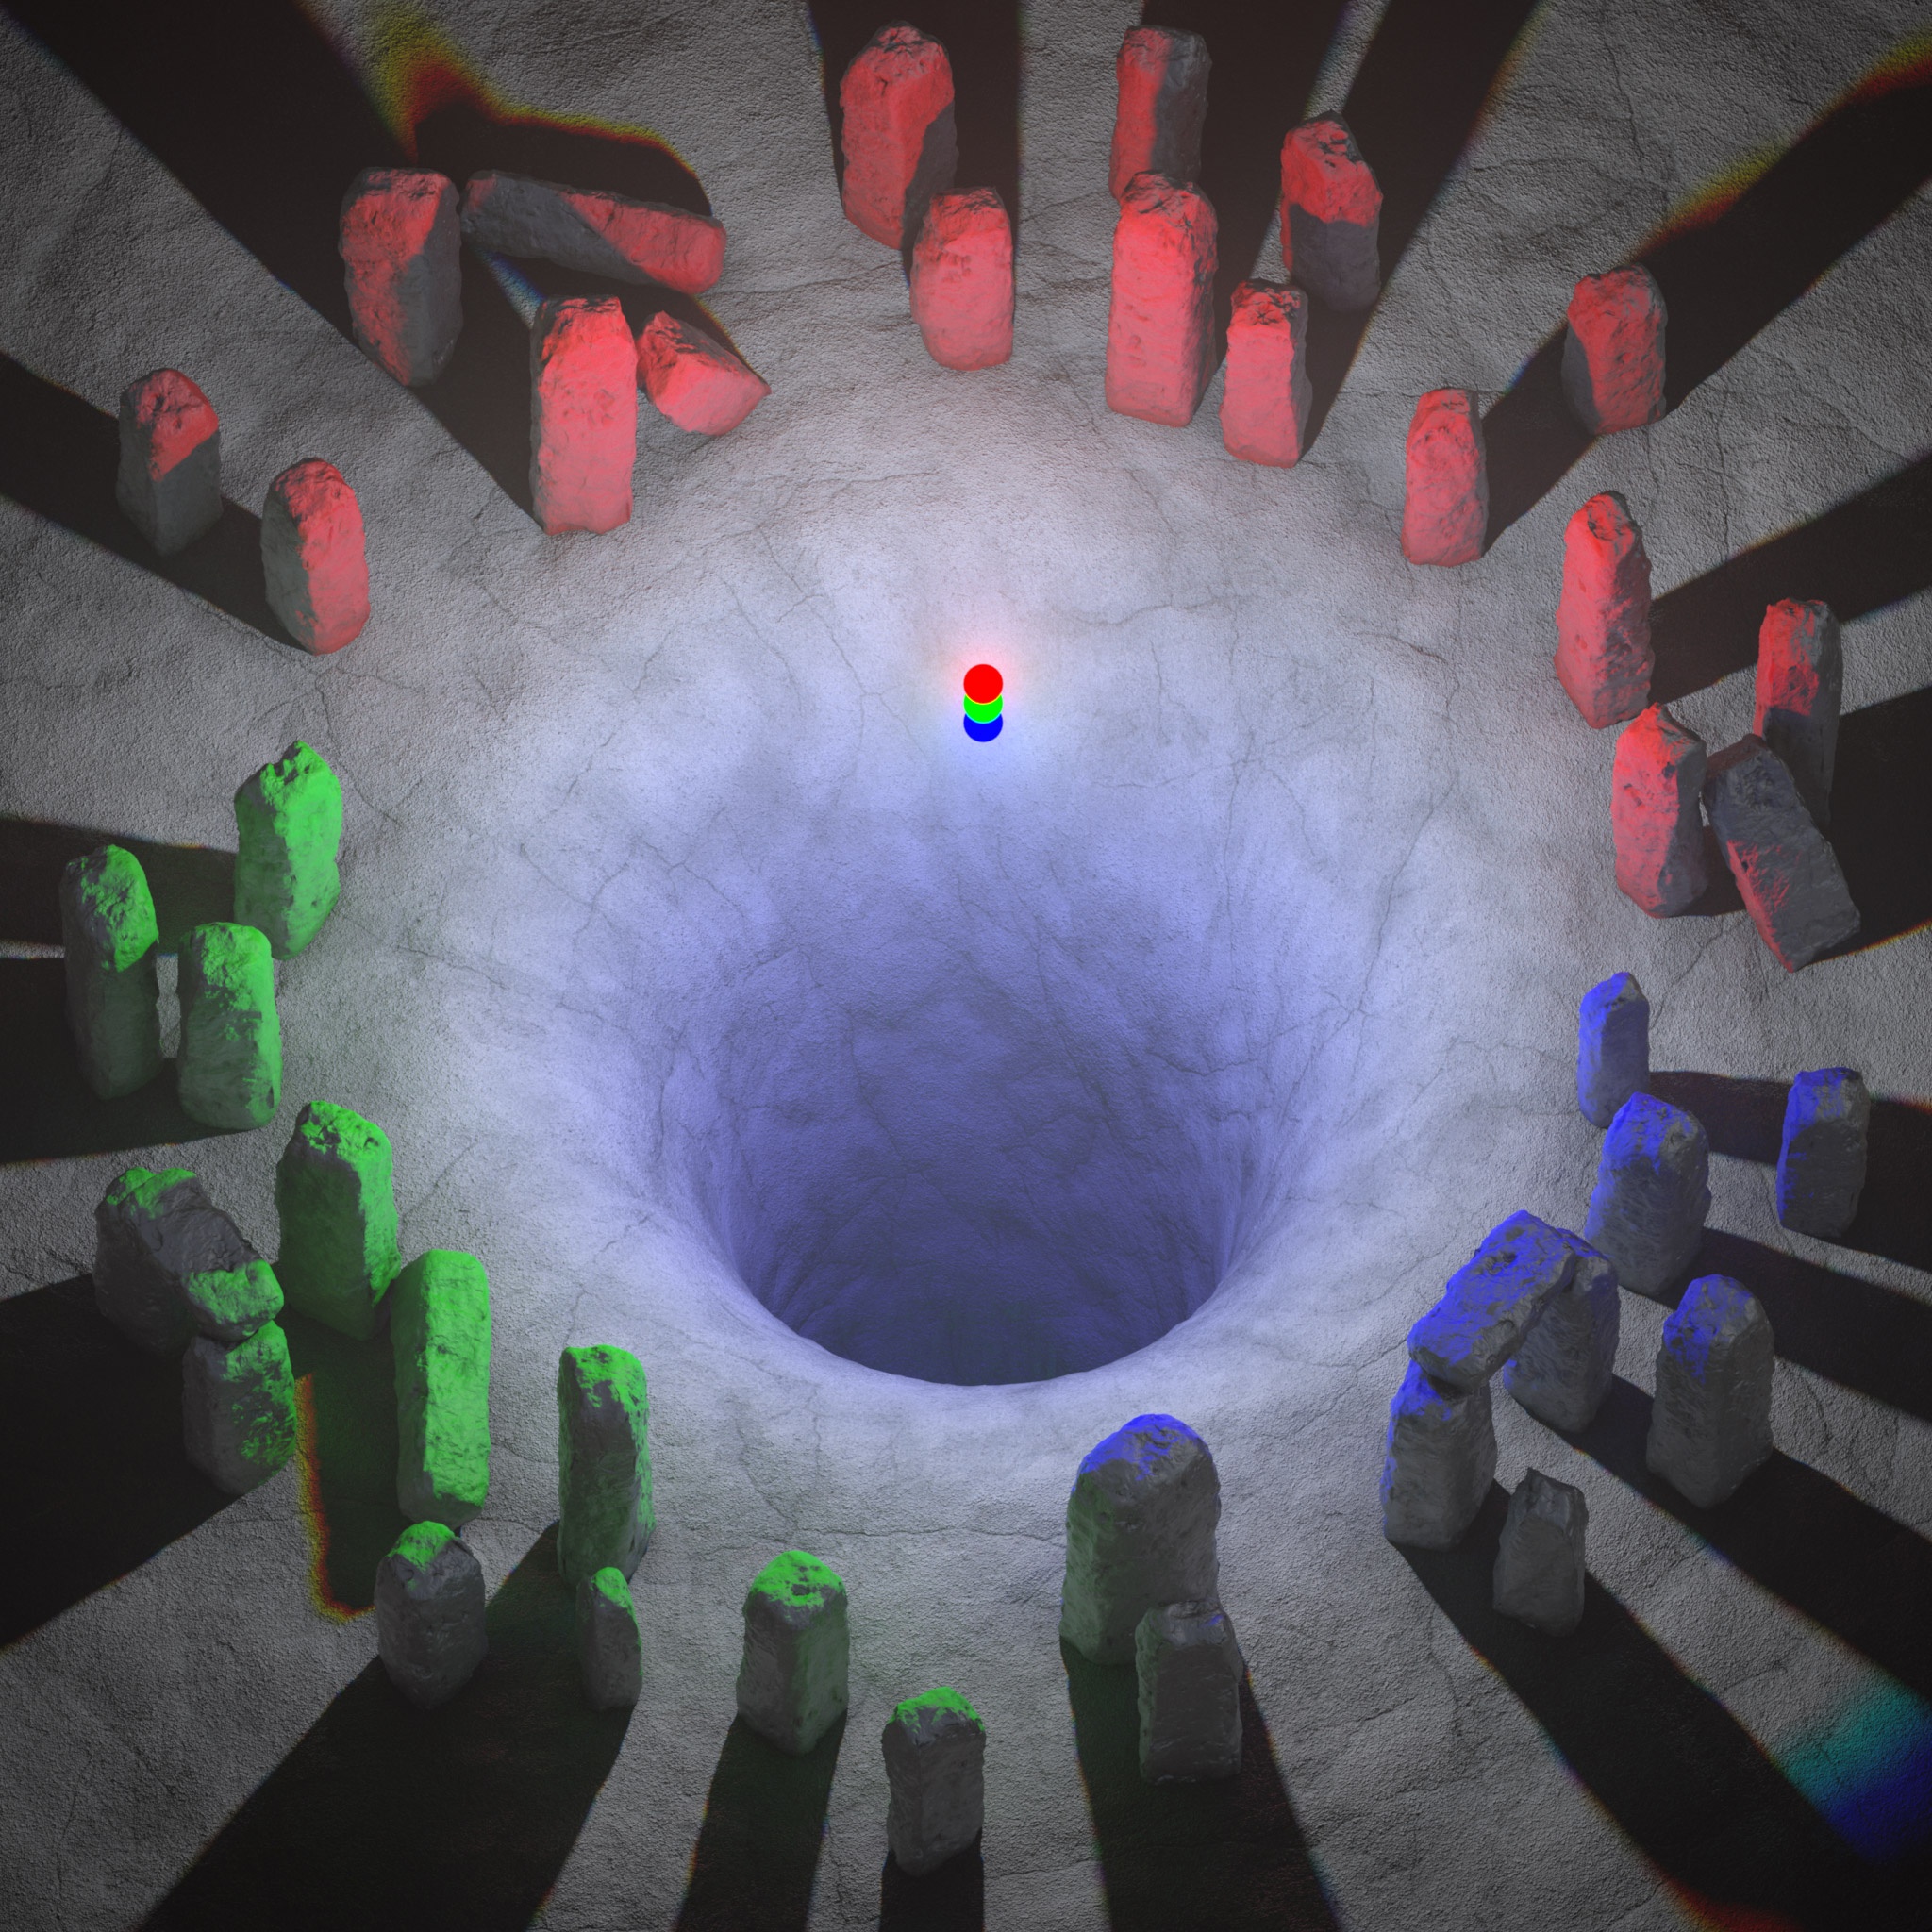
Example scene using shadow linking mode "None"
Despite the shadow link breaking that was done in the last example, this mode ignores both shadow and light linking resulting in the red, green, and blue lights all casting shadows for every object in the scene despite the fact that the lights are still only illuminating the three different rock groups respectively.
As you can see, light and shadow linking allows for complete artistic control when setting up scene lighting allowing you to achieve all sorts of specific and sometimes surreal looks. Below you can see the same 3 examples pictured side by side and just how different the results are when only the Shadow Linking Mode is changed even though the light and shadow links are identical in all examples.
|
|
|
|
| Shadow Linking Mode:Use Light Links | Use Shadow Links | None |