XGen Splines Quickstart
This section will guide you through the creation of a basic XGen
spline scene.
Before we proceed, it is useful to unload the xgenMR.py plugin as
this plugin assumes XGen is being used with Mental Ray and will
result in more steps on our part to "undo" its effect. From the
main menu, select Windows > Settings/Preferences >
Plug-in Manager. Find xgenMR.py and unload it. If you
don't use Mental Ray, we recommend also turning off autoload.
Start with an empty scene and add a polygon plane at the origin 25
x 25 Maya units in size. You can do this "manually", or run the
following MEL:
file -f -new; polyPlane -w 25 -h 25 -sx 10 -sy 10 -ax 0 1 0 -cuv 2
-ch 1;
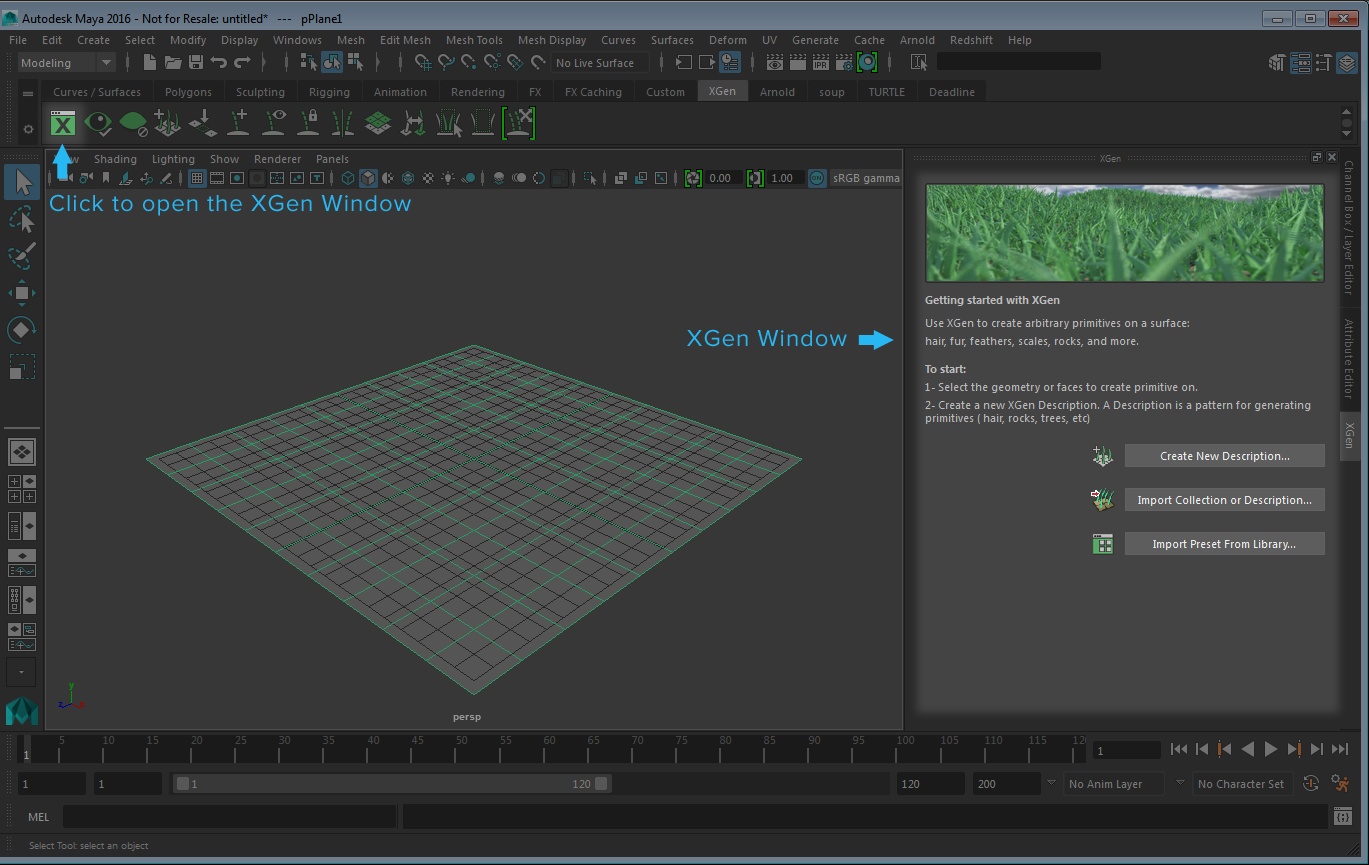
Bring up the XGen window (aka XGen description editor). You can
either click the Open the XGen button on the XGen shelf (first
button from the left), or select XGen > Open the XGen
Window from the main menu (Maya 2015) or select Generate
> XGen Editor from the Modeling menu set (Maya
2016). Alternatively, you can run the MEL command
XgCreateDescriptionEditor.
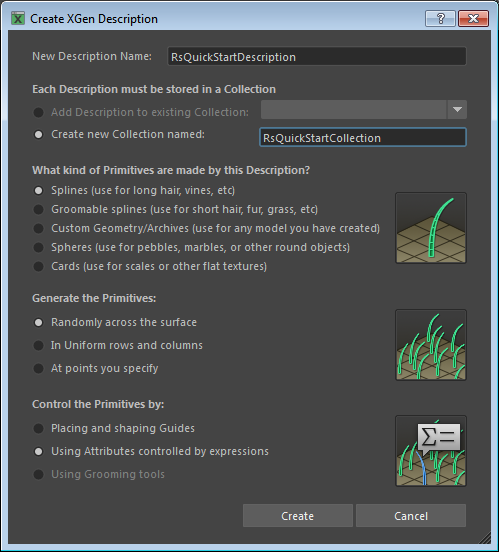
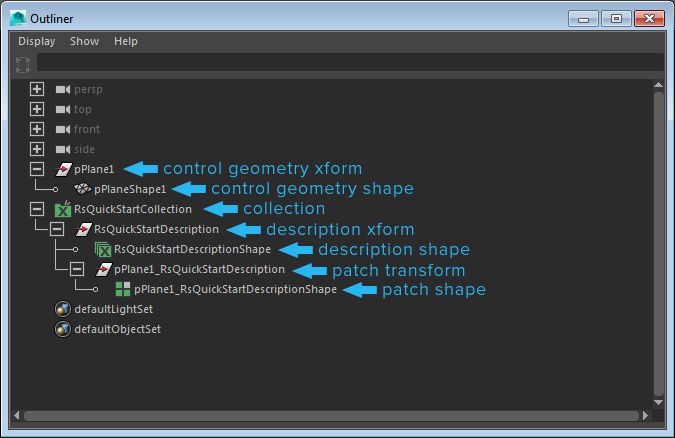
The collection (RsQuickStartCollection) is essentially a container for descriptions. In this example we have a single description, RsQuickStartDescription.
The description holds all the procedural parameters to describe the generated splines. In a non-trivial scene, you could have a number of descriptions, each describing a different 'type' or 'look' of splines. For example, you might have a description for a character's head hair, another for the character's body hair and a third for the character's facial stubble.
Parented under each description are patches, one patch per bound geometry. The patches are named <geometry>_<description> and represent the XGen splines that the given description will generate for the given geometry.
In this trivial example, we have a single piece of control geometry bound to a single description and therefore we have a single patch. In general, you could have multiple descriptions each bound to several pieces of control geometry and any single piece of control geometry can be bound to multiple descriptions.
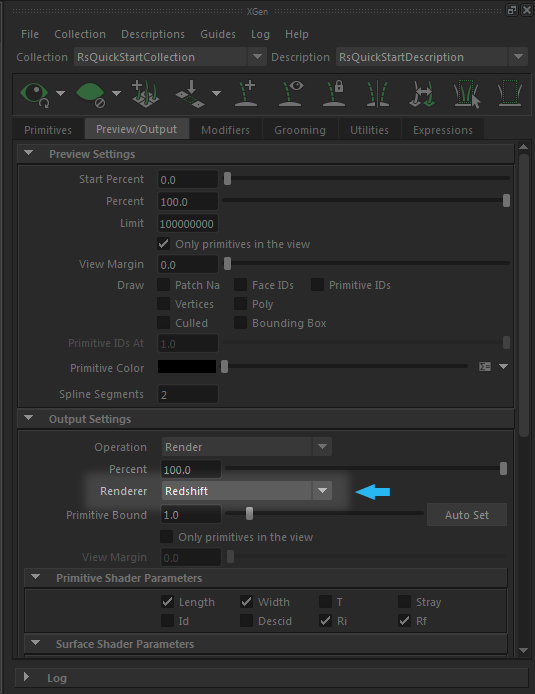
Now, back to the XGen description editor, switch to the Preview/Output tab and in the Output Settings section, change the Renderer to Redshift. Since Redshift does not have any unique XGen description attributes, this step is not strictly necessary, but that may change in the future so it's good practice.