Glo Fi II is a self-animating, fractal-based glow effect for text. Add a unique, organic glow with presets and advanced controls.
Getting Started
In Premiere, After Effects, Final Cut Pro X, Motion, Sony Vegas Pro, and Hit Film, drag the
uni.Glo Fi II effect onto your clip.
In Resolve, you'll need to follow a few extra steps:
Have your text on a video track above your footage's video track.
Create a Compound Clip from your text, select it, and head into the Color
view of Resolve's interface.
Within the Resolve's Node window, sever the default link between the text's node and the output.
Add a new Corrector node and Alpha output within the Node interface.
Create links from the text's RGB and alpha outputs to the newly created Corrector Node's RGB and alpha inputs.
Create links from the Corrector node's RGB and alpha outputs to the final outputs for RGB and alpha, respectively.
Right-click in the Node interface and select
Use OFX Alpha.
Apply Glo Fi to your text node and enable the
Unmult
option.
Apply
uni.Unmult
to your Corrector node.
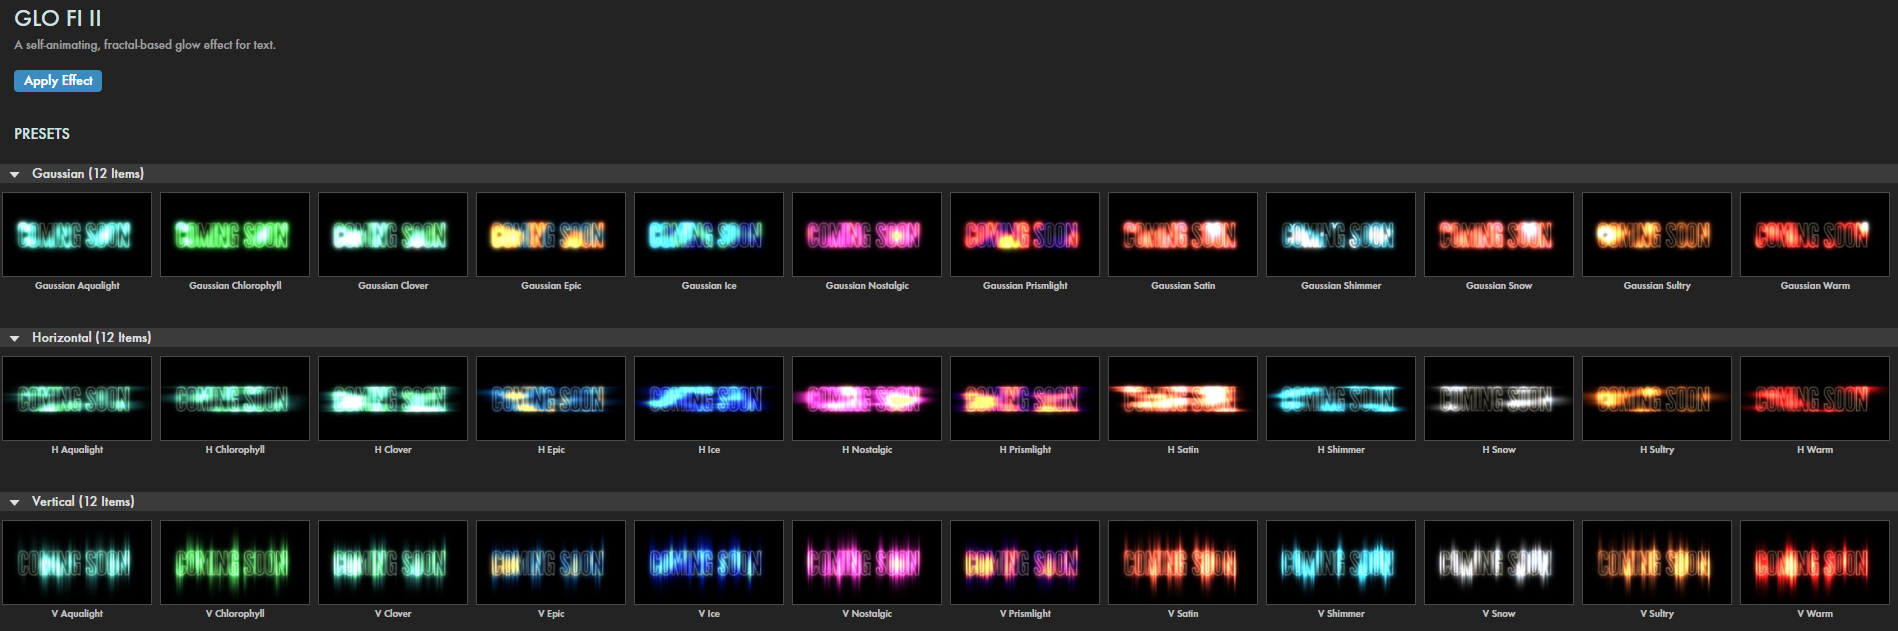
Presets
With three dozen presets to choose from, you're ready to apply stunning Glo Fi II effects in seconds. Find these via the blue Open Dashboard... button or the Choose a Preset... button below it.
As with all other Universe tools, you can modify or create a Glo Fi II look and then save it under its own name by pressing the Save Preset... button.
You might notice that there are actually twelve color
schemes in the presets, each of which replicates in the Gaussian, horizontal, and vertical groups. If you
don't need to change your glow's directional orientation, the Color Map pull-down in the ECP provides quicker access to the
presets' color shortcuts. To illustrate how these different orientations appear when animated, examine the following three clips based on the Chlorophyll color scheme.
Gaussian
Horizontal
Vertical
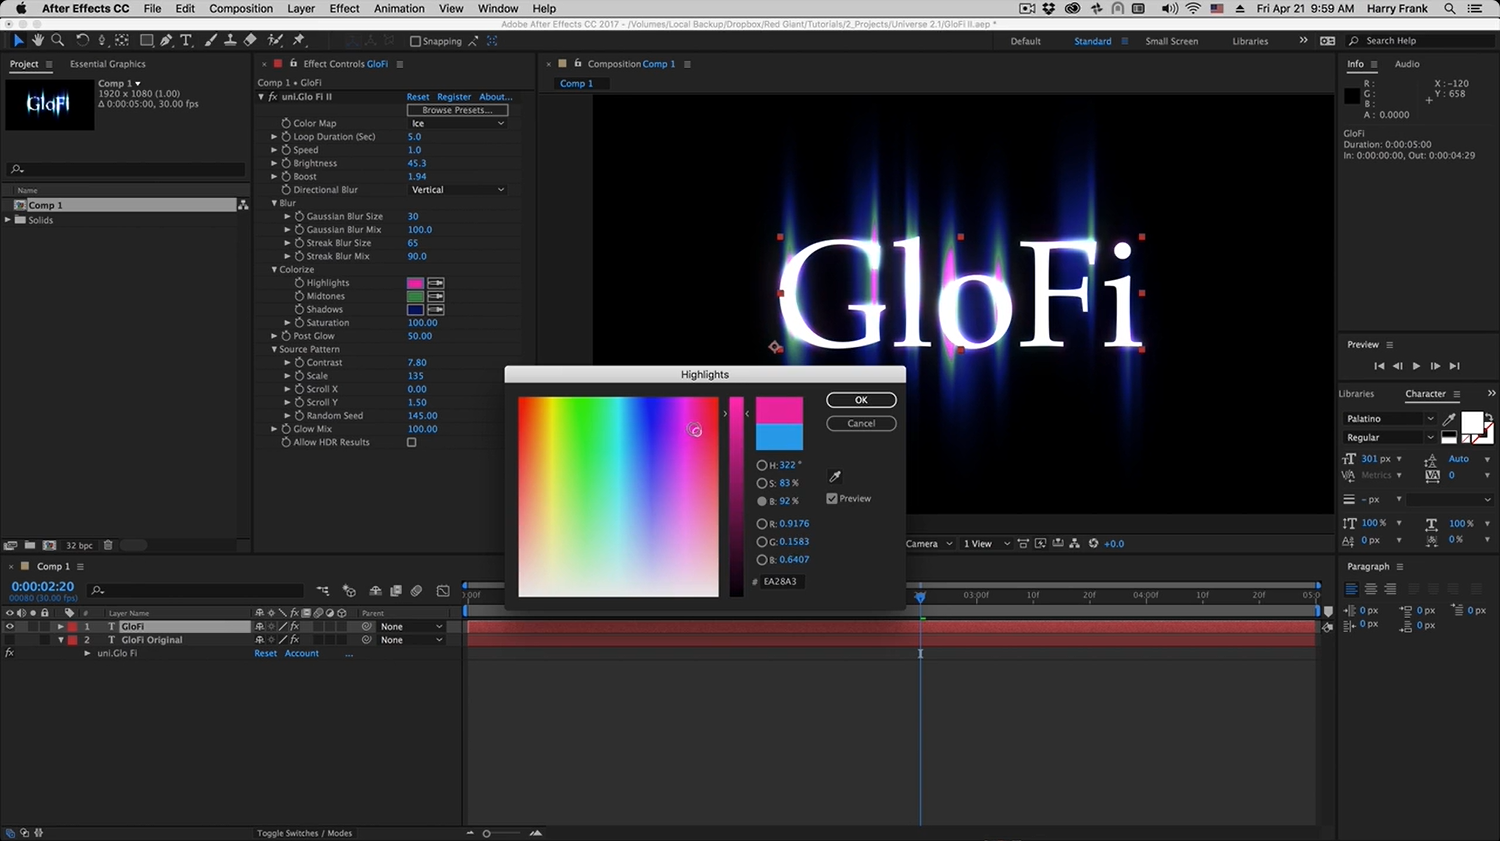
Modify the Effect
Color Map contains a drop-down list of color presets which dictate their colors onto
the adjustable Colorize parameters below. For example, the Chlorophyll color scheme shown above uses light, moderate, and dark green shades, respectively, in its highlights, midtones, and shadows. The Nostalgic color scheme uses yellow, pink, and purple.
Loop Duration (Sec) controls the effect duration in seconds before circling back to the appearance
of its first frame. A longer loop results in a more varied effect. Short loops may not allow the effect enough time to seem natural.
Speed adjusts how fast the effect shimmers.
Brightness determines the range of shades the effect reaches from brightest to darkest.
Boost adjusts the scale at which the brightness builds from the source outward. You might think of it as a brightness multiplier.
Directional Blur controls how the blur expands from the source. You can select the Horizontal axis,
Vertical axis, or None. Note that None effectively selects the Gaussian blur found in the presets.
Blur twirls down various parameters that affect the two blur layers comprising a Glo Fi II effect. Gaussian refers to the primary
"bloom" that emanates from the effect's source. Streak is a directionally oriented secondary layer that stretches horizontally or vertically
beyond the Gaussian bloom.
Gaussian Blur Size controls how large the blur is around your effect.
Gaussian Blur Mix adjusts the opacity of the Gaussian blur over the source.
Streak Blur Size controls how far the streak blur tapers away from the source.
Streak Blur Mix adjusts the opacity of the Streak Blur over the source.
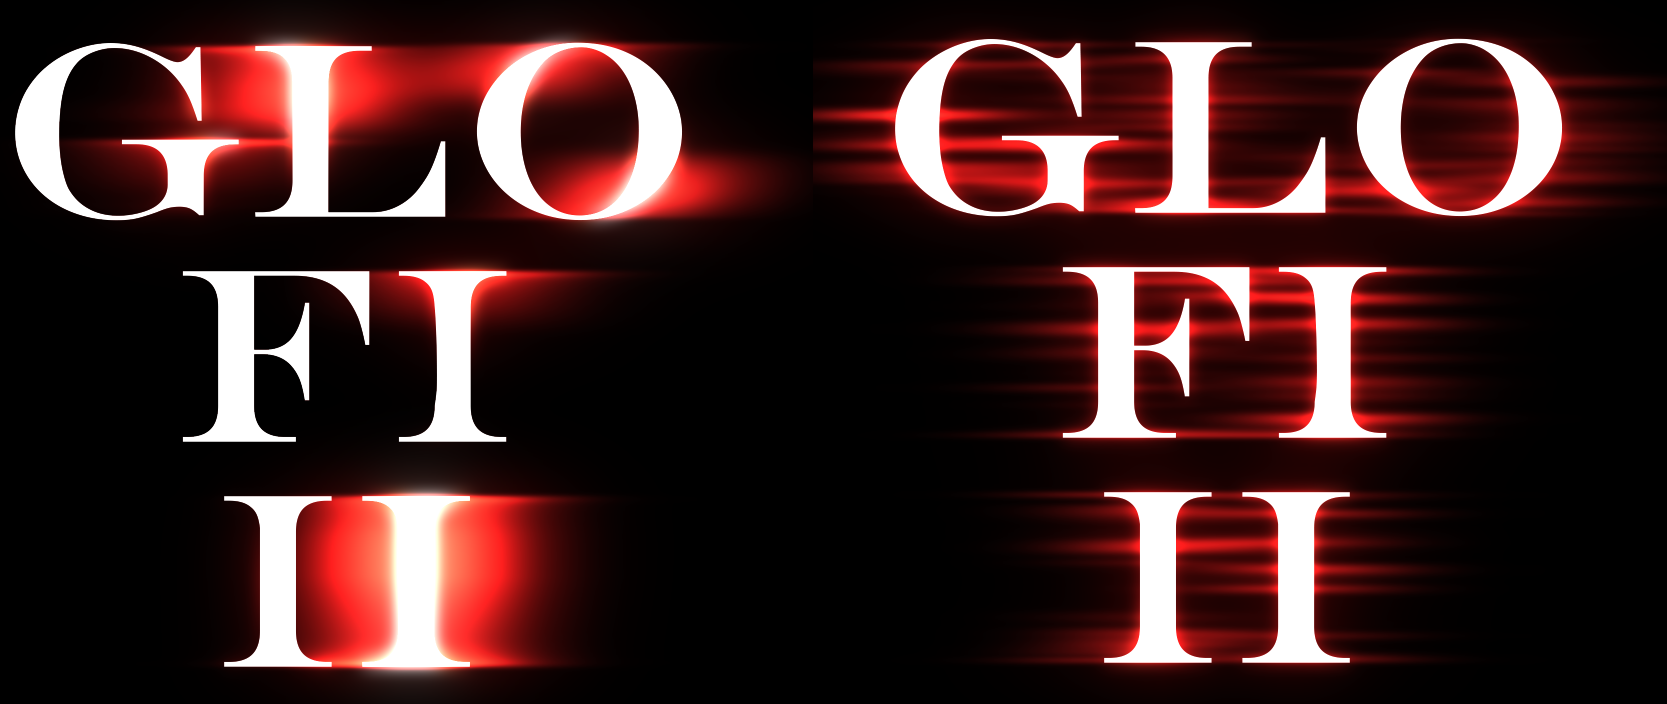
In the following examples, we show the impact of these Gaussian and streak controls with the Ice color scheme.
In the first image (left), we have Gaussian Blur Size, Gaussian Blur Mix, and Streak Blur Size all set to 20.
(We keep Streak Blur Mix at 100 throughout for easier effect visibility.) At center, we max out Gaussian Blur
Size at 200 and increase Gaussian Blur Mix to 70.
It may be hard to spot the difference without enlarging the image to full size. At right, we increase Streak Blur Mix to 70.
Colorize contains adjustable color swatches for the effect's Highlights, Midtones,
and Shadows coupled with a Saturation parameter that controls how saturated or
desaturated you want your glow to be. These are set automatically by the Color Map presets,
but they can be customized to your liking from here.
Post Glow adds an additional glow to the blurred effect created through the above parameters.
Source Pattern twirls down an array of adjustable controls that affect a randomized pattern governing how the glow appears:
Contrast affects the brightness range within the glow’s randomized pattern.
Scale adjusts the scale of the randomized pattern affecting the glow. Lower numbers result in larger
and less repeated variations (0 being no variations). Larger numbers result in smaller, more frequent
variations. In the following comparison, we took default values for the H Warm preset, which has
Scale at 100 (left), then increased it to 1000 (right).
Scroll X/Y scroll the randomized pattern along the x and y axes, accordingly.
Random Seed adjusts the number ("seed") from which the randomized glow pattern was built.
This can used to animate your effect in a different manner than the parameters above allow. Alternatively,
it can differentiate the appearance of your glow effect if it looks too similar to another one alongside it.
Glow Mix adjusts the transparency of the effect over the source.
Allow HDR Results toggles whether the glow effect preserves its high dynamic range colors instead of
remapping them to non-HDR results.
Interested to see these controls put into action and learn more about how Glo Fi II effects layer and operate?
Be sure to watch our quick Cineversity overview
RIGHT HERE.