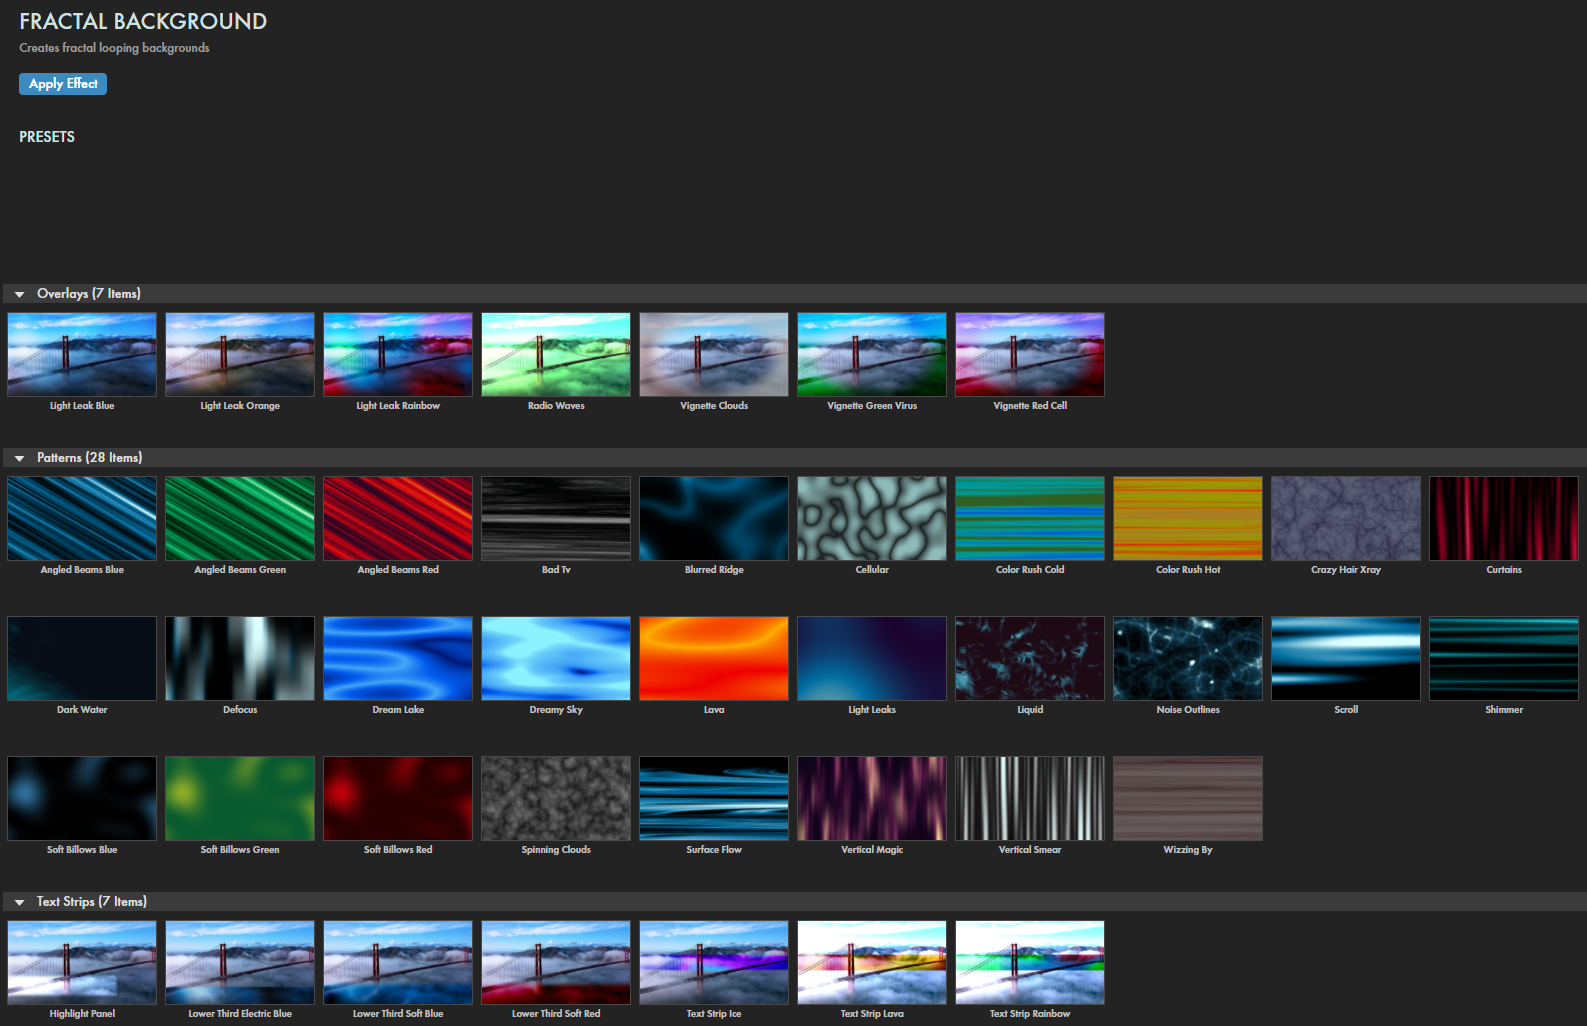
Quickly create complex and colorful looping fractal-based backgrounds for your motion graphics work. The effect includes predesigned noise patterns and color maps as well as lower-third and blend mode features for easy customization.
Presets
Get started instantly in Spectralicious with over two dozen presets that simulate sky color tones, warm/cool moods, and more.
Find these presets via the blue Open Dashboard... button or the Choose a Preset... button below it.
As with all other Universe tools, you can modify or create a Fractal Background look and then save it under its own name by pressing the Save Preset... button.
Modify the Effect
The
Loop Duration
slider sets the frame duration of the looped animation to speed up or slow down how quickly the animated background cycles. The result ends with an image exactly matching the starting image, yielding in a seamless, fluid animation with no visible jump.
Drastically change the selected noise map's look by using the
Scale
slider to expand or shrink the size of the noise displayed. Basically, higher values have the effect of "zooming out" from the noise field. You can see this in the following comparison of values 20 (left), 100 (center), and the maximum of 500 (right). Also, notice how Scale differs from Complexity (below). The two may appear similar at first glance, but they create very different results.
The
Angle
control lets you change and keyframe animate the noise field around its central axis. Note that when you adjust the Angle dial, the noise field will spin in the opposite direction.
When increased, the
Brightness
slider will raise the overall lightness of the three color maps, affecting most intensely the lightest color shown.
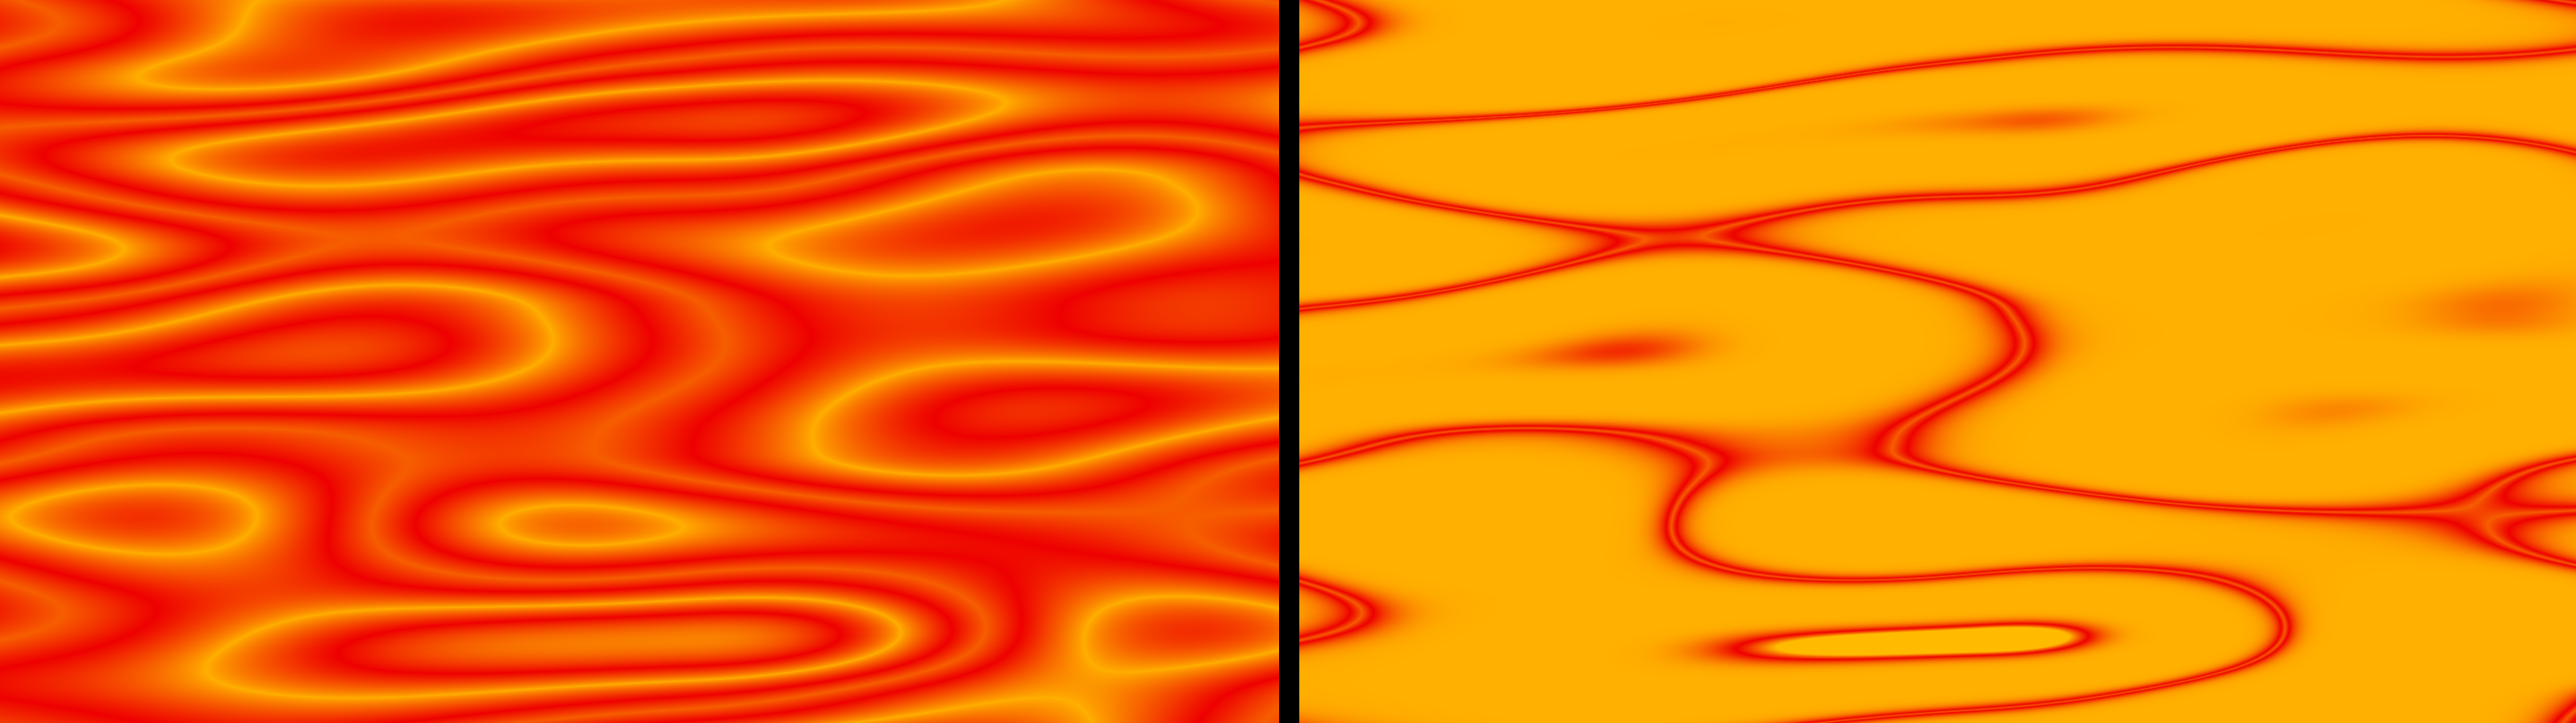
Contrast
changes how blended and soft the noise appears in the image.
The below illustration begins with the Lava preset and compares values of 0.8 (left) and the maximum of 8.0 (right).
Aspect
alters the proportional look between the width and height of the noise map. Lower values appear to stretch the look laterally while higher values squeeze it toward the middle. The following example with the Cellular preset shows values of 0.2 (left), 1 (the default, center), and 10 (right).
Use
Scroll X
and
Scroll Y
to shift the map along either axis.
Rotations
turns the noise map to alter the look of the animation.
Animation Speed
increases or decreases the looping animation cycle speed.
The
Fractal Type
drop-down offers Billowed, Ridged, Perlin, Cellular, Warp, and IQ options for the fractal type being used.
Fractal Background's presets build off of these type options.
If increased,
Complexity
will add more iterations of fractal noise into your noise map.
This example works with the Ridged Fractal Type, showing values of 1 (left), 5 (center), and 10 (right).
Invert
switches the light and dark areas in the noise map underlying the current pattern, making the noise appear inverted.
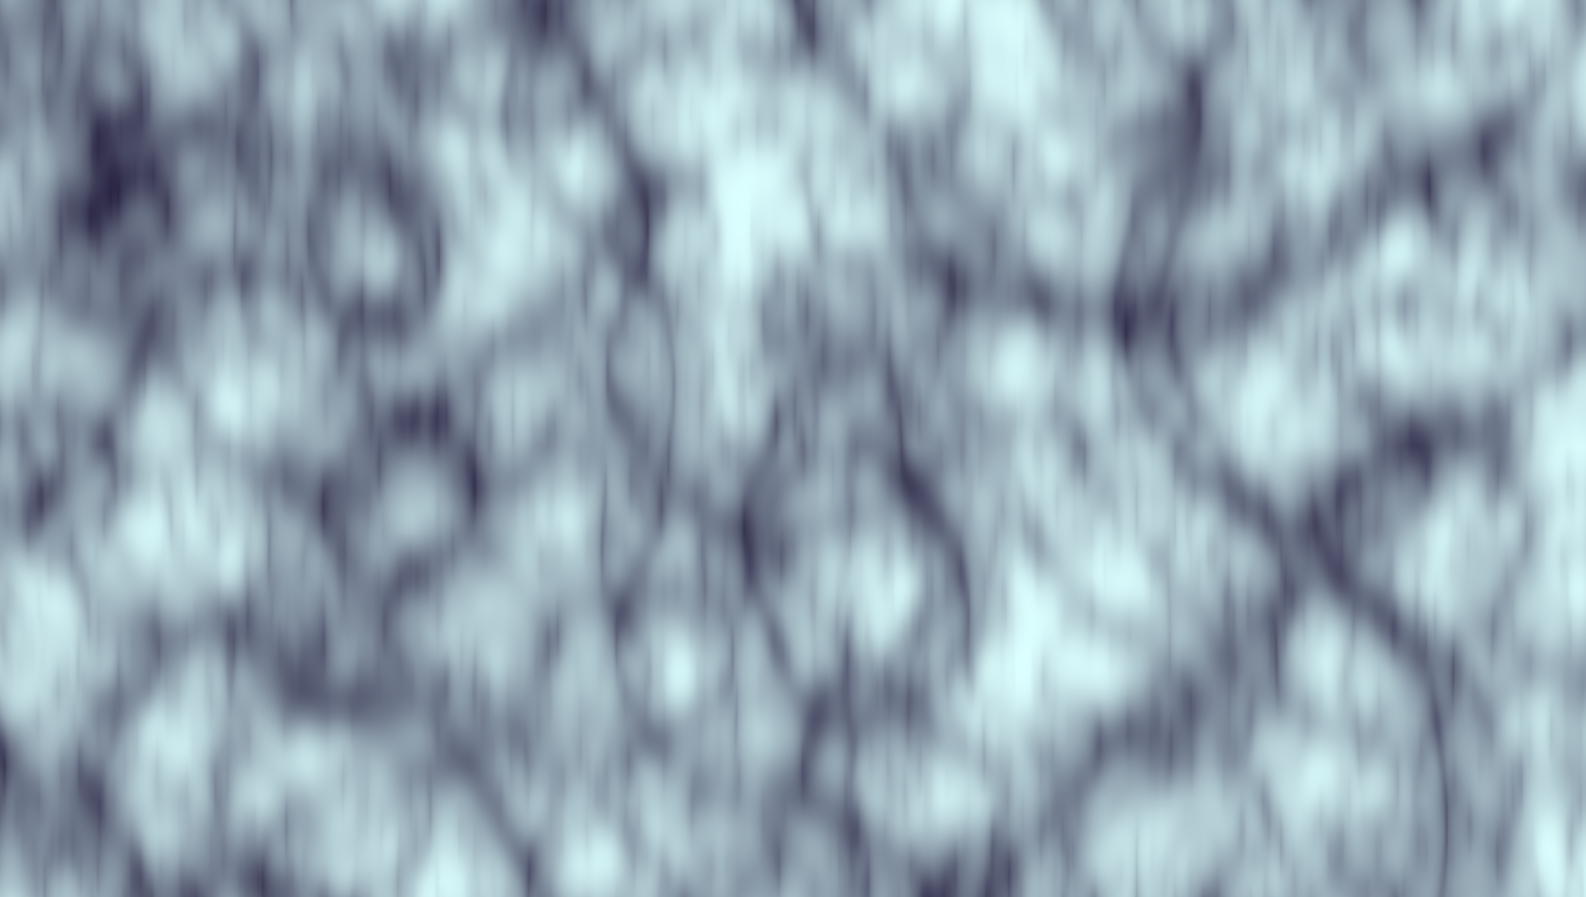
Blur Horizontal
and
Blur Vertical
control the amount of blur along the x and y axes. To be clear, increasing either of these parameters will blur the entire image, but the blur will appear "smeared" in a certain direction, as the below example of Blur Vertical set to 5 shows.
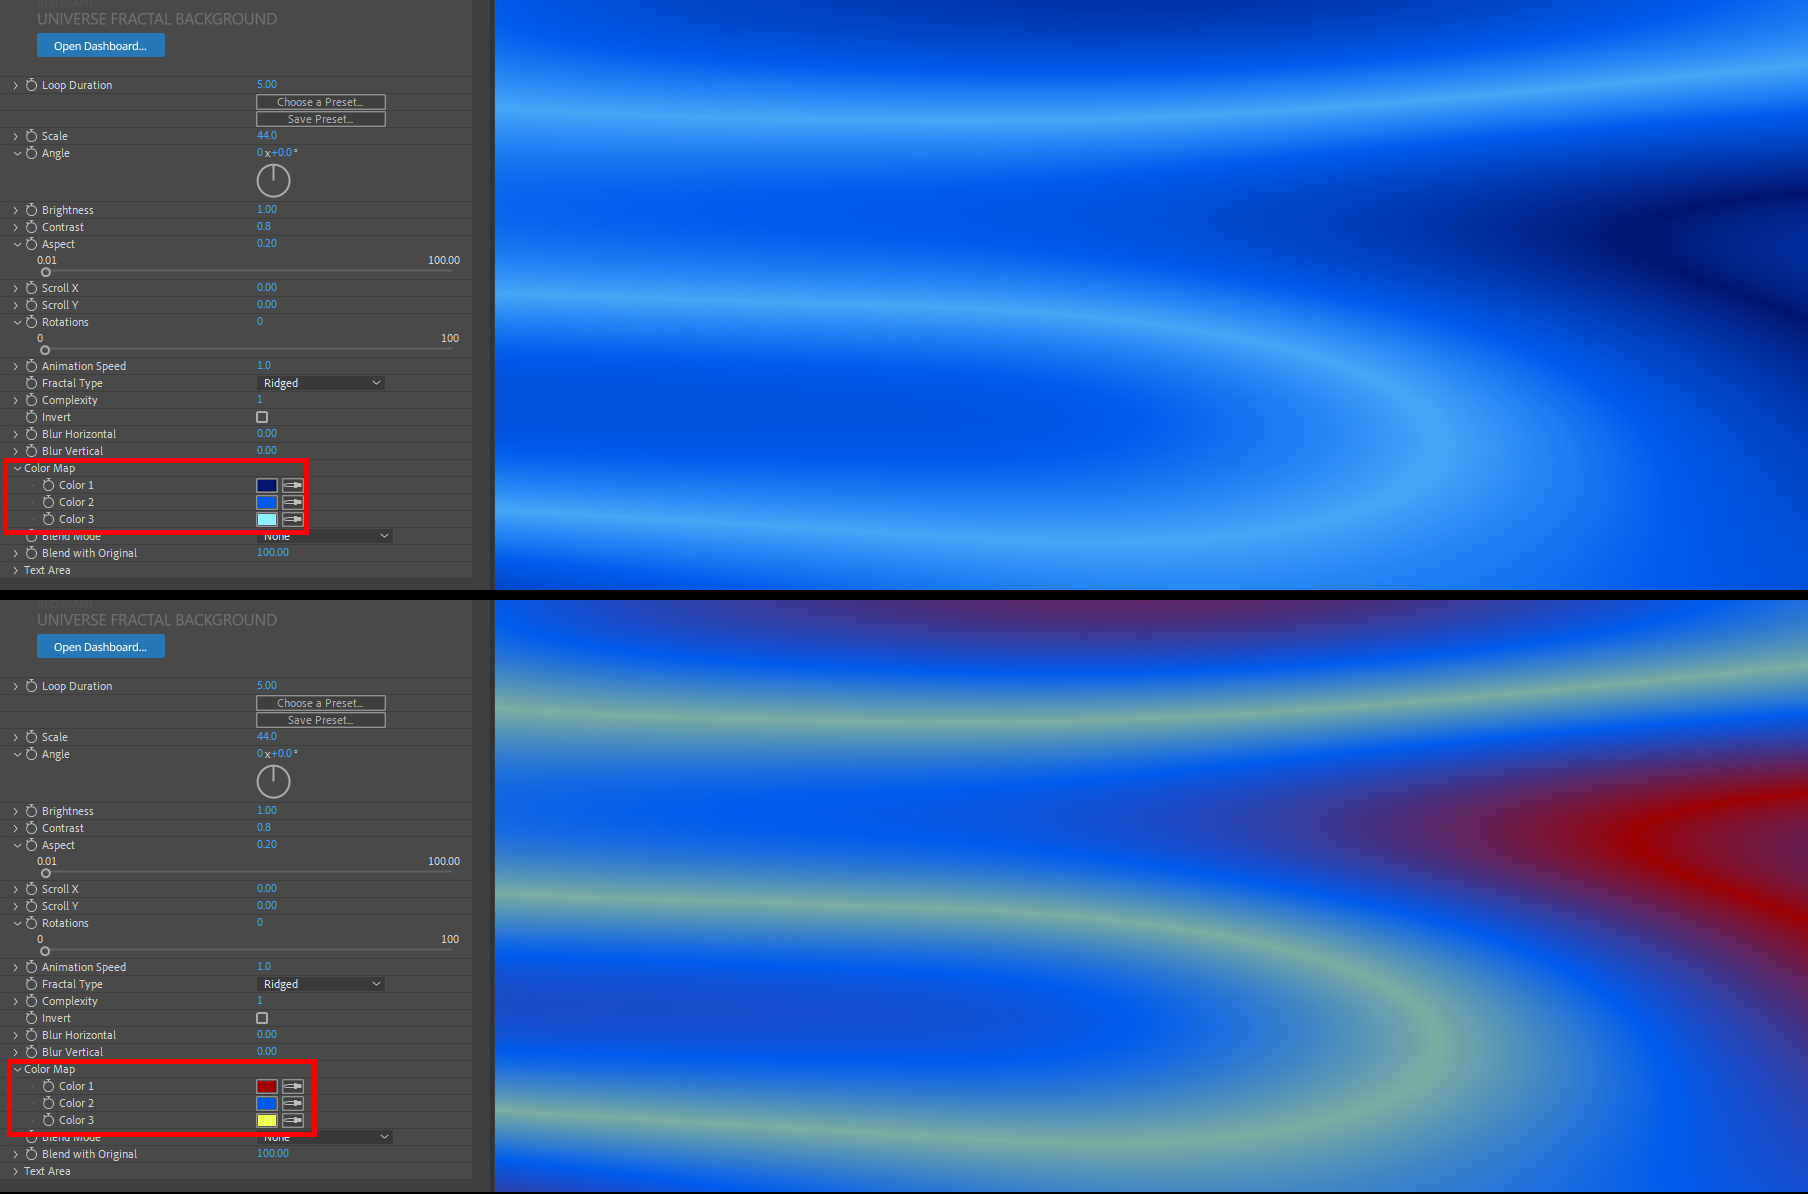
While presets will establish the noise map's initial color scheme, you can modify this by opening the
Color Map Group
and accessing its three color pickers to further customize your background.
Chose from the
Blend Mode
drop-down to select the blending mode used to composite your Fractal Background result over the original layer image.
Blend with Original
combines your Fractal Background with your original footage. If you’d like to keyframe a graceful transition, begin with Blend with Original at 100%, exposing the original image completely, and animate it to 0% to show just the Fractal Background.
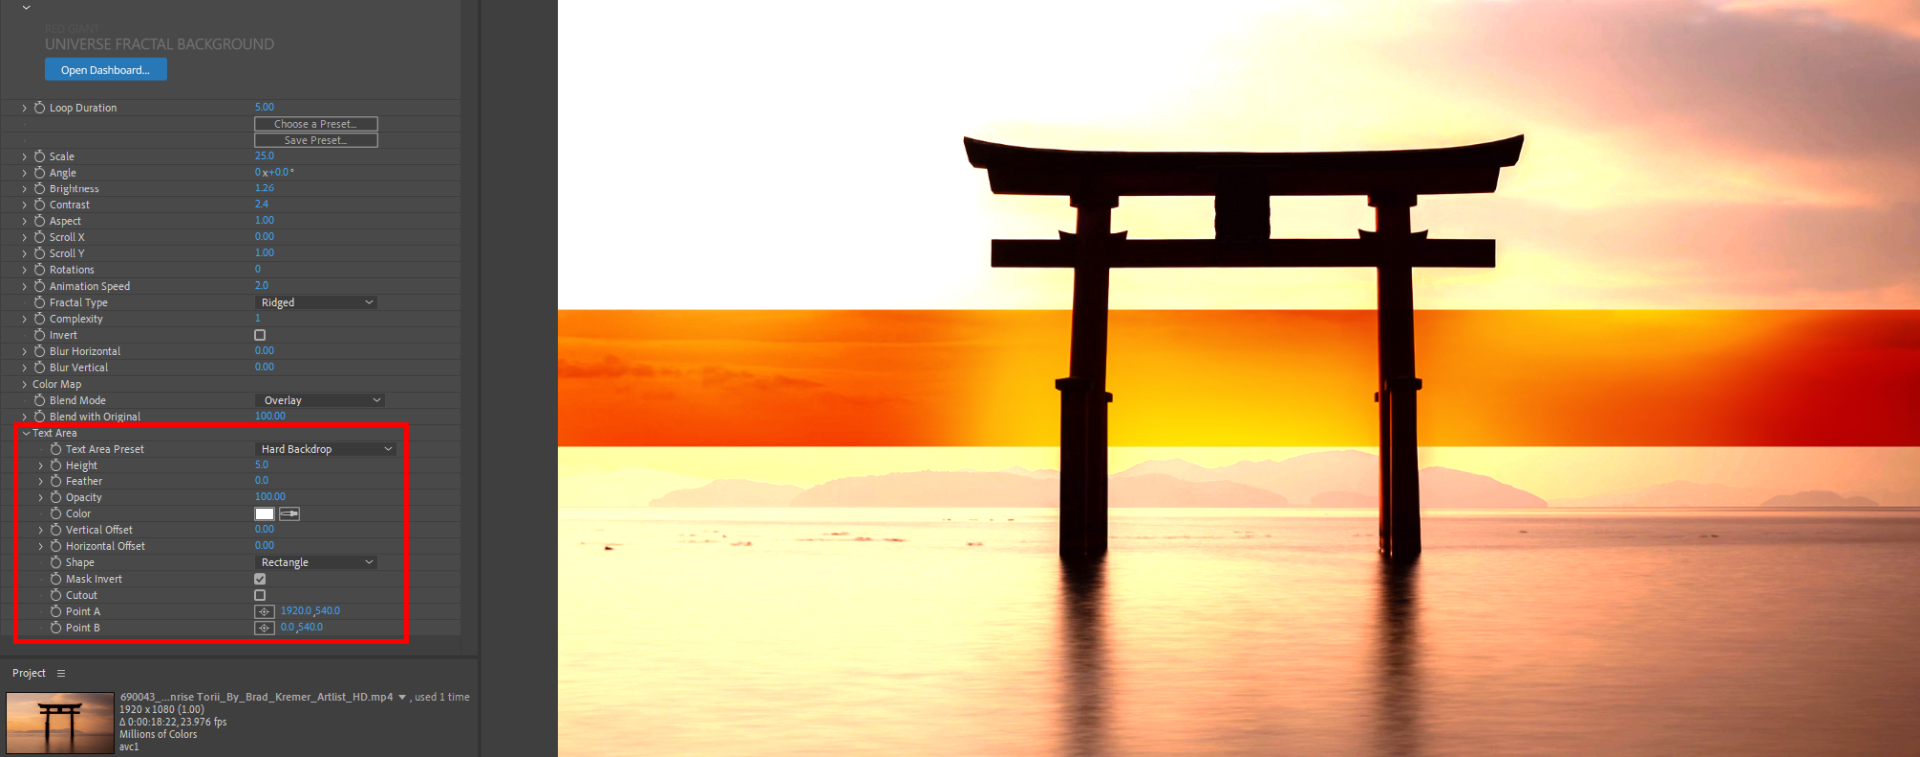
Text Area
Sometimes, you may want to composite text over the background. Fractal Background includes seven Text Strips presets in the Universe Dashboard. Alternatively, the
Text Area Group
can help quickly put readable text into your composition.
The following image shows default settings for the Text Strip Lava preset.
Notice how the Text Strip Laval preset has Hard Backdrop selected in the
Text Area Preset
drop-down menu. This option creates a semi-opaque bar that runs across the screen horizontally and has clear, sharp edges. It may be repositioned and resized with subsequent controls. The
Soft Fuzz
option overlays a fractal background across the comp and then creates a more transparently distributed area in an ellipse shape across the screen. (This becomes more apparent if you turn Opacity up to 100.) The
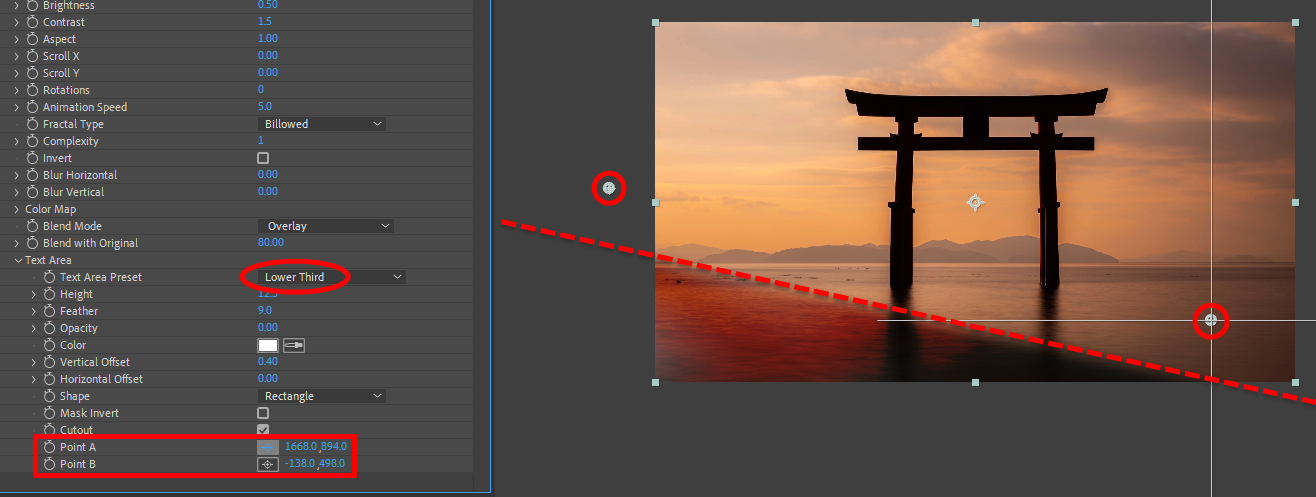
Lower Third
option crops the background so that the animated background pattern itself becomes a “lower third” style text at the bottom of the screen. As with other options, you may alter this look with the controls beneath the preset menu.
You're also not limited to maintaining the background in its preset size, position, or angle, as the following image (at 33.3% zoom) shows.
Height
expands or contracts the height of your text area.
Feather
softens and expands text area edges with higher values. Lowering it will sharpen the edges.
Opacity
controls the blending opacity of the Text Area over the Billowed Background. Lower values yield more transparency.
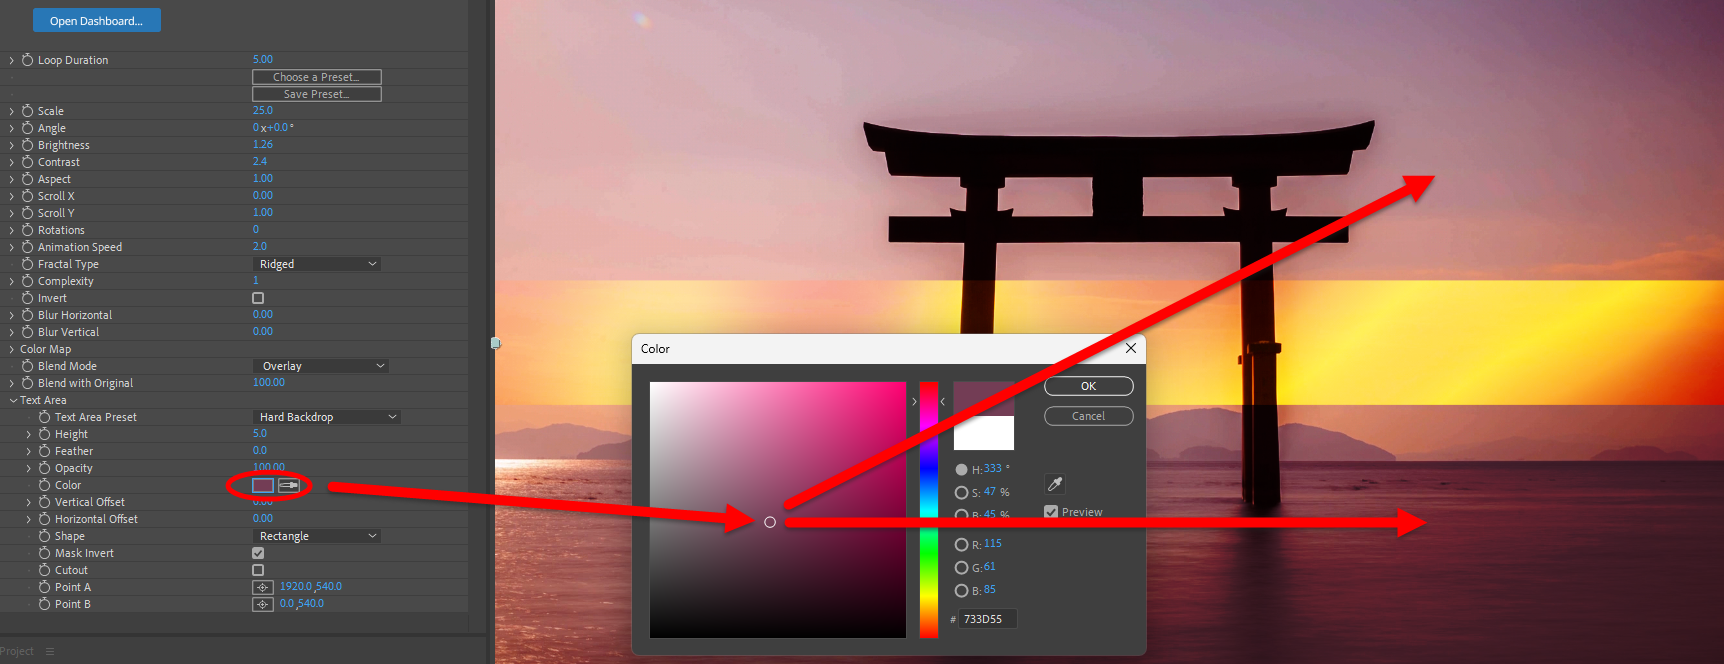
Use the
Color
picker to change the color hue applied outside the Text Area.
Adjust the
Vertical Offset
slider to reposition the lower third bar up or down within the frame.
Adjust the
Horizontal Offset
slider to reposition the lower third bar left or right within the frame, .
The
Shape
drop-down menu gives you the option of having a rectangular or curved elliptical shape for your text area.
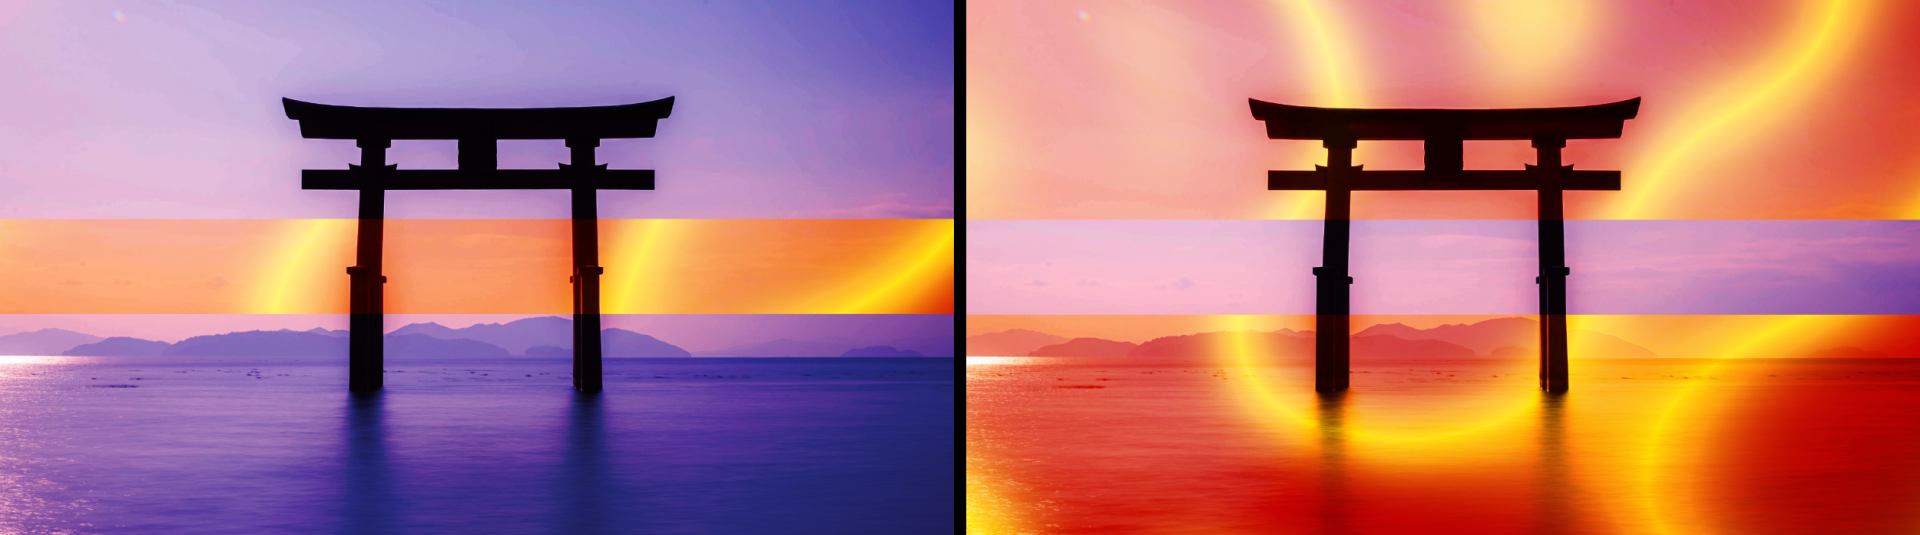
When enabled, the
Mask Invert
checkbox will switch the pattern outside of the mask with the look of the text area inside the mask.
See below for enabled (left) and disabled (right) results.
The
Cutout
checkbox solos the masked shape of the Text Area and hides the rest of the Billowed Background layer, compositing over the revealed original image underneath.
Use the
Point A
and
Point B
controls to fine tune the position of the text area.
Point A
is on the right side of the frame by default;
Point B
is on the left.
(See the slanting Lower Third example above.)