A looping gradient background generator with fractal noise, textures, and more. Choose from different noise types for a variety of moving gradients. Add color, texture, and vignetting to customize your background.
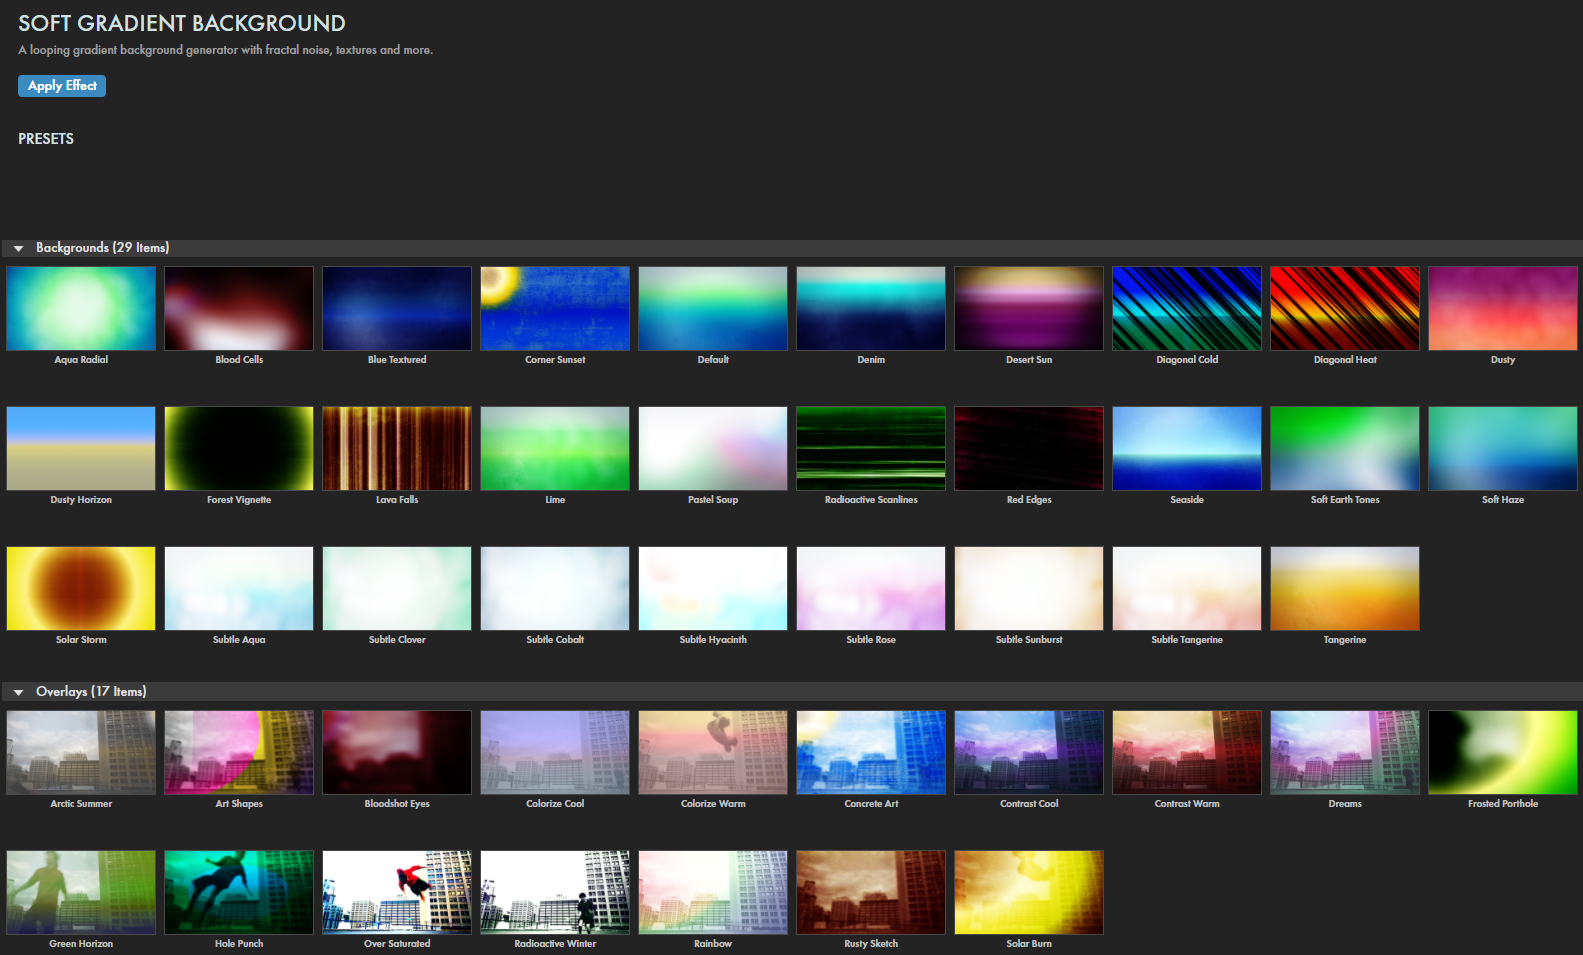
Presets
From soothing pastels to grungy concrete, Soft Gradient Background offers a wide array of color patterns and overlays to give your compositions easy, potentially radically different moods and looks.
Find these presets via the blue Open Dashboard... button or the Choose a Preset... button below it.
As with all other Universe tools, you can modify or create a Soft Gradient Background look and then save it under its own name by pressing the Save Preset... button.
Modify the Effect
The
Source Image
drop-down menu allows you to choose between the default
Fractal Noise
pattern or the
Source
option, which has the gradient be affected by the footage (source) to which the effect is applied.
Options within the Backgrounds collection of presets use Source while Overlay presets use Fractal Noise.
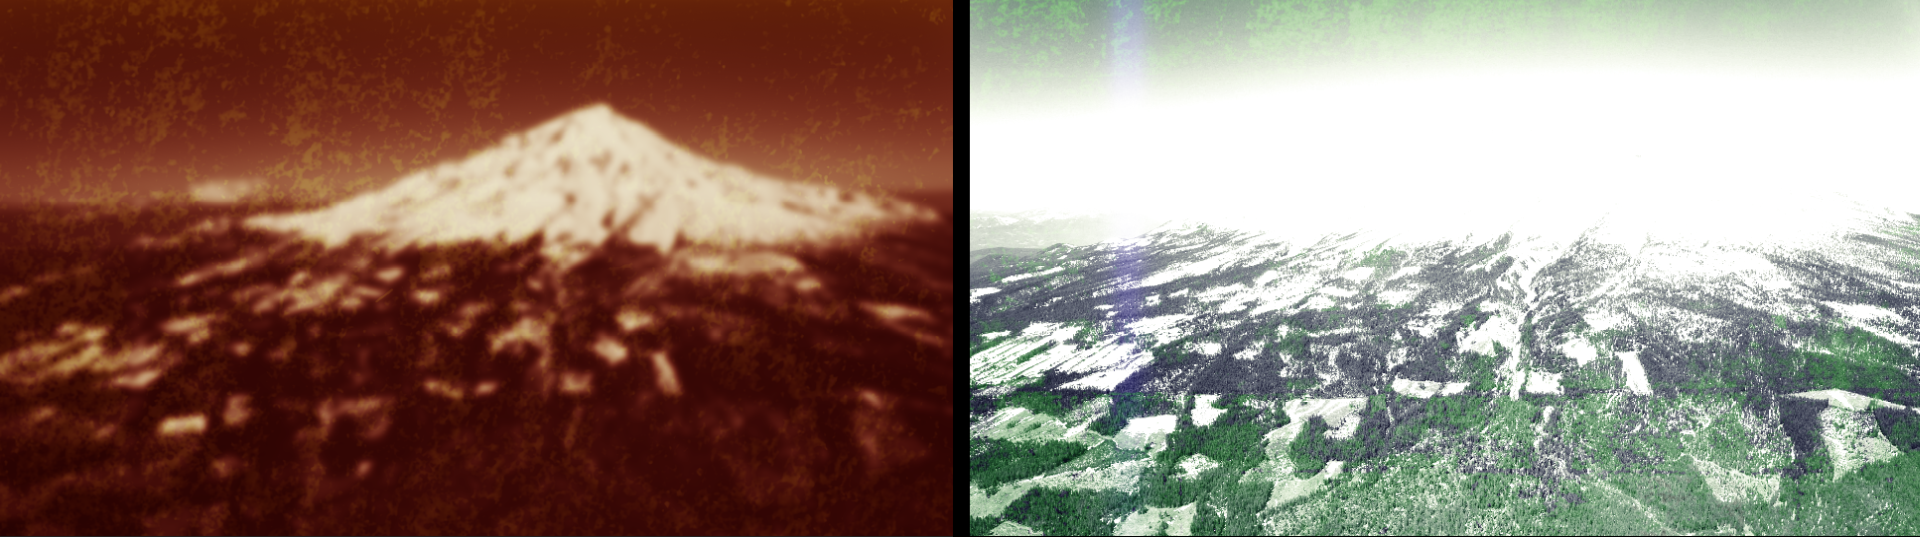
With Source selected for your Source Image, you may use the controls in the
Source Adjust
group to further manipulate how the gradient appears using Source Blur, Saturation, and
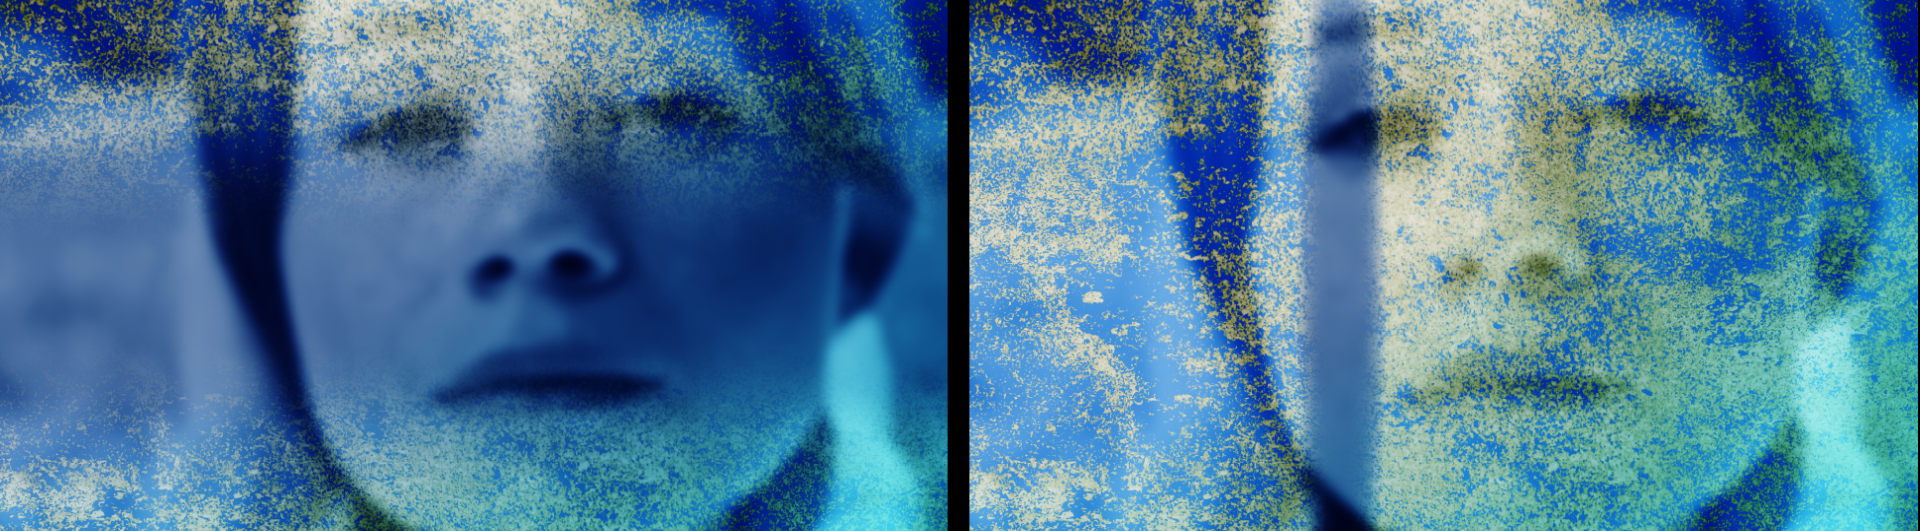
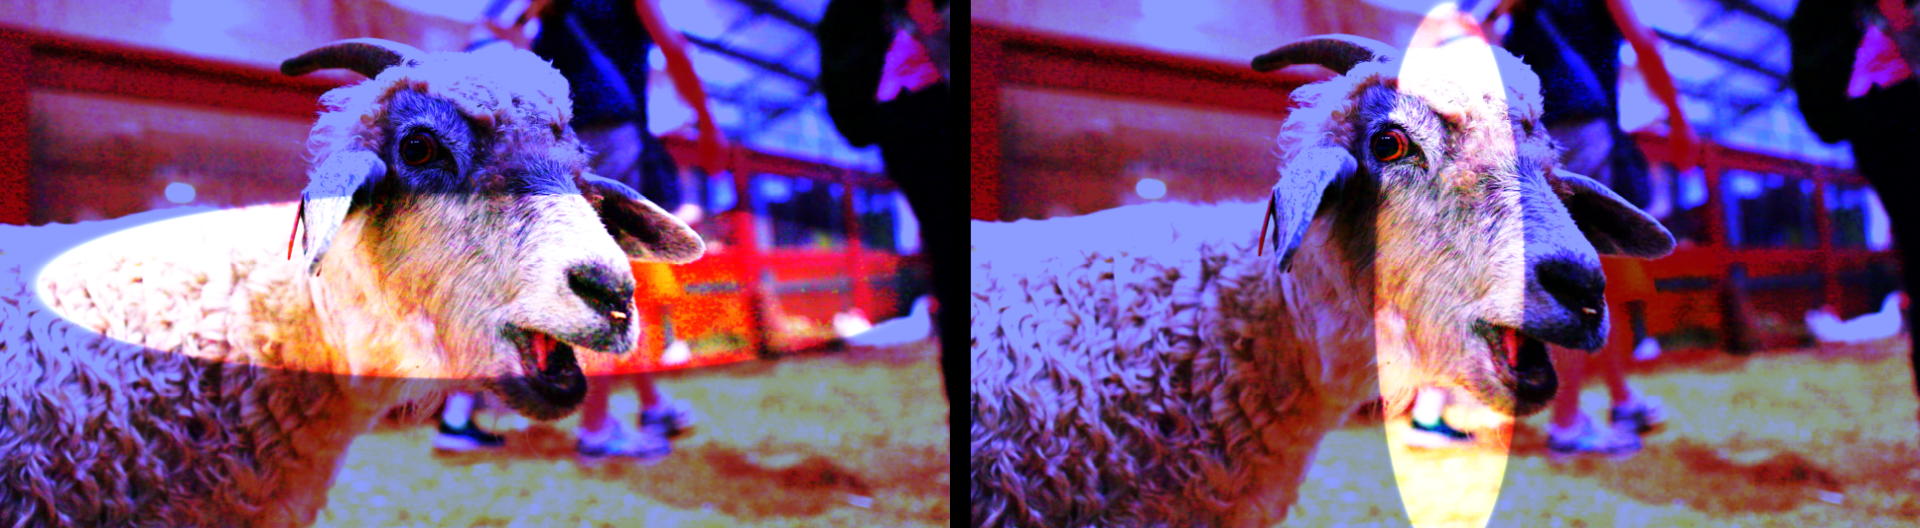
Exposure. Peruse the presets to get a sense for how these parameters alter your images. For example, in the following comparison, the Rusty Sketch preset (left), defaults to Source Blur: 2.00, Saturation: 0, and Exposure: -0.2. This is markedly different from Radioactive Winter (right), which uses Source Blur: 0.00, Saturation: 0, and Exposure: 1.4.
If you’ve chosen the Fractal Noise option in the Source Image menu, you may use the controls in the
Fractal Noise
group to animate and change how the noise appears in the image.
The
Loop Duration
slider sets the frame duration of the looped animation to speed up or slow down how quickly the animated background cycles. The result ends with an image exactly matching the starting image, yielding in a seamless, fluid animation with no visible jump.
Drastically change the selected noise map's look by using the
Scale
slider to expand or shrink the size of the noise displayed. Basically, higher values have the effect of "zooming out" from the noise field, as shown in our animation of the Default preset from its starting Scale value of 8.0 to 400.
Rotate lets you change and keyframe animate the noise field around its central axis. Note that when you adjust the Rotate dial, the noise field will spin in the opposite direction.
When increased, the
Brightness
slider will raise the overall lightness of the color maps, affecting most intensely the lightest color shown.
Contrast
changes how blended and soft the noise appears in the image. The below illustration begins with the Radioactive Scanlines preset and compares values of 0.5 (the default, left) and 1.5 (right).
Noise Aspect
alters the proportional look between the width and height of the noise map. Lower values appear to stretch the look laterally while higher values squeeze it toward the middle. The following example with the Diagonal Cold preset shows values of 5 (left), 10 (center), and 100 (the default, right).
Animation Speed
increases or decreases the looping animation cycle speed.
If increased,
Complexity
will add more iterations of fractal noise into your noise map. Using the Blood Cells preset, we show the values of 2 (left), 6 (center), and 10 (right) below.
Invert
switches the light and dark areas in the noise map underlying the current pattern, making the noise appear inverted.
Whether you're starting from scratch with a preset or stepping into an existing project, you can use the
Color Map group and its four color-picker controls to further customize your background's look.
The
Gradient Type
drop-down allows you to set the gradient to display in either a
Linear
(parallel bands) or
Radial
(concentric circles) pattern.
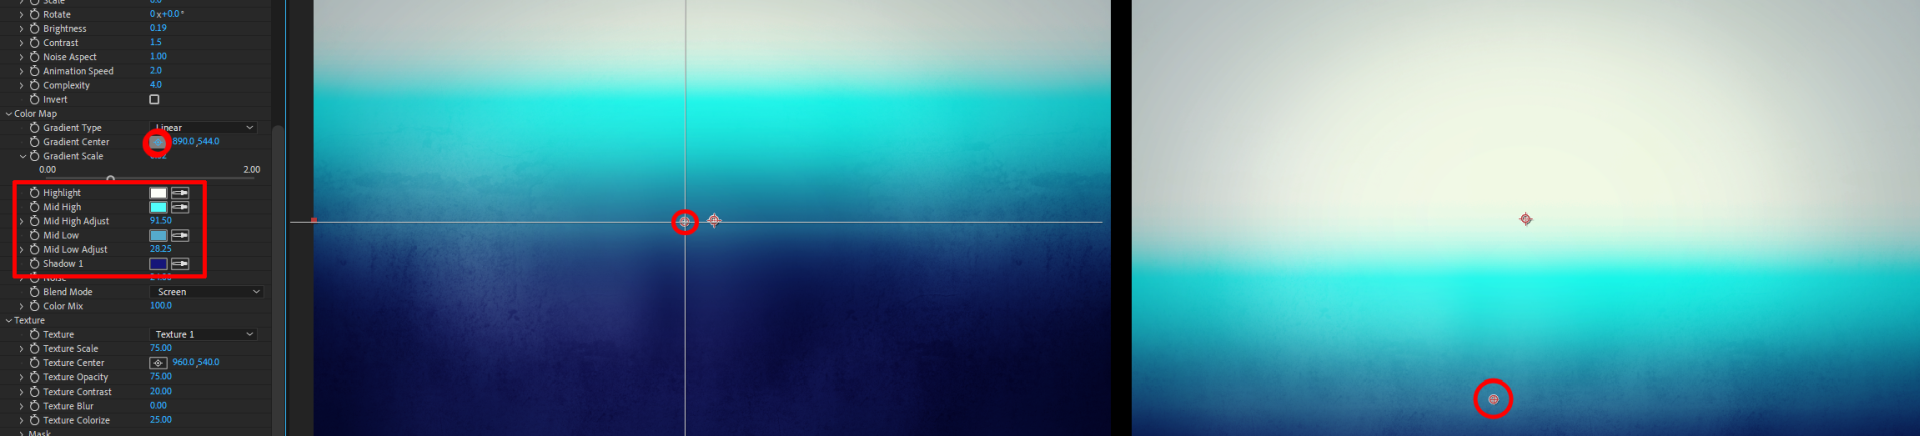
Use the
Gradient Center
control to reposition the gradient's center point within the frame.
Observe in the image below how moving the Gradient Center lower in the comp shifts the color distribution such that the Highlight and Mid High are much more pronounced.
Use the
Gradient Scale
slider to expand or shrink the size of your gradient. Smaller values compress the gradient; higher numbers expand it.
At 0.00 with a radial gradient, the Shadow color will fill the entire composition save for a dot at the center point.
To change the gradient's colors, use the
Highlight, Mid High, Mid Low, and Shadow color pickers.
The
Mid High Adjust
and
Mid Low Adjust
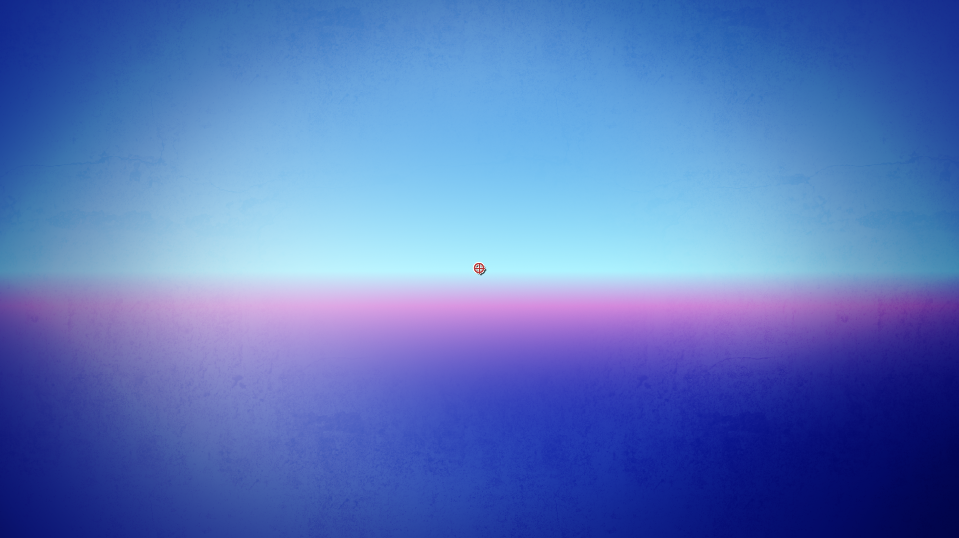
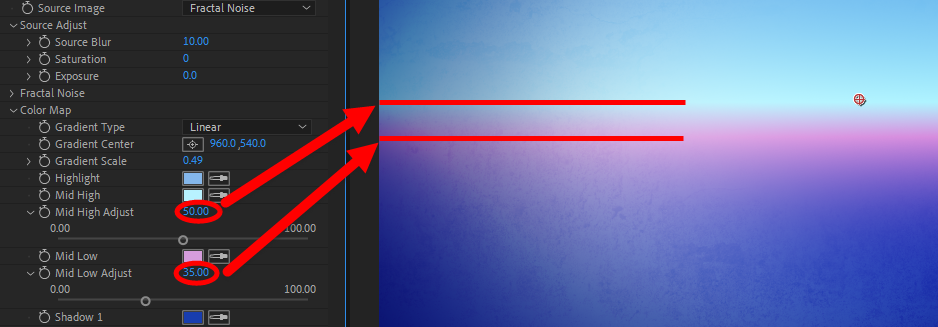
controls set how color control points feather across the gradient. A few examples may help here. Let's start with the following image, based on a slightly modified version of the Seaside preset. You'll notice that the Gradient Center point sits in the comp's exact center. That center marks the 50% line on the y axis. So, it makes sense that our Mid High color (pale blue) has an Adjust value of 50.00, making it pass directly under our center point. Similarly, our Mid Low Adjust, which corresponds to that mauve Mid Low color, runs along a lower line since its value is 35.00. If you try to set the Mid High Adjust value lower than the Mid Low Adjust, or the Mid Low Adjust higher than the Mid High Adjust, it will simply smash the two lines together and leave you with a hard edge. (See left image below.) Alternatively, you can expand the distance between the Adjust lines, as we did with Mid High Adjust: 80 and Mid Low Adjust: 20 (below, right).
Chose from the
Blend Mode
drop-down to select the blending mode used to composite the Color Map result over the Source Image map.
The
Color Mix
slider gives you control over the blending opacity of the Color Map over the source map. A 100% value makes it completely opaque. Lower values will make it more transparent, as you can see in the following comparison of 0% (left), 50% (center), and 100 percent (right) using the Concrete Art preset with Texture 5.
The Texture
group changes the look of the effect's overlaid texture.
Choose from six texture types in the
Texture
drop-down menu to find the desired look for your footage.
Change the size of the texture using the
Texture Scale
slider.
Texture Center
lets you reposition the center of the texture on the canvas using the x/y numerical controls or the cross-hair selector.
Make the overlaid texture more transparent by turning down the
Texture Opacity
control.
Bringing up the
Texture Contrast
will darken the contrast within the texture.
Raising the
Texture Blur
control will soften the texture map's focus and detail.
Increasing the
Texture Colorize
control will add the Mid Low color to the texture overlaid on the image.
Mask:
By default, the texture is masked so it appears at the edges of the frame and blurs toward the center.
Turn the
Enable Mask
control off to disable this effect and have the texture appear across the entire frame.
Mask
Scale
resizes the mask up or down from 0% to 2000% across the image.
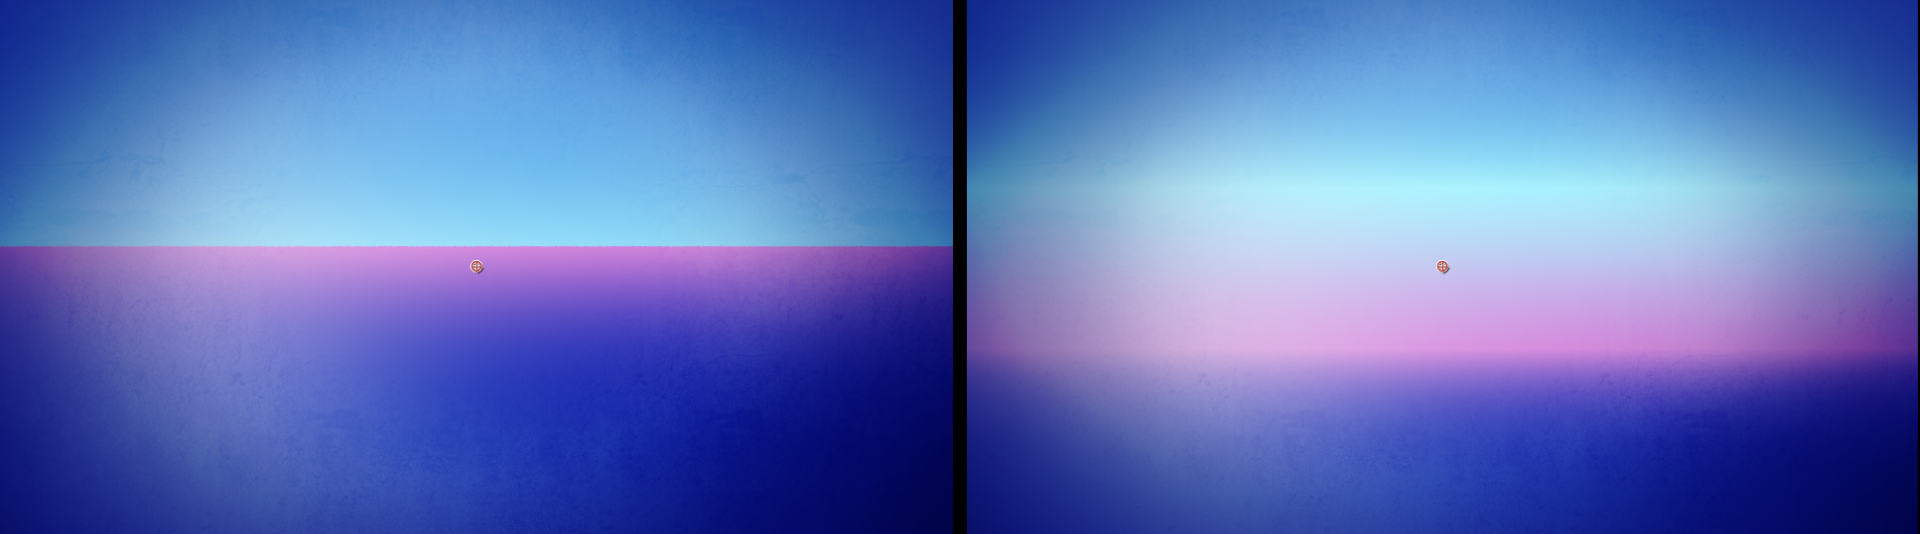
Mask Center
allows you to move the position of the mask along the x and y axes using the cross-hair or numerical controls. Be aware that the Mask Center point may default to a position outside the comp, as shown below (with 25% zoom).
Change the shape of the masked area by adjusting the
Aspect
control. Turn this slider down toward 0 to spread it out horizontally or up toward 10.0 to squeeze it vertically.
The
Falloff
control softens mask edges for a more subtle difference between the footage and the texturized masked vignette.
It also impacts the apparent width of the mask effect. Shown below are Mask Aspect: 0 with Mask Falloff: 0.75 (left) and Mask Aspect: 10 with Mask Falloff: 0.10 (right).
Chose from the
Texture Blend Mode
drop-down to select the blending mode used to composite the texture result over the Source Image map.
The
Vignette
group adds subtle darkness to frame edges.
Center
changes the location of the vignette with the cross-hair point position or x/y axis numerical controls.
Radius
adjusts how large the vignette shape is on the screen. Taking Center and Radius together, you can see the impact on vignette shape, almost like a mask. Shown below are Radius: 0.1 with Aspect: 0.2 (left) and Radius: 0.3 with Aspect: 3.7 (right).
Aspect, set at 0.8 by default, changes the vignette's aspect ratio. Turn it up to 20.0 to compress the blur toward the center, making it vertically taller and narrower, or turn it down to 0.0 to stretch it horizontally.
Falloff smooths the edge area around the Center point to create a more subtle transition around the vignette's edges.
Let's illustrate this. In the following triptych, we start (at left) with Falloff: 0.00, giving us a very defined vignette edge. Increasing to Falloff: 1.00 (center) softens this edge, but it also shrinks increases the vignette spread, thereby shrinking our central area. So, we then increase Radius from 0.3 to 0.5 (right), to push the vignette back toward the corners. Note that this happens because we positioned the vignette Center near the comp's center.
The
Strength
control increases how strongly the vignette applies to the overall effect.
Use the
Color
control to set the vignette's color.
Post Contrast
adjusts the overall difference between light and dark within the effect. Shown below are values of -4 (left), 0 (center), and 4 (right).
Fancy a more video-oriented walk through Soft Gradient Background? Check out our quick overview on Maxon's Cineversity!