Easily composite and frame one layer of footage over a larger layer. Includes the ability to add and customize a colored border and feathering.
Presets & Video Walk-Through
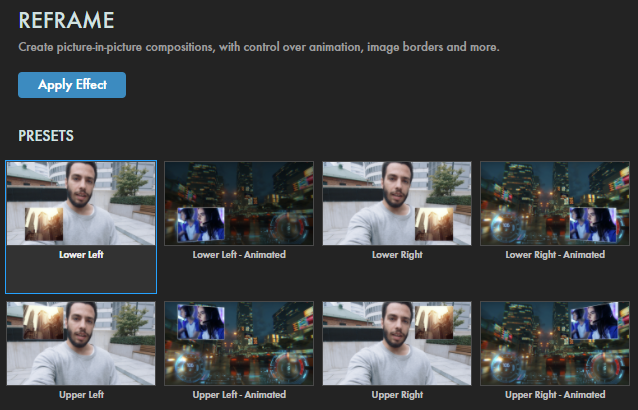
Reframe offers eight shortcuts to help you quickly apply your second clip in a picture-in-picture overlay atop a primary clip, either as a static box or an animated effect that begins at full screen, then quickly shrinks to a corner position. Find our presets via the blue Open Dashboard... button or the Choose a Preset... button below it.
As with all other Universe tools, you can modify or create a Reframe look and then save it under its own name by pressing the Save Preset... button.
If you'd like a visual overview of the plugin before diving into this guide, we recommend giving our Cineversity tutorial a watch.
Modify the Superimposed Picture
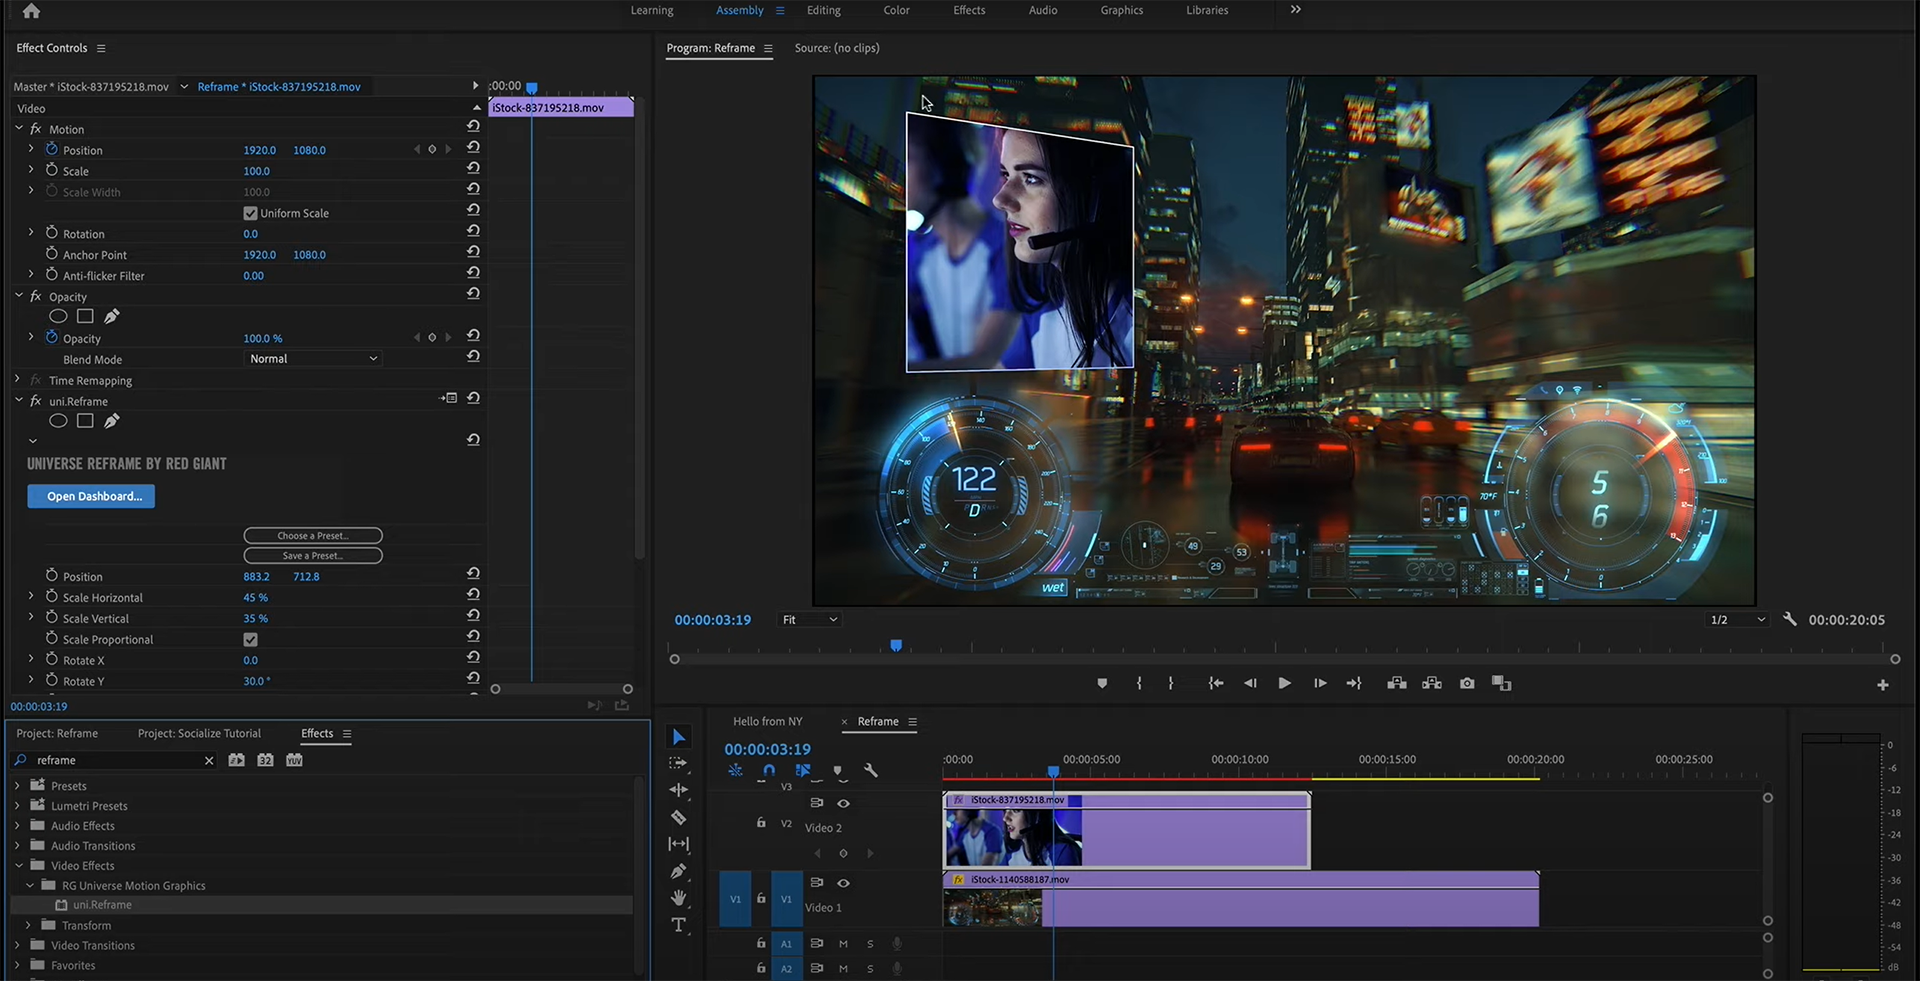
Position allows you to move the overlay's center via the x and y numerical controls or the cross-hairs selector.
Change the size of the superimposed image using the
Scale Horizontal
percentage control. Uncheck the
Scale Proportional
checkbox to activate the
Scale Vertical
control to alter the frame's aspect ratio.
Rotate X/Y/Z
rotates the image in 3D space.
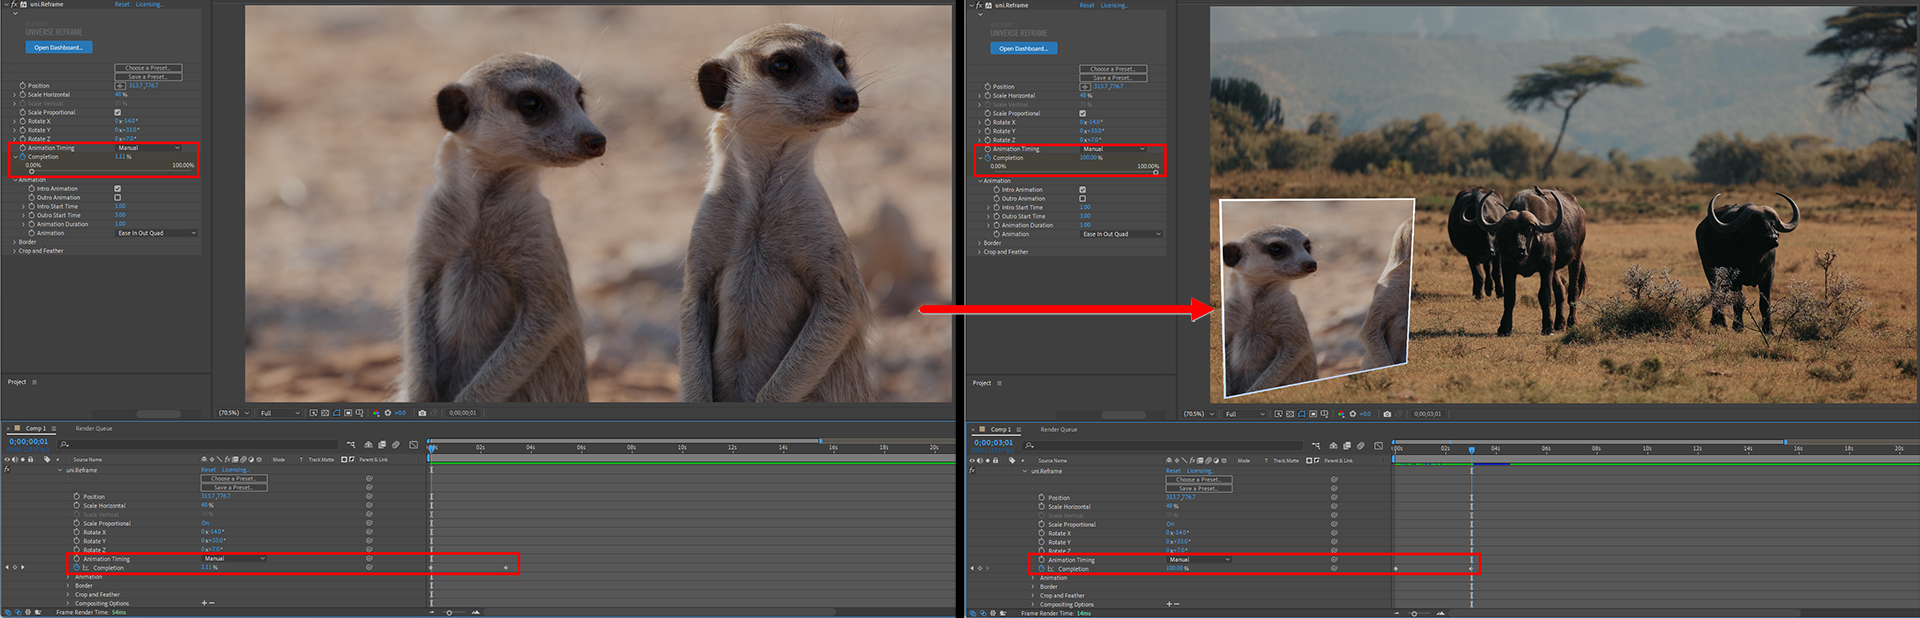
The
Animation Timing
parameter offers two options: Manual (shown below) and Automatic. The former sets whether the frame animates into place using the
Completion
slider; the latter uses the Animation subgroup controls.
Animation
Intro Animation
toggles whether the image animates into place, beginning from full screen.
Outro Animation
toggles whether the image animates from a smaller picture-in-picture overlay to full screen.
The following example shows the effect of enabling Intro and Outro Animation.
Intro Start Time
sets the time at which the overlay frame begins to animate into place.
Outro Start Time
sets the time at which overlay frame begins to animate back to full screen.
Animation Duration
sets how many seconds the animation lasts from start to finish.
Naturally, you want to keep track of what starts when and for how long. For example, if your Intro Start Time is 3.00 and your Animation Duration is 3.00, an Outro Start Time of 5.00 may prove disappointing.
Animation
provides the standard array of
Animation Tween options
that configure how the picture animates in and out of position.
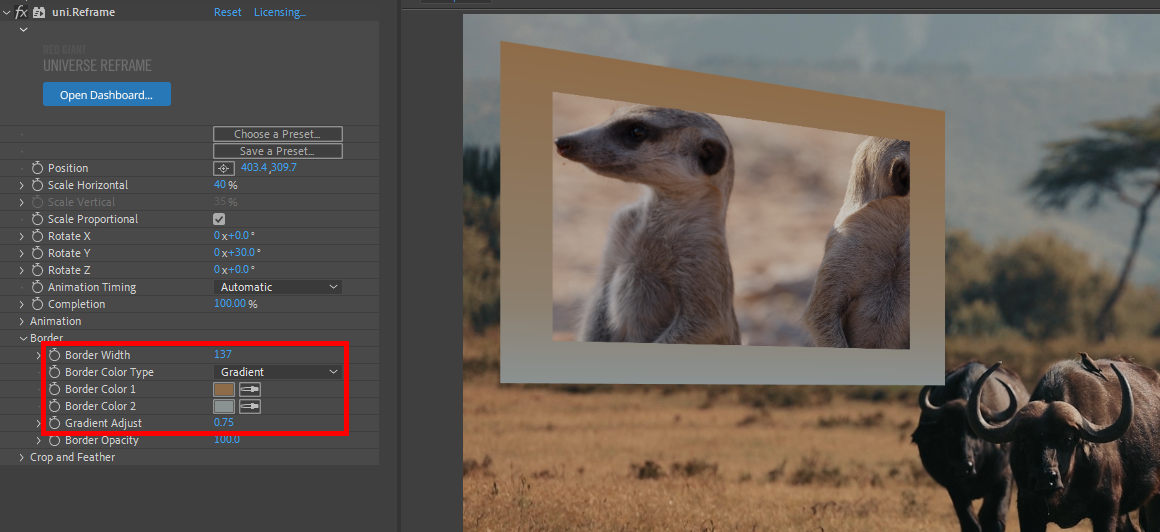
Border
Border Width
adjusts the border size.
Border Color Type
can be set to either Solid, which applies
Border Color 1
to the entire frame, or Gradient, which blends from Border Color 1 into
Border Color 2. In the following image, we applied a very thick border (value: 137) and used the color picker tools to sample the foreground grass and background hills for our gradient.
Gradient Adjust
controls the positioning of the gradient's scale within the border.
Lower values let Border Color 2 dominate the frame; higher values emphasize Border Color 1.
Border Opacity
adjusts the border's transparency.
Crop and Feather:
Crop X
and
Crop Y
set the percent of the original image cropped along the x and y axes.
By keyframing both values from 0 to 100, we began at a single dot and reach our full-sized overlay, as shown below.
Feather Direction
sets whether the
Feather
is applied along the Vertical (left) or Horizontal (right) axis, as pictured here.
Note that negative values result in feathering (transparency) along the left or upper sides.
Falloff
adjusts the scale, or length, of the feathering range from opaque to transparent.
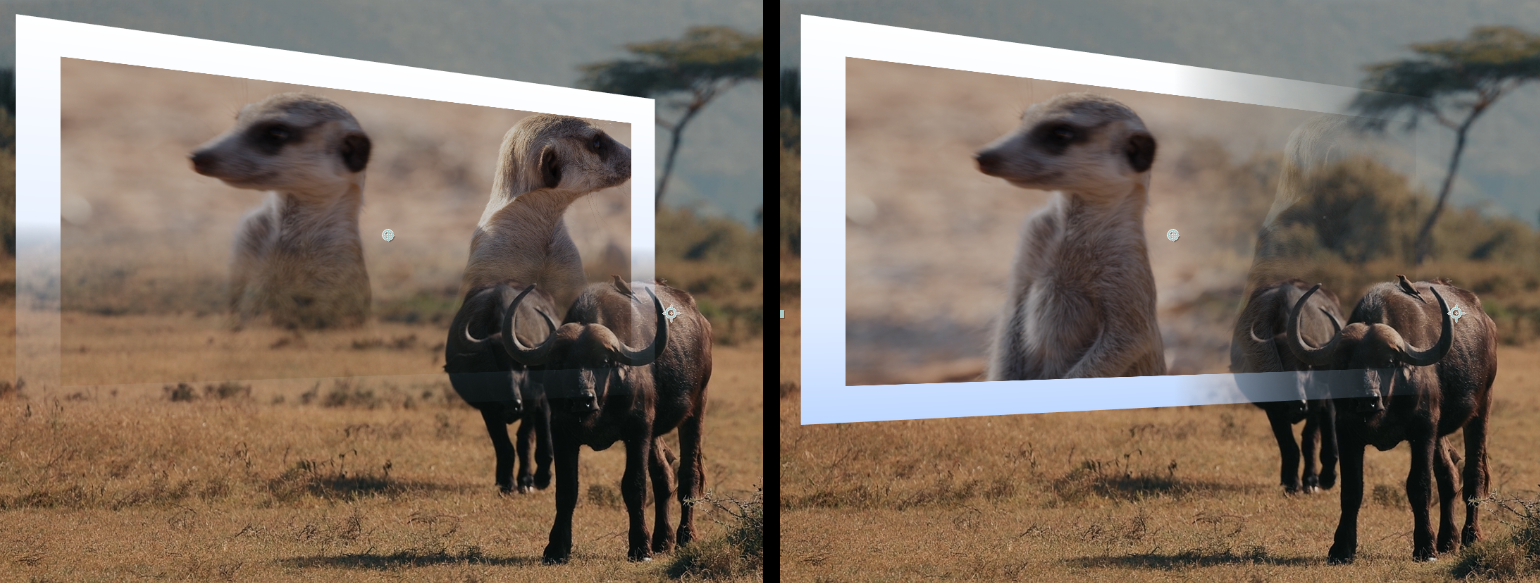
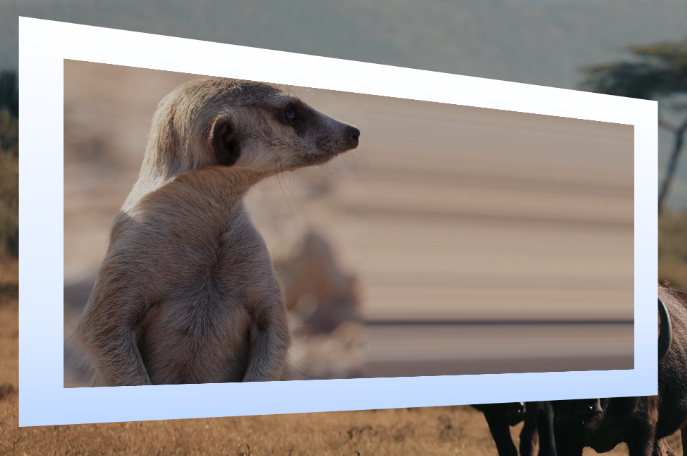
X/Y Offset shifts the overlay image's position within its frame. You may have noticed that the meerkat on the right in our examples occasionally gets cut off. A large negative value for X Offset shifts the cuddly creature back into view. However, you can see that shifting too far yields streak artifacts that fill the frame in the absence of actual image data, so be careful with your values.