Trapcode Particular
Choose 3D Model as your Emitter Type to emit particles from 3D models.
Using a 3D object as an emitter can create some very complex and powerful results, including creating the look of a three-dimensional object being created out of particles.
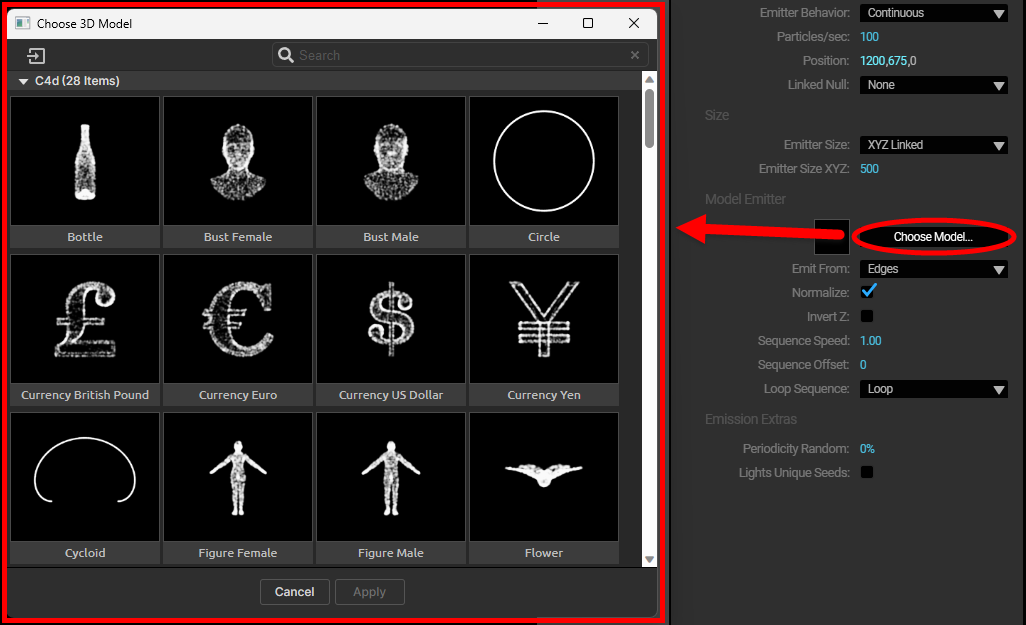
There are two ways to import 3D models. After selecting the 3D Model option from the Emitter pop-up, you can import a 3D file (or sequence) with the Choose Model button. This opens a window that shows Particular's included models, including a search field to help quickly filter them. You can also import your own models from here by clicking the Add New Model icon in this window's upper-left corner.
You can access the 3D files included with Particular through the Designer by going to Blocks > Emitter Type > 3D Model, then clicking the Choose Model/OBJ button in the Block controls.
Alternatively, you can also import models or animated 3D sequences into the Project panel in After Effects, then add them to compositions manually as you would any other asset.
|
Note for Cinema 4D Models : Cineware (.c4d) files can be exported directly from Cinema 4D under File > Save Project for Cineware . If you want to Save Polygons or Animation in your Cineware file, you can toggle these options under:
Animations typically have the best results when:
|
Note that when using 3D model files with Particular (regardless of the method used to import them), the model's layer will need to have its visibility disabled in the composition. Otherwise, a warning about the file format may be displayed:

Note: Particular does not support negative indices (also called relative indices) inside the model. Indices reference vertices inside the 3D model file.
Model Emitter Settings
With your Emitter Type set to 3D Model, settings in the Model Emitter group will become available. These provide more options for customizing how your particles look.
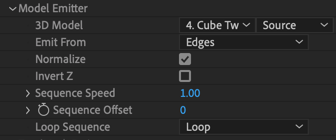
Once you have imported a model and added it to your composition, use this menu to choose its layer.
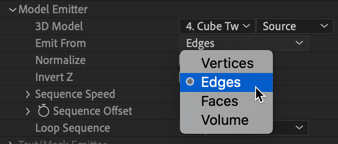
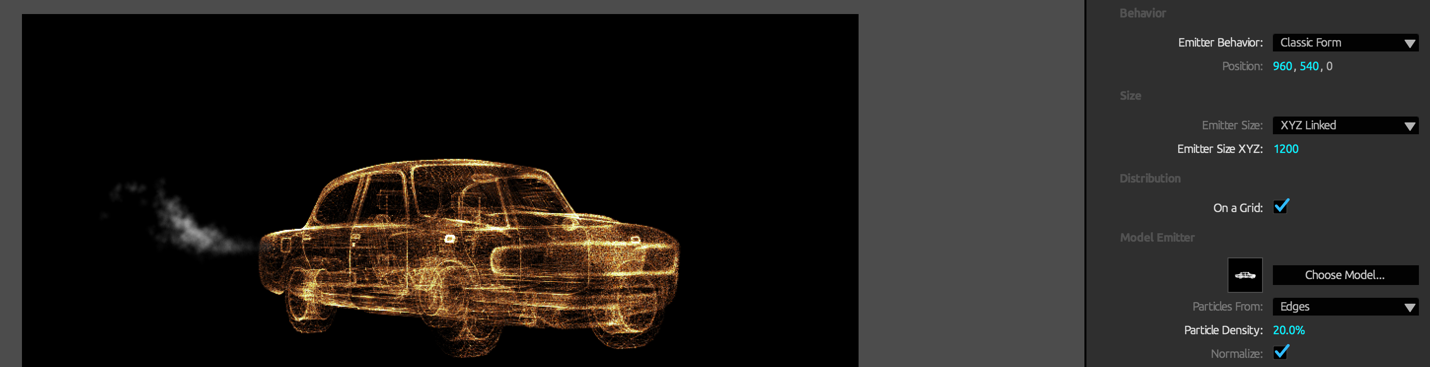
The Emit From menu determines which component of your 3D model will emit particles. This changes to a Particles From menu when a Classic or Dynamic Form behavior is selected. There are four options:
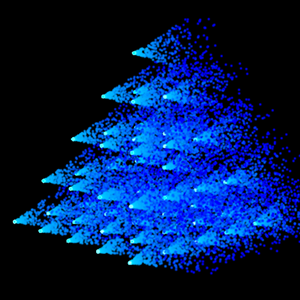
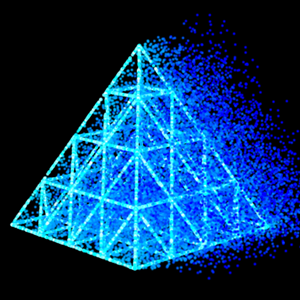
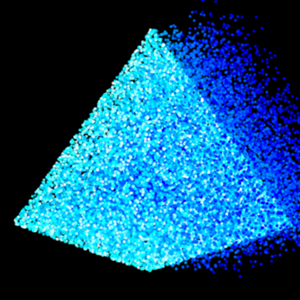
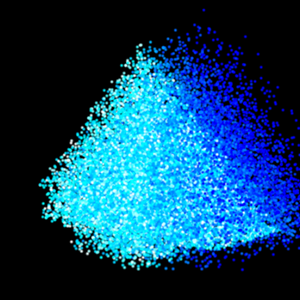
Examples of Emit From set (from left to right) to Vertices, Edges, Faces, and Volume on a pyramid model.
With a form behavior selected, you can choose to place your particles on a grid. When choosing this, the Particles (i.e., how many particles) property disappears. This is because On a Grid doesn’t use these particle count settings to determine the number of particles on a 3D Model. Instead, particle count is based on the model's mesh in conjunction with the option selected in the Particles From pop-up. Reducing the Particle Density value allows you to remove particles from the mesh, making the form less dense. Note that you can also take this value above 100% to add more particles.
Normalize scales and moves the model to ensure it is centered on the Emitter position and fits within the bounding box defined by the Emitter Size parameters. If the model is an animated sequence, the first frame becomes the reference for the normalization.
If you turn off Normalize, your model might not be visible within the field of view, or it may be very small or large depending on the range of coordinate values used by points in the model.
|
C4D Files:
When this option is disabled and you’re working with a C4D file, the model centers on coordinates defined by the C4D file. If the model disappears when this option is disabled, check that the imported scene aligns with the camera. The C4D coordinates may have positioned the model somewhere off screen.
|
Invert Z flips the model on the z axis, turning the object to face forward or backward (if located at default values).
You can import static 3D models, or you can import an animated sequence of 3D models. This creates an animated emitter. There are three parameters that allow you more control when working with animated sequences.