Trapcode Particular
Multi-system functionality takes all of the power and capability of Trapcode Particular and multiplies it through a wealth of multi-system presets. Individual blocks for each system component can be quickly disabled or deleted. And since creating a new system from Particular's ECP After Effects UI launches the Designer anyway, you might think of the Designer as a hub for both creating and adjusting multiple systems.
On the left side of the Effects Chain, the systems area displays all systems currently in use. This area also gives you a great deal of power for creating and adjusting systems.
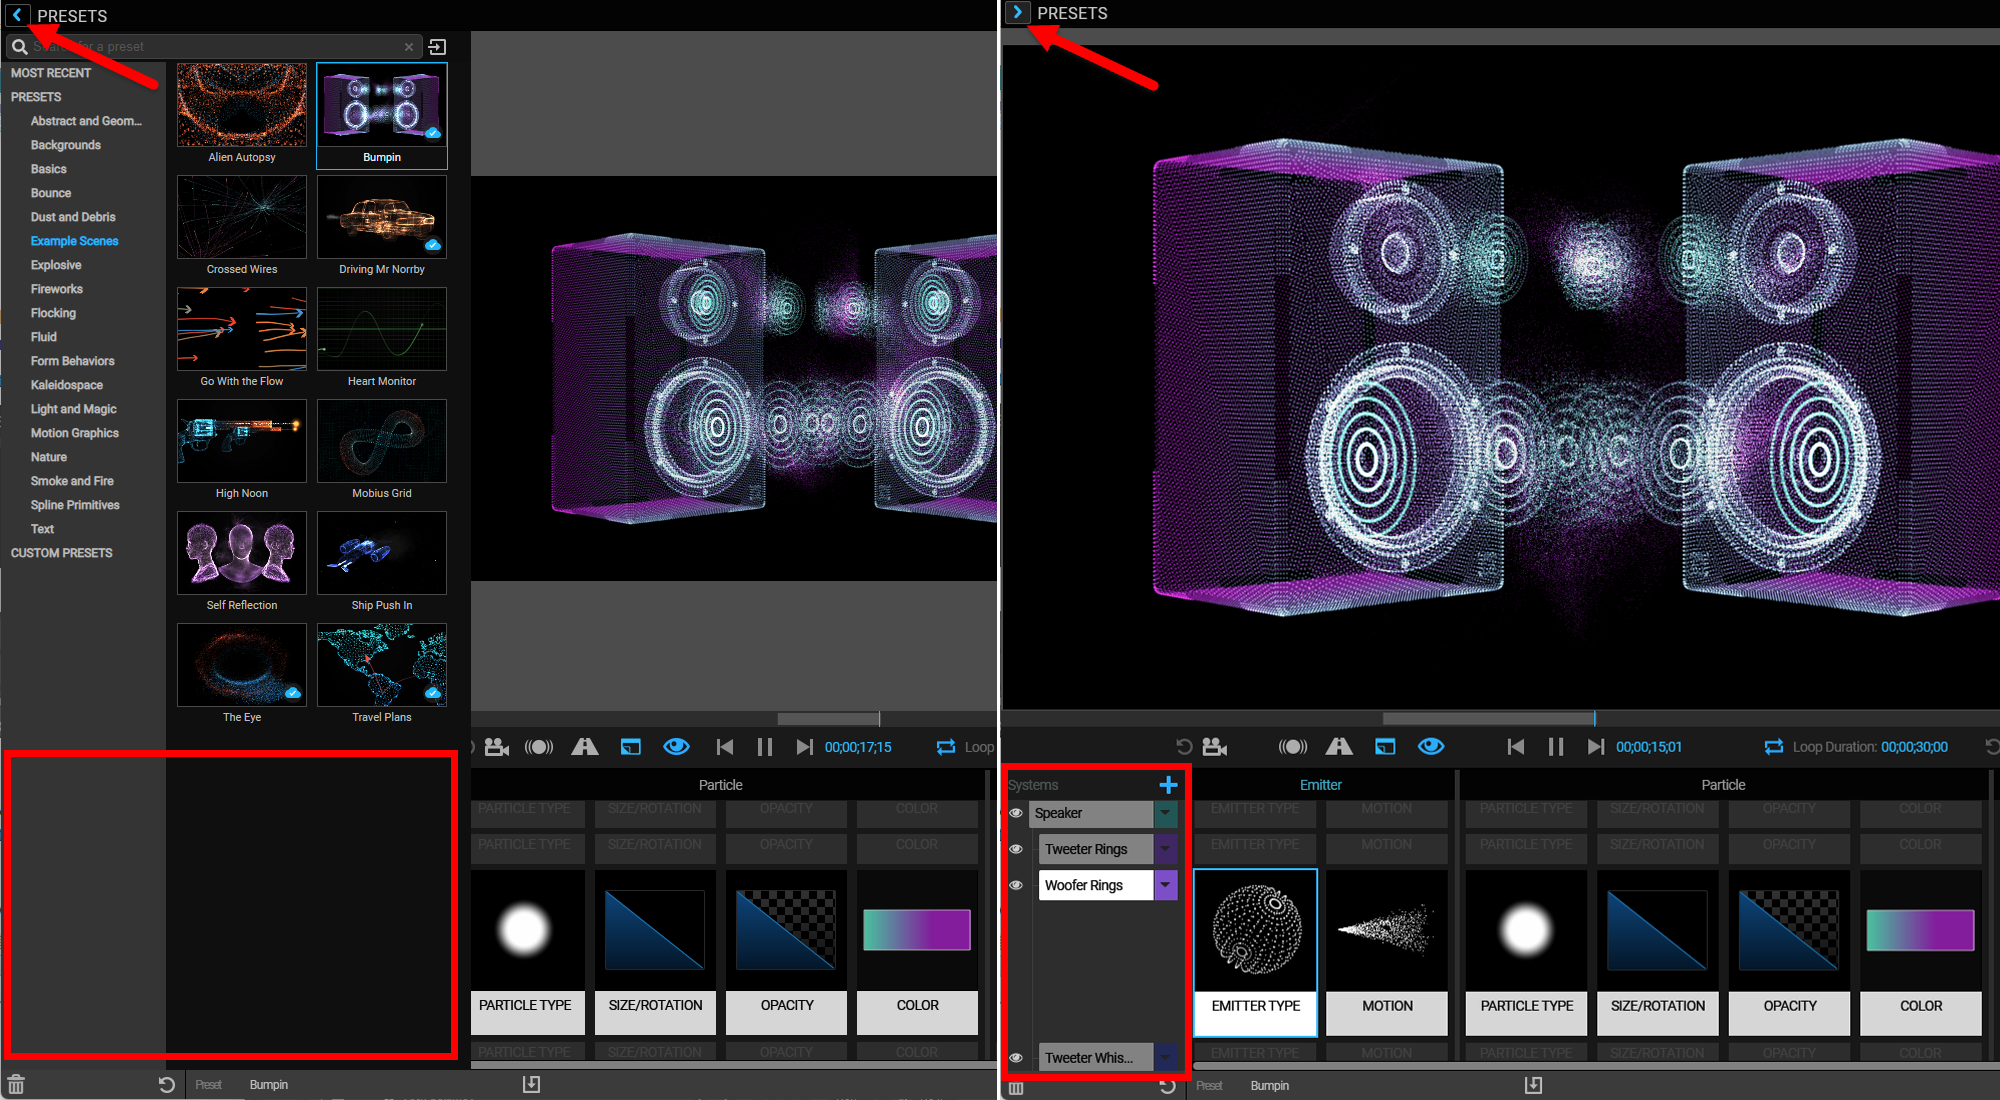
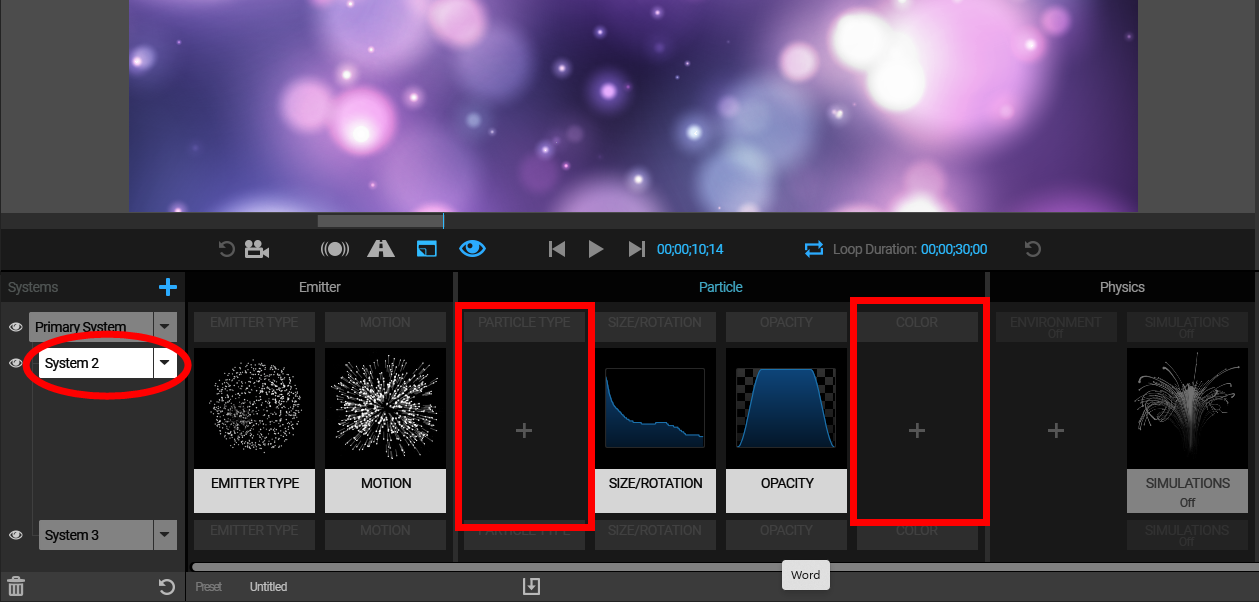
Reminder: If you find yourself wondering, "Hey! Where'd my systems on the Effects Chain go?!" don't worry. As shown below, this confusion is likely caused by your Presets panel being locked out and covering the Systems area. Simply close the Presets panel for the full Effects Chain view.
Perhaps the fastest way to create a multiple system is to apply a preset from the Presets pane, as we did with the Bumpin preset above. Alternatively, to create and adjust systems on your own, click the blue plus sign (above Primary System) to add a new system. The new system will automatically adopt Particular's default settings.
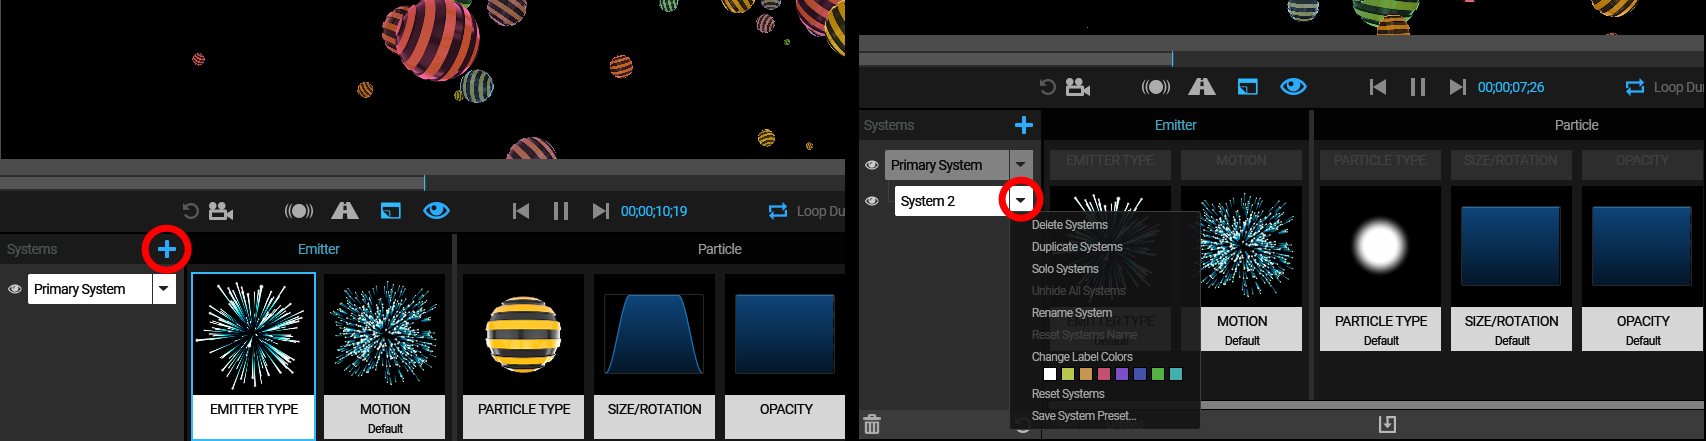
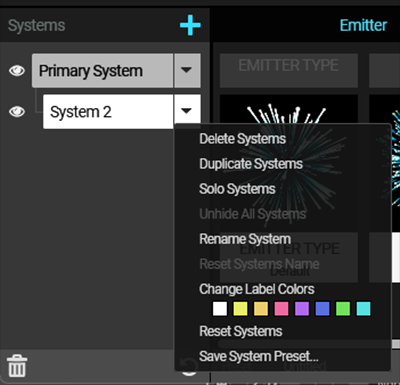
As shown above (right), you can click on a system's down arrow get a helpful drop-down list of options.
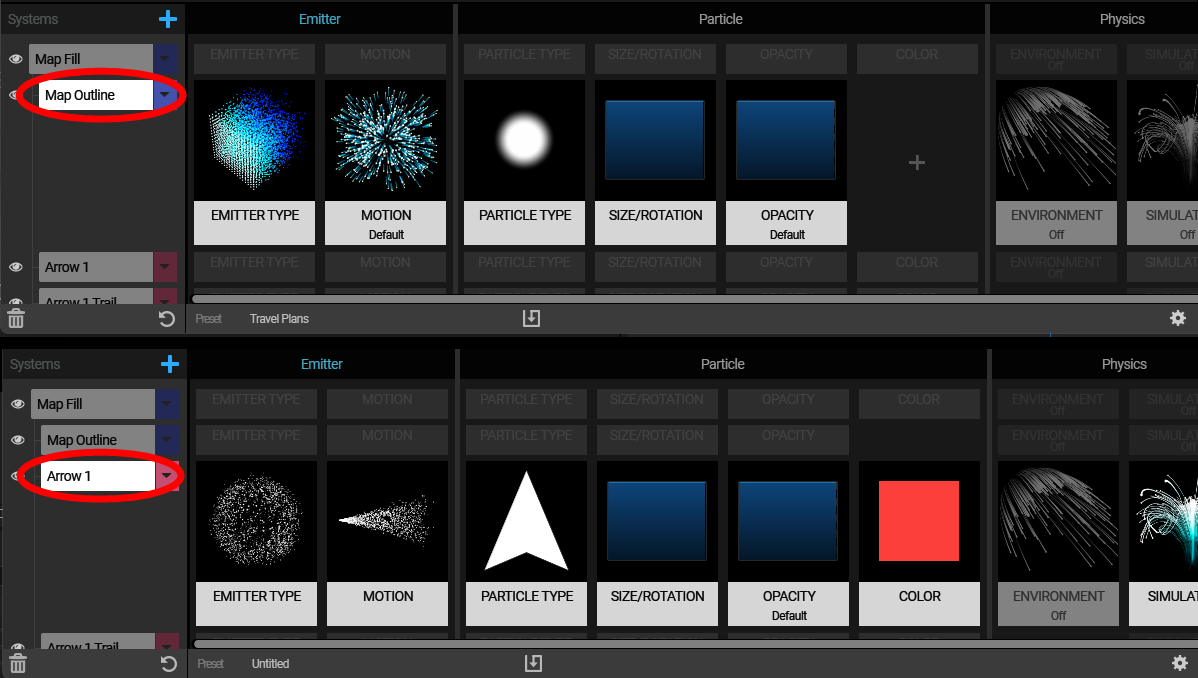
To select the different systems in your project, click the name of the system in the systems area. Selected systems are white; deselected systems are gray. When you select a system, its blocks become brighter and full size, showing the system's blocks along the Effects Chain. Deselected systems have gray blocks, and their thumbnail will be temporarily hidden.
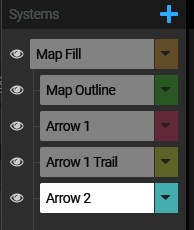
We illustrate this below with a snip of the systems found in the Travel Plans preset. Travel Plans is comprised of 11 systems. (You might find it informative to disable their System Visibility (see further down on this page) one by one to examine how the different blocks and block types within a system correlate to what's seen in the animated preview.) You can see how the blocks shown in the Effect Chain stack minimize when a system is not selected. Clicking on the system name reveals the blocks and preview thumbnails for that selected system.
You can select multiple systems to perform some of the functions available under the Systems drop-down simultaneously, such as deletion or renaming. For example, you might want to assign multiple systems a single label color. Click the name of one system, then Cmd/Ctrl + click each additional system you want selected. You can also select a list of systems by clicking one at the top and then Shift-clicking the one at the bottom. You can remove any systems from the selection by Ctrl/Cmd-clicking their names.
From a system's drop-down menu, choose Rename System. The resulting dialog box provides a field for you to type in a custom name. When ready, press OK to accept the name change. You can also reset the system name from the same drop-down.
Give your particle systems one of eight different label colors. Select one or multiple systems, then select a label color from the drop-down.The color change will be reflected in the drop-down menu icon for each selected system.
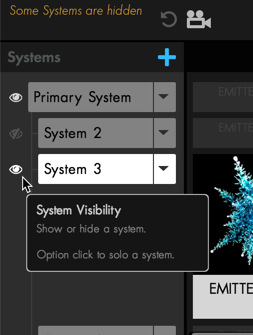
To change a system's visibility, click the eye icon next to the system selector in the Effects Chain's systems area. A white eye icon indicates that a system is visible, while a gray eye icon with a slash through it indicates that the system is currently hidden. Below, the eye icons indicate that the Primary System and System 3 are visible, while System 2 is hidden.
When you have an invisible system, a message will indicate that the system is hidden. To restore visibility to all systems, choose Unhide All Systems from the system selector pop-up menu.
It’s frequently helpful to see just one system at a time, or, in other words, to "solo" it. You can choose Solo System from the system selector pop-up menu. When you only have one system visible, a message will indicate that you have a soloed system.
You can also solo a system by Alt/Opt + clicking the eye icon to the left of the system selector.
And remember, Solo systems always shoot first.
Occasionally, you might want to reset just one system back to Particular’s default settings. Simply choose Reset System from the system selector drop-down menu. This will reset to the defaults of Particular, not to the Primary System. Nothing will be inherited from the Primary System in the newly reset system.
In the Designer, you can delete a system in any of three ways:
You can duplicate one or multiple systems inside the Designer. With your desired systems selected, open the source system's pull-down menu and choose Duplicate System. Duplicate systems do not retain the name or color label of the original system, but the block settings will be identical.
When you create an additional system, it creates a new system with Particular's default settings (white spheres, point emitter, etc.). For secondary (non-primary) systems, though, you can cause attributes to be inherited from the Primary System by deleting blocks. We’ll look at exactly how to do this later on this page. But for now, let’s look at a very brief tutorial to understand how this works.
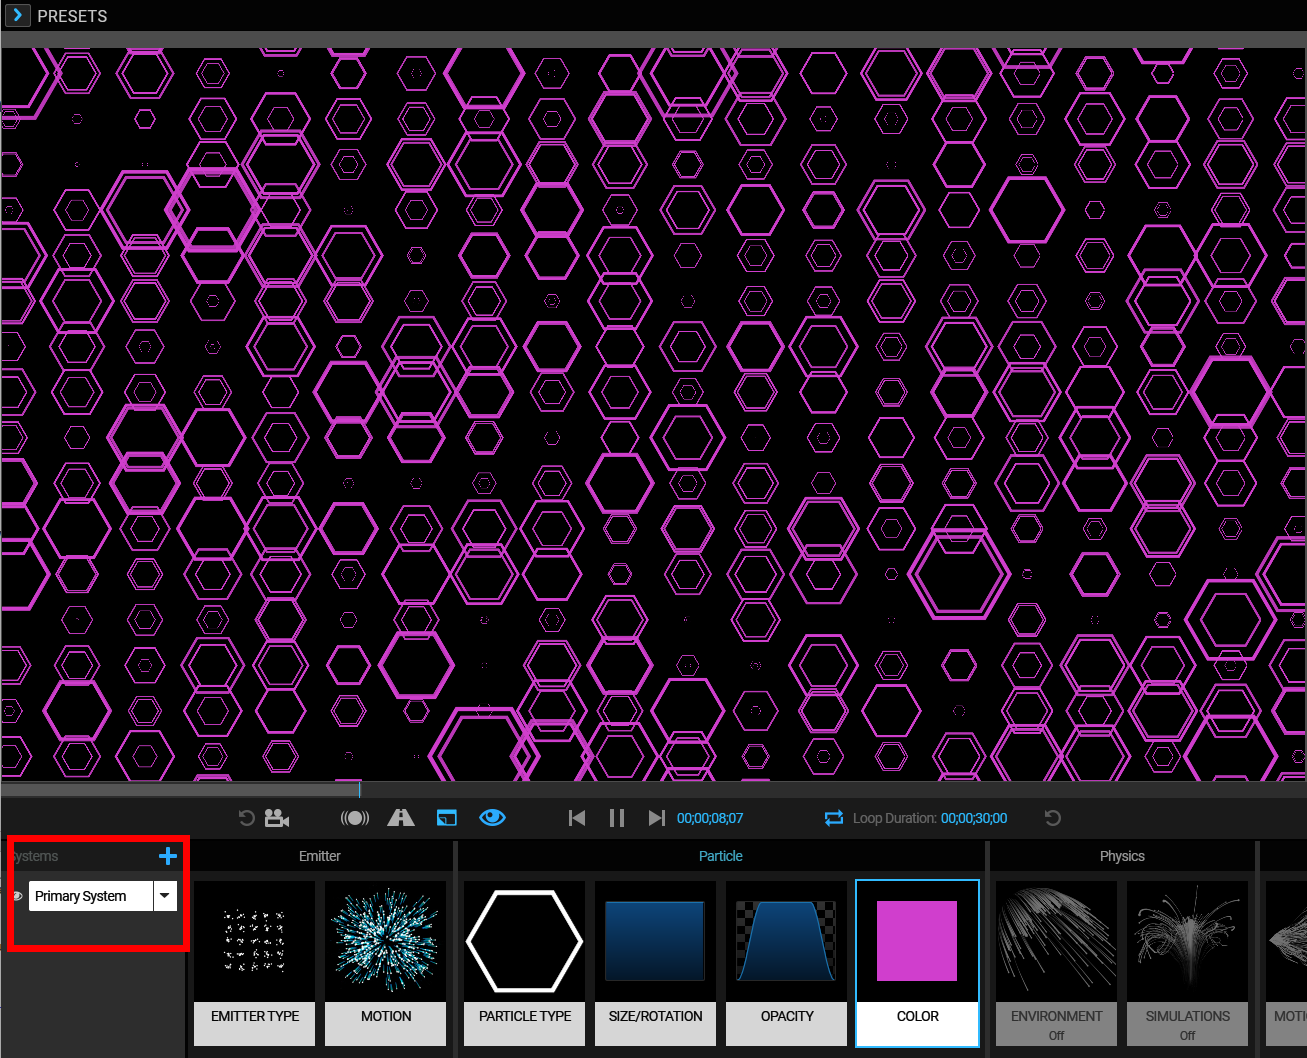
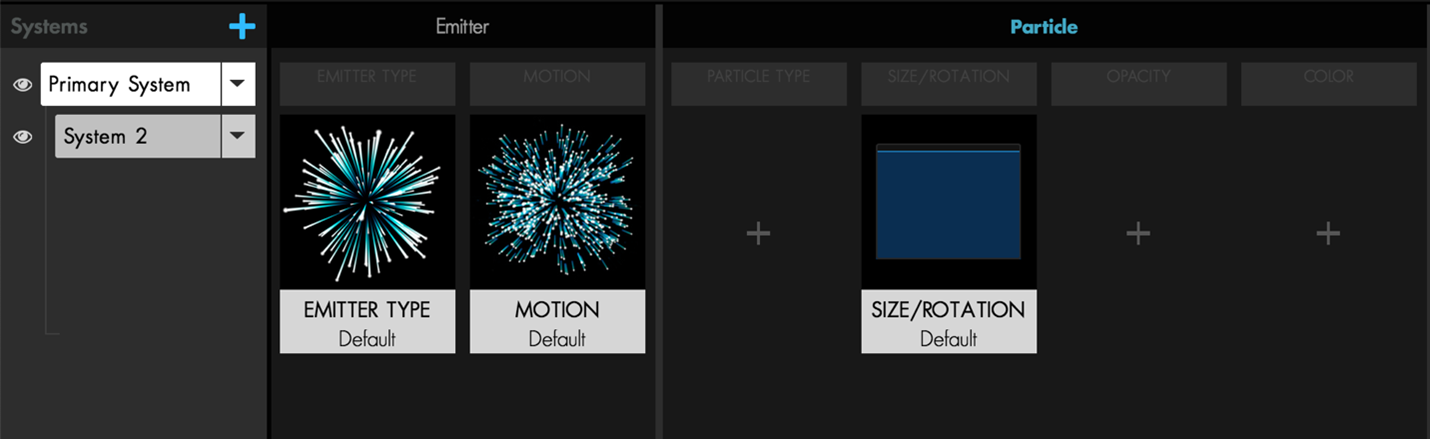
The graphic below shows a new, simple particle system, essentially just a bunch of pulsing purple hexagons.
Now, let's add another system. Notice the default white sphere particles mixing in with our hexagons.
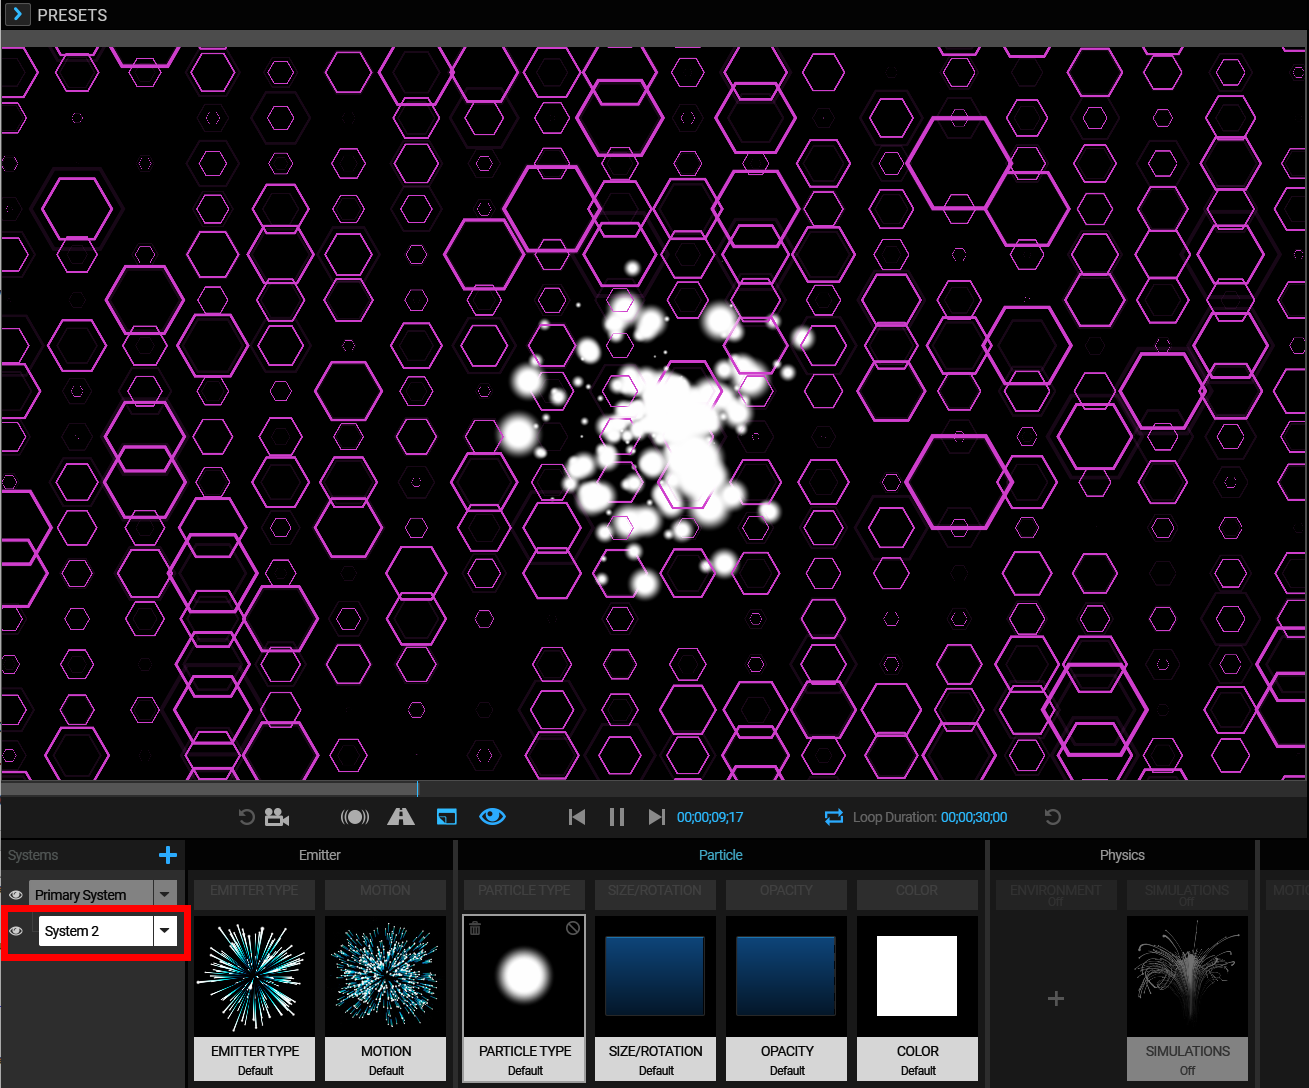
Now, let's return to the Effect Chain blocks for System 2 and delete the Color block (covered below).

Deleting the Color block in System 2 tells Particular to “inherit” this specific attribute (i.e., color) from the corresponding Primary System block. Thus, it turns purple, using the Primary System’s color instead of its own color.
Understanding attribute inheritance is essential for getting the most out of using multiple systems and the following features on this page.
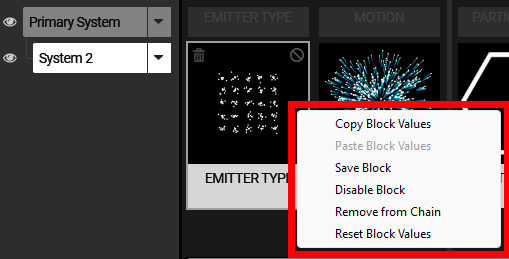
You can copy one system’s block properties and easily paste them to another. Select a block you wish to copy. Right-click on the block and select Copy Block Values from the pop-up contextual menu. Select the same block type in another system. Right-click and select Paste Block Values. This system now shares the same block settings as the one copied.
For secondary (non-primary) systems, we can delete blocks or simply disable them. When we disable blocks, Particular lets us see what that specific block would look like using inherited values instead of that block's native values.
To see this, recall our previous example of a Primary System with big blue squares and a newly created System 2 with default settings.
Now, we’ll disable a block. To do this, click on the circle/slash icon in the upper-right corner of a secondary system block.
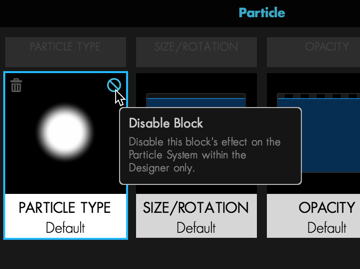
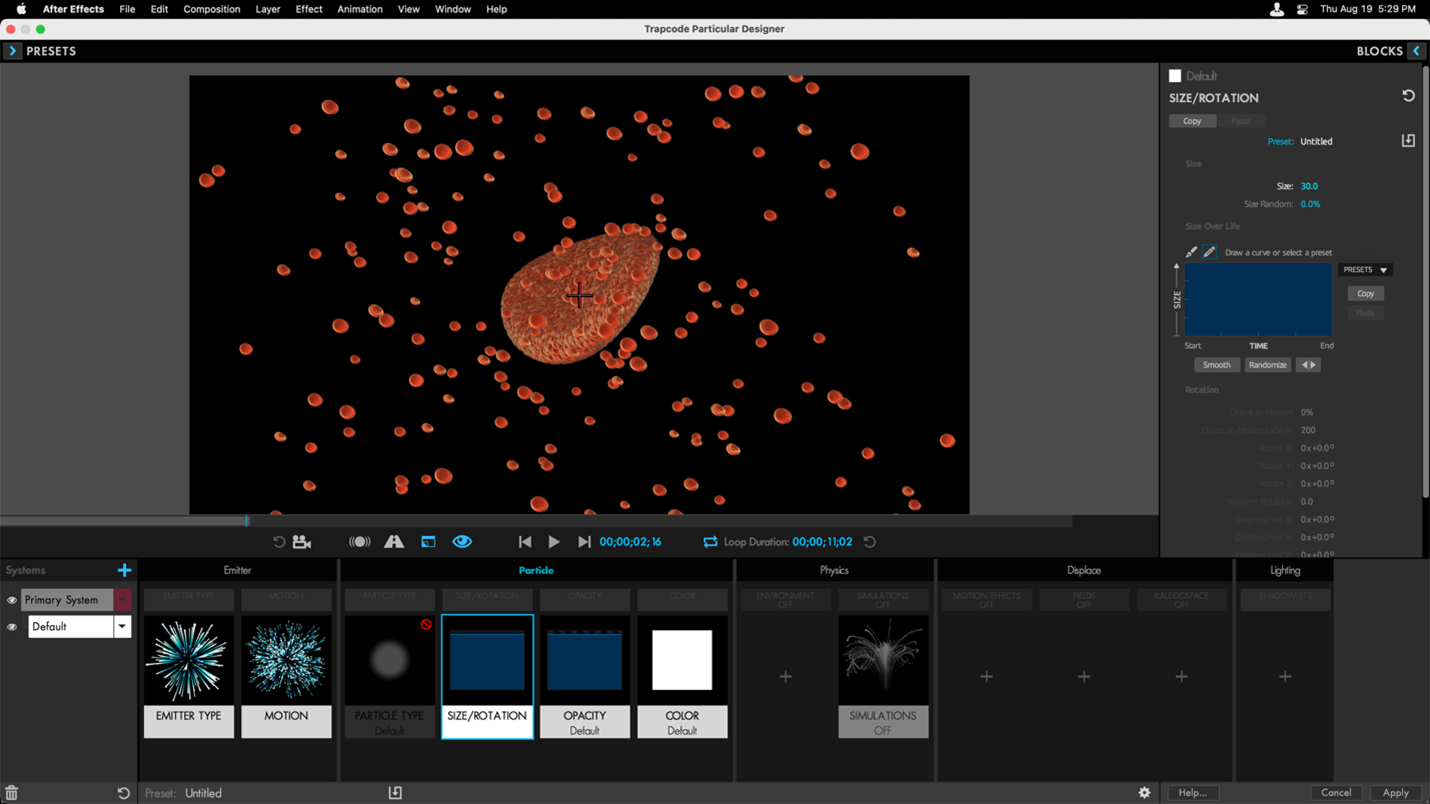
In this case, we'll disable the Particle Type block on System 2 named Default (the one with the moving cells). This will cause all other attributes to stay the same, except for Particle Type. By disabling this block, it will no longer use its own settings (Sphere) and will instead use the Particle Type of the Primary System (an orange Cell sprite).
Remember that this is only temporary. To turn the block back on, simply click the icon again. To permanently use the inherited values for a block, delete it.
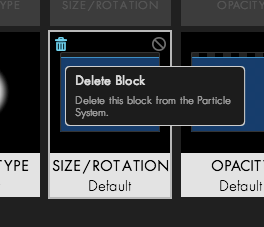
Deleting a block from the Effects Chain of a secondary system will cause the settings for that block to be inherited from the Primary System. You can delete a system block in two ways.
If you delete a block accidentally, you can immediately press Ctrl/Cmd + Z to undo that action.
When a secondary system inherits attributes from the Primary System, there will be a plus icon occupying that position on the Effects Chain in lieu of a block.
Here, the Particle Type, Opacity, and Color values inherit from the Primary System.
If you want a block in a secondary system to become a “particle adult,” complete with its own life choices and set of values, you can click the plus icon and choose a block preset setting. This will create a new block for the secondary system, which will function independently from the corresponding block on the Primary System.
In the following example, based on the Magical Glow Spheres preset, smaller spheres are generated from System 2, a secondary system. As you can see in our version below, Particle Type and Color are inherited from the Primary System.
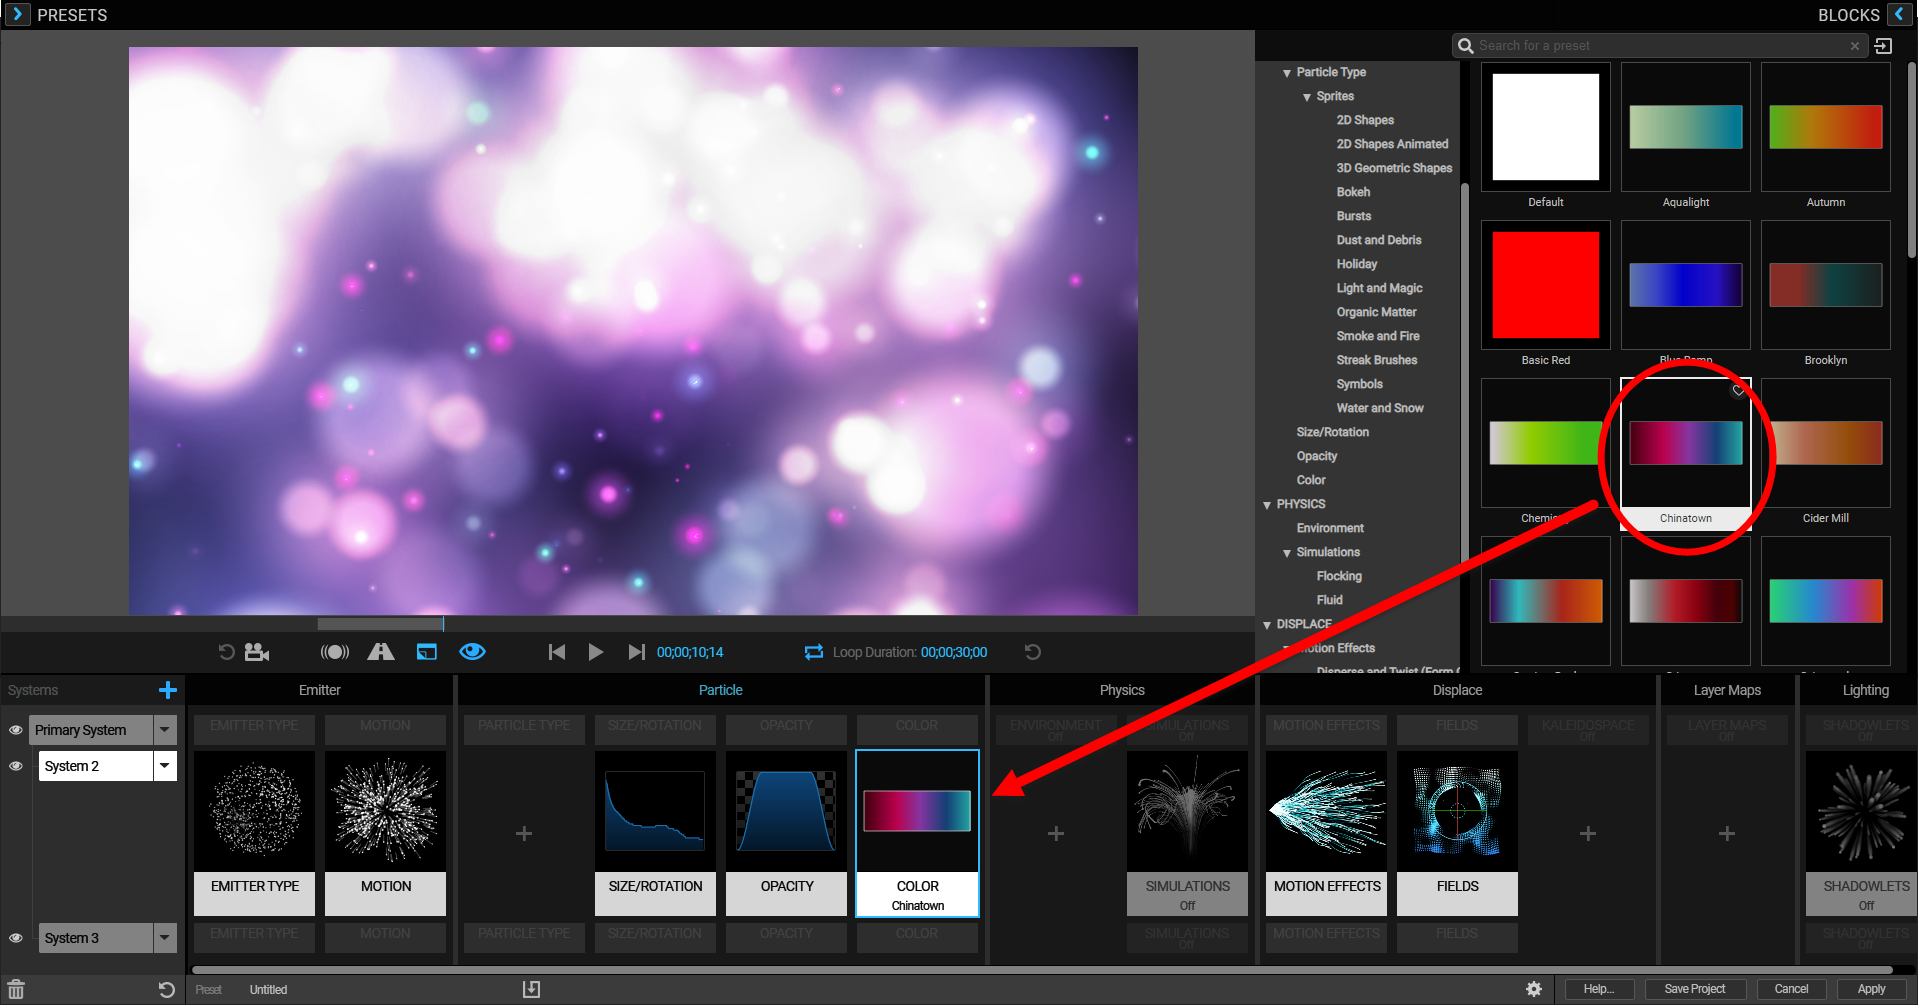
However, if we click the plus icon in the Effect Chain's Color block area, the Blocks pane will open. When we select a new block preset, it creates a new Color block for System 2, bestowing its own color independent from the Primary System settings.
In the Designer page's Preset area, we saw how to save your own presets by clicking the Save Systems preset button at the bottom of the Designer.
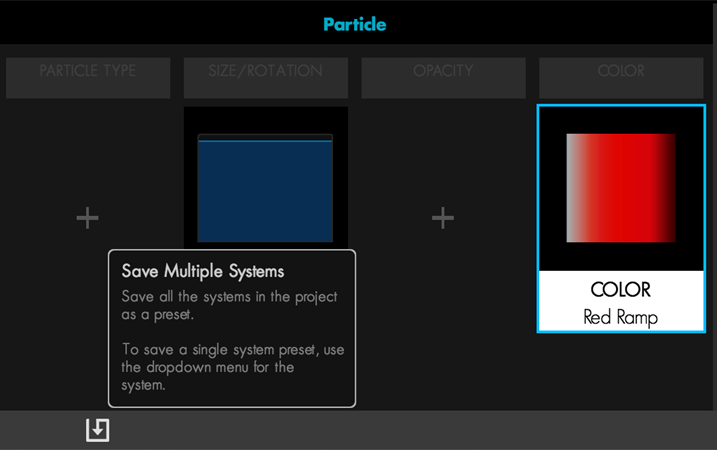
This handy button saves all your systems and settings for later use. You'll find them in the Custom folder under the Presets pane's Multiple System Presets tab.
What if you only want to save one system, not all of them? Just go to the system selector pop-up and choose Save System Preset.
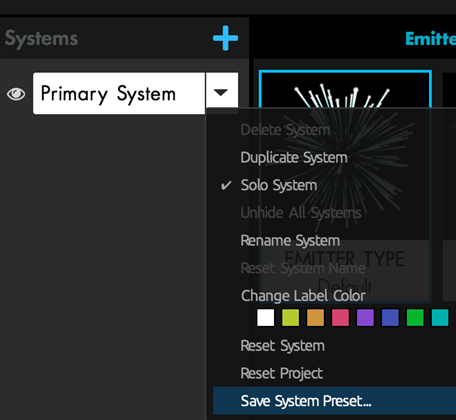
This will save a System Preset for that system only. It will then be accessible for current and future projects in the Custom folder of the Presets pane.