Trapcode Particular
The Fluid model makes particles move in a pattern similar to liquid.
If you're looking to add additional fluid emitters, performance will improve if you work within one instance of Particular. Adding fluid emitters on separate Particular instances on separate layers increases render times dramatically.
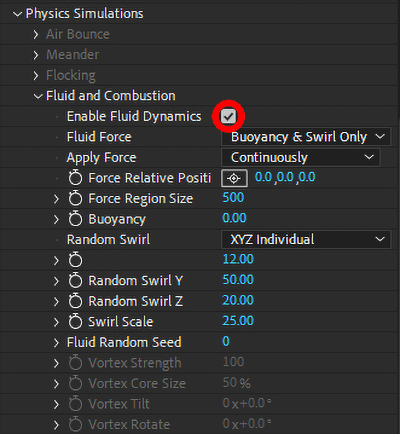
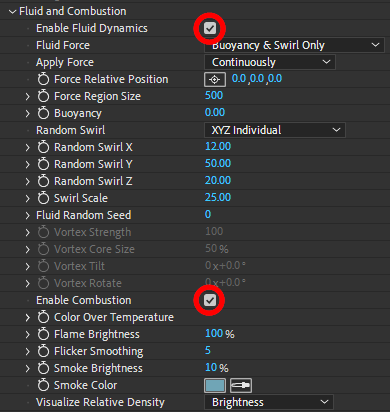
Turn on Enable Fluid Dynamics to activate the Fluid Simulation. Fluid Motion doesn’t always play well with other engines. For that reason, the other Physics Simulations categories will disable when Fluid is chosen.
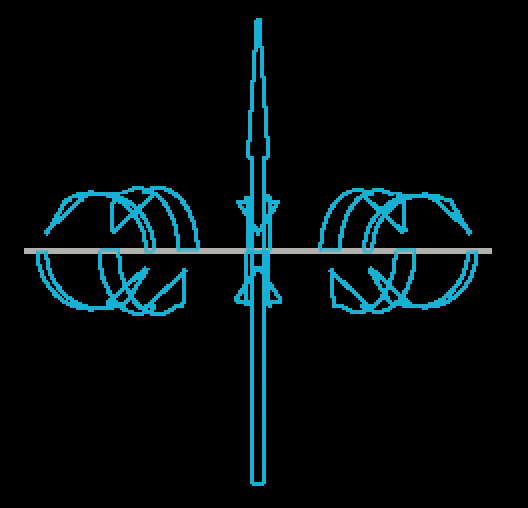
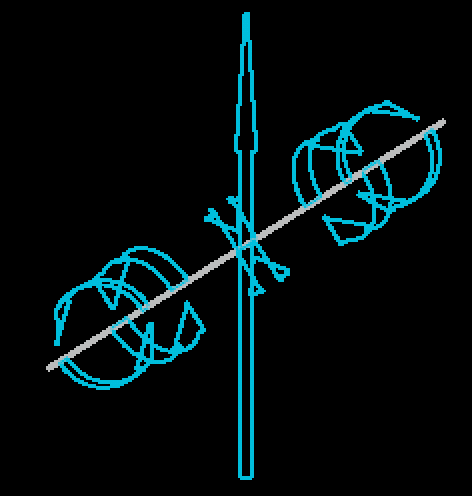
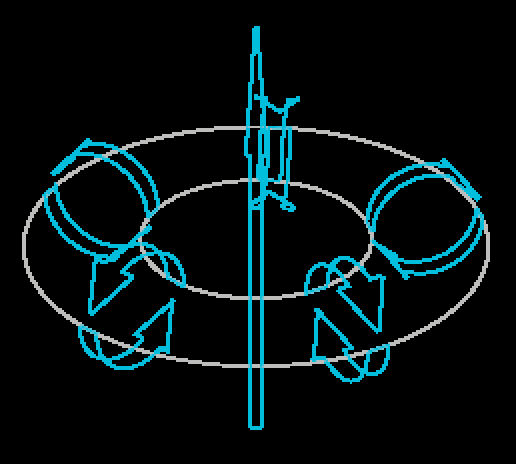
This control defines what type of force applies to liquid particles.
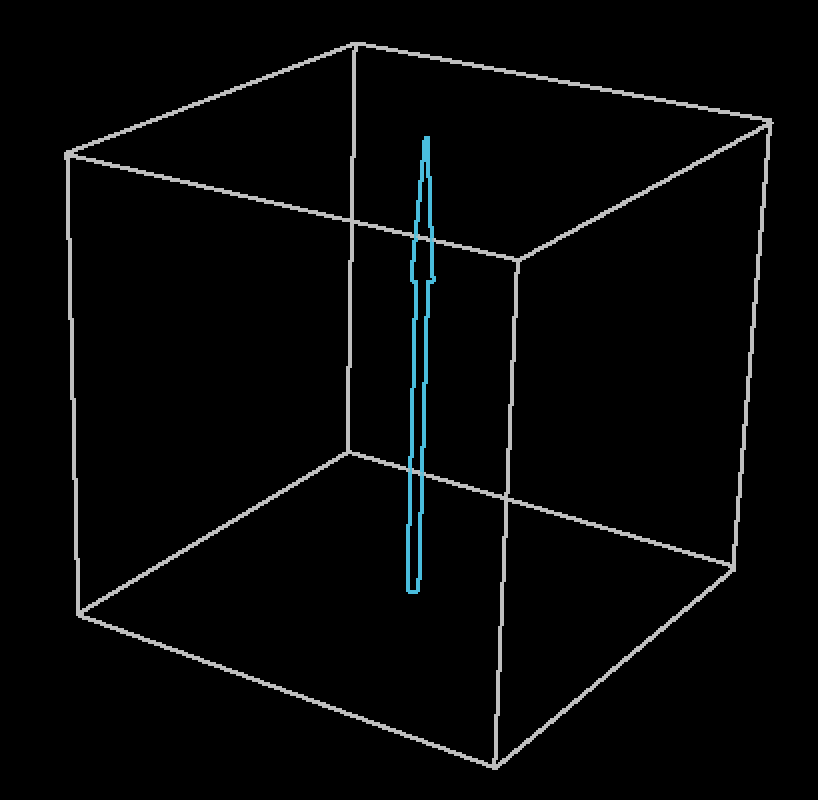
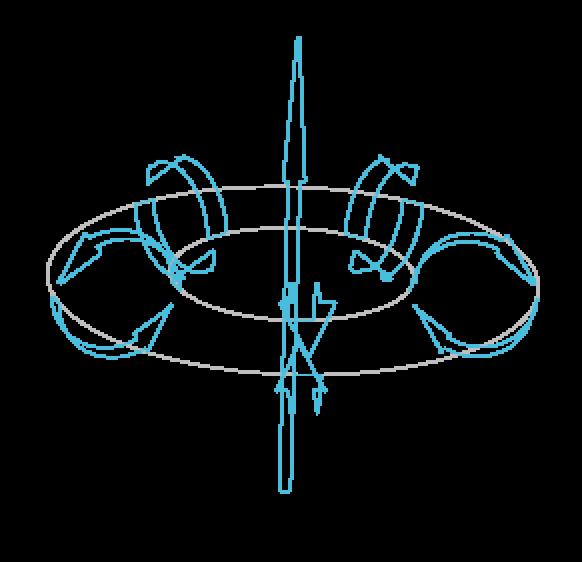
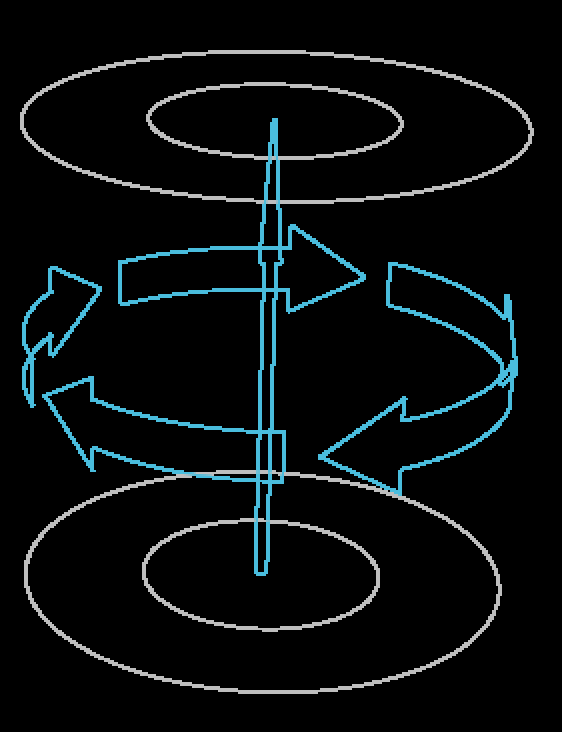
From left to right: Buoyancy & Swirl Only, Vortex Ring, and Vortex Tube.
This control determines if the force dictated above is applied Continuously or only once at the outset (At Start) of the effect.
This control offers a set of x, y, and z coordinates that determine where the forces defined above are applied to the particles in relation to the emitter.
This control determines the region around the emitter in which the force affects particles' positions.
This control defines how much upward (positive) or downward (negative) force applies to particles.
This controls how turbulent swirling forces are applied along particles' x, y, and z axes. The higher the number, the stronger the forces and the further particles travel from their original position.
This control adjusts the size of the forces used to create swirl effects. Low values produce large swirls while higher values create smaller swirls.
This control adjusts the integer used to create a random effect. Changing this will help give one fluid particle system a slight variation from any others sharing the same parameters.
The following vortex controls enable when you select Vortex Ring or Vortex Tube from the Fluid Force parameter.
This control establishes how fast the vortex is spinning, which increases and decreases the force exerted on fluid particles.
This control adjusts the diameter of the vortex forces used to spin fluid particles.
This control tilts vortex forces along the axis of the buoyancy force.
This control rotates vortex forces around the axis the buoyancy force. Note that this will only have a noticeable effect when the vortex tilt has been adjusted.
Interestingly, the particle physics underlying fluid movement also map to fire. This is why Particular's combustion features appear alongside fluid dynamics within Physics Simulations and why both Enable Fluid Dynamics and Enable Combustion must be checked to access combustion features.
Color Over Temperature presumes that a flame is hottest at the point of fuel injection and combustion and that it cools over time and as it transitions to smoke. The default combustion gradient shows a progression from deep orange to white.
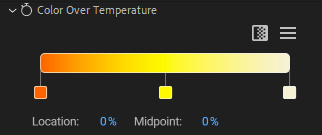
Naturally, you can alter this gradient however you please to create a desired look. However, because Particular is controlling color based on particles' physical state, this gradient relies heavily on the combination of other Combustion parameter values. If you're not seeing as much color variation as you'd like, try sliding the middle and right color stops closer to the stop at the far left (as shown below).
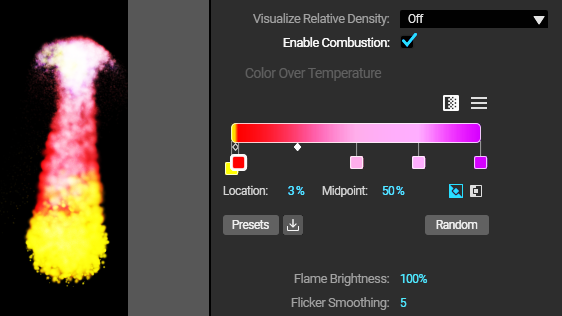
Note that when you enable Combustion, the Set Color menu in the Particle group will automatically change to Over Life/Temperature. You can still manually override this setting if you wish.
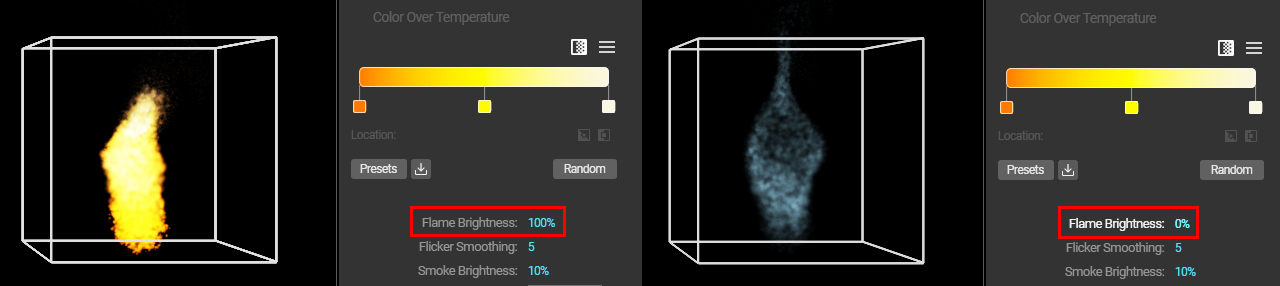
This parameter adjusts overall flame brightness rather than requiring adjustment of each gradient color stop). A setting of 0 results in only smoke being visible.
This feature smooths local changes in flame brightness over time.
Increasing smoke brightness might prove useful in certain creative situations, such as if a snuffed torch is under a spotlight or you want to draw attention to a whorl of smoke drifting up from behind an object. Setting the value to 0 results in only flame being visible.
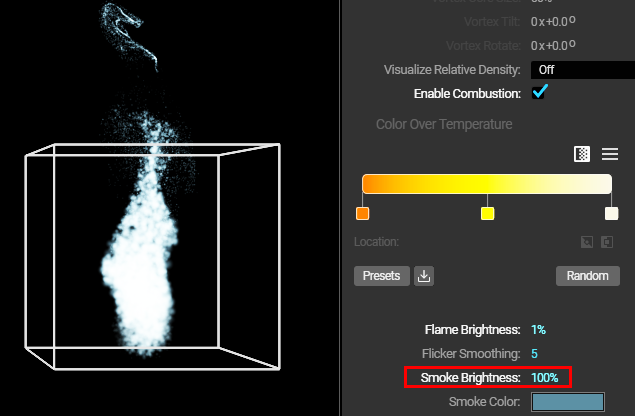
You'll note that the default smoke color has a bluish-gray tinge to better approximate burning wood or other common items. Water vapor might benefit from a whiter "smoke" color. Alternatively, you may want to veer more toward black if mimicking the exhaust from an engine with too much fuel in its air/fuel ratio (as from a clogged air filter).
You'll observe that the following parameters appear within the Designer but not in the Fluid and Combustion section of the ECP. This is because they apply to all systems — hence "global."
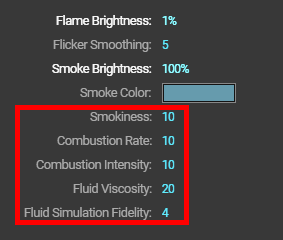
In the same vein, these parameters are not available in the Designer for secondary systems. They must be manipulated within the primary system.
This parameter controls the rate at which flame converts to smoke. Setting the value to 0 will result in no smoke. Keep in mind that a bright fire may obscure increases in Smokiness.
This control sets the rate at which fuel (injected by the emitter) converts to flame. Setting this value to 0 will result in no flame and no smoke.
Controls the amount of energy released during combustion. A higher value will result in more heat and thus more buoyancy (and more vigorous fluid motion). Setting to 0 will result in the flame producing no heat (and thus no additional buoyancy within the fluid).
As noted in this guide's Global Fluid Controls page, Fluid Viscosity defines how much particles tend to stick to one another. Higher viscosity yields a more semi-fluid, thicker appearance.
This control sets the scope of forces applied to fluid particles. Higher values create more granular, micro-force interactions. Lower values create broader, more macro-force interactions. The impact of Fluid Simulation Fidelity may be easier to observe with lower particle counts.
This control lets you adjust particle appearance with relation to the combined density of the particles and the fluid forces surrounding them. Buoyancy must be set above zero for this effect to be seen.
Visualize Relative Density Off (left), Opacity (center), and Brightness (right).