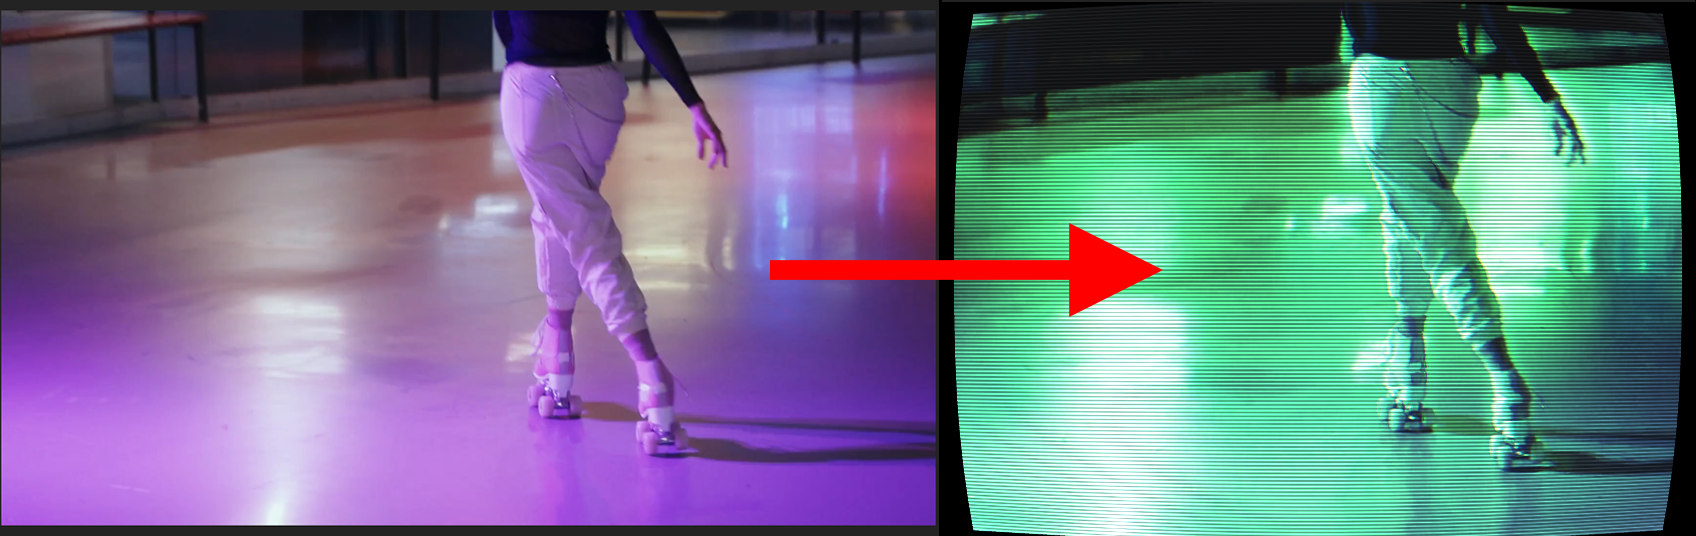
Artificially integrate your footage onto a lined monitor shape with visible pixels or scan lines.
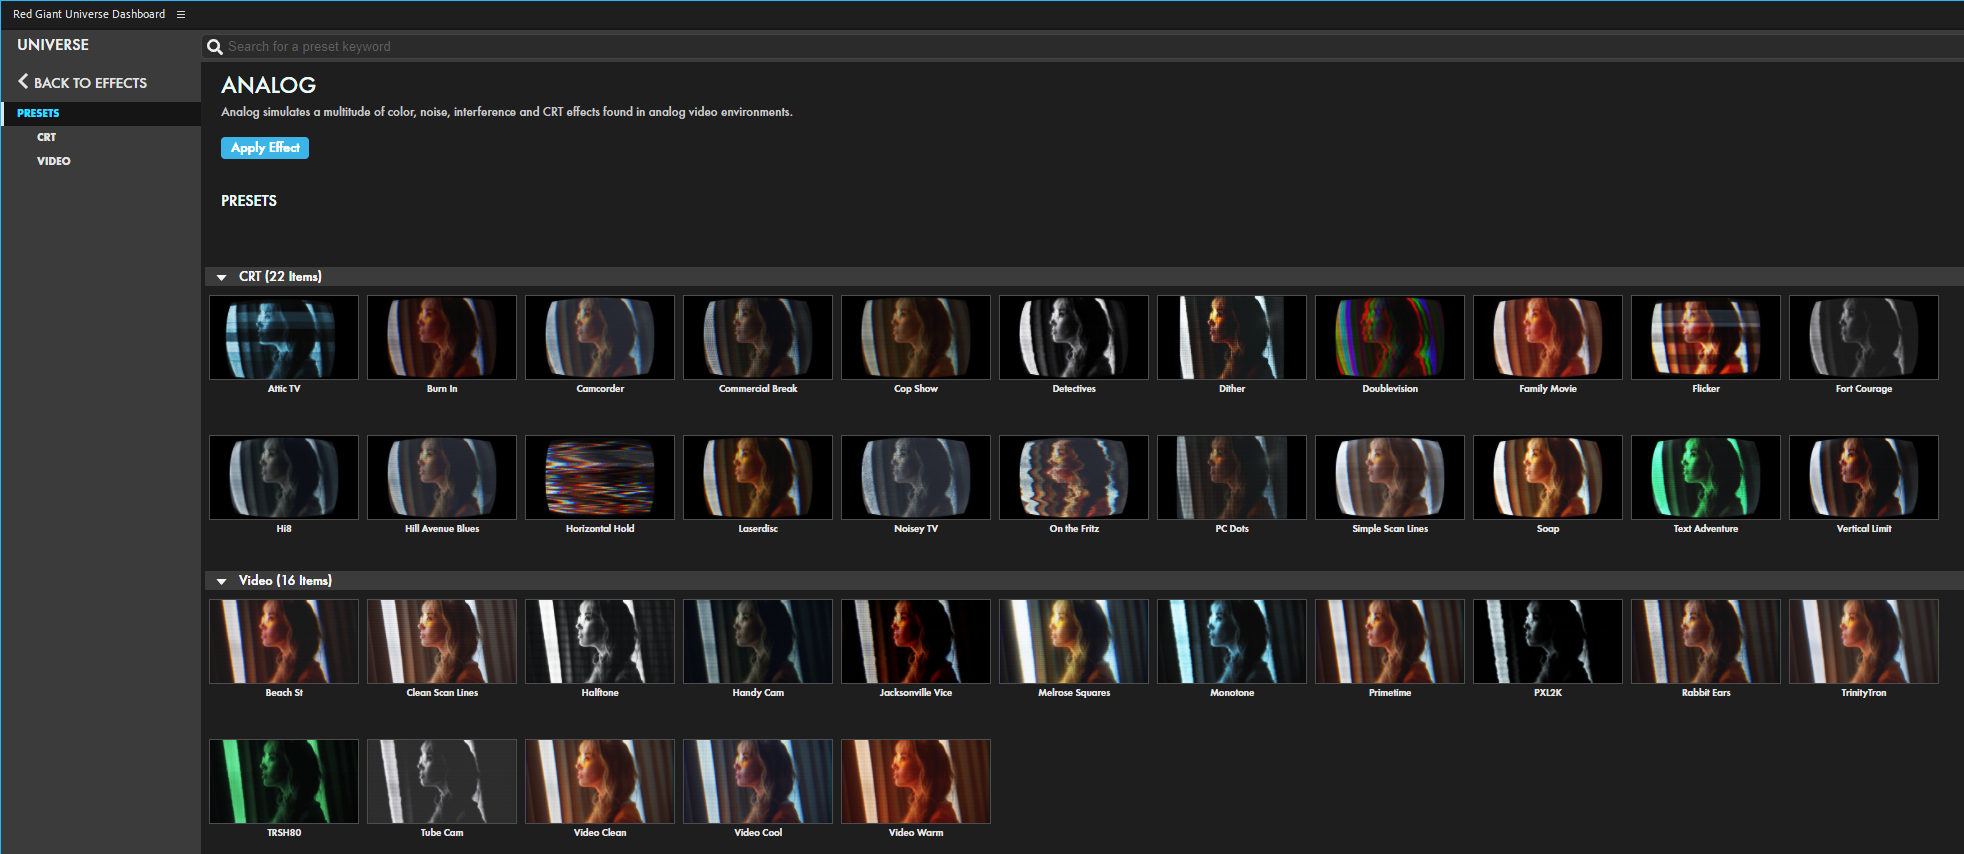
Presets
As detailed below, Analog offers dozens of controls. You can change everything from image dimensions to color characteristics to lighting. However, you might find a handy shortcut in Analog's presets, located in the Red Giant Universe Dashboard (accessible via the blue Open Dashboard... button or the Choose a Preset... button below it).
As with all other Universe tools, you can modify or create an Analog look and then save it under its own name by pressing the Save Preset... button.
You may find that a preset handles 90% of the work in getting your clip to a desired look. From there, a few tweaks will take you to the finish line. Or you may want to skip the presets, experiment, and design your analog look from scratch. Either way, let's walk through the options.
Dimensions and Color Controls
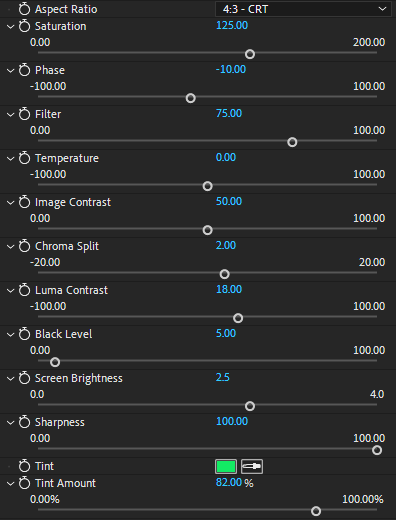
Aspect Ratio. Mimic the squarer dimensions of analog displays or bring the same look into a wider, more modern output.
4:3 CRT (default)
1:1 square
16:9 widescreen
5:4 PC
16:10 widescreen PC
When you first apply the Analog effect, color and brightness controls range around somewhat moderate levels (except for Black Level, which defaults to 0). Experiment with sliding these values up and down to get just the right amount of old (and decrepit) in your old-school look.
Saturation controls color intensity across all image channels.
Phaseshifts the hue into redder (lower values) or greenish (higher) tones while also blurring either the U or V color space channels after performing round-trip RGB/YUV/RGB conversion.
Filtermixes the RGB channels to replace the luma (Y) channel after a RGB/YUV/RGB conversion. This results in brighter (higher) or darker (lower) values of lighter colors.
Temperature shifts the color between warmer (lower) or colder (higher) hues.
Image Contrast adjusts color contrast around image edges, giving them an embossed look.
Chroma Split separates the RGB channels horizontally.
Luma Contrast adds additional contrast to the image's luma values.
Black Level adjusts how closely color matching correlates with the image’s original black level. A 0 value results in layer preserving the black point. A 100 value essentially increases overall brightness to white.
Screen Brightness adjusts overall brightness to the point of blowing out much detail in the image's lighter areas.
Sharpness preserves original image sharpness (100) or adds blur (lower values).
Tint Color Swatch and Tint Amount change the output's color tint and decide the overall tint strength.
Scan Lines
CRT monitors use an electron beam to rapidly scan across the inside of the screen, one line at a time, from left to right and top to bottom. The beam illuminates phosphor dots on the screen's inner surface, which then emit light to create a visible image. Scan lines are visible because the electron beam takes a brief moment to travel from one side to the other. During that time, the phosphor dots begin to fade. By the time the next line is drawn, the previously illuminated dots have already started to lose their brightness. This fading effect causes scan lines to manifest as horizontal dark lines between brighter lines.
The number of visible scan lines depends on the resolution and refresh rate of the CRT display. Lower-resolution displays generally have more visible scan lines, while higher-resolution displays can minimize or eliminate the scan line effect.
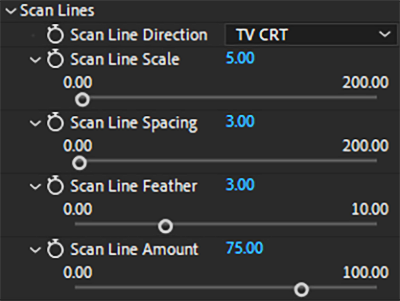
Scan Line Direction selects between Horizontal, Vertical, Squares, TV CRT, or PC CRT.
Scan Line Scale controls the thickness of the scan lines. The default setting is 5. The value range is from 0 to 200. Higher values make lines thicker. If Scan Line Distance is low, line thickness may overtake the gap between lines, making the source image appear solid again.
Scan Line Spacing determines the distance between scan lines. The default is 3. The value range is from 0 to 200. At 0, there are no lines and the image is solid. Higher values increase the distance between lines, which creates visual gaps in the source footage.
Scan Line Feather sets scan line softness. The default value of 3 gives lines a hard edge. Higher values make lines softer, giving them a feathered edge. This softness is often difficult to see unless the Distance and Thickness values are high.
Scan Line Amountcontrols scan line opacity.
Footage at 200% zoom with Analog defaults applied (left) and then with Scan Line Scale and Scan Line Amount increased.
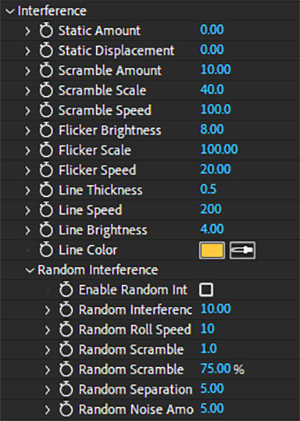
Interference
Analog signals often find themselves beset with interference from nearby and ambient sources, such as electromagnetic emissions from adjacent circuit board components to shifting magnetic fields around the device. This interference can result in a host of minor and major anomalies in analog displays. Universe emulates these interference anomalies with a range of controls.
Static Amount sets how much static noise overlays atop the output.
Static Displacement sets whether the static displaces the underlying pixels to distort the image.
Scramble Amount controls how far pixels are randomly displaced by way of an animated scramble effect (created by a fractal noise layer).
Scramble Scale sets the size of the fractal noise layer used to create the scrambled effect. The higher the size, the finer the scramble effect and the less detail comes through from the original image. The lower the size, the bigger the scramble effect, resulting in more detail coming through from the original image.
Scramble Speed determines how fast the scramble effect animates over the image.
Flicker Brightness adjusts an additional flicker of the image opacity by way of thick flicker lines, akin to TV distortions or signal loss.
Flicker Scale adjusts the size of the flickering lines that adjust the brightness.
Flicker Speed controls the speed of the flickering lines.
Line Thickness defines the thickness of an additional line that moves down the frame from top to bottom, akin to monitor refresh rates not matching the camera speed.
Line Speed sets the speed the line moves across the image.
Line Brightness determines the brightness of the line.
Line Color sets the color of the line.
An example of multiple interference parameters adjusted to illustrate the impacts of static, scramble, flicker, and a moving horizontal line.
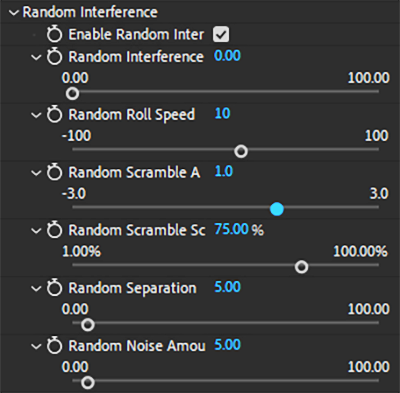
Random Interference
Enable Random Interference switches whether output is garbled and distorted at random intervals.
Random Interference Frequencysets how often random interference occurs throughout out the effect’s duration.
Random Roll Speed controls how fast the image scrolls when the image rolls across the frame.
Random Scramble Amount controls how far pixels randomly displace via an animated scramble effect that randomly occurs, created by way of a fractal noise layer.
Random Scramble Scale sets the size of the fractal noise layer used to create the randomly occurring scramble effect. The higher the size, the finer the scramble effect and the less detail comes through from the original image. The lower the size, the bigger the scramble effect, allowing more detail to come through from the original image.
Random Separation Amount controls how often channels separate throughout the random interference.
Random Noise Amount defines how often random noise occurs throughout the random interference.
Random interference controls in action.
Transformation
Curvature bends the image's corners to fit your desired monitor display look.
Crop Source Image determines whether the transformation added to image edges crops the source.
X and Y Rotation move the transformation along the x and y axes.
Scale resizes the entire image and its effects to smaller or larger areas.
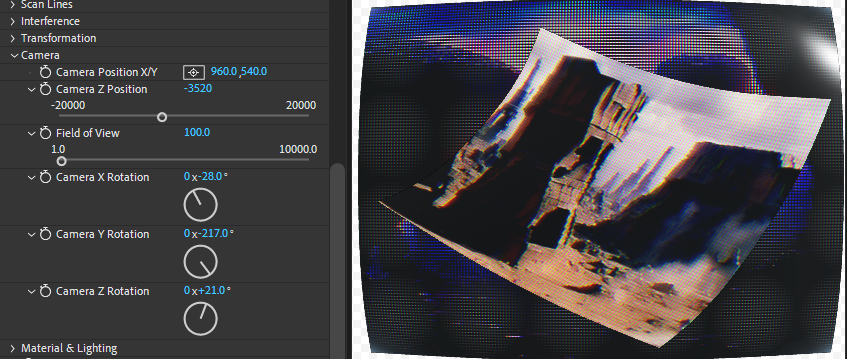
Camera
Camera Position X, Y, and Z moves the effect’s camera (which is of the output and its transformation) along the x, y, and z axes relative to the viewer.
Field of View sets how much of the frame the output will consume. A lower field of view results in a bigger image.
Camera X, Y, and Z Rotation rotates the effect’s camera along the respective axes.
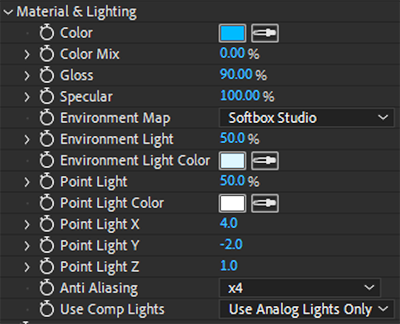
Material & Lighting
Colorand Color Mix work in tandem to establish how much of the original image is affected by the selected color. A Color Mix of 100% will turn the entire image that color.
Gloss adds an additional reflective effect over the image along the contours, as if a light were reflecting off the CRT's corner. This generally comes at the expense of image sharpness.
Specular controls the mirror-like reflection of light on a surface. When turned up, the material appears more glossy, like plastic or metal. A 0 value results in an almost paper-like appearance.
Environment Map allows you to choose from five different environment maps.
Environment Light brightens (with higher values) the selected environment map over the monitor surface.
Environment Light Color sets the environment light tint.
Point Light sets the opacity of the light reflected on the screen.
Point Light Color sets the color of the light reflected on the screen.
Point Light X/Y/Z defines the point light's position around the screen's curvature.
Anti Aliasing controls the light texture sharpness. Higher values result in much longer rendering times.
Use Comp Lights sets whether the reflection incorporates only the Analog Lights, Comp Lights, or both.
Glow Amount brings up the glow's brightness, thereby reducing its opacity and giving it a more solid, neon-like effect.
Glow Radius expands or shrinks the glow from highlight areas. This will spread the glow's intensity, making it more translucent.
Random Seed adjusts the randomness formula used throughout the Analog effect. This is useful for discerning one similar effect from another or just seeing other variance options.