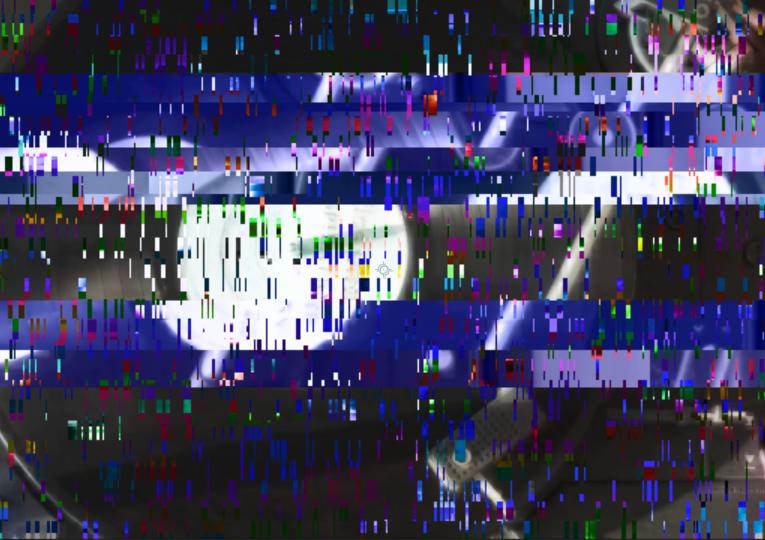
Universe Glitch gives your footage and text the look of compressed, glitched video. This tool emulates poor internet connections, bad video encoding, corrupt data streams, and low-bandwidth broadcasts.
An important note about working with text layers or shape layers in After Effects: As a general rule, most effects don't play nicely with text layers or shape layers, especially if they are 3D layers. Because these layers are procedurally generated and have no dimensions, you'll always do best to pre-compose these layers before applying effects and making them 3D.
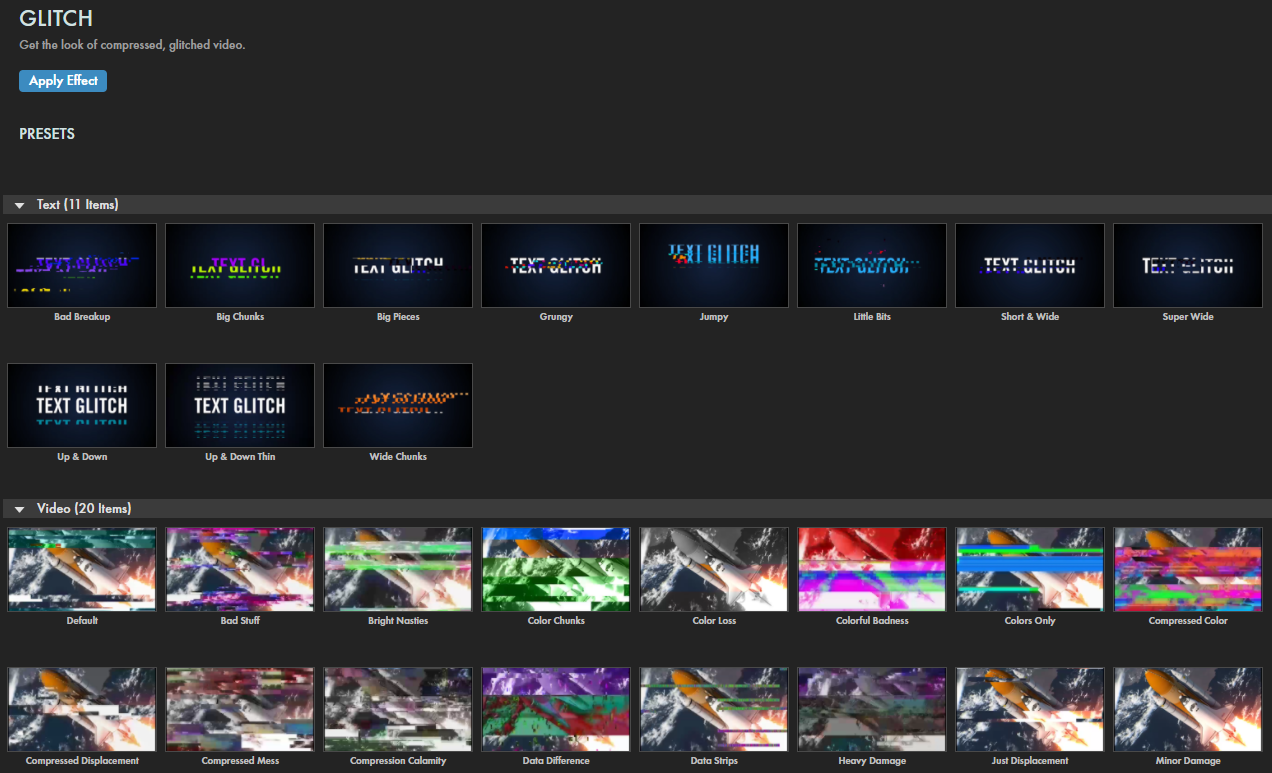
Presets
Apply preconfigured Glitch distortions to your text and images with these convenient shortcuts. Find these presets via the blue Open Dashboard... button or the Choose a Preset... button below it.
As with all other Universe tools, you can modify or create a Glitch look and then save it under its own name by pressing the Save Preset... button.
Modify the Effect
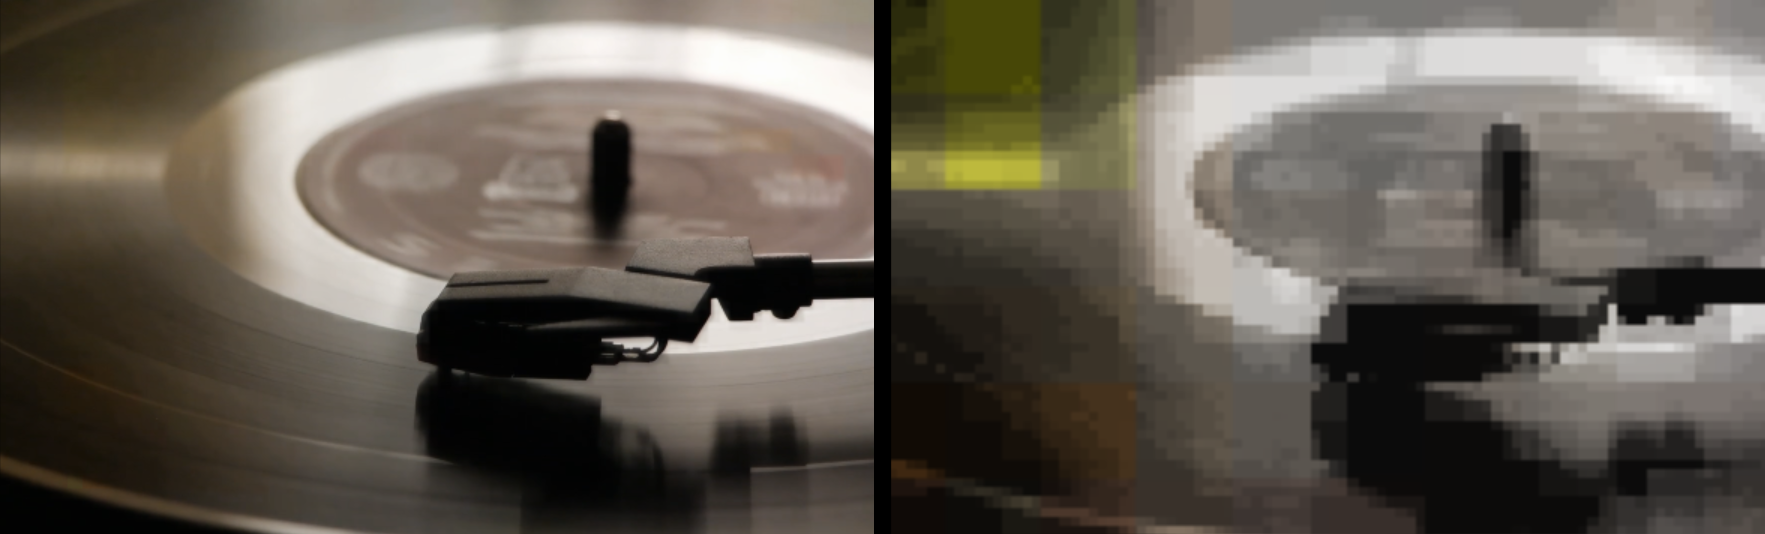
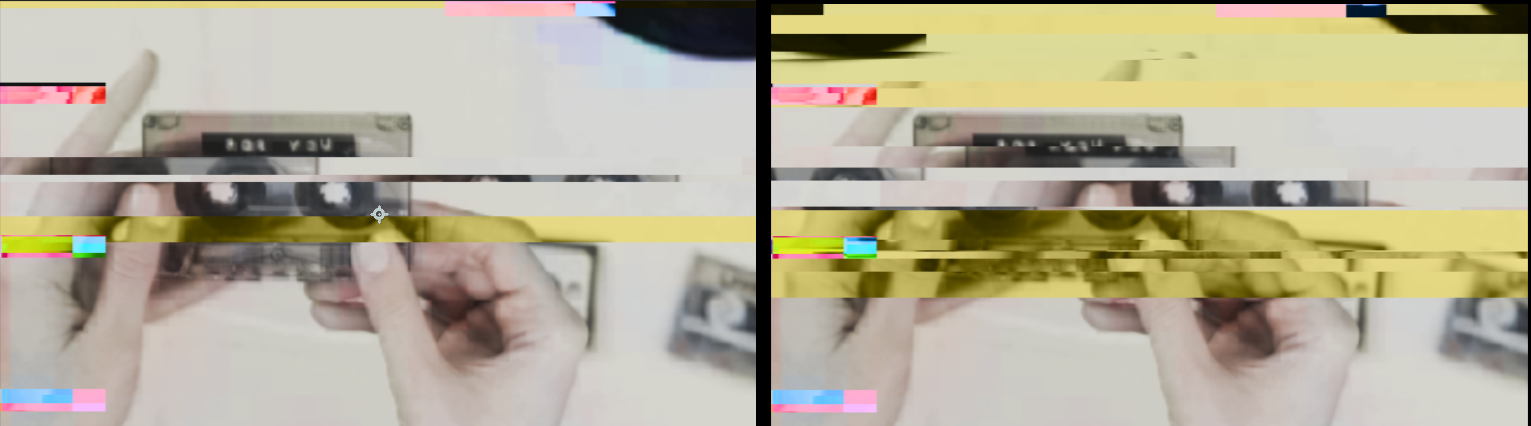
Compression
creates the look of internet video compression. Higher values remove more detail and color, making the image look increasingly compressed.
Below, we compare a setting value of 5 (left) against 85 (right).
Compression Last.
By default, compression applies to the image first (below, left). After that, glitches apply on top of it. The glitches are sharp, bright, and colorful on top of messy footage. However, if you want to compress the glitches so that they look less defined and mix in with the footage, turning this control on (below, right) applies compression at the end of the effects chain. Note that the higher your compression setting, the more pronounced the impact of Compression Last will appear.
Glitch Frequency
defines the chance (as a percentage) of glitching. At 100%, you will see glitches in virtually every video frame. At 50%, half of all video frames shown will be glitched. At 0%, no glitches occur.
Glitch frequency makes it easier to animate with audio. In After Effects, you can use the keyframe assistant, called "convert audio to keyframes," or a plugin like Trapcode Sound Keys, which can isolate various audio bands. The louder the sound, the more glitching you will see.
Try linking audio with the Frequency, Small Glitches, and Wide Glitches properties for a really pleasing effect.
If you are not working in AE, you can impressively animate frequency by hand with keyframes.
Glitch Speed
controls the rate of the glitch animation. Higher values result in faster glitch animations. Lower values slow them down.
Glitch Speed Random
adjusts the chance (as a percentage) that glitch animation speeds will vary from one to another.
Legacy Modeenables the texture map present in legacy versions of Universe. Honestly, the texture was a bit dodgy, but for users who got used to it and still prefer it, the feature remains accessible here.
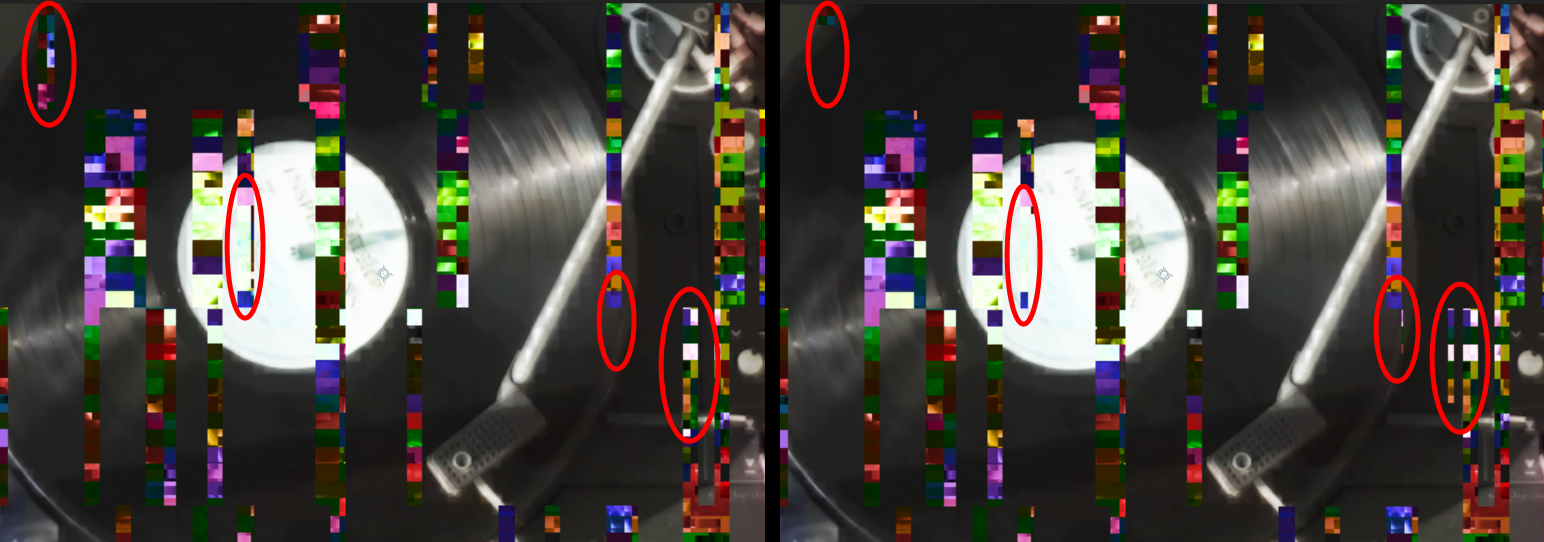
Small Glitches controls the number of small glitches on the screen. Higher numbers create more glitches.
Small Glitch Settings
SG - Blending Mode sets the blending mode for glitches. This is especially helpful in making glitches more visible for different kinds of footage. Brighter footage might do better with the Difference mode while white text might benefit from Normal mode. It depends on the footage.
SG - Saturation controls the level of saturation in glitch color. Lower numbers drain more color from the glitch and, depending on your setting, from the footage. With some blending modes, you might not see much difference beyond 15. Depending on your setting for SG - Blending Mode, though, higher numbers can give some interesting and unexpected results.
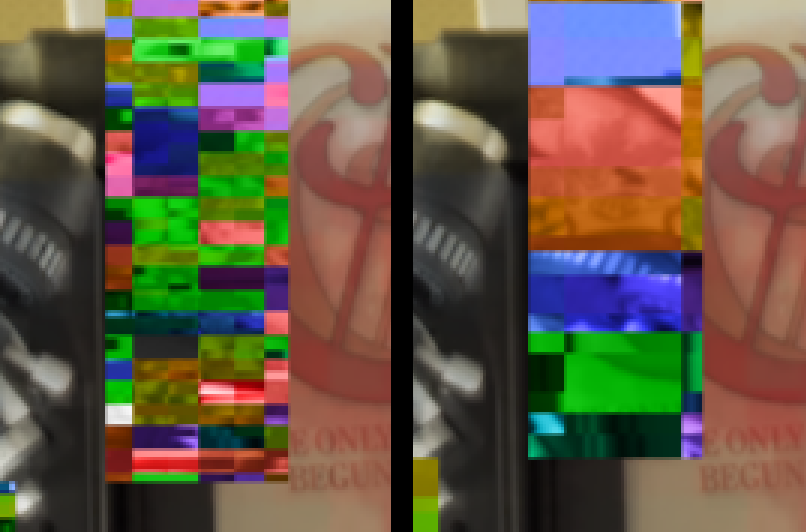
SG - Complexity determines glitch shape complexity. Lower values create more regularly squared or rectangular images. Higher values break up glitches a little more and make their blockiness appear more random. Compare values of 1 (left) and 3 (right) below. The effect can be subtle and hard to spot, depending on your other settings.
SG - Size governs small glitch size. Higher numbers make bigger glitches by zooming in on the effect. If you want big glitches to fill the screen, you'll also need to increase the Small Glitches value.
SG - Aspect sets the aspect ratio (or width) of small glitches. A value of 1 creates square glitches. A value above 1 creates glitches more rectangular in shape. Values below 1 (such as 0.1, shown below) make glitches that are tall and thin.
Note the difference between small and wide glitches (the scene-spanning indigo bands) in the below image.
SG - Pattern Size controls the size of the color/displacement pattern in glitches. Higher values make the pattern bigger by zooming in on the effect. We illustrate this below with settings of 1 (left) and 75 (right).
SG - Pattern Aspect sets the aspect ratio (or width) of the small glitch color/displacement pattern. A value of 1 creates a more square-like color pattern. A value above 1 creates a pattern with color chunks more rectangular in shape. Values below 1 make a pattern with chunks that are tall and thin.
SG - Displacement X/Y controls displacement on the x and y axes. Glitched pixels will be moved left/right or up/down, respectively. Higher numbers means more pixel displacement.
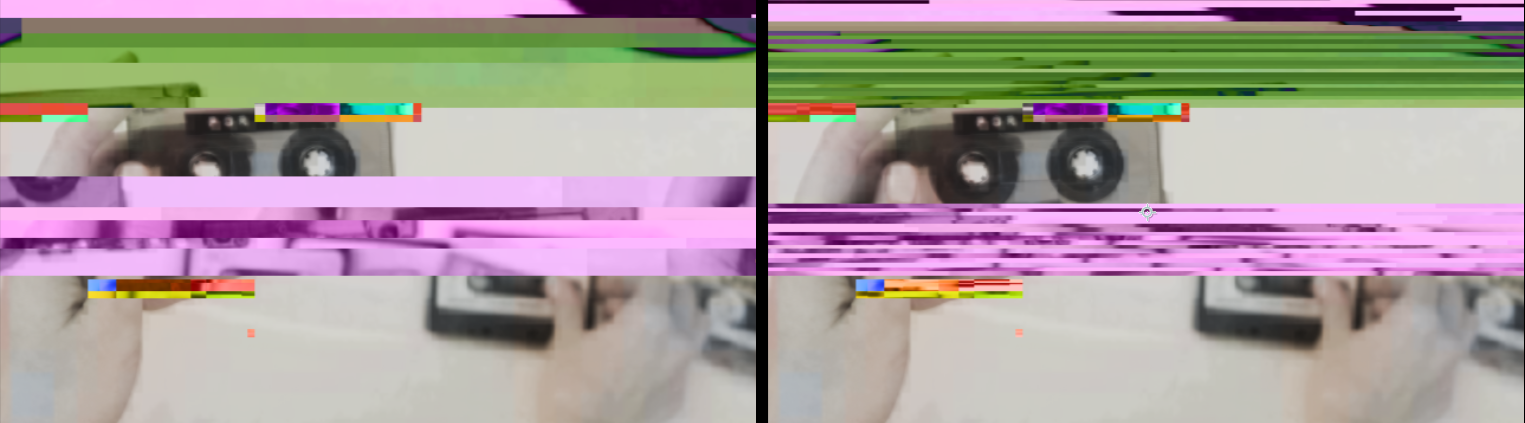
Wide Glitches
governs the likelihood of wide glitches appearing. Higher numbers mean wide glitches are more likely to appear.
Wide Glitch Settings
WG - Height
sets the height of areas affected by wide glitches.
Compare the minimum value of 5 (below, left) with a value of 30 (right).
WG - Blending Mode
selects a blending mode for the glitches. This is especially helpful in making glitches more visible for different footage types. Brighter footage might do better with the Exclusion mode, whereas white text might look best with Normal.
WG - Saturation
controls the amount of saturation in the glitch color. Lower numbers remove color from the glitch and, depending on your setting, from the footage. With some blending modes, you might see scant difference with values beyond 15, but, depending on your setting for SG - Blending Mode, higher may produce interesting and unexpected results.
WG - Difference Glitches
provides a second level of wide glitching.
WG - Pattern Size
sets how tall the wide glitch stripes are within the area of the wide glitches. This pattern will affect the brightness of the glitch color on the footage as well as the displacement. Higher values yield taller stripes, which means less complex color and displacement.
Note the difference between values of 5 (left) and 40 (right) below.
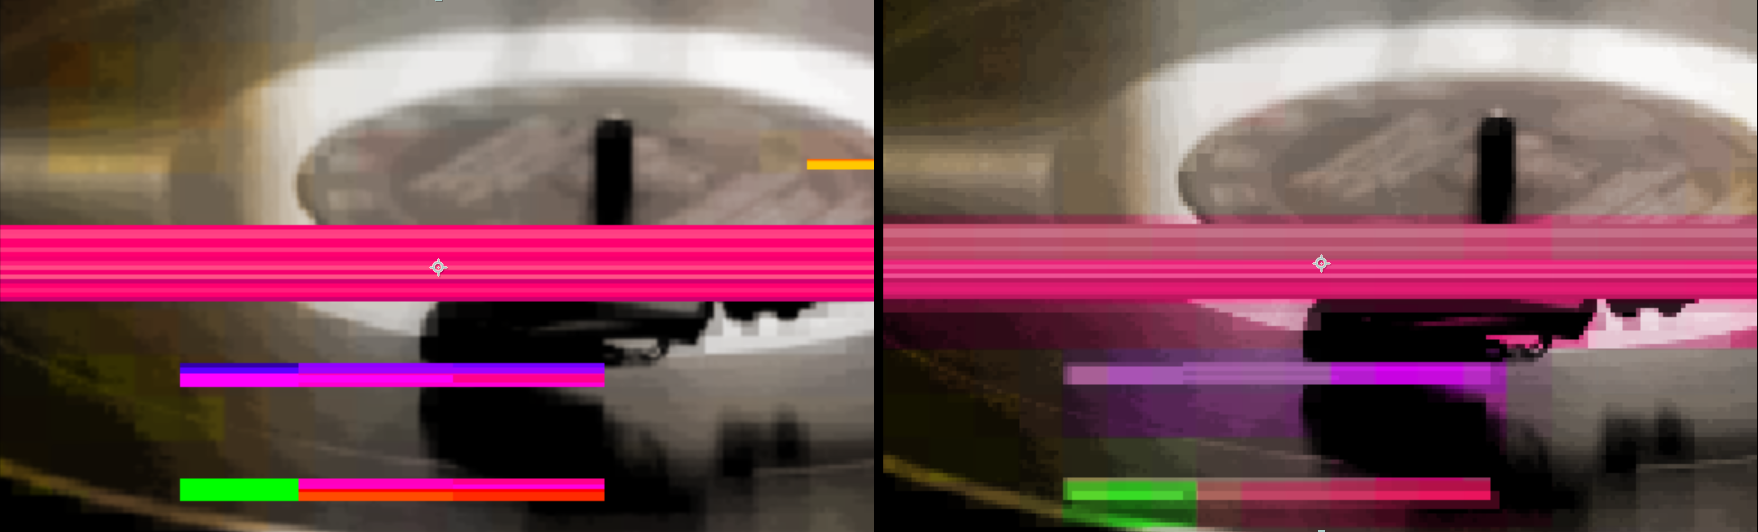
WG - Color/Difference Displacement
controls whether pixels within wide glitch and difference glitch areas displace.
In the image series below, our primary wide glitch band is pink. The difference glitch band is purple. (We selected Color for our WG - Blending Mode.) The first image (left) shows the result of having both displacement boxes unchecked. In the middle image, we checked WG - Difference Displacement. The final image shows both displacement boxes checked.
WG - Displacement X/Y
controls displacement on the x and y axes. Glitched pixels will be moved left/right or up/down, respectively. Higher numbers means more pixel displacement.
Random Seed
generates random values. If you don't like the look of a given frame’s glitch, change the Random Seed to recalculate the random values used to create the glitch configuration. This slider is also helpful if you have more than one layer being glitched and you don't want their glitches to look identical.
Unmult
removes a black background from your footage.