The Retrograde toolset helps create the realistic look and damage of old 8mm and 16mm film.
The Retrograde toolset helps create the realistic look and damage of old 8mm and 16mm film.
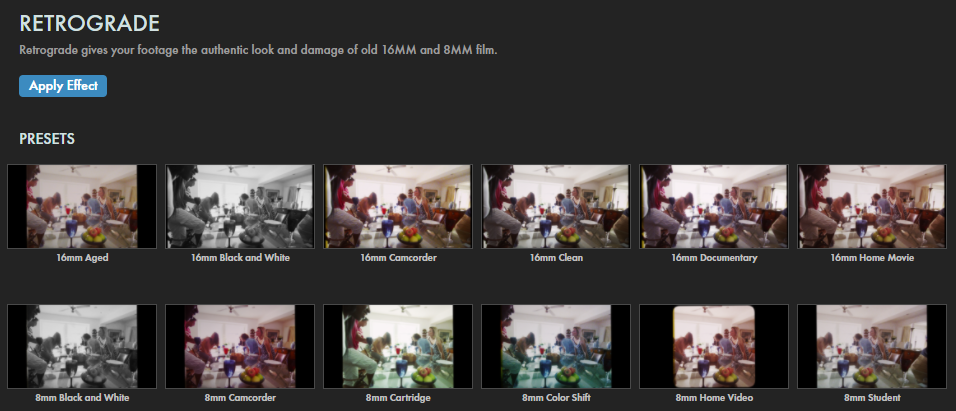
Apply common 8mm and 16mm looks to your compositions with Retrograde's handy presets. Find these via the blue Open Dashboard... button or the Choose a Preset... button below it.
Once you select a preset, its name will automatically populate the Film Stock drop-down menu field. Alternatively, you can simply pick a preset from this pull-down and sidestep the Presets pop-up window.
As with all other Universe tools, you can modify or create a Retrograde look and then save it under its own name by pressing the Save Preset... button.
Real analog source material was used to create Retrograde's unique film textures. The 8mm and 16mm film stock options were created from DPX laser scans of old, commonly used Kodak and Fuji film. You might do a double take as your footage transforms into something from another era! 8mm is a smaller film with larger artifacts and more apparent grain. Larger 16mm film stock gives your footage smaller artifacts and features a subtler grain.
Note: The host app will always respect the film stock size (8mm or 16mm) and color settings of the Retrograde Preset Menu over the Film Stock menu. Changing the Film Stock menu selection to a different film stock than the one chosen in the Retrograde Preset menu will result in even subtler changes in film grain, saturation, and color tint to your clip, but the Retrograde preset will always remain the dominant setting. After choosing your overall and film stock presets, you're ready to dial in your look with the advanced controls listed below.
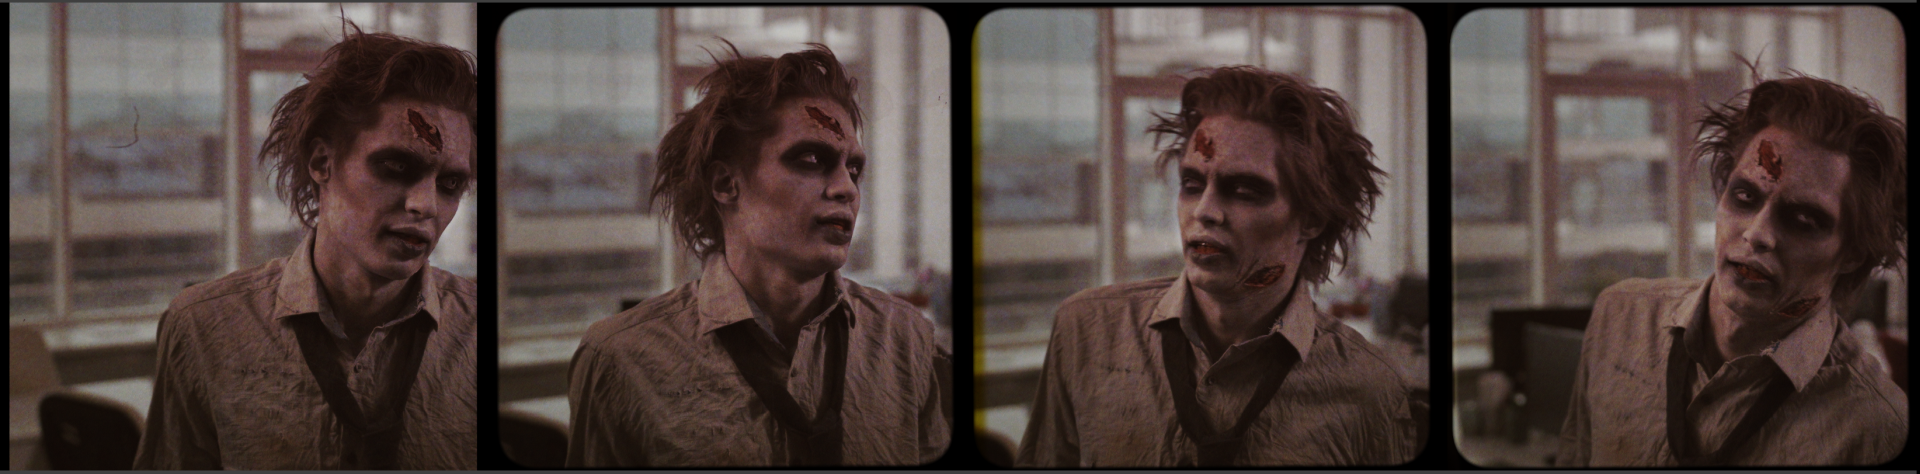
To illustrate the 16mm Camcorder preset, we offer this found footage of Ted, a Maxon sales intern who unfortunately fell asleep in a corn field at the company's 1978 Summer Bash event. He was found wandering in a nearby cemetery the following week. Forty-five years later, the still-youthful Ted remains a valued employee in the Maxon documentation team.
After applying Retrograde, you’ll notice that the 18 FPS box is checked “On” by default. 18 FPS emulates the subtle, jerky, stuttered effect commonly seen in home movie film cameras. Uncheck this box to return to your clip's original frames-per-second settings.
The Color Treatment control group isn’t just for your footage's color channels. In the black and white preset, you can see the changes after tweaking these settings.
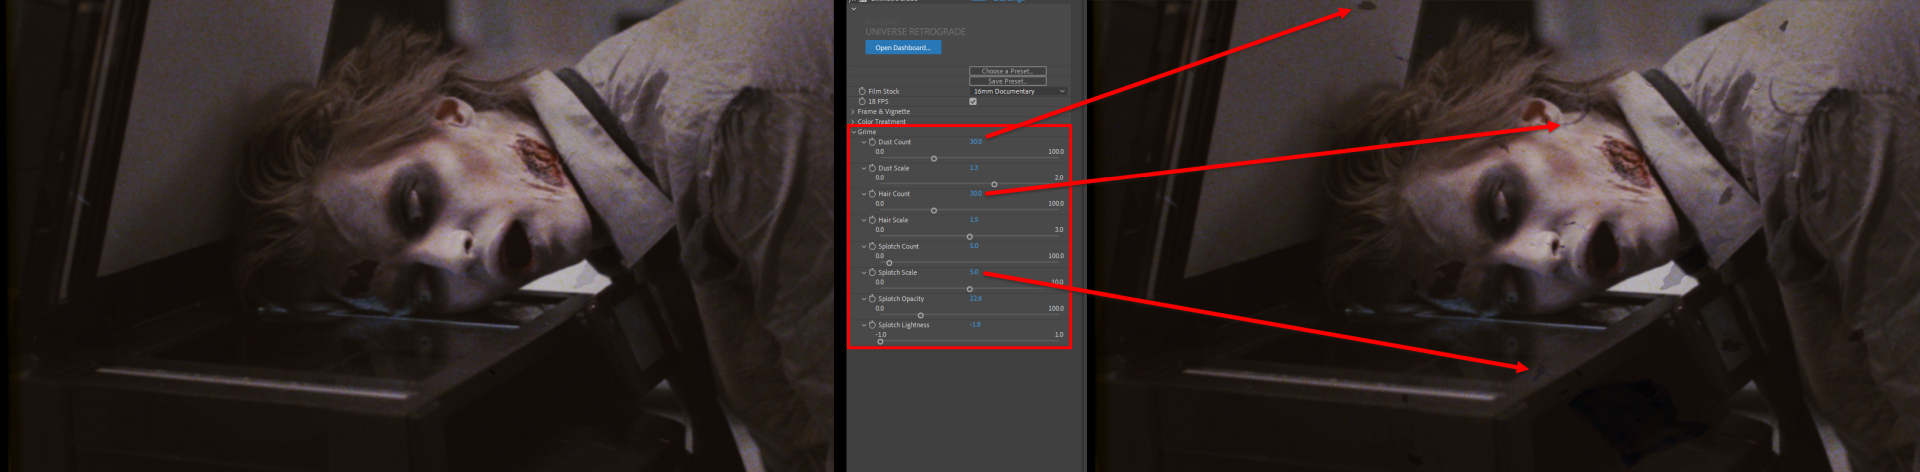
Though Retrograde film stock options provide realistic textures and grain to your project, some scenarios may benefit from even more character and age. The Grime controls group can help you add more imperfections common to old film stocks and projections.
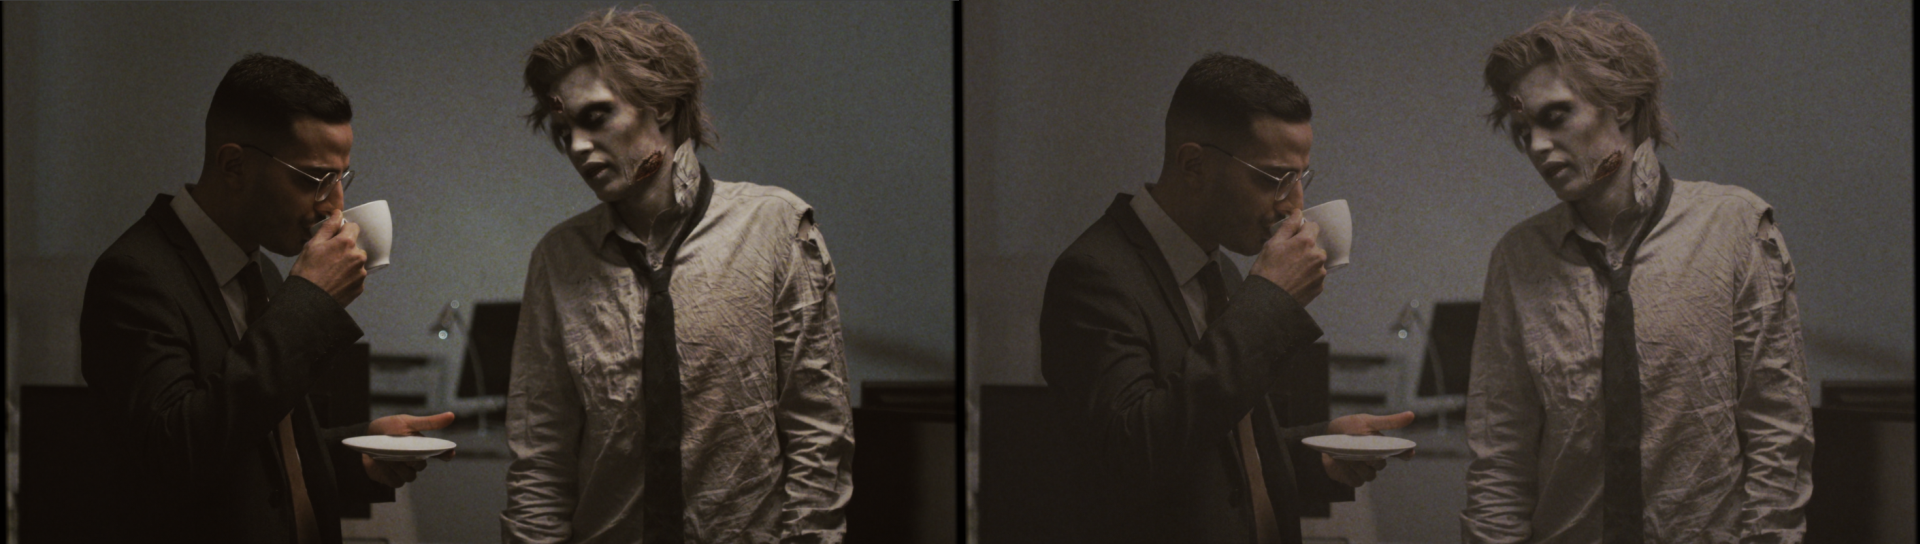
In the following comparison, we document Ted's daily office "life" through the 16mm Documentary preset, shown with default values (left) and with some elevated Grime parameters (right) to showcase the results.