Turn your video into living art. From pencil drawings to fine art on canvas, it's all possible with this fast tool. For those who miss the old Red Giant Toonit tool, your wait is over. Its replacement, Sketchify, is better than ever.
Presets
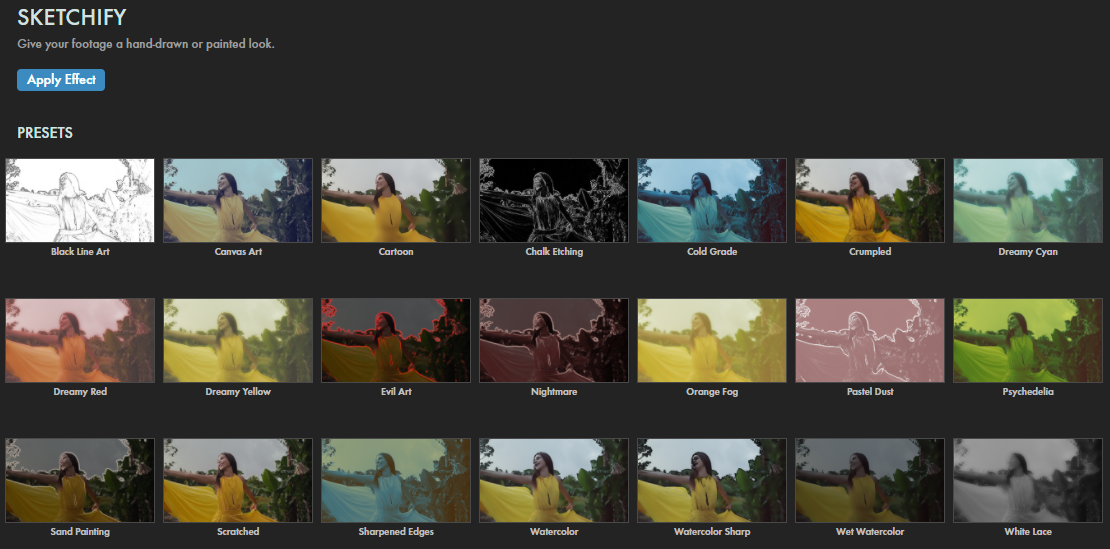
Sketchify's presets put over 20 different texture and color schemes at your fingertips. Find them via the blue Open Dashboard... button or the Choose a Preset... button below it.
As with all other Universe tools, you can modify or create a Sketchify look and then save it under its own name by pressing the Save Preset... button.
Modify the Effect
Pre-Process operations can help streamline footage for subsequent work pipeline steps.
Pre-Blur controls the amount of blur applied to the original image prior to the edge detection process.
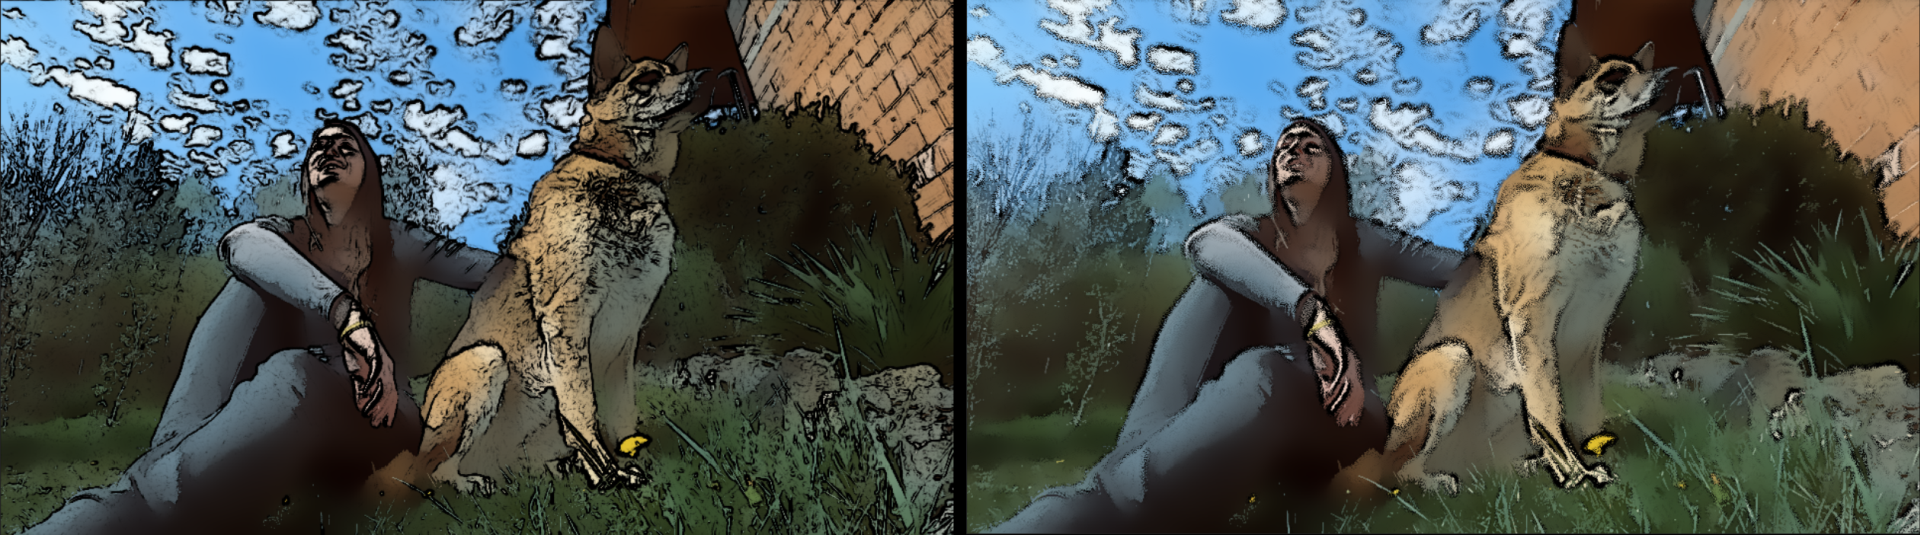
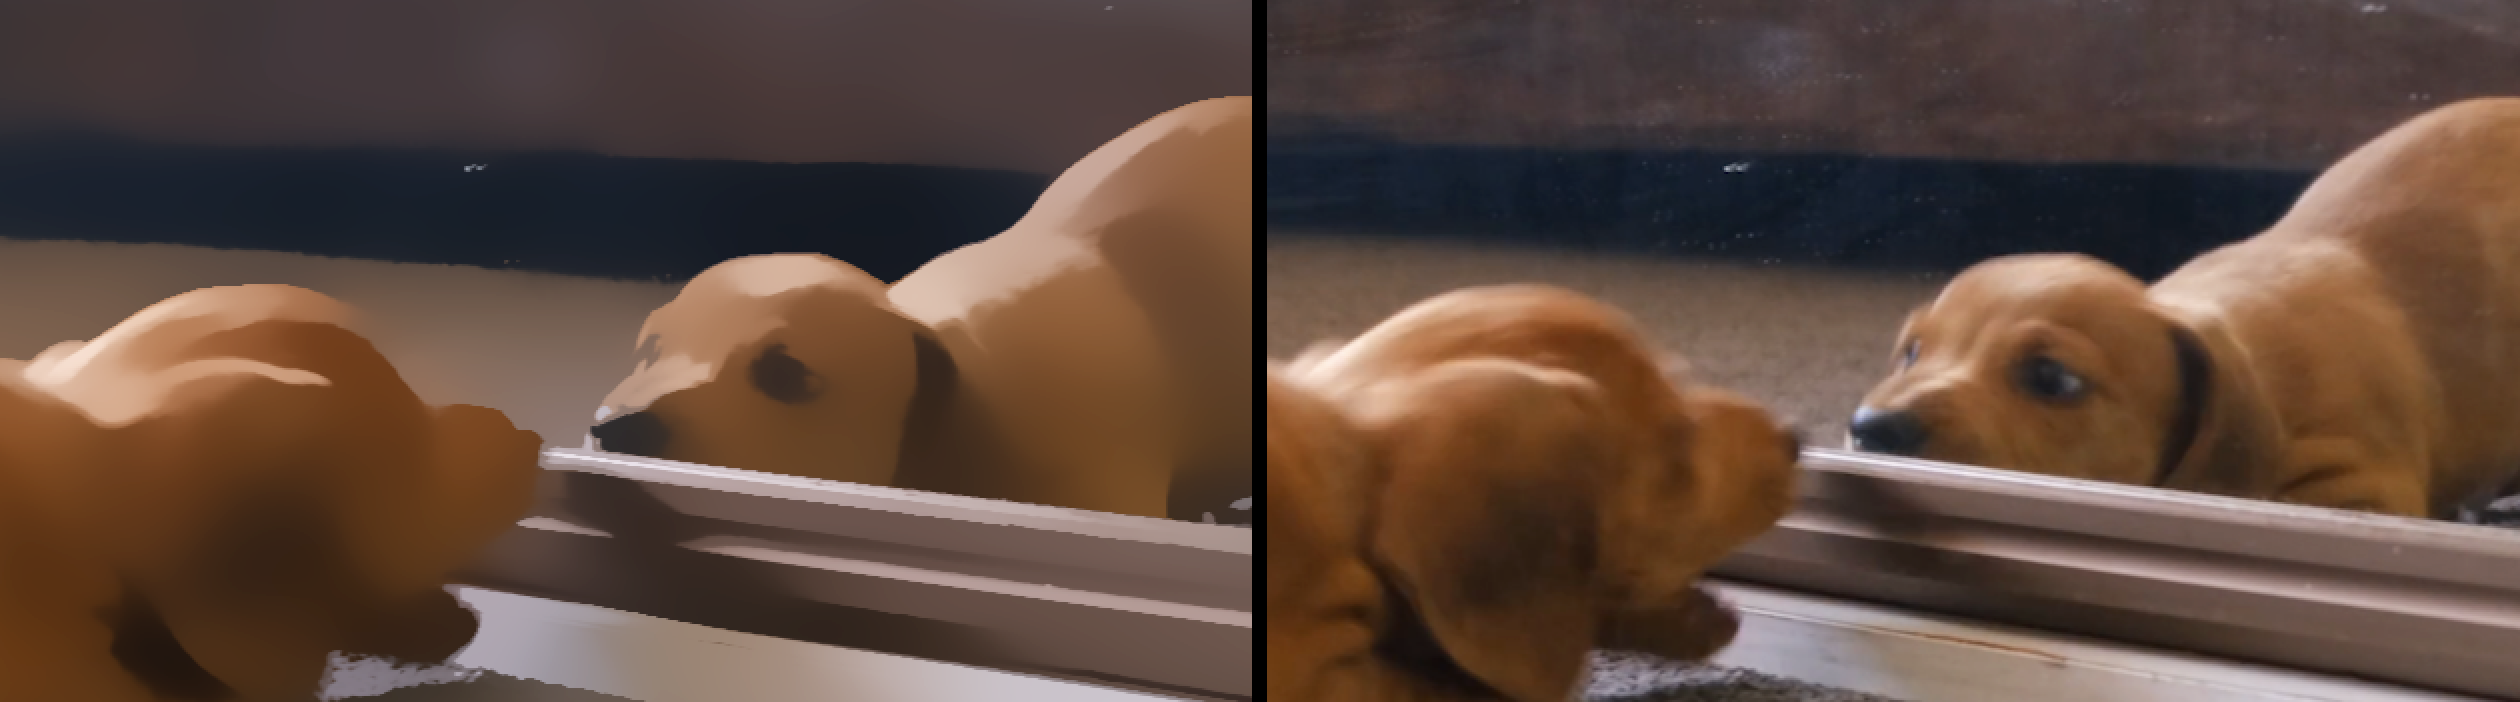
Sharpen controls the amount of sharpness applied to the original image prior to edge detection. In the following image, we show Sketchify applied with default values of Pre-Blur: 0.25 and Sharpen: 0.0 on the left. On the right, we move to Pre-Blur: 0.9 and Sharpen: 100.
Ink Intensity defines the outline effect level. To illustrate, we right the right image above and dropped the Ink Intensity from 100 (default) down to 0. Increasing toward the maximum of 500 would make those stroke edges thicker and darker.
Ink Color, as you'd expect, defines the sketch stroke ink color. In the illustrations here, we've kept the default Ink Color of black. Changing to red, for example, would turn all of those sketch strokes and thick edges red.
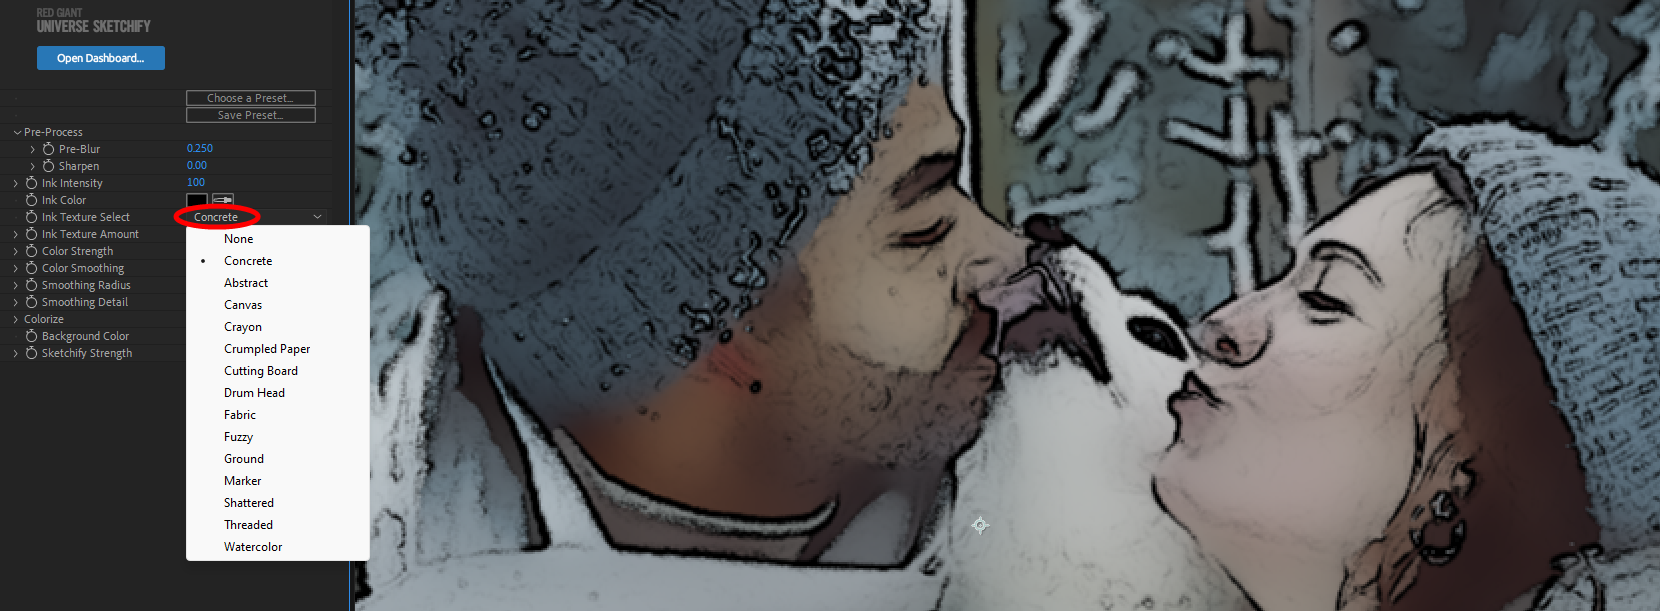
Ink Texture Select provides a range of ink effects. Note how the control's pull-down menu offers 15 options, but these only apply to texture. This is not the same as the Sketchify presets noted above.
Ink Texture Amount determines how much a selected texture applies to the ink effect. Impact will vary based on the texture, but, in general, lower values yield smoother stroke lines.
Color Strengthcontrols the amount of color sampled from the original image. Reducing this effectively reduces the opacity of the source image, thereby revealing more of the Background Color. If you have Background Color and Ink Color set to opposing tones (such as white and black), a Color Strength: 0 setting will leave you with something very close to a two-tone sketch effect.
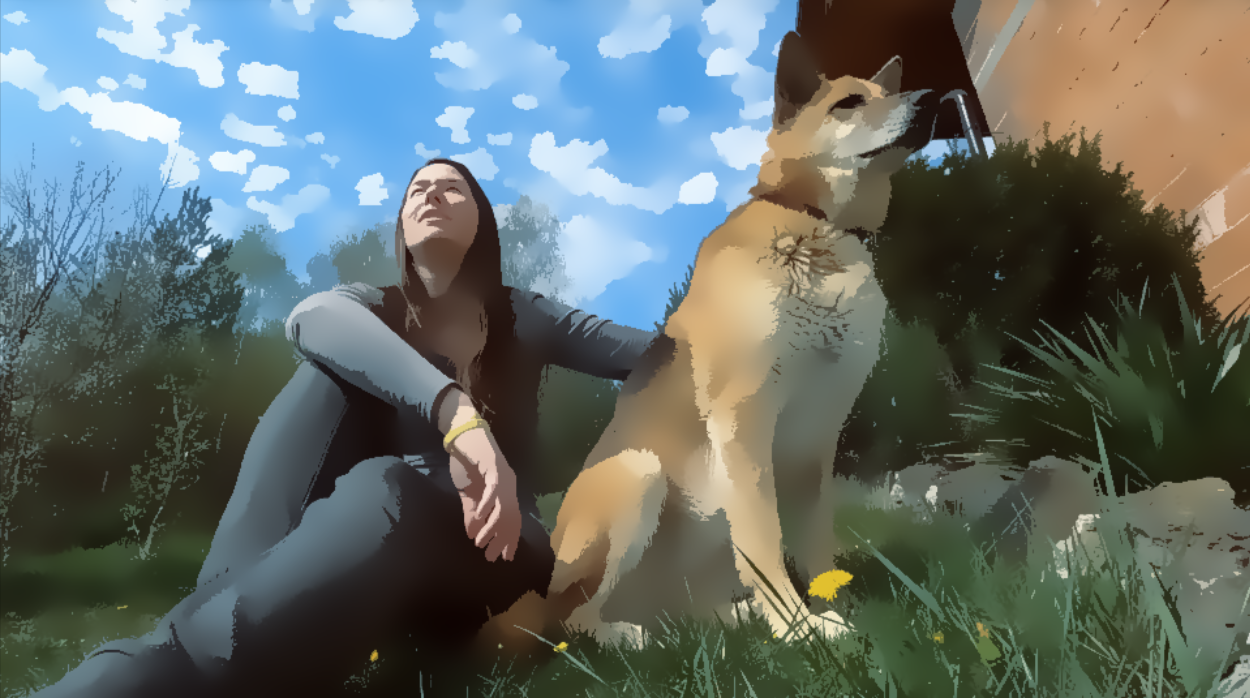
Color Smoothing blurs the original image by color, removing detail and creating blobs of color to create a cartoon-style image. In the image below, we applied the Cartoon preset, which uses a Color Smoothing: 100 value. Then we dropped the value to 0, which revealed all the detail of the source clip.
Smoothing Radius controls the blur radius. A value of 0 has no blur. A 100 value can blur the entire image. However, if Color Smoothing is at 0, even maxing out Smoothing Radius will have no effect.
Smoothing Detail can restore detail to a blurred image. You might also find it handy for minimizing banding effects while not bringing back unwanted detail.
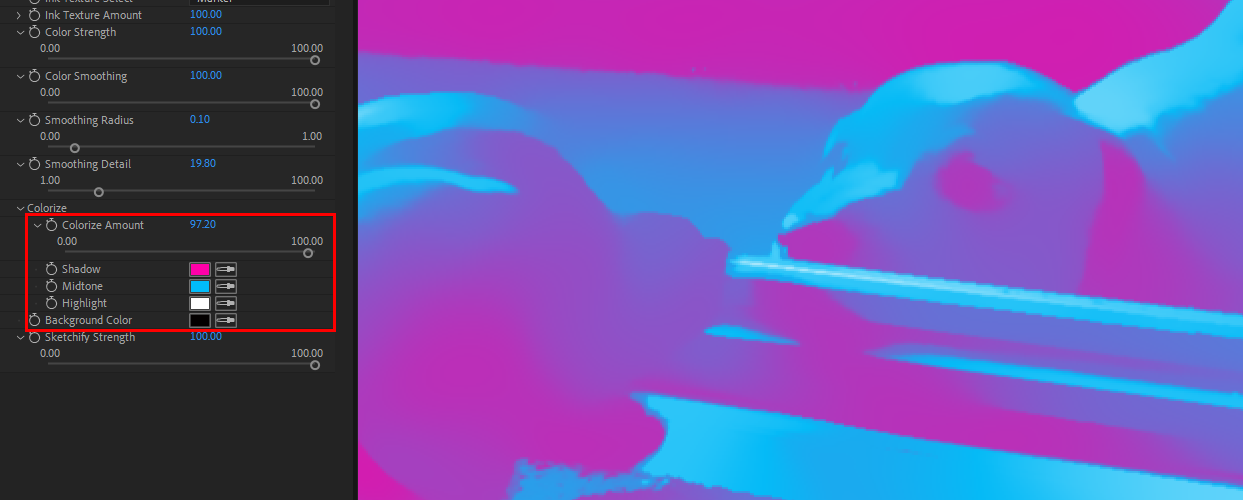
Colorize allows you to reassign the effect's Shadow, Midtone, and Highlight colors as well as the amount of colorization applied in your effect (Colorize Amount). Compare the following adaptation of the Cartoon preset shown above.
Background Color is useful in various situations, especially when blending with other effects. In Sketchify by itself, bringing down the Color Strength value to 0 will leave you with only the Background Color visible.
Sketchify Strength controls the strength of the overall Sketchify effect, with a value of 0 having no effect and 100 being full strength.