Arrange and frame your compositions for various social media platforms, making sure it all looks correct before finalizing the export.
Presets
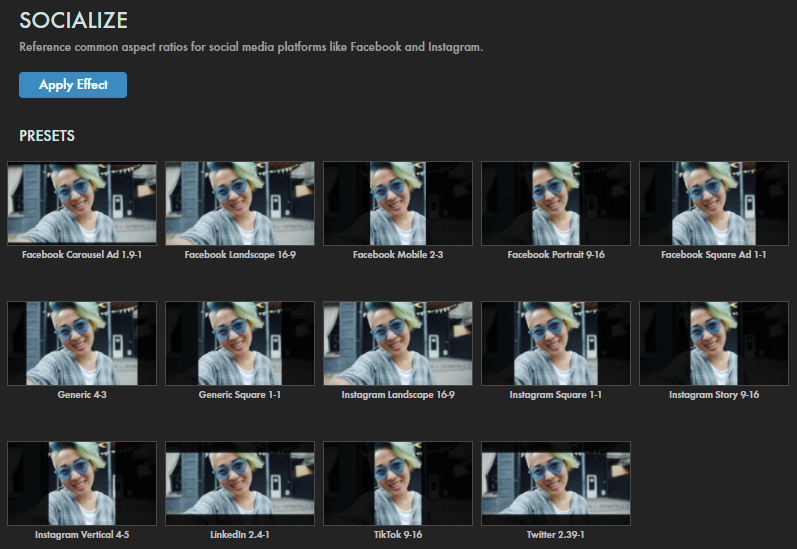
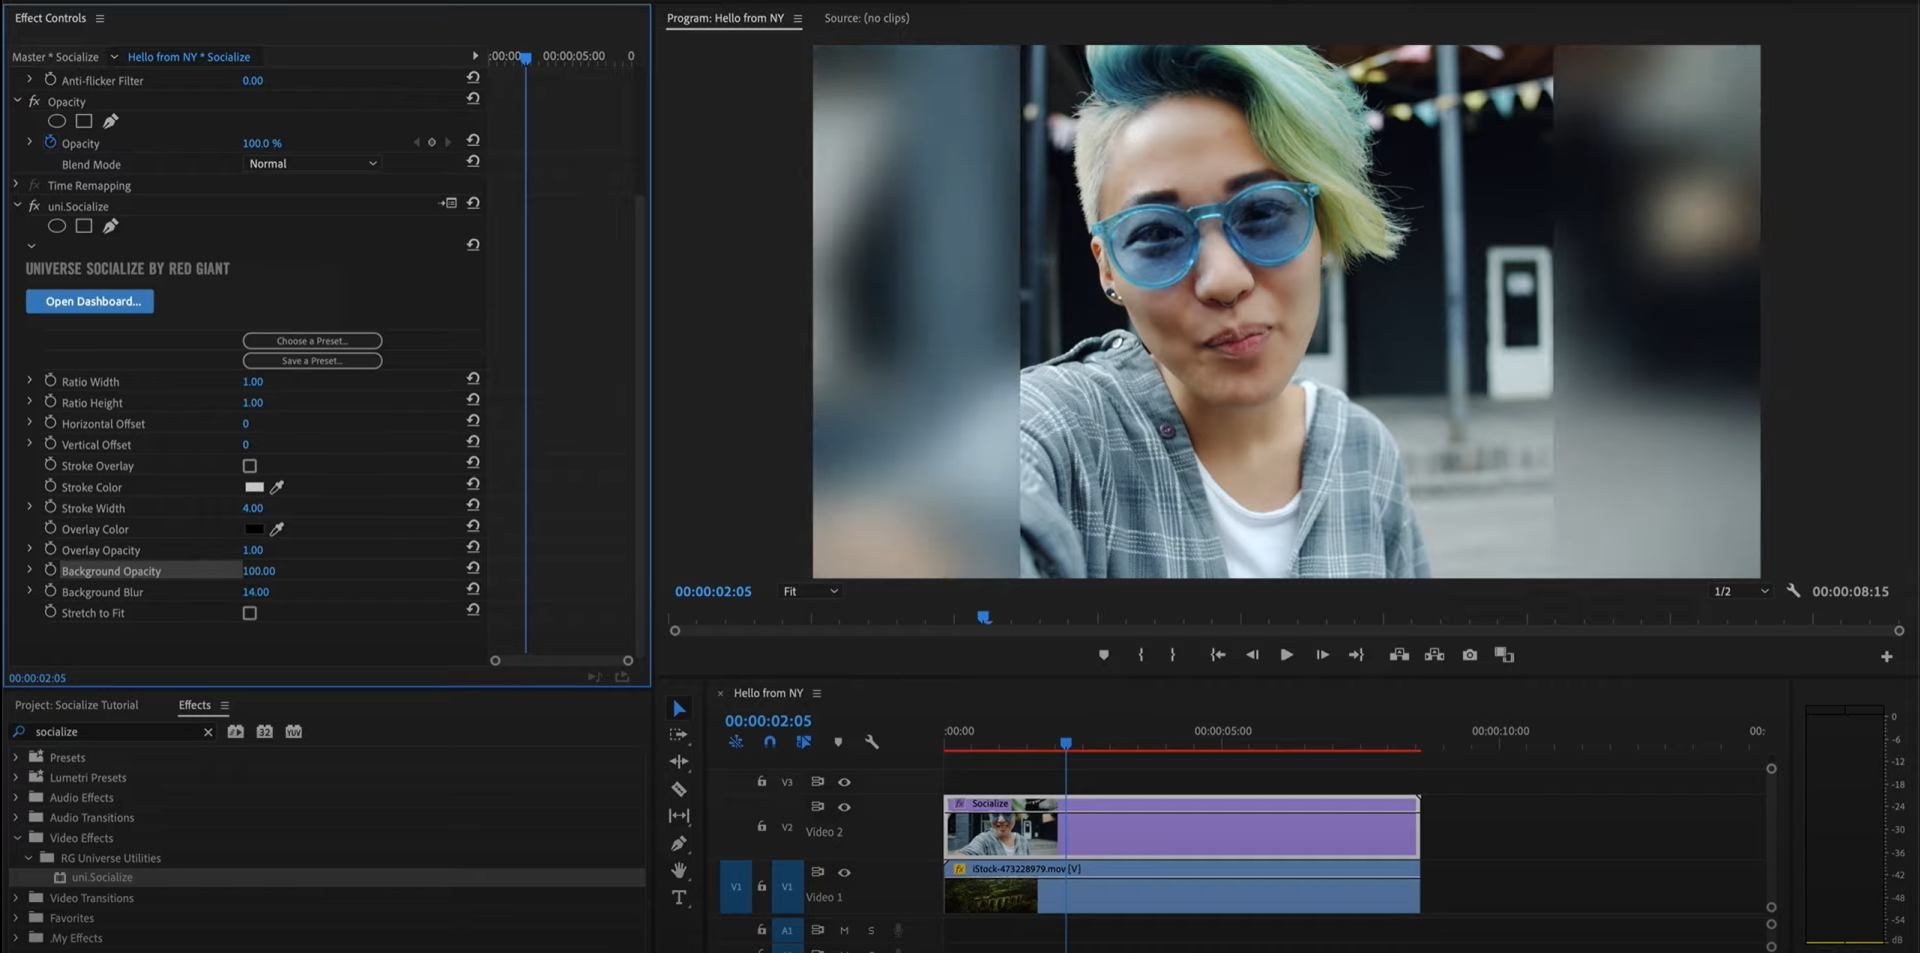
Socialize contains over a dozen convenient presets for making quick work of optimizing video clips for today's most popular social media outlets. Find them via the blue Open Dashboard... button or the Choose a Preset... button below it.
As with all other Universe tools, you can modify or create a Socialize look and then save it under its own name by pressing the Save Preset... button.
Modify the Effect
Ratio Width
and
Ratio Height
adjust the cropping borders along the x and y axes.
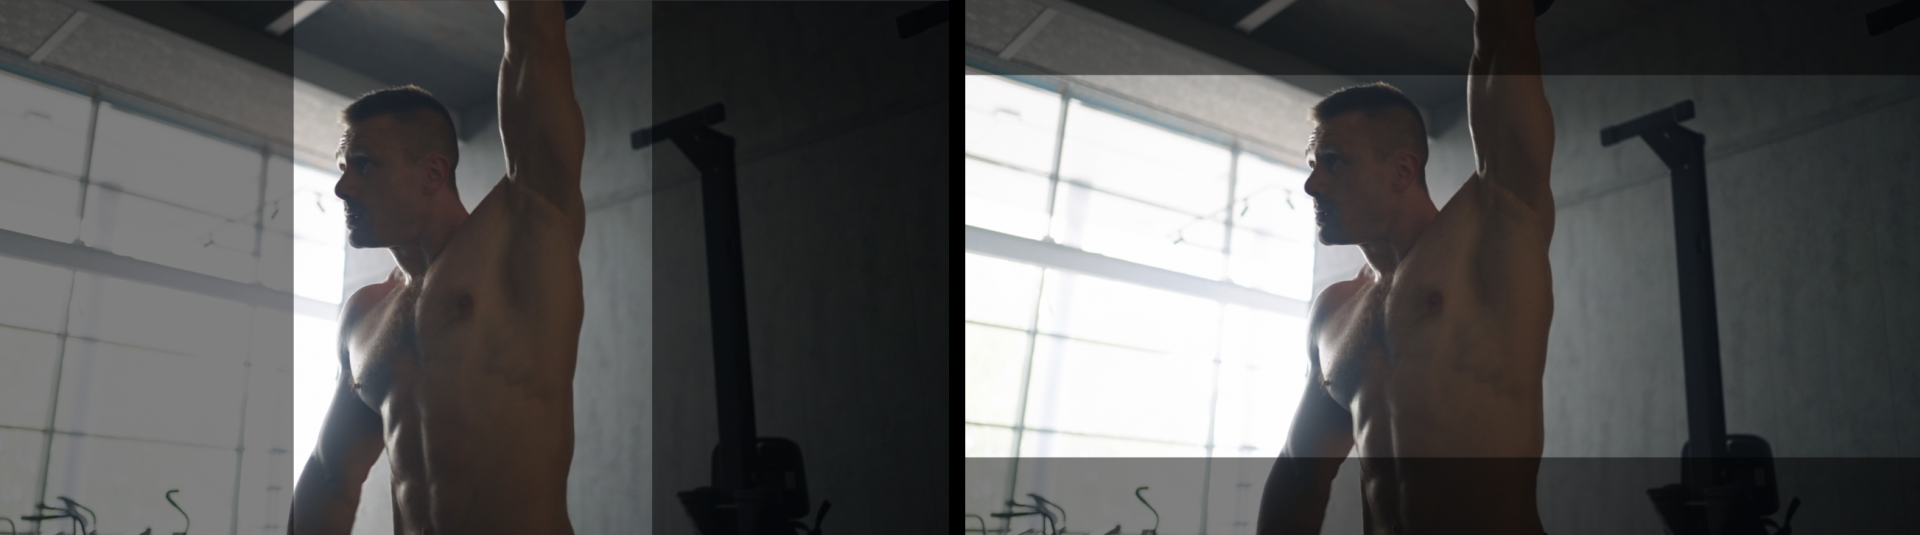
For example, the following shot shows the Facebook Mobile 2-3 preset applied to our source footage. By default, this yields a Ratio Width of 2.0 and a Ratio Height of 3.0 (left). Changing Ratio Height to 0.80 yields the image on the right. Note that the ratio between the two values is what matters. Ratios of 8:4, 4:2, and 2:1 all yield the same result.
Horizontal Offset
and
Vertical Offset
move the cropped output along the x and y axes.
For instance, this can be useful in cases when your source resolution exceeds your composition settings, resulting in cropping. The first image below (left), shows our comp at 100%, but this arguably crops too much of the kettlebell. We set Horizontal Offset to 160 (center) to bring more of the weight into the scene. If you raise the offset value(s) too much relative to other settings, though, expect to see mirroring appear in your comp, as shown by the red box in our right image.
Stroke Overlay
toggles a stroke along the inside border of the cropped area.
An example is the white frame you see in the image below.
Stroke Color
provides a swatch and eyedropper tool to adjust the stroke color.
Stroke Width
adjusts the size of the stroke inward onto the cropped area.
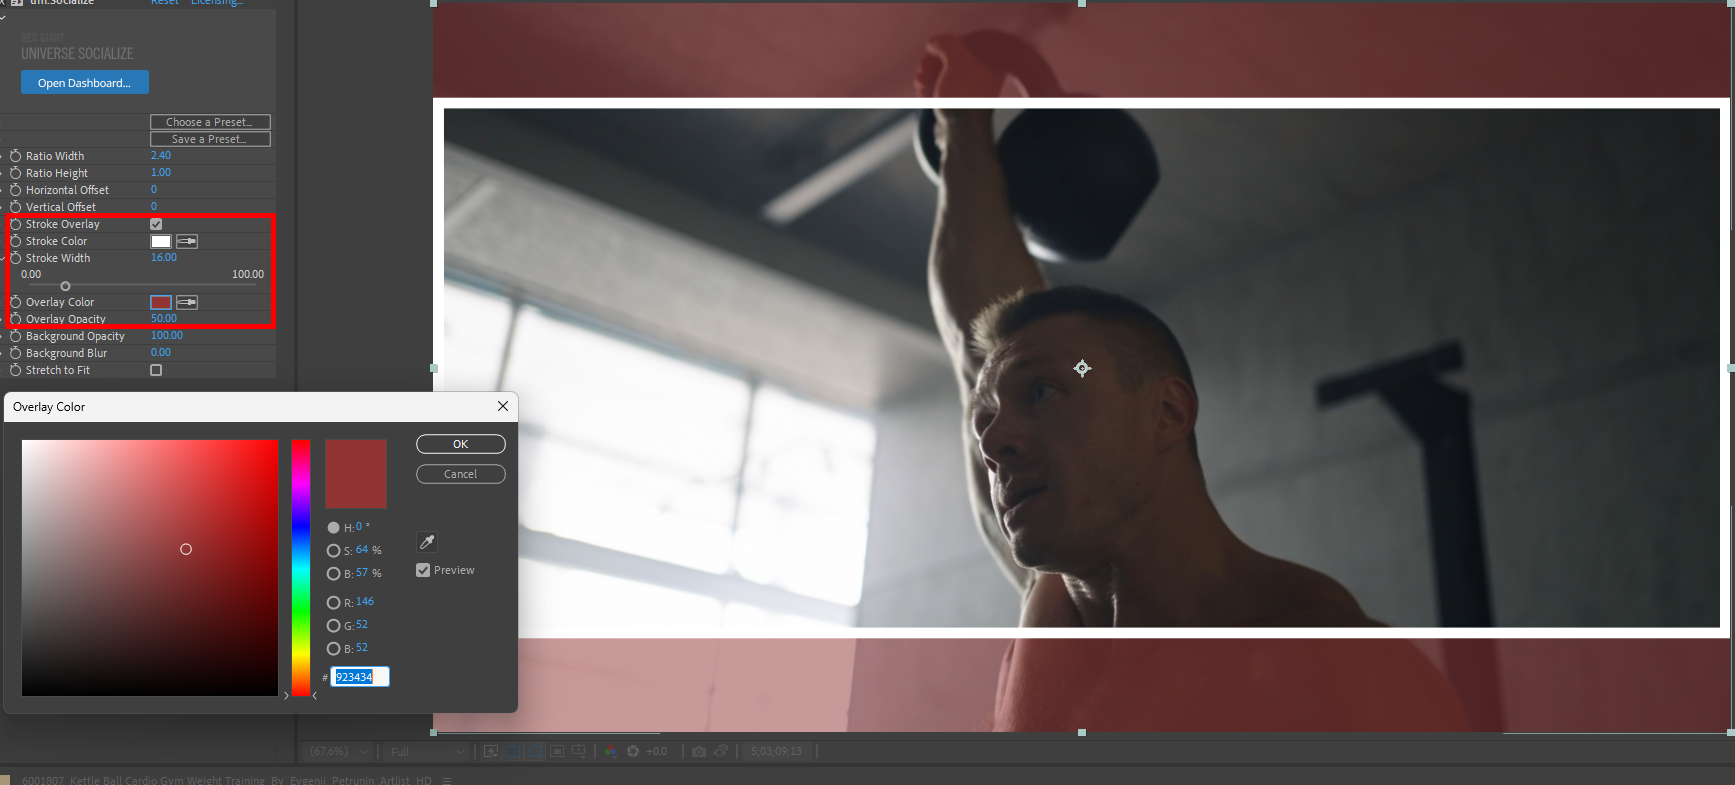
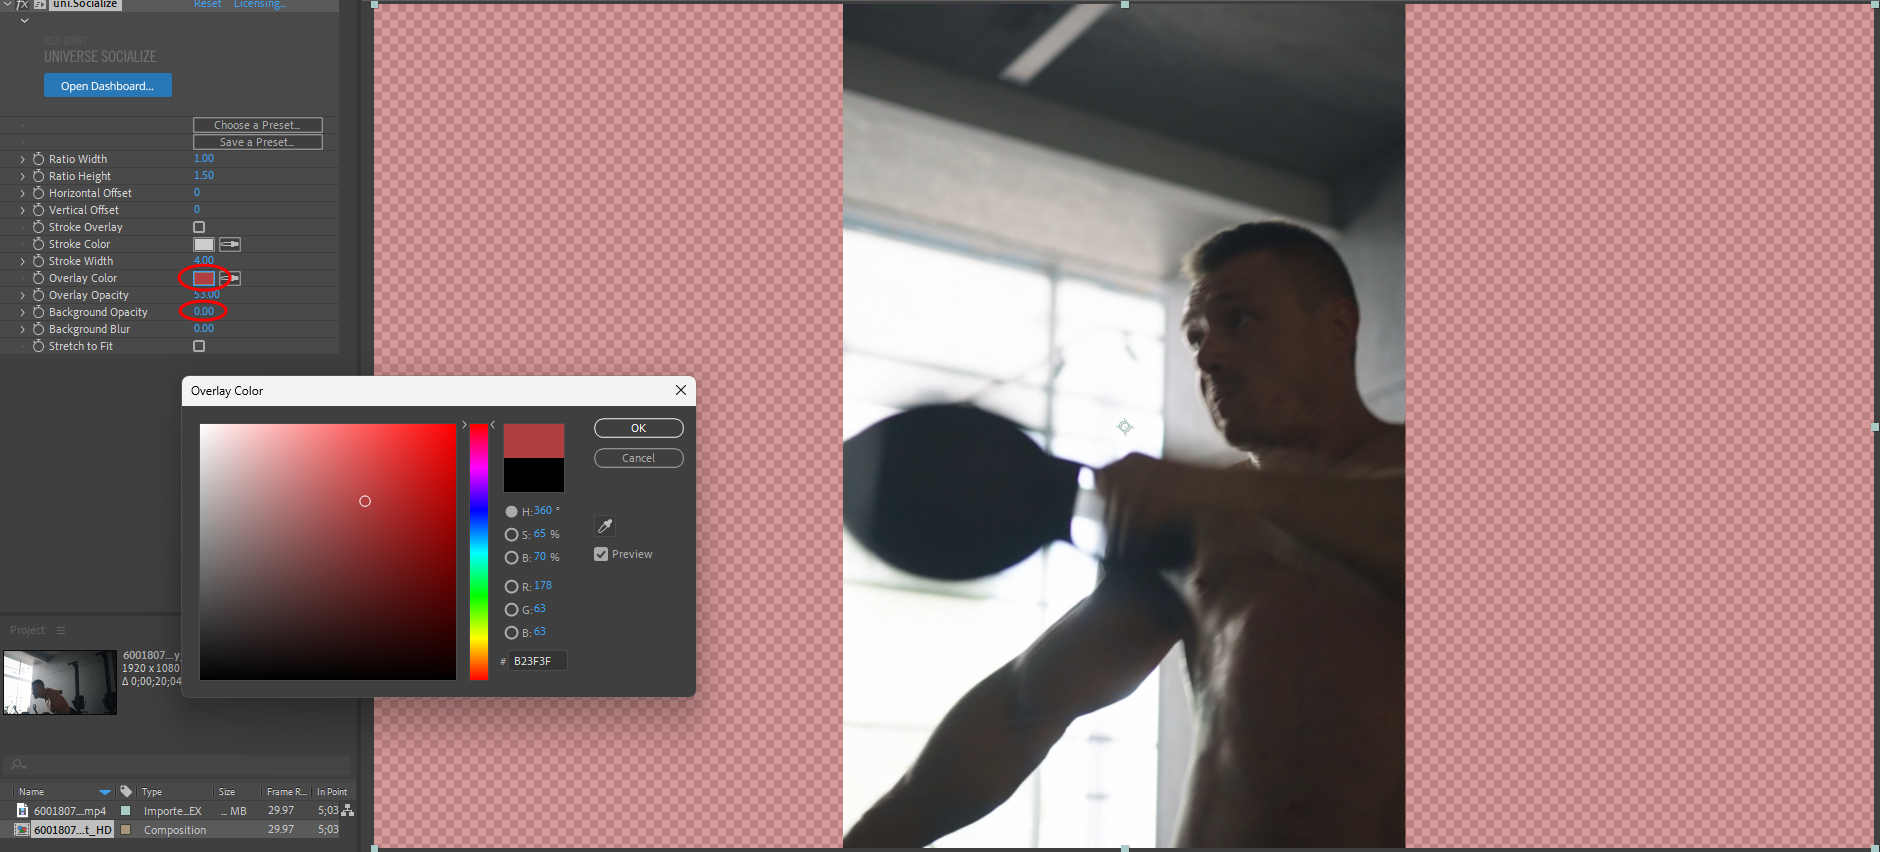
Overlay Color
provides a swatch and eyedropper tool to control the matte's coloring. In this illustration, you see how we used Overlay Color to give the overlay, meaning the area outside the Socialize crop, a dark red cast. You may find such coloring helpful in distinguishing between the matte and primary areas, especially if you opt not to use a stroke overlay.
Overlay Opacity
adjusts the transparency of the matting.
Background Opacity
adjusts the background's transparency.
Below, you see how the gym background behind the matte has now been turned transparent, as we lowered Background Opacity to zero.
Background Blur
controls a blur within the image's matted areas.
Stretch to Fit
toggles whether the cropped image fills the cropped area.
Compare the prior and following images to get a sense of when you might (and definitely might not) want to apply this feature.
Care for a more video-oriented walk-through of Universe Socialize? We've got you covered over at Maxon Cineversity. Check it out HERE.