Universe Hacker Text transitions between two text inputs by altering individual characters and text lines.
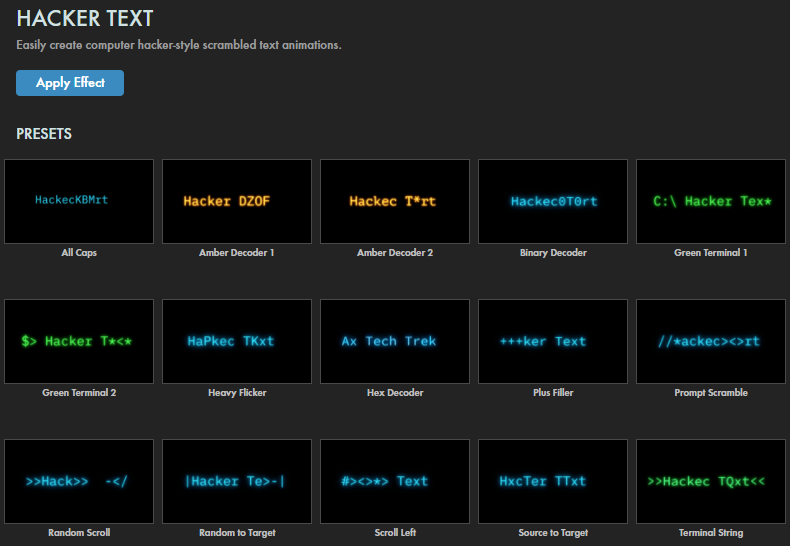
Presets & Video Walk-Through
Hacker Text presets deliver one-click shortcuts to get you various visually interesting means of scrambling and "decrypting" text lines. Find our presets via the blue Open Dashboard... button or the Choose a Preset... button below it.
As with all other Universe tools, you can modify or create a Hacker Text look and then save it under its own name by pressing the Save Preset... button.
If you'd like a visual overview of the plugin before diving into this guide, we recommend giving our Cineversity tutorial a watch.
Modify the Effect
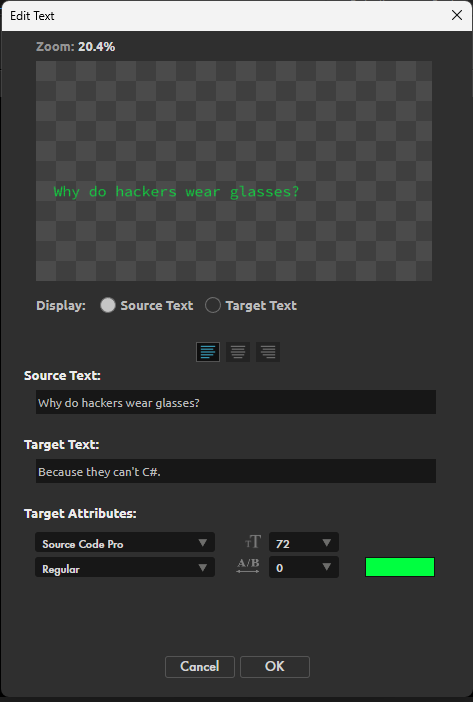
Edit Text launches a modular window with options to customize the text input for the transition.
Note that host application restrictions will likely require you to have Animation Timing (see below) set to Manual to view the entire text line in the preview window.
Display
toggles between displaying the starting text (Source Text) and final text (Target Text) in the preview window.
The alignment icons ( ) offer standard text alignment options for left, center, and right.
Source Text
defines the text string at the beginning of the Hacker Text effect.
Target Text
defines the text string at the end of the Hacker Text effect.
Target Attributes
contains several text customization options, including font, size, color, emphasis (e.g., bolding and italics), and character spacing.
Position
controls the coordinates that define where within the frame your text will appear.
Choose from manual x/y numeric entry or use the cross-hair tool.
Animation
Animation Timing offers whether to let Universe assume Automatic control of your effect timing details or provide Manual control via additional parameters (below). Those new to Hacker Text may find Automatic easier for getting familiar with the plugin's operation, but Manual will ultimately provide a greater level of control.
Text Transition Type determines which states are transitioned through.
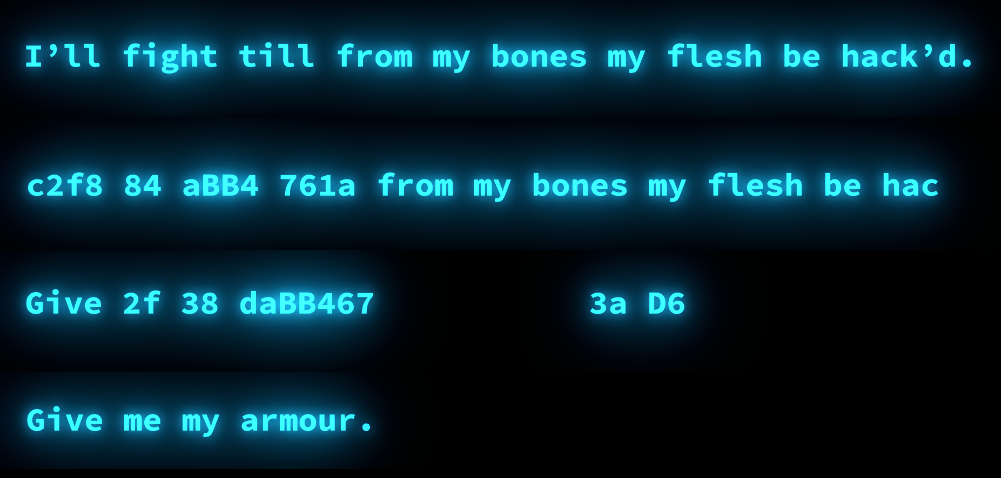
Random=>Target starts with a random assortment of characters before transitioning to the Target Text.
Note that the length of the random character will match the length of your Target Text. Also, you can customize these "random" characters by editing the default characters under Randomization > Random Characters > Edit Custom Text button (see below).
Source=>Random=>Target starts with the Source Text before transitioning into random characters that then transition into the Target Text.
Source=>Target starts with the Source Text and then transitions directly to the Target Text.
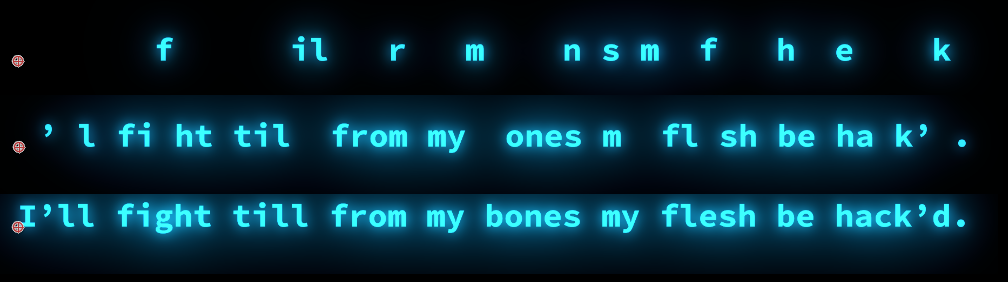
Text Direction affects the directionality of how the Target Text appears. For example, Left to Right reveals the Target Text starting with the line's first character. This may be the only visible Target Text character, depending on your selected Text Transition Type. In the following example, we begin with the last frame of the Source Text displayed (top). Next, you see the random characters of the transition start to take over. Next, since we selected Left to Right, the Target Text begins to emerge on the left from the diminishing randomness. Finally, we see the finished Target Text displayed (bottom). For the curious, the above lines are from the last act of Macbeth. Shakespeare loved hackers.
Text Transition controls the progression from original Source Text (0%) to final Target Text (100%).
Text Wipe, predictably, wipes the line of text in accordance with your Text Wipe Direction (see below) setting. For example, with the direction set as Left to Right, a Text Wipe value of 0 shows the entire text line. As you slide toward -100, the text disappears, starting from the left and moving to the right. As you slide toward 100, the wipe starts from the right edge and moves to the line's beginning.
Text Wipe Direction establishes the directionality of the Text Intro (and Outro) wipe when Enable Text Intro (see following) is checked, meaning "the text starts coming in over here and finishes coming in over there." Your options are Left to Right, Random, and Right to Left. The following sequence shows the progression of a Random Text Wipe.
Enable Text Intro. The Text Intro is an optional span from the first frame of your Hacker Text effect to when the Source Text is fully displayed to the extent you want it displayed. (For example, if you have a constant Flicker applied (see below), it may be that all of the characters in your Source Text are ever completely revealed.) If this checkbox is disabled, then the Source Text displays in full from the first frame. To illustrate, we started with the Amber Decoder 2 preset and disabled Flicker for greater example clarity. With Enable Text Intro disabled, we see the top line — our Source Text shown in full (top). With Enable Text Intro enabled, we only see a line of dashes (bottom), which is the lone character used by this preset for its Text Intro. (You could edit the dash into a different character via Text Settings > Filler Character.)
Text Wipe Intro Start/End. Our preset defaults to Start: 0.00 and End: 0.50, which means that the intro wipe will begin on the first frame and conclude after half of a second. If we wanted to leave that line of dashes intact for one second and then conduct a half-second wipe, we would Start: 1.00 and End: 1.50. Here's the wipe starting at 0.00 with an End: 3.00 value.
Enable Text Transition. The Text Transition is the effect that bridges the Source Text and Target Text. In this preset, the transition is comprised of four symbol characters established in the Custom Text parameter (shown here but discussed below). When Enable Text Transition is disabled, the Source Text remains intact until the Text Outro begins. Also note that if Enable Text Transition is disabled, the Target Text will not display.
Text Transition Start/End set the times at which your Text Transition begins and completes.
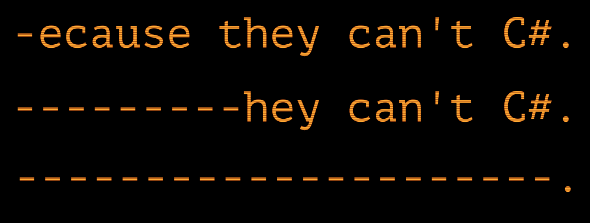
Enable Text Outro toggles the outro effect that concludes the display of your Target Text. As shown in our example below, the outro overwrites our Target Text with a series of dashes. Remember that Text Wipe Direction controls the directionality of how your outro progresses over your Target Text.
Text Wipe Outro Start/End sets the outro's beginning and finish times. Here, you see the first frame into the effect (4.01, one frame after our Text Wipe Outro Start value of 4.00, shown at top), followed by the outro's middle and penultimate frame.
Text Settings
The Edit Custom Character... button opens a dialog box that allows you to input any character string of your choice. This Custom Character can then serve as your Filler Character, Prefix (as shown below), or Suffix when you select Custom from the bottom of their respective pull-down menus.
Filler Character establishes what character is used in your wipes. Below, we used the asterisk, shown in the early stages of a Right to Left wipe.
The
Prefix
and
Suffix
pull-down menus offer an assortment of symbols that can either precede or follow the text inputs that remain unchanged during the transition.
Font Size
adjusts how large or small the text appears.
Font Color
defines the text color.
Justification
determines if the text is aligned to the Left, Center, or Right.
Horizontal Tracking
controls the spacing between characters.
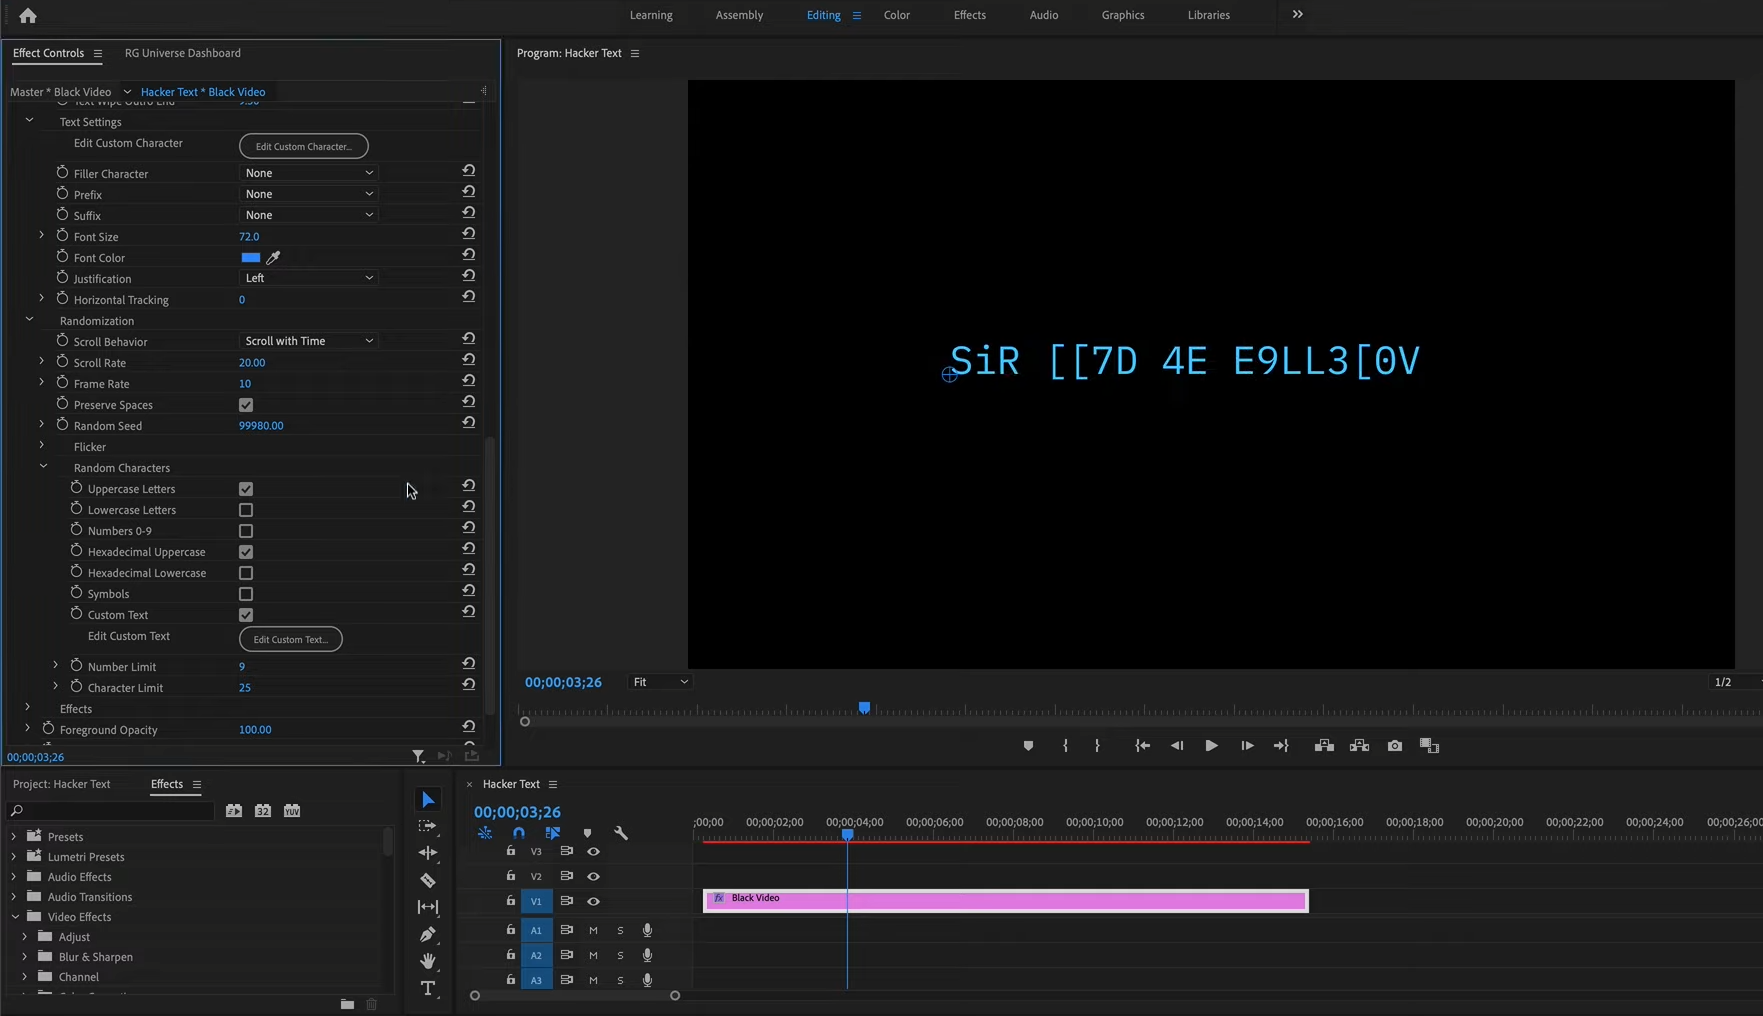
Randomization
These parameters will only affect your transition if Animation >
Text Transition Type (defined above) is set to Source=>Random=>Target. This section applies to the Random part of that process.
Scroll Behavior
determines if the randomized text will scroll through random characters regardless of the
Transition
completion percentage
(Scroll with Time)
or only when the
Transition
completion is adjusted
(Scroll with Transition).
Scroll Rate
controls the speed at which randomized text changes from one character to the next.
Preserve Spaces
toggles whether spaces in your text inputs are maintained during the randomized text animations.
Random Seed
adjusts the formula, and subsequently the variations, used to create the random effect.
Random Characters
contains toggle checkboxes that define which types of characters appear within the randomizations as well as what
Number Limit
or
Character Limit
(A-Z) is in place.
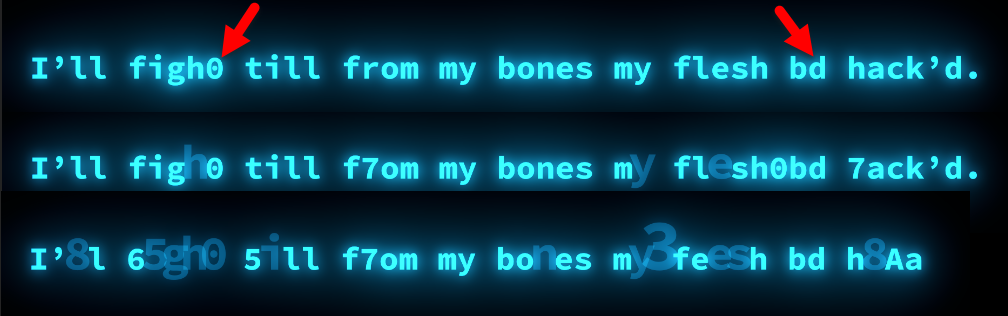
Following shows Flicker Frequency: 10 and Flicker Sustain: 10 (top), Flicker Frequency: 100 and Flicker Sustain: 10 (middle), and Flicker Frequency: 100 and Flicker Sustain: 30 (bottom) at the 23rd frame, after the Text Intro and before Text Transition.
Effects
Enable Glow
toggles a glow around the text with control over the brightness (Glow Intensity) and expansion
(Glow Radius)of the glow. In this example, you can see the difference between no glow effect (top) and glow enabled with settings of Glow Intensity: 30, Glow Radius: 2, and Glow Boost Light: 3. Glow Boost Light can provide some fun effects and make your text appear to be burning into (or cooling from) scorching hot. Shown below are values of 5 (top) and 10 (bottom).
Enable Scan Lines
toggles a pattern of CRT-like lines that overlay the text. You can control over Scan Line Thickness,
Scan Line Spacing, and Scan Line Opacity. Keep in mind that a strong glow can overpower scan line visibility.
Foreground Opacity
and
Background Opacity
control the opacity of the text
(Foreground Opacity)
or the layer to which the text has been applied (Background Opacity), complete with the standard Blend Mode options that adjusts how the text overlay interacts with the background.
None
is the default, with
Normal
overlaying the text on top of whatever background it's been applied to.

 ) offer standard text alignment options for left, center, and right.