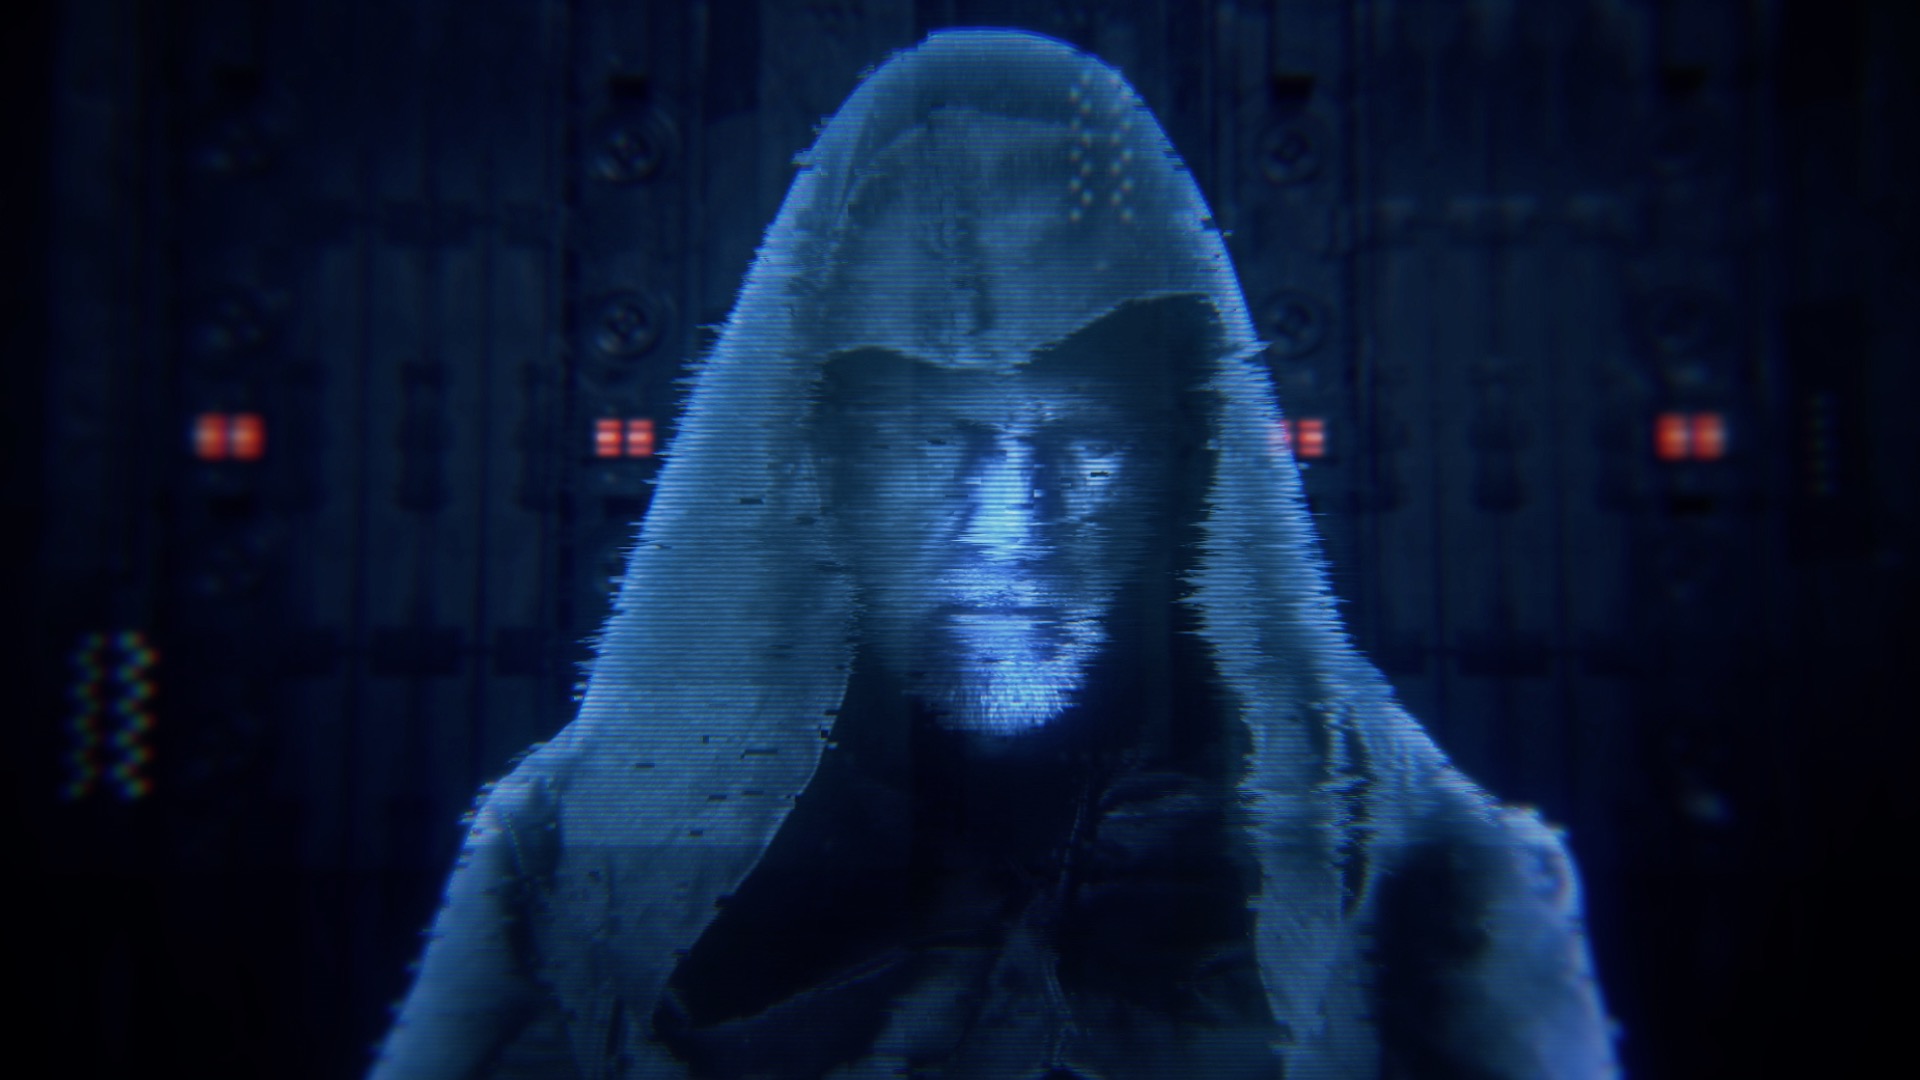
Universe Holomatrx II gives your text, footage, HUD elements, and logos the look and distortion of futuristic technology, including a sci-fi hologram. A major upgrade from the original Effects Suite Holomatrix, this version is built for speed and is brimming with features.
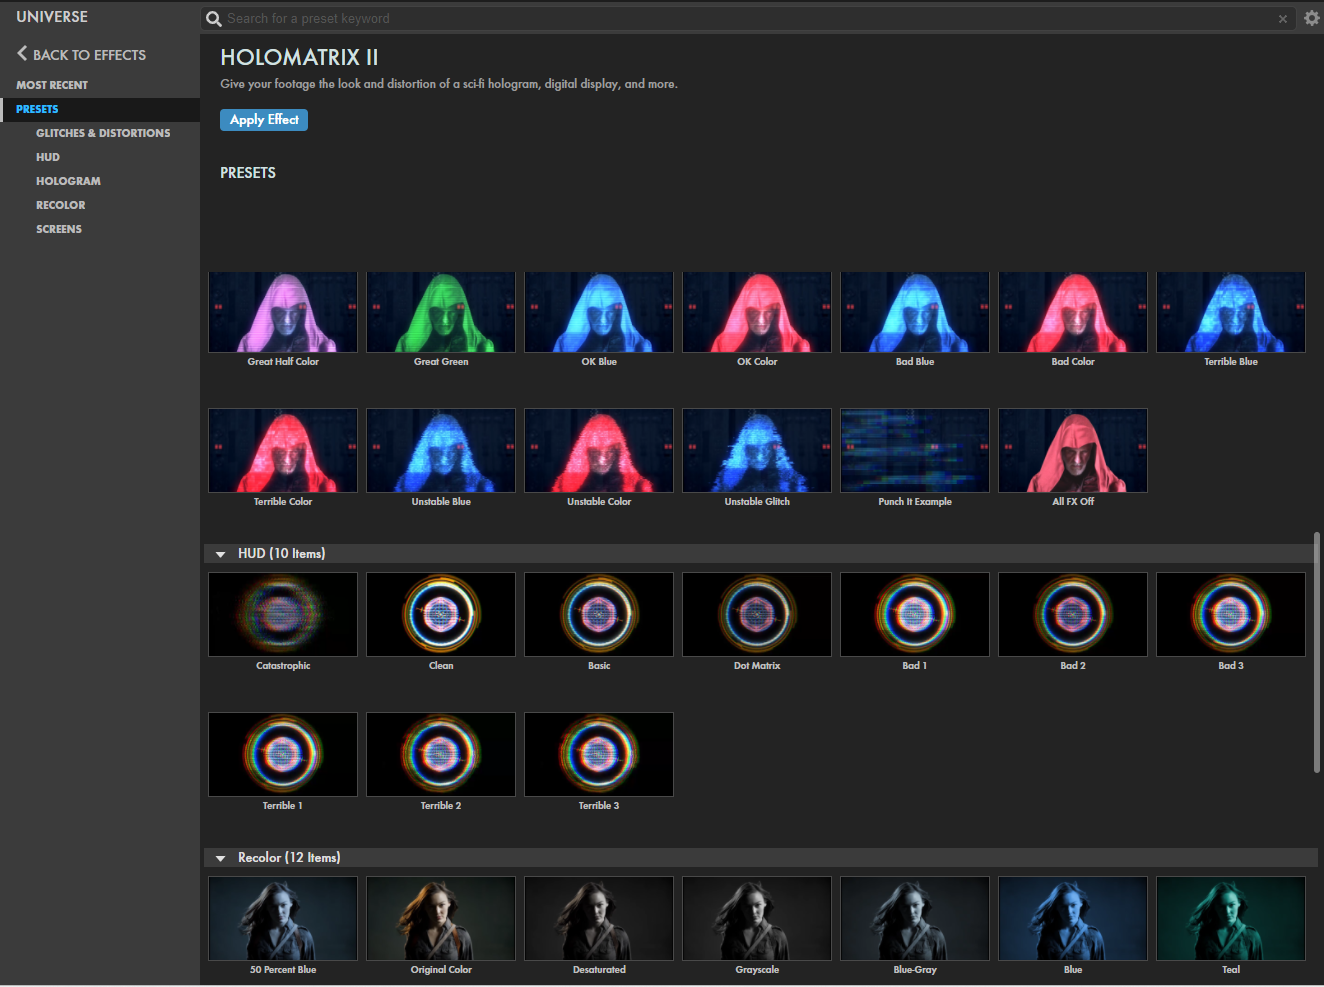
Presets
Match bundled Holomatrix II presets with your layer content type to save time.
Presets are now available in five categories:
Hologram
Screens
HUD
(Heads-Up Display)
Glitches & Distortions
Recolor
Find these presets via the blue Open Dashboard... button or the Choose a Preset... button below it.
As with all other Universe tools, you can modify or create a Holomatrix II look and then save it under its own name by pressing the Save Preset... button.
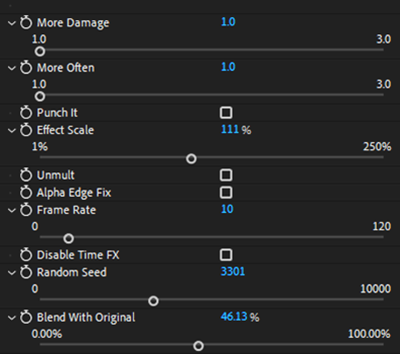
Initial Controls
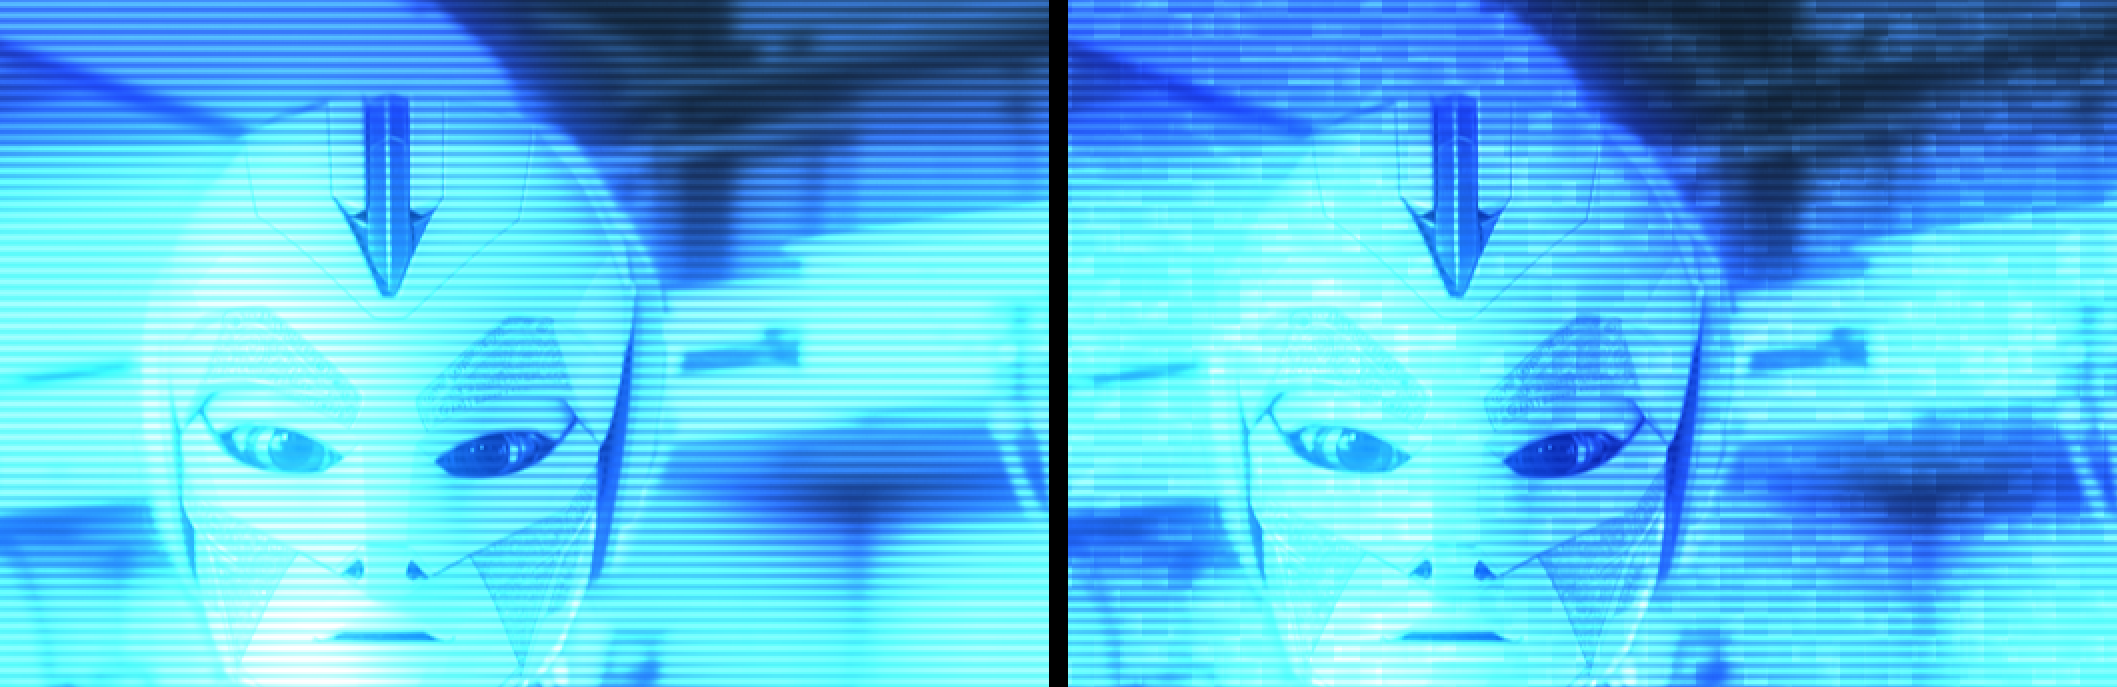
More Damage
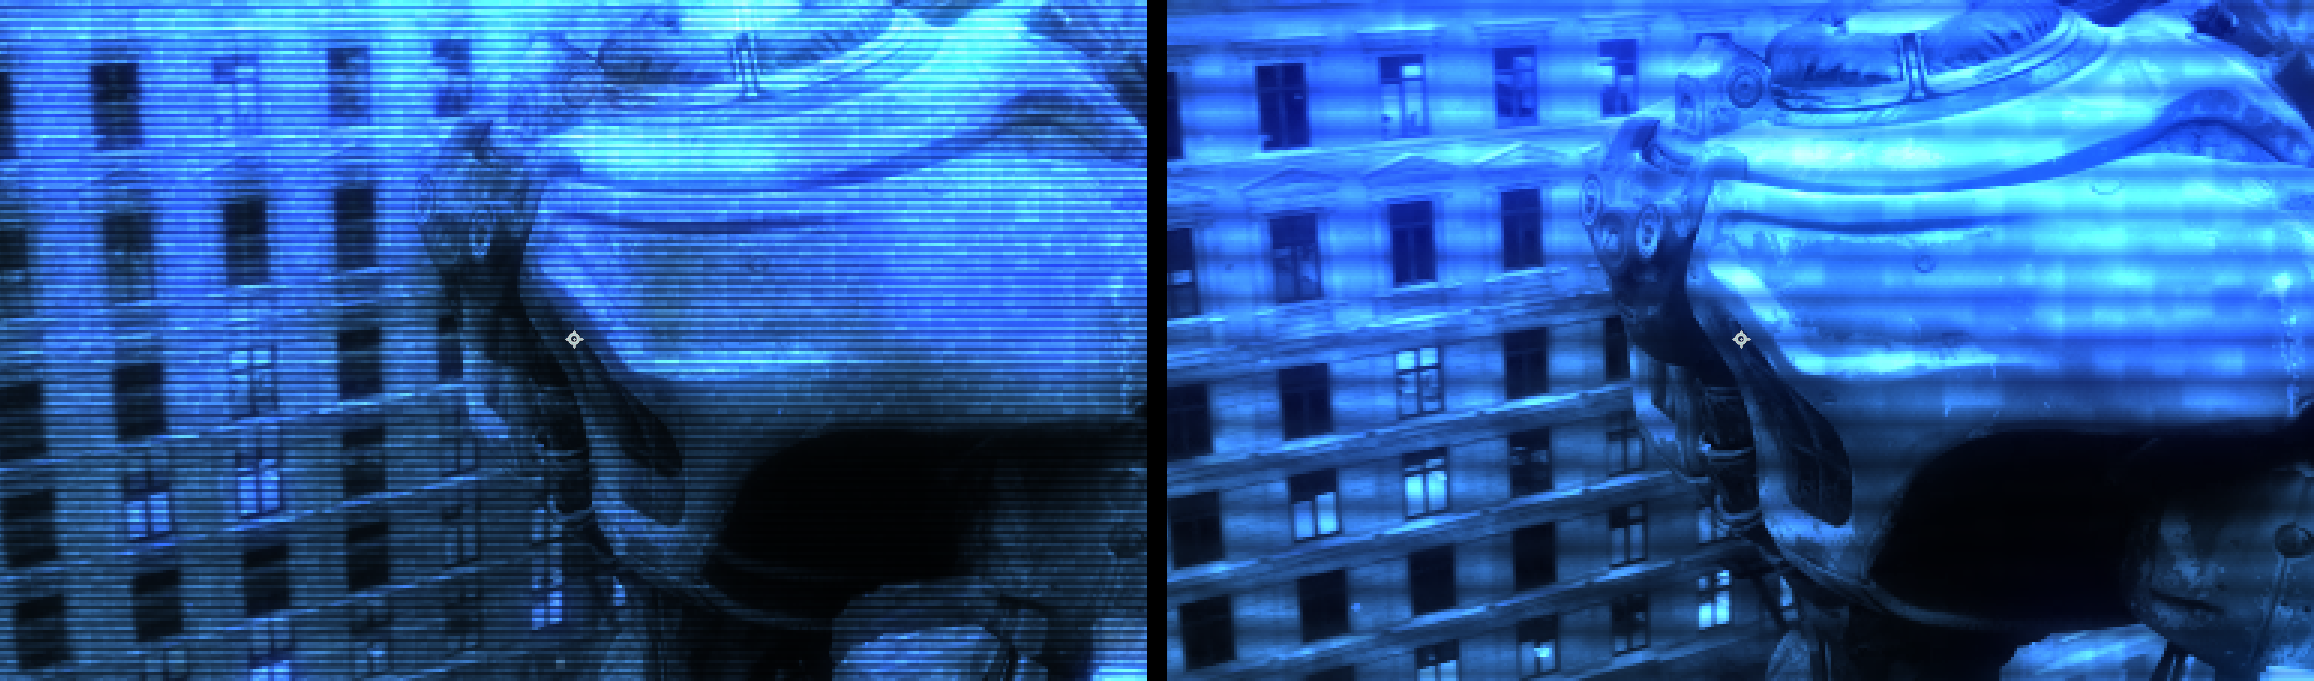
adds more distortion to the effect, splits the color changes, adds noise and static, and breaks apart the image. Damage will appear in different forms depending on what preset you have selected. Some have more static effects, while others more color separation. The comparison below shows values of 1 (left) and 3 (right) using the Terminator preset.
More Often
increases how frequently glitches and damage appear in the frame.
Punch It
turns on otherwise random Holomatrix II effects 100% of the time. Holomatrix II uses a chance (expressed as a percentage) to decide how often any random effect should occur. This means you can get effects like glitching and color separation at random. This can be useful when you want to control when effects appear (e.g., timing with audio). However, when the Punch It checkbox is turned on, it will set the chance of any enabled effect occurring to 100 percent, meaning those effects are constantly on, even if a given effect may have only a 25% chance of occurring normally.
Effect Scale
changes the size of the effect. This is useful when working with compositions that are smaller (SD) or larger (4K) than the standard 1080 (HD) size. Scale the effect up or down over the image to get the correct look for your composition.
Note that at very low values, the scene will darken as effect details become too small and dense. The comparison below shows values of 40 (left) and 250 (right).
UnMult
makes the alpha channel of the Holomatrix layer transparent when the box is checked, allowing you to composite the hologram or ghost over background footage more easily.
Alpha Edge Fix
removes a color fringing effect that sometimes occurs on the edges of an image in Holomatrix when the image has a partially transparent alpha channel (such as keyed footage or text). Checking the box will remove the fringing. However, you would not want this turned on with straight video that has a fully opaque alpha channel.
Frame Rate
adjustments can smooth out (with higher values) the hologram or make it even jerkier (with lower values) relative to the 10 FPS default. For an optimally smooth animated effect, set this value to match the footage’s original frame rate. Note that Frame Rate affects the frame rate of various Holomatrix effects in exactly the same way. For example, Frame Rate affects the motion of the horizontal Lines in some presets. The speed of the line motion remains unaffected; only the effect's playback rate changes.
Disable Time FX.
You may notice that if you apply Holomatrix after other effects have been applied to your footage, those effects will disappear. This happens because Holomatrix includes many effects (such as Frame Rate, Random Frame Rate, and Freeze Frame) that distort the flow of a footage’s time. Thus, these effects have to bypass previous effects. Usually, you can pre-compose a layer with the effects applied, then apply Holomatrix onto the precomp. However, Disable Time FX shuts off all Holomatrix time-based effects while keeping other Holomatrix effects live. Disable Time FX also allows previous effects in the stack order to remain live.
Important:
When Disable Time FX is turned on, other Holomatrix effects, such as Lines and Static, will still play back based on whatever frame rate you have set for Holomatrix’s frame rate. So, while your 24p footage would play back at 24 FPS, if frame rate is set to 10 FPS, Holomatrix effects will continue to play back at 10 FPS.
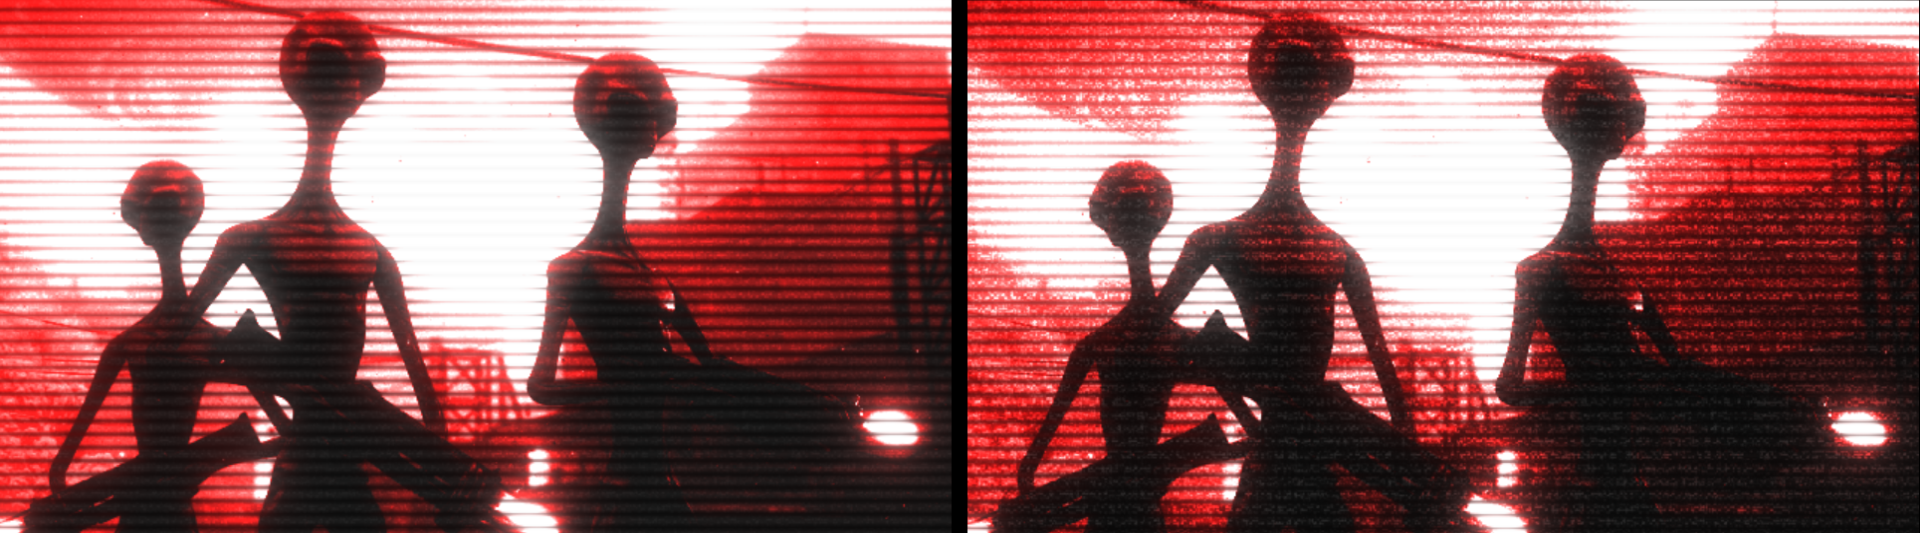
Also important:
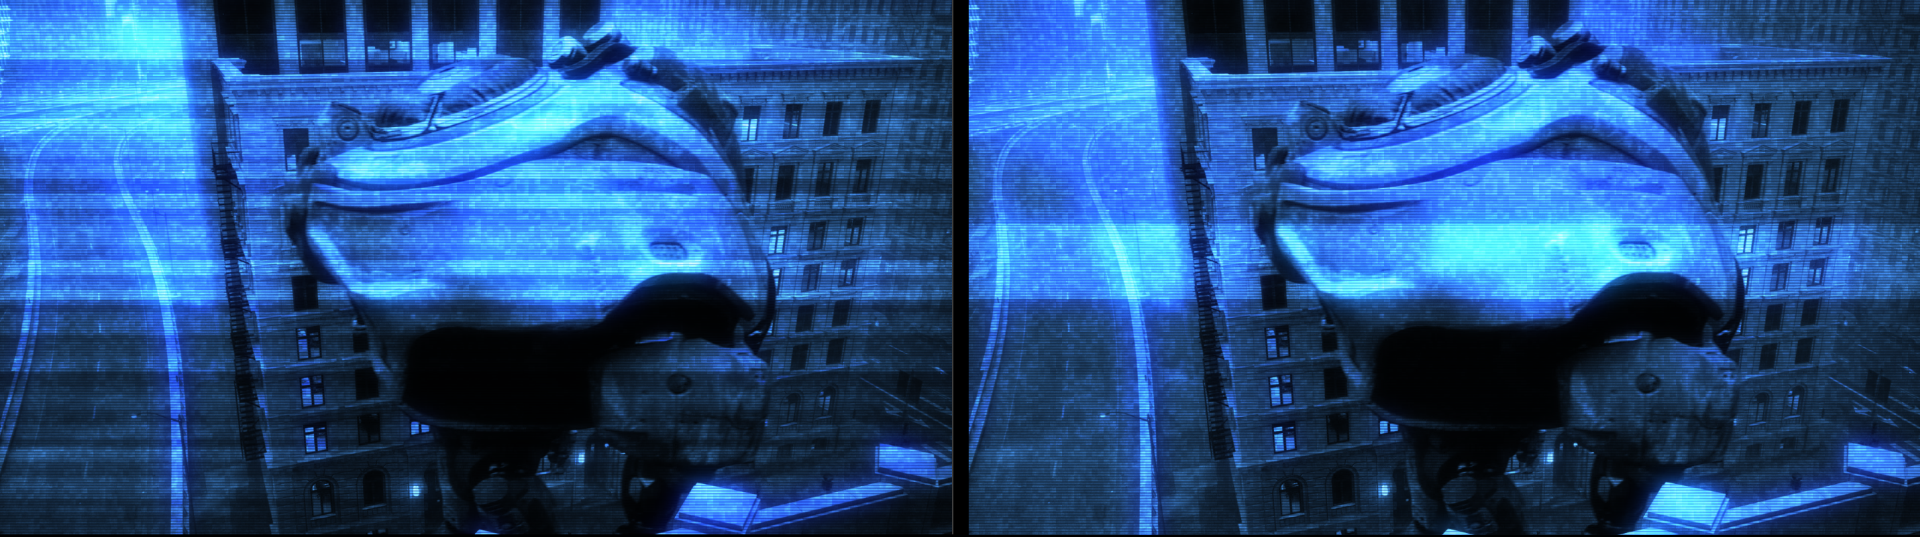
Mismatches between you composition and source resolution and/or frame rate can result in unwanted display issues. Checking the Disable Time FX box can remedy this. In the below example, our comp settings are 1920 x 1080 @ 25 FPS, but our source footage is 4096 x 2160 @ 25 FPS. The left image shows our preview with Disable Time FX unchecked and the right with it checked. Because unchecked is the default, this might be confusing at first.
Random Seed
generates different random values. If you don't like the result of the effect on a given frame, change this value to recalculate any of the random values used to create it. This slider is also helpful if you have more than one layer being affected and you don't want them to look identical.
Blend with Original
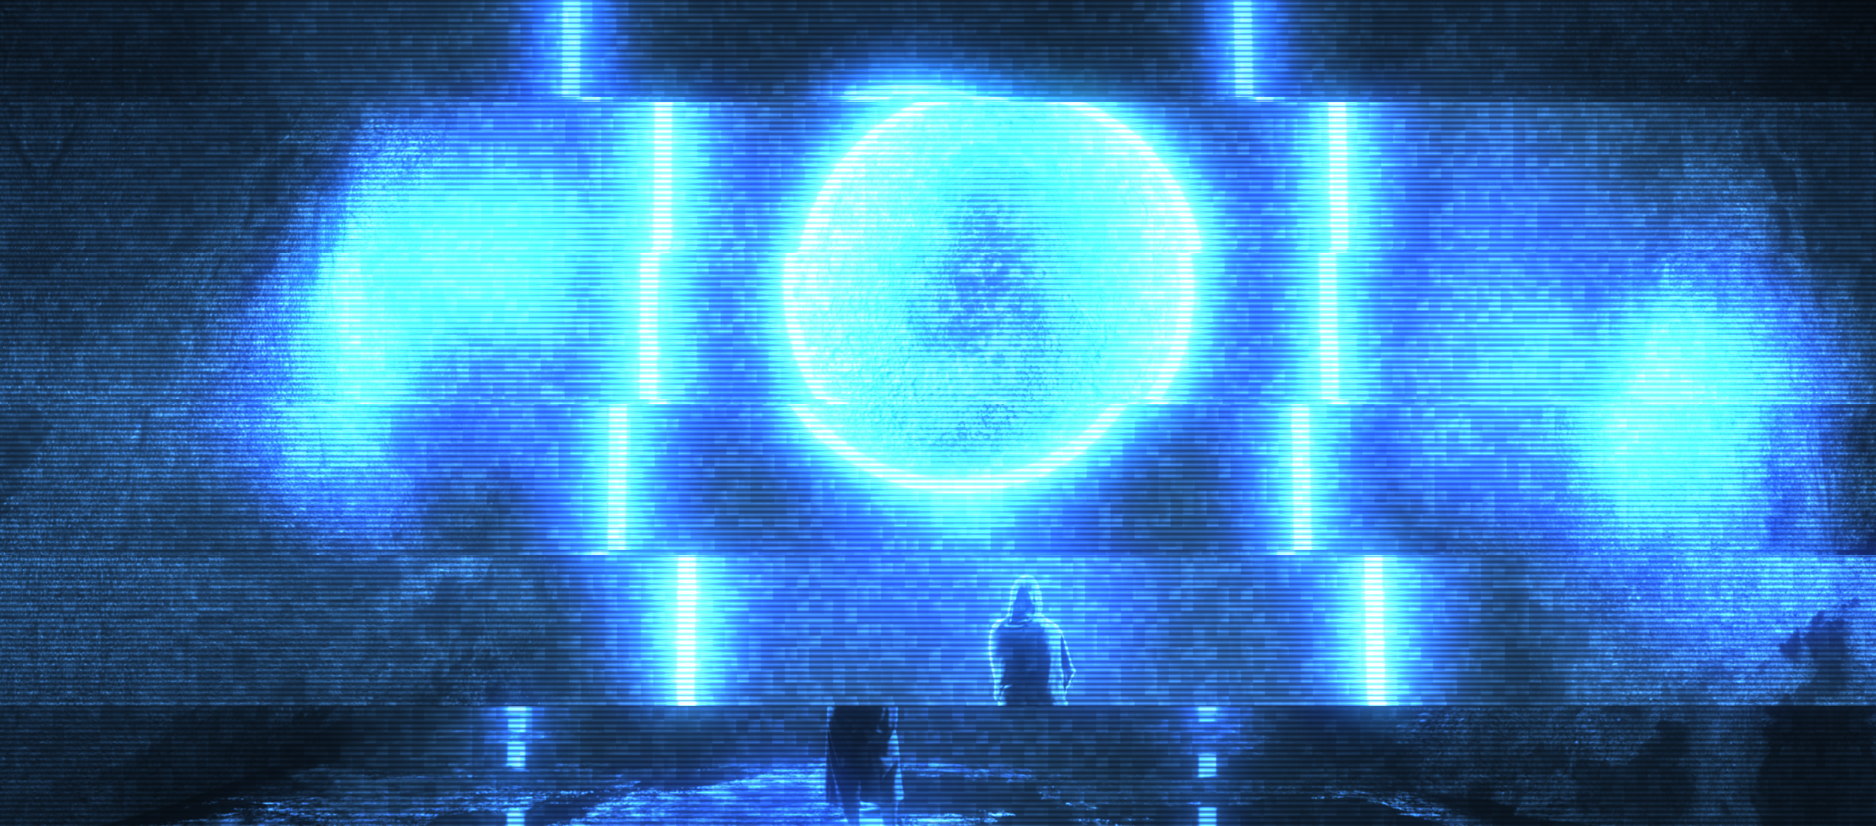
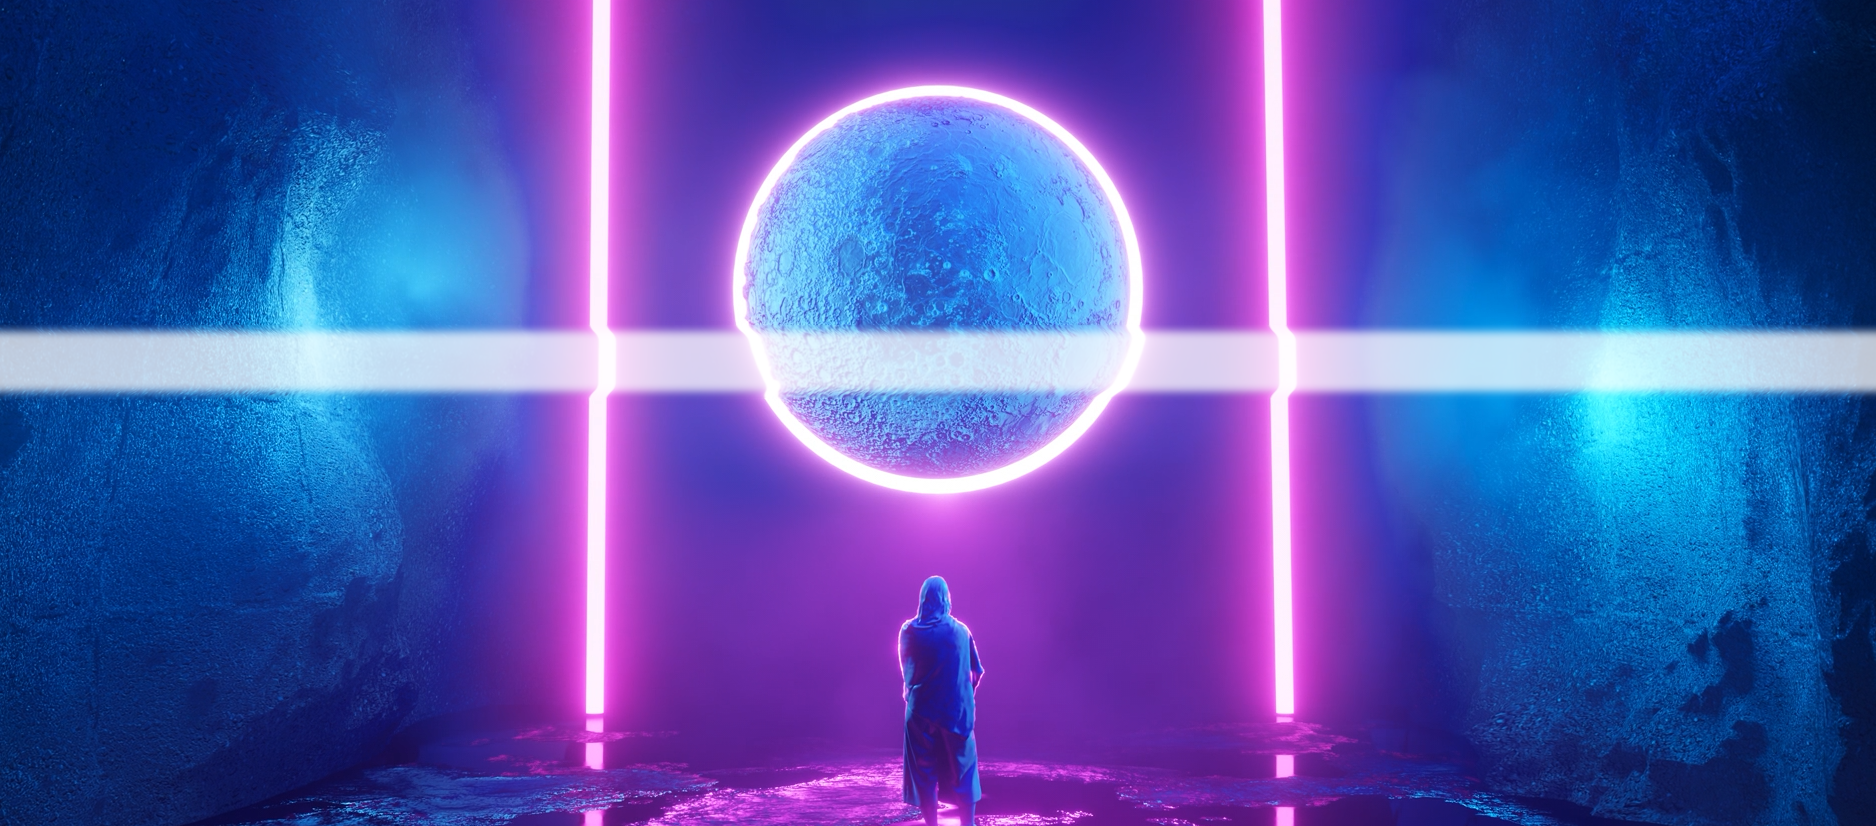
combines Holomatrix effects with your original footage. If you’d like to keyframe a graceful transition, begin with
Blend with Original, when set at 100%, exposes the original image completely. Animate it to 0% to show just the Holomatrix effect
— or vice versa as shown below.
Effects
The Effects group offers a list of checkboxes that let you activate or deactivate an associated group of controls. You will notice that not all checkboxes are enabled by default. Changing presets in the Preset menu will turn some of the boxes on or off, depending on which effects constitute the preset. To add an effect to the current preset, simply enable one of the boxes and twirl down the menu arrow beside the group name. Therein, you'll find sliders for each advanced, keyframe-ready contro function.
Random Frame Rate
Randomly change the frame rate of the original footage. The starting frame rate is based on the Frame Rate value (see above). Parameters in the
Frame Rate Settings
group:
% Chance of Random Frame Rate
determines the chance of a random frame rate occurring. Values range from 0 to 100. Higher values increase the chance of a random rate.
Frame Rate Randomness Range (%)
controls how much the random frame rate can vary from the Frame Rate value. Values range from 0 to 100. Higher values increase the amount of frame rate variance.
Frame Rate Random Duration
sets how long a random frame rate can last. Values range from 0 to 200, measured in seconds. Higher values increase the length of the random rate.
Random Duration Variation
establishes how much the random frame rate duration can vary. Values range from 0 to 100, measured as a percentage. Higher values increase the chance of a random duration.
Technical Note on Frame Rate:
The Frame Rate parameter controls the frame rate of the original footage and the effects. However, if your imported footage and the composition have different frame rates, then using Frame Rate gets complicated because you are dealing with three frame rates: the footage frame rate, the composition frame rate, and the Holomatrix frame rate.
Technically, Frame Rate does not alter the footage frame rate. It alters the composition frame rate. This is because when you apply Holomatrix to a layer, Holomatrix pre-composes the footage at the same frame rate as the original comp to run properly. If your footage is 25 FPS but the comp is 30 FPS, then Frame Rate is playing with the 30 FPS settings of the comp (and pre-comp), not the footage's 25 FPS settings.
Normally in After Effects, if your footage runs at 15 FPS, but your comp runs at 30 FPS, then every footage frame plays twice to fill in the gaps between frames. If you use Holomatrix's Frame Rate controls and set the Frame Rate to 10 FPS, then you are making that 30 FPS comp behave like a 10 FPS comp, meaning two out of every three frames will be dropped. Normally, when your footage is 30 FPS and your comp is 10 FPS, the comp drops every second and third frame and footage plays evenly. However, this means your 15 FPS footage will first double every frame (to fill the 30 FPS comp) and then drop every second and third frame (as two thirds of the comp's frames are discarded). So, some frames will be doubled while others will be dropped, depending on where they fall in the timeline. Working with three frame rates is not ideal unless you are trying to simulate bad reception, because you are alternating between repeated frames and dropped ones.
Bottom line: We recommend setting your imported Holomatrix footage to the same frame rate as the Holomatrix composition. That way, you're only dealing with two frame rates: the footage frame rate and the Frame Rate parameter.
Colorization
The Colorization checkbox uses the three color swatches in the Color/Brightness Settings group. With Colorization turned off, Holomatrix uses the original footage colors.
In the triptych below, we used the Great Half Color preset. You can see the original image (left), Colorization unchecked (center), and then Colorization checked (right).
The
Color/Brightness Settings
options let you change the brightness, contrast, color, and blend of the effect's color palette.
Source Brightness
controls the brightness of the original footage. Values range from -100 to 100. Higher values increase the brightness level.
Source Contrast
controls the contrast of the original footage. Values range from -100 to 100.
Perhaps counter-intuitively, negative values make the image brighter while positive values grow darker.
Color – Highlights, Midtones, Shadows
set the highlight, midtone, and shadow color for the footage. Default settings are Highlights at light blue, Midtones at medium blue, and Shadows at black (see right edge of triptych above).
Colorize %
determines how much of the layer is colorized. Values range from 0 to 100. Higher values add in the colorization effect. At 100%, the color effect is fully applied. At 0%, the color effect is essentially turned off.
Glow
There are two kinds of glows in the Glow section, and each corresponds to one of two checkboxes: Glow and Secondary Glow. The main Glow brightens the holographic image. The Secondary Glow creates more of an outer, blurry glow. (Note that, depending on the preset, it can be hard to discern Glow's effect without Secondary Glow enabled.) Both glows work by finding the brighter parts of an image and applying a diffuse, bright aura to those areas.
Using the Going Rogue preset, we show Glow and Secondary Glow enabled (left), Glow disabled with Secondary Glow enabled (center), and Glow enabled with Secondary Glow disabled (right).
Glow Settings:
Glow Threshold determines how much of the original image is included in the glow, based on the brightness values of the source image. The brighter the pixels, the more the glow applies. Higher values raise the threshold, which makes the glow less intense.
Glow Radius
determines how far the glow extends. This distance is measured in pixels from the bright areas of the image. Higher values produce more diffuse glows. Lower values produce glows with sharp edges.
Glow Intensity
sets the glow's brightness of the glow. Values range from 0 to 100, but be warned that a little intensity can go a long way.
Secondary Glow Radius
controls the growth of a blurry glow. This glow typically shows along the outer edges of the source image. Higher values increase the spread and diffuseness of the glow. Lower values make the glow tighter and more intense.
Scan Lines
Scan lines are a big part of the Holomatrix effect. With Scan Lines enabled, a regularized set of lines runs through the image, helping convey the effect of a legacy, analog-era transmission. In the following triptych, we show the Ghostify preset at 200% zoom with Scan Lines unchecked (left), enabled with horizontal lines (center, see Scan Lines Direction below), and with both horizontal and vertical lines (right). Interestingly, notice how scan lines can help reveal some details otherwise obscured by an effect's high glow settings.
Scan Line Settings:
Scan Line Distance
determines how far apart scan lines are set. At a 0 value, there are no lines, and the image is solid. Higher values increase the distance between lines, which creates visual gaps in the source footage.
Scan Line Thickness
controls the thickness of the scan lines. Higher values make the lines thicker. If the Scan Line Distance is low, line thickness may overtake the gap between lines, making the source image appear solid again.
Scan Line Feather
controls the softness of the scan lines. The default value gives the lines a hard edge. Higher values make the lines softer, giving them a feathered edge. This softness is often difficult to see unless Distance and Thickness values are high.
In fact, these three parameters are closely interrelated and may need to be adjusted together to achieve a desired appearance.
Scan Lines Direction
lets you choose between Horizontal, Vertical, or Horizontal & Vertical scan lines going in both directions (such as for a dot-matrix look).
Scan Line Advanced.
Because Holomatrix scales based on composition size, effects get bigger in larger comps. Hence, scan lines can look odd and wrongly-spaced at small values, or they can be difficult to make very thin. The advanced parameters solve these issues.
Scan Line Fix
forces Holomatrix to use integers only in calculating scan lines. This ensures that scan lines are always spaced apart perfectly.
Disable Scaling
forces Holomatrix to ignore auto-scaling and use the absolute values the user sets in the scan line parameters, not the auto-scaled equivalent. This allows you to create thinner scan lines.
Lines
The Lines feature creates a strobe effect of lines moving upward or downward through the holograph image. The
Lines Up (LU)
parameters control line opaqueness, how fast they move, their height, and their vibration.
Lines Down (LD)
offers the same parameters as Lines Up, but with the lines moving downward.
Line Settings:
Line Direction.
Choose up, down, or both.
LU/LD - Speed
controls the speed of the lines moving through the frame.
LU/LD - Line Height
controls the lines' height as they move through frame. At low values, lines are thin, like "regular" lines. Higher values make lines thicker, or wider, in height. At very high values, the lines get thick enough that you will only marginally see them as they move, which creates a more subtle effect.
Shown below are values of 10 (left) and 100 (right).
Lines Distortion Strength uses effect lines as a displacement map and pushes pixels on the x axis. Darker lines push in one direction and lighter lines in the opposite direction, shifting lines laterally like the slippage of tectonic plates. The following image reflects a Lines Distortion Strength of 20.
Advanced
LU/LD - Random Seed
randomly changes the appearance (e.g., brightness and position) of the lines. The default setting is 0. Changing the value selects a different random seed.
LU/LD - Opacity Min/Max
sets the minimum/maximum line opacity during strobe. Values are measured as a percentage. Higher values give lines greater opacity. Lower values make lines more transparent. Opacity Min and Max work together. Min sets how transparent the lines can be while Max sets how opaque (solid) they appear.
LU/LD - Strobe Every X Frames
controls how often lines strobe. Values range from 1 to 100, measured in frames. Higher values make the strobe happen less frequently.
LU/LD – Fade Instead of Strobe
determines if lines fade or strobe between Min and Max opacity values. These checkboxes are turned off (unchecked) by default. When off, lines "strobe," meaning their opacity jumps between the minimum and maximum values over time as determined by the Strobe Every X Frames parameters. When enabled, lines "fade," meaning they interpolate between values, becoming more or less visible over time. The longer your strobe time, the more you will see the difference between a strobe and a fade. If your strobe time is only a few frames, the fade up and down will happen quite quickly, appearing almost like a strobe light effect, especially if you are using a low frame rate.
Scrolling Lines Settings
Scrolling Line creates the effect of a horizontal line scrolling down the screen, displacing the footage. With the right settings, it can also be used to generate a randomly placed white line that jumps around the footage.
Scrolling Line On/Off Checkbox
activates the scrolling line effect.
SL - % Chance determines how likely it is for a scrolling line to manifest.
SL - Opacity
controls the scrolling line's opacity.
SL - Duration sets the length of time for a scrolling line.
SL - Duration Variation determines how much a block of scrolling line time can vary in length. Higher amounts mean more variation from the set duration.
SL - Line Speed sets how fast the line will scroll down the screen. Negative numbers make the line travel up the screen instead of down.
Note that values close to 0 may barely register onscreen before expiring, leading to the impression that no line displays.
SL - Line Height
determines the height of the scrolling line.
SL - Distortion Strength
controls how much footage distorts horizontally. Higher values yield more distortion.
SL - Fade Time
sets how much time is used to fade the line and its distortion on and off at the beginning and end of the effect occurrence, or as it reaches the top or bottom edge. With a low value, the line appears to pop onto the screen. With a higher value, it fades in smoothly over time.
SL - Offscreen Edge %
determines how far from the edge the fade begins.
SL - Random Start Position
allows the scrolling line to start from a random position so the effect seems more organic, as opposed to it starting from the very top each time and looking repetitive.
SL - Randomize Position
jumps the scrolling line position horizontally while continuing to scroll up or down. How often it jumps position is based on the next parameter: SL - Randomize Position Frequency.
SL - Randomize Position Frequency
determines how often the scrolling line will jump horizontally each second. A value of 30 means it will jump position 30 times each second.
SL - Random Seed
randomly generates a new set of rendering properties for the Scrolling Line effect.
Static Settings
Static Settings create...well, you can guess, right?
Basically, "static" is a lot of a little noise. Static tends to be subtle, and you can make it more or less so.
Below, you can see the Static checkbox disabled (left) and enabled (right) at default settings with 200% zoom.
Static Size
determines the size of static artifacts. Higher values make static grains larger. Tip: Static can best be seen if Color Contrast is set low in the Color/Brightness Settings group.
Static Opacity
establishes the static's opacity, measured as a percentage. Higher values make the static more opaque (or solid). Lower values make the static more transparent.
Color Noise Settings
Color Noise Settings make color noise visible. By "noise," we mean fractal-based, colorized grayscale noise. This group is especially good for generating a "bad TV" effect.
Color Noise Settings include:
Noise Opacity increases the noise's visiblity as values increase. Color Noise is fully visible if the Colorization checkbox is disabled. With Colorization on, the noise's prismic color is discarded, although some amount of noise can still be seen.
Noise Scale allows you to scale the color noise. You cannot scale below the 100% default setting. Higher values increase noise size.
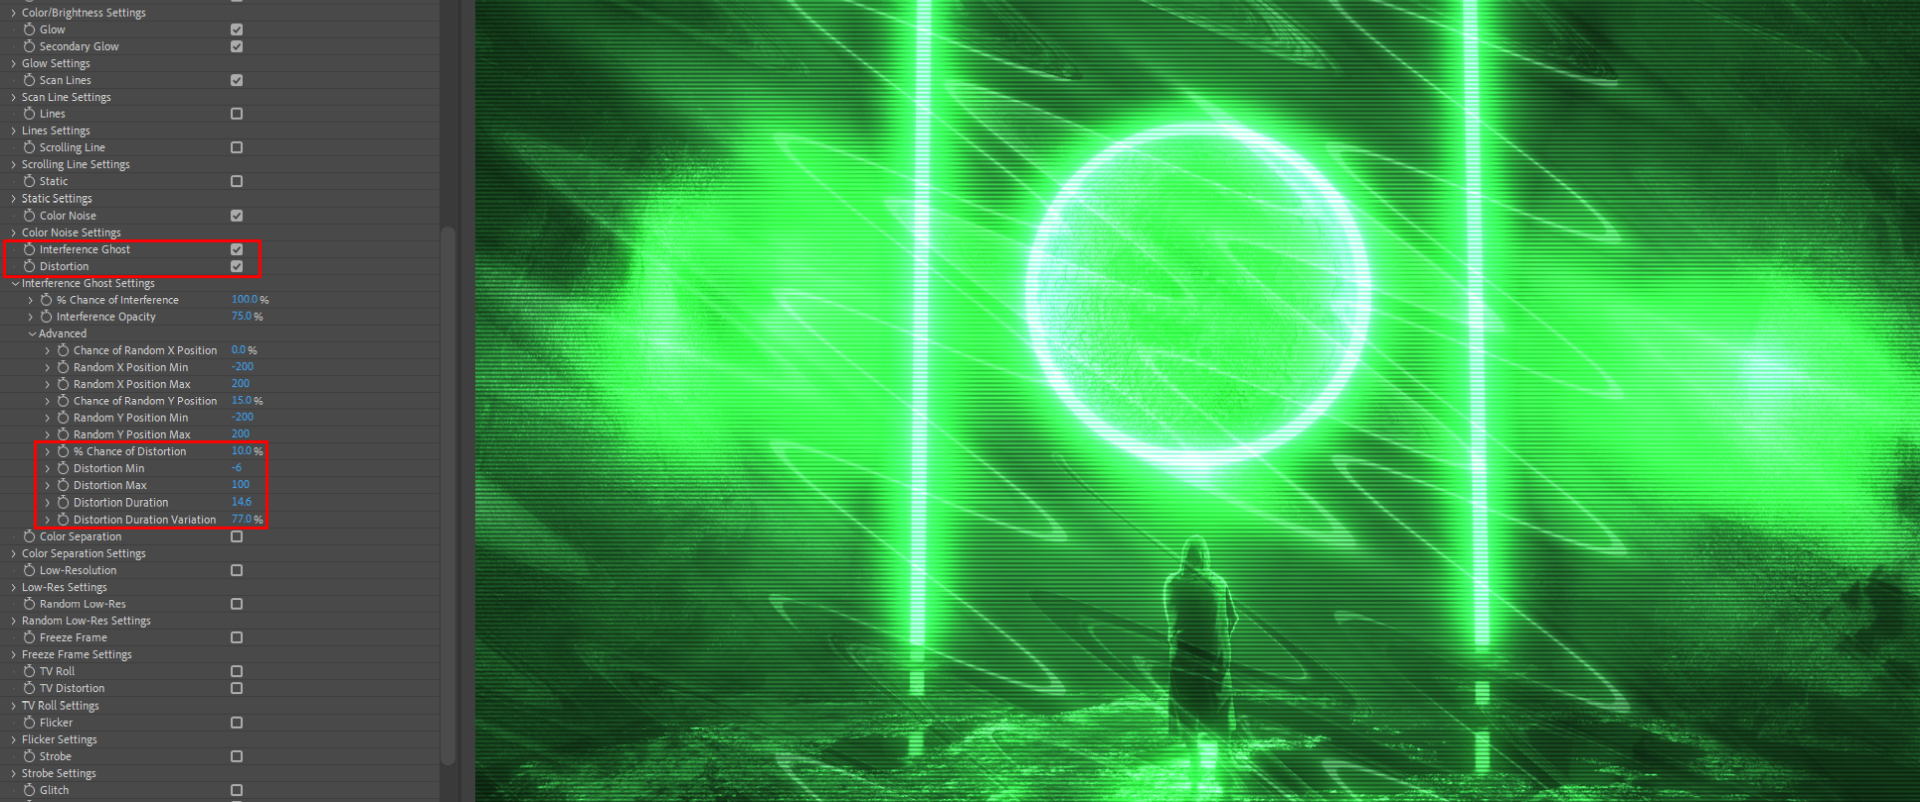
Interference Ghost Settings
create a doubling of the holographic image, a "ghosting" that shows the current frame of video in an offset and overlaid version. This group corresponds to two checkboxes:
Interference Ghost,
which activates the entire parameter group, and
Distortion,
which activates the group's Distortion parameters. The Distortion checkbox distorts that ghosted image by making it a little wavy. Let's read about both sets of controls.
% Chance of Interference
determines how likely we are to see the interference ghost at any given frame. Higher values mean ghosting is more likely to happen.
Interference Opacity indicates how translucent that ghost interference will be if it shows up. The image above has Interference Opacity set to 100% (the maximum).
Now, within the Advanced Parameters, you'll find controls for random ghost positioning and the distortion applied to that ghosting. Chance of Random X/Y Position affect the likelihood of the interference ghost happening along that axis orientation by setting a random value to the likeliness. If ghosting does happen along an axis, then position controls for that axis come into play. For instance, with Random X Position Min and Max at -500 and 1000, respectively, the ghost distance value randomly sets between 500 pixels to the left of the source and 1000 pixels to the source's right.
Tip:Random Y Max can save your project from looking fake. With Random Y Max set to 0, the ghosted image can't go lower than the bottom of the source image. This keeps the hologram image from appearing to move lower than the floor line.
As with the displacement used in random positioning, the Interference Ghost Settings group's distortion controls give the interference ghost a chance of being affected by distortion that makes the ghost look wavy. Naturally, Interference Ghost needs to be enabled in tandem with Distortion since we're distorting the ghost rather than the source image. As you might guess now,
% Chance of Distortion determines how likely we are (as a percentage) to see the distortion in any given frame. Higher values create a greater likelihood of distortion.
Distortion Min and Max determine the minimum and maximum waviness of the ghosted distortion. At 0, there is no visible distortion while -100 and 100 yield the highest possible distortion. Distortion Min and Max work together by setting the potential amount of distortion. The higher these values are, the more likely it is there will be waviness and the more distorted that waviness will be. For example, if Distortion Min is set to -5 and Distortion Max to 5, then there is a small range and a fair possibility that distortion will hit 0, meaning no visible distortion. If Min is -50 and Max is 50, then the range of distortion possibilities is much greater.
When a distortion does occur, Distortion Duration
establishes how long that distortion will occur, as measured by a percentage of a five-second maximum.
Distortion Duration Variation
determines how much a given distortion, expressed as a percentage, can vary from the Distortion Duration value. Thus, at 100% variation, the Distortion Duration can as much as double the set amount of time. It can also show no distortion, as the range to set Distortion Duration is now between 0 and 100 percent.
Color Separation Settings
Enabling the Color Separation checkbox opens your access to red/green/blue image separation, similar to what you might see in a bad TV transmission. Holomatrix II lets you choose the amount of separation and how often the colors will separate.
% Chance of Color Separation
determines how likely colors are to separate at any given frame, expressed as a percentage. Higher values mean separation is more likely to occur.
Amount of Separation
sets the distance between separated colors. Values range from -100 to 100 and are measured in pixels. For reference, we set the example above at 20. Positive values move red to the left and blue or green to the right; negative values do the opposite. A value of 0 does not separate the colors, but they still appear over the image, altering its colors slightly.
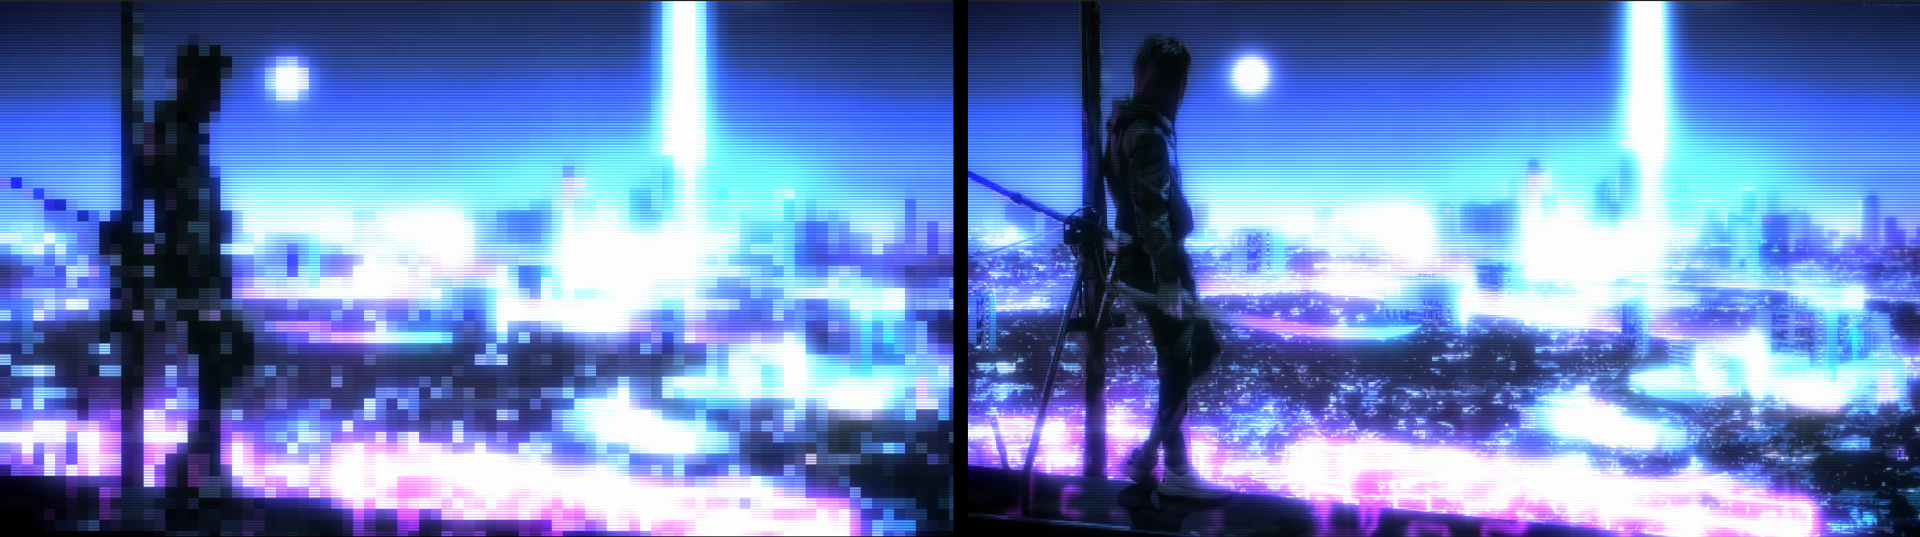
Low-Resolution
Low-res settings simulate incomplete data coming in through the holographic data stream by making the Holomatrix image look pixelated and chunky, as if there isn't enough data coming through. Enable the Low-Res group with the
Low-Resolution
checkbox.
Low-Res %
sets the video's resolution, making it appear pixelated and chunky. Values range from 0 to 100 percent, with higher values show more pixels and thus appearing sharper. Lower values show fewer pixels, making footage more pixelated. The example above shows values of 10 (left) and 80 (right).
Random Low-Res
Enable the Random Low-Res group by checking the
Random Low-Res
checkbox. This control group randomly generates low-resolution frames to simulate that incoming/outgoing bad signal. With Random Low-Res enabled, the Holomatrix effect will randomly lose resolution at times.
Random Low-Res Min/Max
set the minimum and maximum possible resolutions value. This is the lowest/highest the resolution will go during a Random Low-Res frame occurrence. Values range from 0 to 100, with higher values setting a higher minimum and maximum resolution, respectively.
% Chance of Low-Res determines the likelihood of a given time block manifesting a low-resolution appearance. (You set that block of time with the Low-Res Duration parameter.) Values range from 0 to 100, with higher values making a low-resolution appearance more likely to occur.
How Low-Res % works with Min/Max:
Say we set Low-Res Min to 12.5% and Max to 25 percent. When the Random Low-Res effect appears, it will have a resolution between 12.5% and 25% of the original footage. Min and Max are also affected by the Low-Res Settings > Low-Res %. No matter what your Random Low-Res Max value is set to, the effect will never generate a resolution higher than the Low-Res %. To illustrate, say your Low-Res % value is set to 17. Even if your Random Low-Res Max is 25% (higher than the Low Res value), the effect will still only have a maximum output of 17% resolution.
Low-Res Duration
sets the length of time for random low-resolution blocks. Values range from 0 to 5, measured in seconds.
Low-Res Duration Variation
determines how much a low-resolution time block can vary in length. Values range from 0 to 100, with higher values noting a greater variation in time length.
Freeze Frame
Check the Freeze Frame box to decide when, how often, and how long the holographic signal will freeze. This decision is somewhat random and creates a signal loss effect.
% Chance of Freeze Frame
determines the possibility of a random Freeze Frame. Values range from 0 to 100 percent, with higher values increasing the possibility of a frozen frame.
Freeze Duration
sets the amount of time for a Freeze Frame. Values range from 0 to 5, measured in seconds. Higher values increase the length of the freeze.
Duration Variation (%)
establishes how much a block of Freeze Frame time can vary in length. Values range from 0 to 100 percent. Higher values increase the variation, with 100 potentially doubling the duration.
TV Roll/Distortion
TV Roll creates a scroll of your source footage. This was designed to simulate the rolling frames of a TV screen with bad reception. It is especially suitable if you are using Holomatrix for a "bad TV" effect.
TV Distortion warps your source footage into a wavy analog signal distortion pattern. TV Distortion can only happen when the TV Roll effect becomes active.
Holomatrix offers settings for amount, speed, and duration of the TV roll. A gap in time follows before the next TV roll happens.
TV Roll Speed
determines how fast the image rolls up or down. Values range from -20 to 20, with higher values giving the roll a faster speed.
% Chance of TV Roll
governs how likely it is for a given block of time to have a TV Roll. Values range from 0 to 100 percent. Higher values increase roll likelihood.
TV Roll Duration
sets the length of time for a TV roll. Values range from 0 to 5 seconds.
TV Roll Duration Variation (%)
determines how much a block of TV Roll time can vary in length. Values range from 0 to 100 percent. Higher values increase the length of time variation.
TV Distortion Settings:
(requires the TV Distortion checkbox to be enabled)
% Chance of TV Distortion
controls how likely it is that a given TV Roll will also have a TV Distortion. Values range from 0 to 100 percent.
TV Roll Distort Amount
sets the distortion effect's strength. Higher values yield more distortion.
TV Distortion Scale
determines how big the distortion pattern will be. Lower values compress the analog distortion waves closer together. Higher value push the distortion waves further apart.
TV Distortion Random Seed
randomizes the distortion pattern and likelihood of distortion occurring based on the random seed value.
Flicker
Flickering creates a random flickering of the image opacity. This is great for TV distortions or signal loss.
Flicker Opacity Min/Max
determines how low/high the flicker's opacity will extend. Higher values for Min mean the frame will not completely disappear when flicker occurs while lower values for Max mean flicker frames will be less visible.
% Chance of Flicker
sets how likely it is for a given block of time to have flicker.
Flicker Duration
controls the flicker's length of time as measured in seconds.
Flicker Duration Variation
determines how much a flicker can vary in time length, expressed as a percentage. A 100% value can potentially double the flicker duration.
Strobe
The Strobe checkbox enables the strobing of a layer’s opacity between two values. It is especially useful in creating the effect of a projected hologram’s refresh rate not matching with a camera’s shutter speed.
Strobe Opacity Min/Max
sets the minimum/maximum layer opacity during strobe. Higher values give a greater opacity to the layer; lower values make the layer more transparent.
Strobe Opacity Min and Max work together. Min sets how transparent the lines can be while Max sets how opaque (or solid) they can appear.
Strobe Every X Frames
controls how often the layer strobes. For example, a value of 1 makes the effect strobe at every frame, 2 strobes every other frame, and so on.
Fade Instead of Strobe determines if the layer fades or strobes between Min and Max opacity values. When the checkbox is off, the layer strobes.
This means its opacity jumps between the Min and Max values over time, as determined by the Strobe Every X Frames control. When this checkbox is on, the lines "fade,"
causing them to interpolate between values and become more or less visible over time. The longer your strobe time, the more you will see the difference between a strobe and a fade.
If your strobe time is only a few frames, the fade up and down will happen quite quickly, almost looking like a strobe light effect, especially if you are using a low frame rate.
Glitch
Glitching determines how often and how much the image gets a digital glitch, which is a displacement of blocky pieces of the image. Glitch holes concern whether a glitch has blocky patches of the image removed.
To illustrate, the triptych below shows footage with the Great Half Color preset applied. You can see the preset's default settings (left), the Glitch checkbox enabled with default Glitch settings applied
(center), and then Glitch Holes checked with default values applied (right). We circled some of the holes to make them easier to spot.
% Chance of Glitch determines the likelihood of a glitch appearing in a given block of time, expressed as a percentage.
Glitch Amount allows you to increase or decrease the percentage of pixels in the frame affected by a glitch.
Glitch Size sets how large the blocks of a glitch are relative to the frame. Higher values produce larger blocks.
Glitch Aspect stretches or squeezes glitch blocks to correspond them to the frame's aspect ratio. Higher values produce larger blocks.
Glitch Complexity, when increased, introduces smaller, more random pixels into glitch blocks. Higher values produce more complex areas of glitch with smaller random pixel distortion.
Glitch Fragments, when increased, breaks up glitch blocks more frequently into quartered areas that appear and disappear at random.
Glitch Displacement H/V offset the glitch effect from its original position along the x and y axes, respectively.
Glitch Speed controls how quickly the Glitch effect moves and changes within the timeline. This is basically a “glitches per second” setting.
Glitch Random Seed randomly changes the appearance of the glitching. Changing this value selects a different random seed.
Glitch Duration determines a glitch's length of time, expressed in seconds.
Glitch Duration Variation sets how much a glitch time block can vary in length, expressed as a percentage. Higher values increase the length of time variation.
Glitch Hole Settings
% Chance of Glitch Holes
controls how likely it is for a given block of time to have a glitch hole, expressed as a percentage. Higher values increase the likeliness of a glitch hole.
Glitch Hole Amount
increases or decreases the percentage of pixels in the frame affected by Glitch Hole.
Glitch Hole Size
determines how large the blocks of glitch hole are relative to the frame. Higher values produce larger blocks.
Glitch Hole Aspect
stretches or squeezes glitch hole blocks to correspond them to the aspect ratio of the frame. Higher values produce larger blocks.
Glitch Hole Complexity
brings smaller, more random pixels into glitch hole blocks. Higher values produce more complex areas of glitch with smaller random pixel distortion.
Glitch Hole Fragments
breaks up glitch hole blocks into quartered areas that appear and disappear at random. Higher values introduce fragments more frequently.
Traveling Distortion
Traveling Distortion creates the effect of a horizontal pattern of distortion scrolling down the screen. With the right settings, it can also generate a randomly placed line of distortion that jumps around the footage.
TD - % Chance
determines the likelihood of a given block of time having a traveling distortion.
TD - Duration
sets the length of time for a traveling distortion, measured in seconds.
TD - Duration Variation
establishes how much a block of traveling distortion time can vary in length. Higher percentages mean more variation.
TD - Line Speed
determines how quickly the line will scroll down the screen. Negative numbers make the distortion pattern travel up the screen instead of down.
TD - Distortion Speed
controls how quickly the distortion pattern evolves.
TD - Distortion Strength X/Y
sets how much the footage will distort horizontally or vertically, respectively. Higher values yield more distortion.
TD - Soften Distortion Map
blurs the distortion map to create smoother, less jagged distortion.
TD - Distortion Scale
determines the distortion pattern size.
TD - Distortion Falloff
controls how much the distortion fades vertically before distortion vanishes. With a low value, the distortion will just cut off. With a high value, the distortion will fade off more organically.
TD - Chromatic Distortion
displaces red, green, and blue channel pixels differently for a more organic effect.
The
TD - Chromatic Settings group controls the amount of horizontal and vertical displacement for each RGB color channel. The further the value is from zero, the greater the displacement.
TD - Distortion Blur Amount controls the amount of blurring in distorted footage areas. Higher values increase blur.
TD - Distortion Blur Quality
determines the quality of the distortion blur. Higher values yield smoother results but may slow down image processing.
TD - Distortion Blur Falloff
creates a falloff in the amount of blur from the distortion area’s center outward. With no falloff, the blur cuts off where the distortion ends. With falloff, the blur visibly decreases from the distortion center outward.
TD - Fade Time
sets how much time will be used to fade the distortion on and off at the beginning and end of the effect occurrence, or as it reaches the top or bottom edge. With a low number, the distortion will appear to pop onto the screen. With a higher number, it will fade in smoothly over time.
TD - Offscreen Edge %
determines how far from the edge the fade begins.
TD - Random Start Position
allows the scrolling effect to start from a random position, so the effect seems more organic rather than it starting from the very top each time and looking repetitive.
TD - Randomize Position
will jump a distortion line's position horizontally while continuing to scroll up or down.
TD - Randomize Position Frequency
sets how often the distortion line will jump horizontally each second. A value of 30 means that it will jump position 30 times a second.
TD - Random Seed
randomizes the various rendering properties in the Traveling Distortion effect.
TD - Distort Last.
For ultimate nerdiness, this parameter addresses whether the broadcast signal is bad or the holographic equipment is broken. In a movie where holograms are used for communication, if the equipment is bad, then the scan lines get messy during a distortion. If the signal is being hacked, then the projector works fine and, while the imagery is broken up, the scan lines stay clean. So…
If Distort Last is turned on, the scan lines distort along with the rest of the footage, simulating damaged holographic equipment. If Distort Last is turned off, then the scan lines will remain clean, simulating a bad signal.
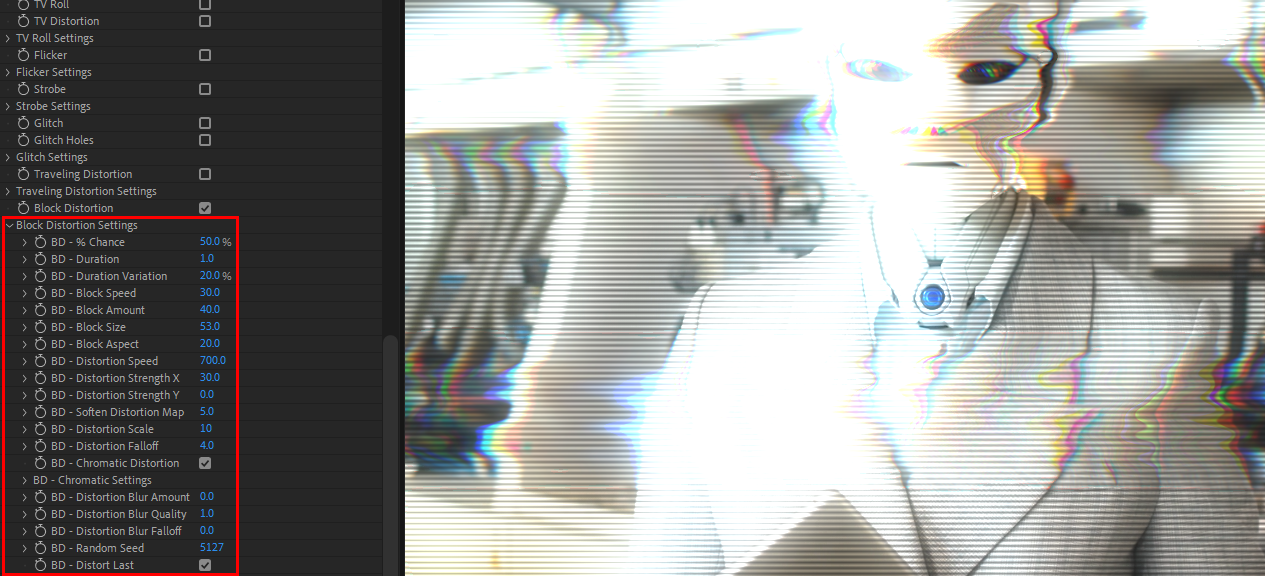
Block Distortion
Block Distortion creates blocky bits of distortion on your footage.
This distortion can often have the look of smearing.
BD - % Chance
determines the likelihood that a given block of time will contain a block distortion.
BD - Duration
sets the length of time for a block distortion.
BD - Duration Variation
controls how much a block distortion time can vary in length. Higher amounts mean more variation.
BD - Block Speed
determines how fast the distortion band will scroll down the screen. Negative numbers make the distortion pattern travel up the screen instead of down.
BD - Block Amount
sets the number of distortion blocks that will be generated on screen.
BD - Distortion Speed
controls how fast the distortion pattern evolves.
BD - Distortion Strength X/Y
sets how much the footage distorts horizontally and vertically. Higher values yield more distortion.
BD - Soften Distortion Map
blurs the distortion map to create a smoother, less jagged distortion.
BD - Distortion Scale
determines the distortion pattern size.
BD - Distortion Falloff
controls how much the distortion fades around its edges before there is no more distortion. With a low value, the distortion will cut off at the edges, going abruptly from distorted to non-distorted. With a high value, the distortion fades more organically.
BD - Chromatic Distortion
activates chromatic distortion, displacing pixels on the red, green, and blue channels for a more organic effect.
The BD - Chromatic Settings group controls the amount of horizontal and vertical displacement for each RGB color channel. The further the value is from zero, the greater the displacement.
BD - Distortion Blur Amount controls the amount of blurring in distorted footage areas. Higher values create more blurriness.
BD - Distortion Blur Quality sets distortion blur quality. Higher values yield smoother results but may slow down image processing.
BD - Distortion Blur Falloff creates a blur falloff from the distortion area’s center outward. With no falloff, the blur cuts off where the distortion ends. With falloff, the blur visibly ramps down from the distortion center outward.
BD - Random Seed
randomizes the Block Distortion effect's various rendering properties.
BD - Distort Last.
With Distort Last enabled, scan lines distort along with the rest of the footage, simulating damaged holographic equipment. If Distort Last is turned off, scan lines remain clean, simulating a bad signal.
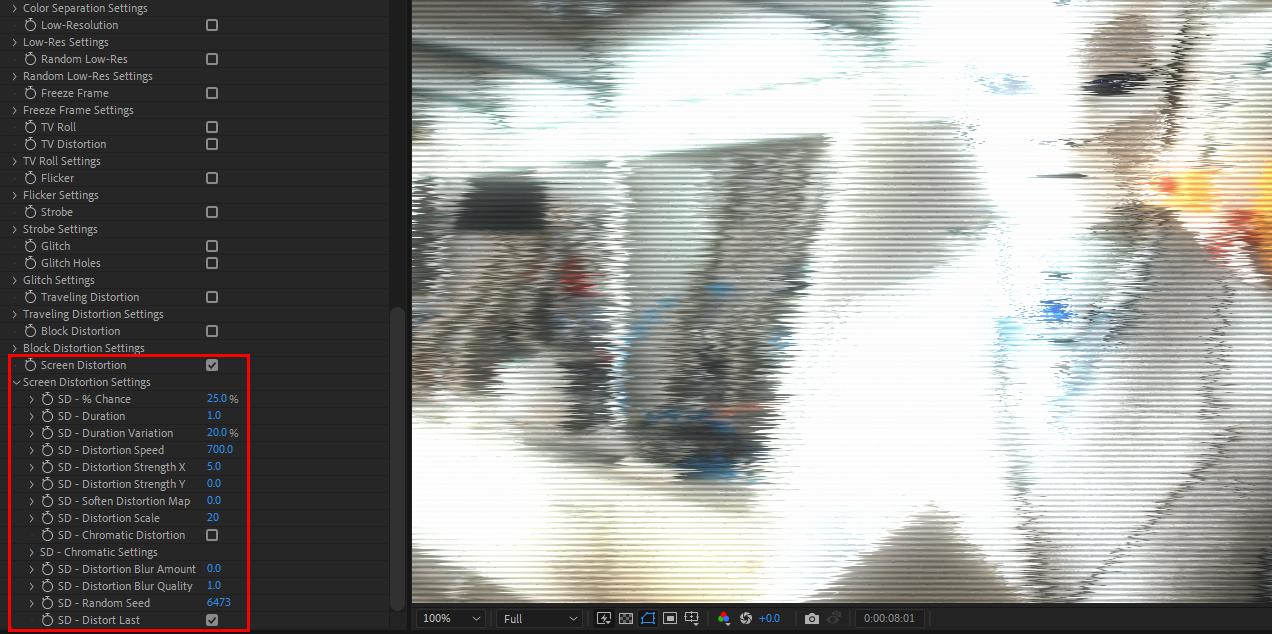
Screen Distortion
Screen Distortion creates the effect of "fuzzy" distortion lines across the entire scene.
SD - % Chance
determines the likelihood for a given block of time to contain a screen distortion.
SD - Duration
sets the length of time for a screen distortion.
SD - Duration Variation
controls how much a block of screen distortion time can vary in length. Higher amounts mean more variation.
SD - Distortion Speed
determines how fast the distortion pattern evolves.
SD - Distortion Strength X/Y
set the amount of footage distortion applied horizontally or vertically. Higher values yield more distortion.
SD - Soften Distortion Map
blurs the distortion map to create a smoother, less jagged distortion.
SD - Distortion Scale
determines the distortion pattern size.
SD - Chromatic Distortion
activates chromatic distortion, displacing pixels on the red, green, and blue channels for a more organic effect.
The
SD - Chromatic Settings group controls the amount of horizontal and vertical displacement for each RGB color channel. The further the value is from zero, the greater the displacement.
SD - Distortion Blur Amount
sets the amount of blurring in distorted footage areas. Higher values create more blurriness.
SD - Distortion Blur Quality
controls distortion blur quality . Higher values yield smoother results but may slow down image processing.
SD - Random Seed
randomizes the various rendering properties in the block distortion effect.
SD - Distort Last.
If Distort Last is turned on, then scan lines distort along with the rest of the footage, simulating damaged holographic equipment. If Distort Last is turned off, then scan lines remain clean, simulating a bad signal.
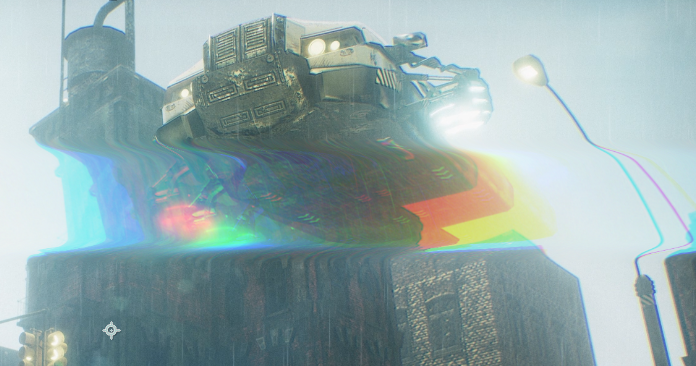
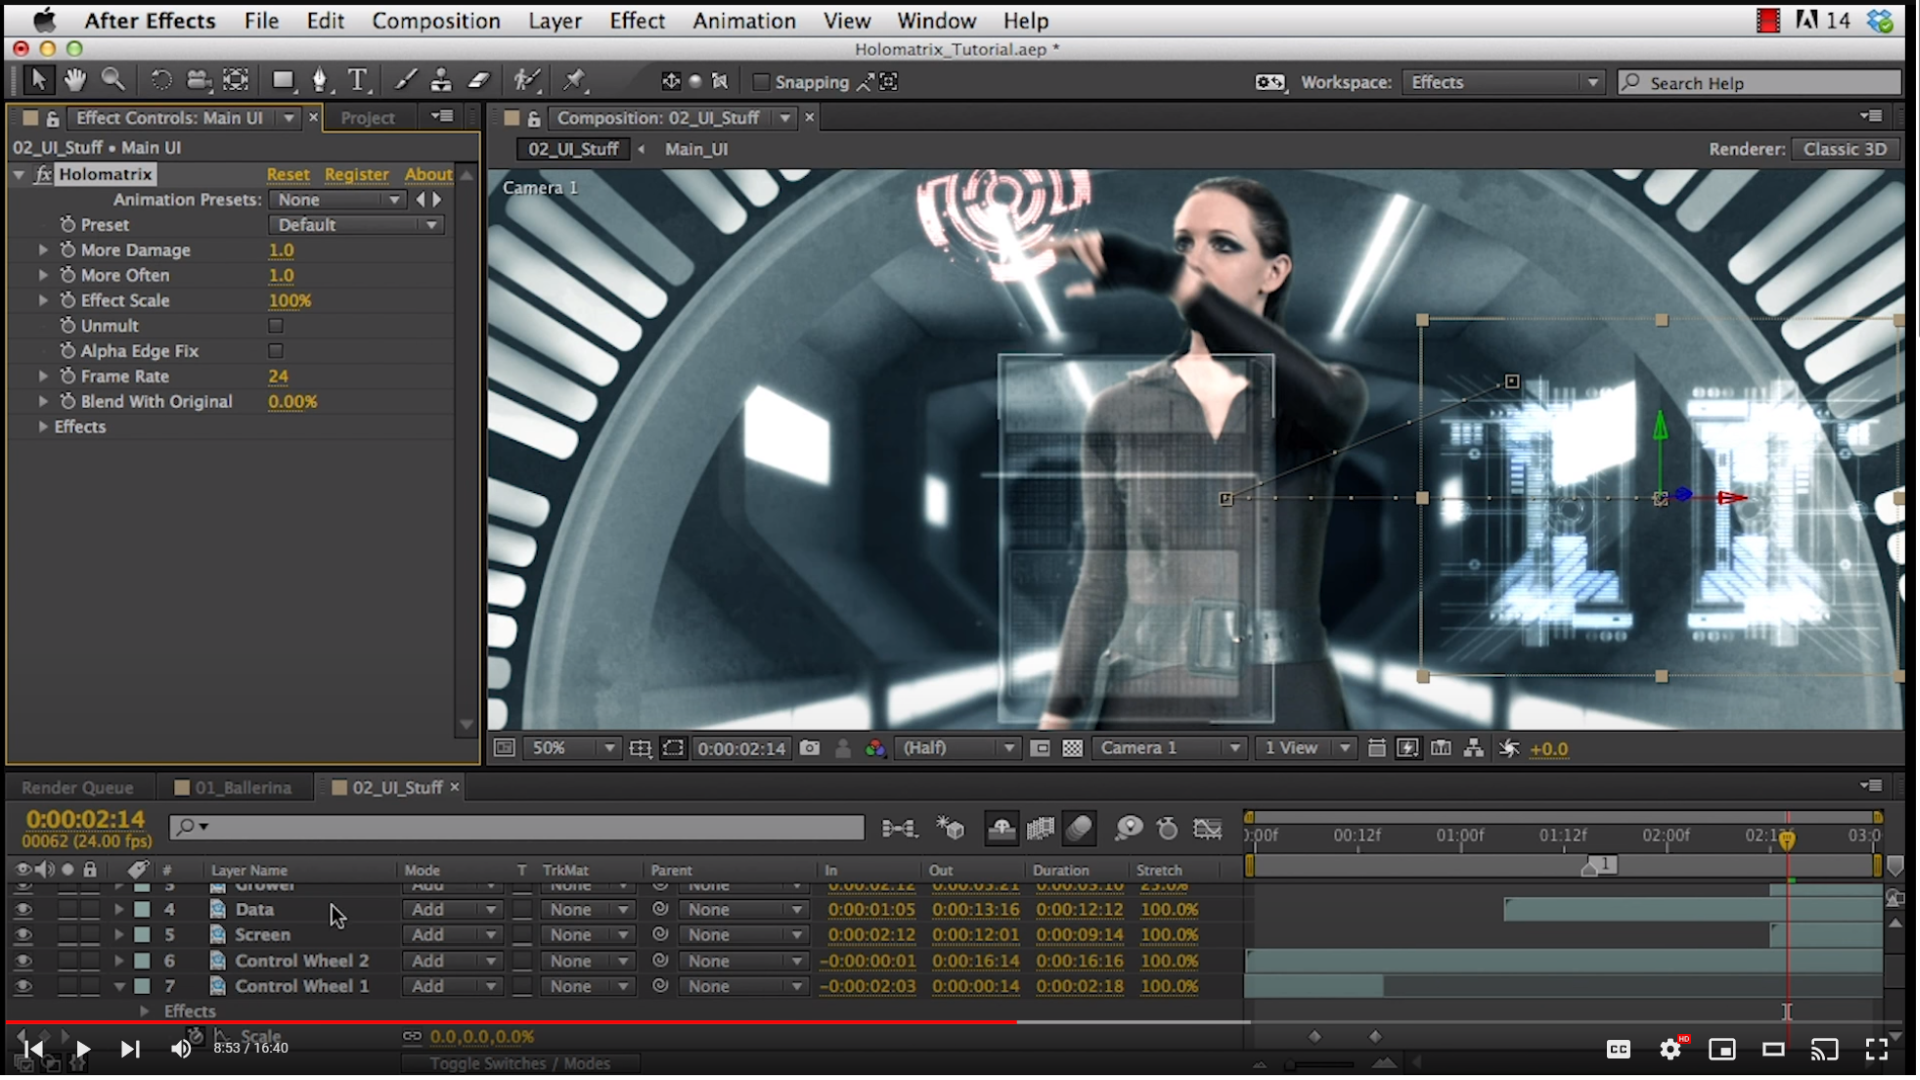
As you can see, Holomatrix II is as powerful as it is nuanced. If you'd like a different view of the tool's functionality (including applying it to HUDs, as shown below) and a walk-through of how to use it,
please check out our video HERE.