Universe
PRISM DISPLACEMENT
Prism Displacement distorts and displaces the pixels in your image with a prism-like, chromatic effect based on the luminance values of another layer.
Getting Started in a timeline


- Add video layers in the timeline for the displacement source and the image to be distorted.
- Apply uni.Prism Displacement on the layer you want to be distorted.
- Use Displacement Source to choose the video layer that you want to guide the luminance displacement.
Getting Started in a compositor


- Apply uni.Prism Displacement on the layer you want to be distorted.
- Use Displacement Source to choose the footage layer that you want to guide the luminance displacement.
Presets
A wealth of Prism Displacement presets will help slash the time needed to apply fascinating, oily or opalescent looks to your images and text. Find these via the blue Open Dashboard... button or the Choose a Preset... button below it.
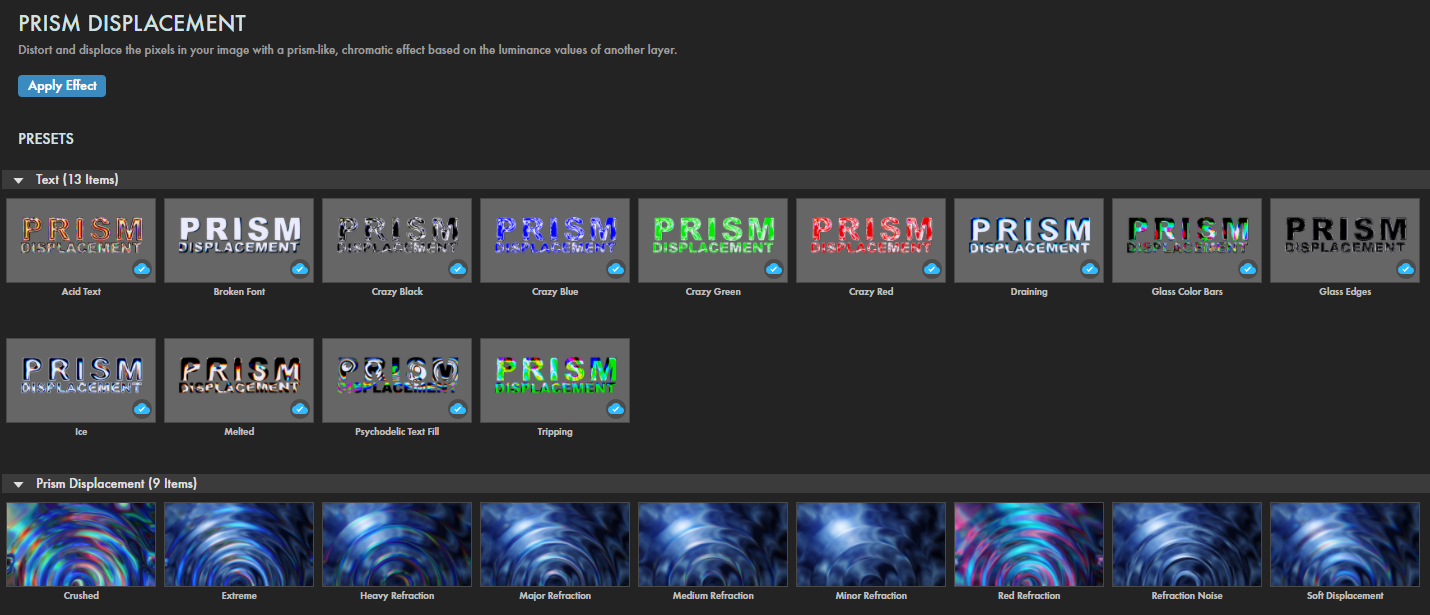
As with all other Universe tools, you can modify or create a Prism Displacement look and then save it under its own name by pressing the Save Preset... button.
Modify the Effect
- In a bit of a different twist from most Universe tools, the ECP's Preset pull-down menu does not mirror the Universe Dashboard presets shown above. Here, you'll find another eight presets, including the Default used when you first apply Prism Displacement.
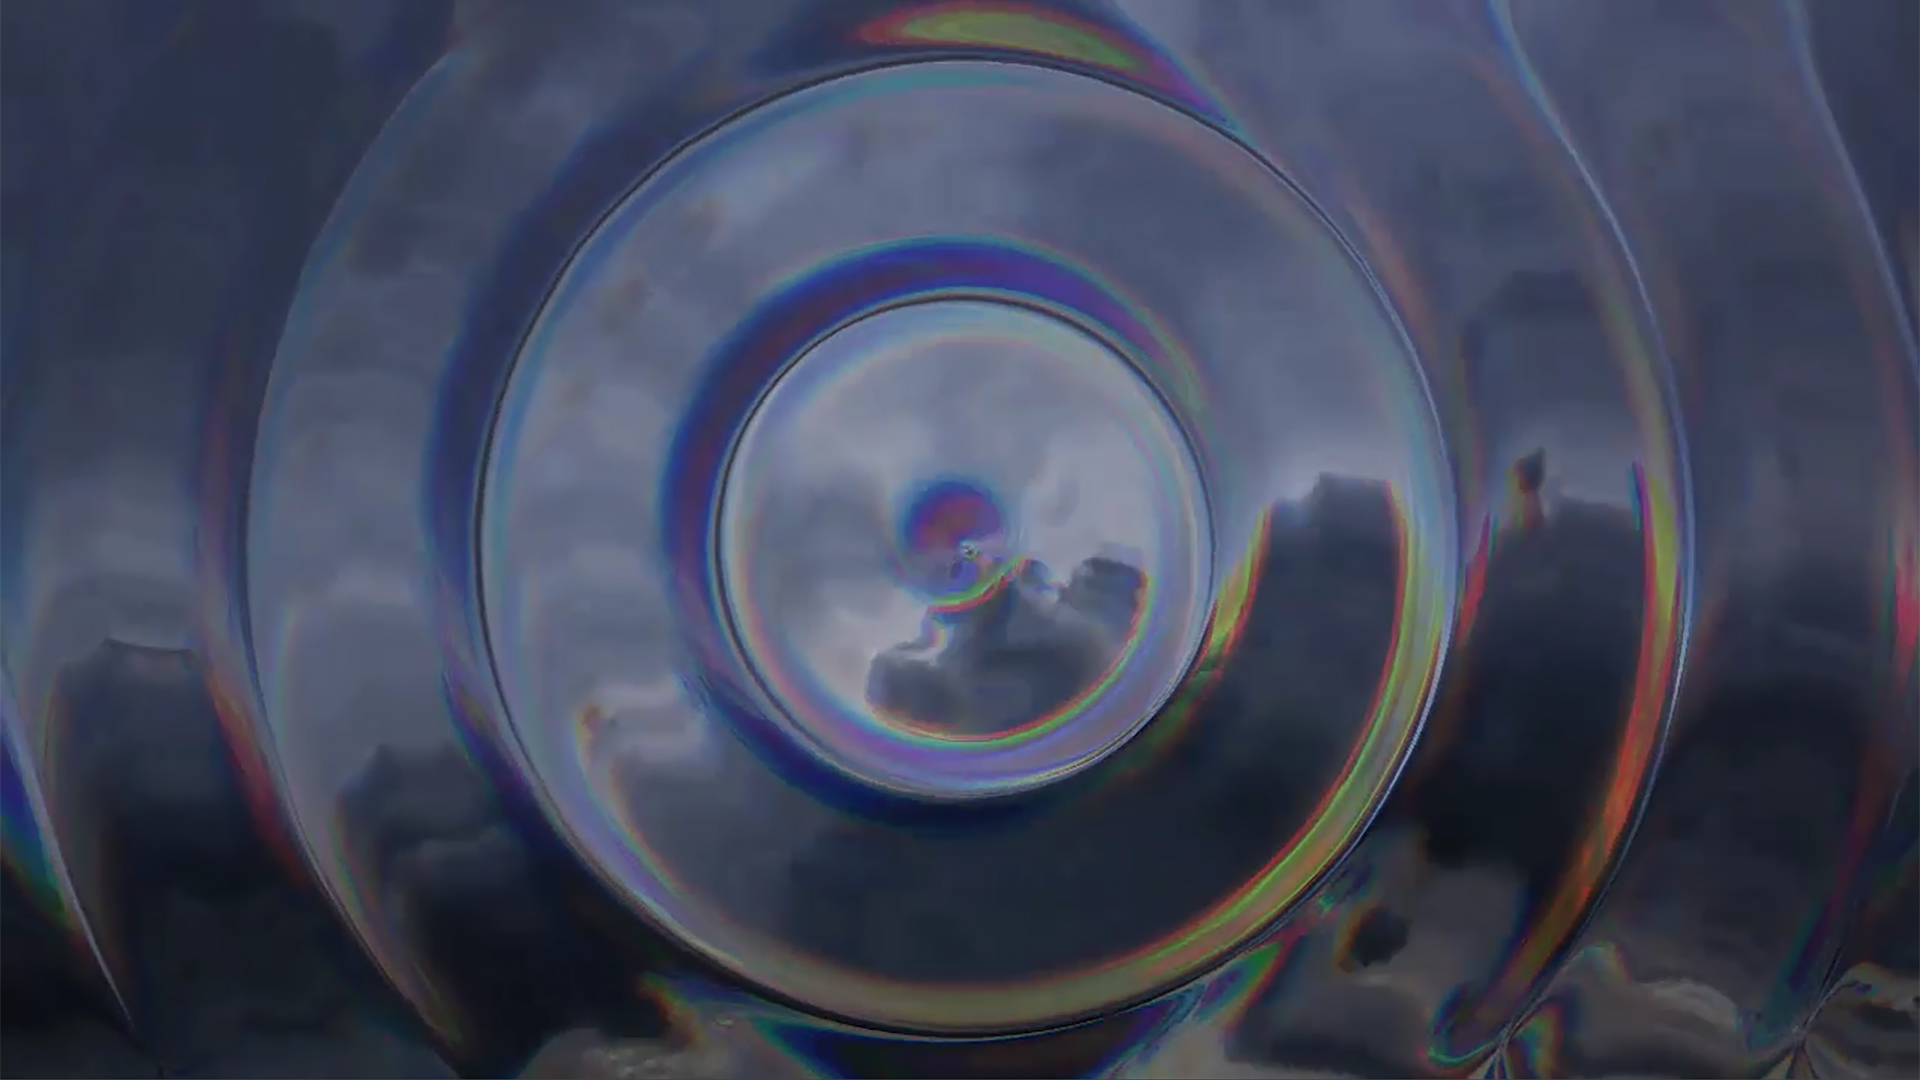
As you'd expect, these presets can yield markedly different end results. In the following image, we assigned the effectSource (see below) as our lava lamp video clip, then applied the Minor Refraction (top), Major Refraction (center), and Reverse Color (bottom) shift presets.
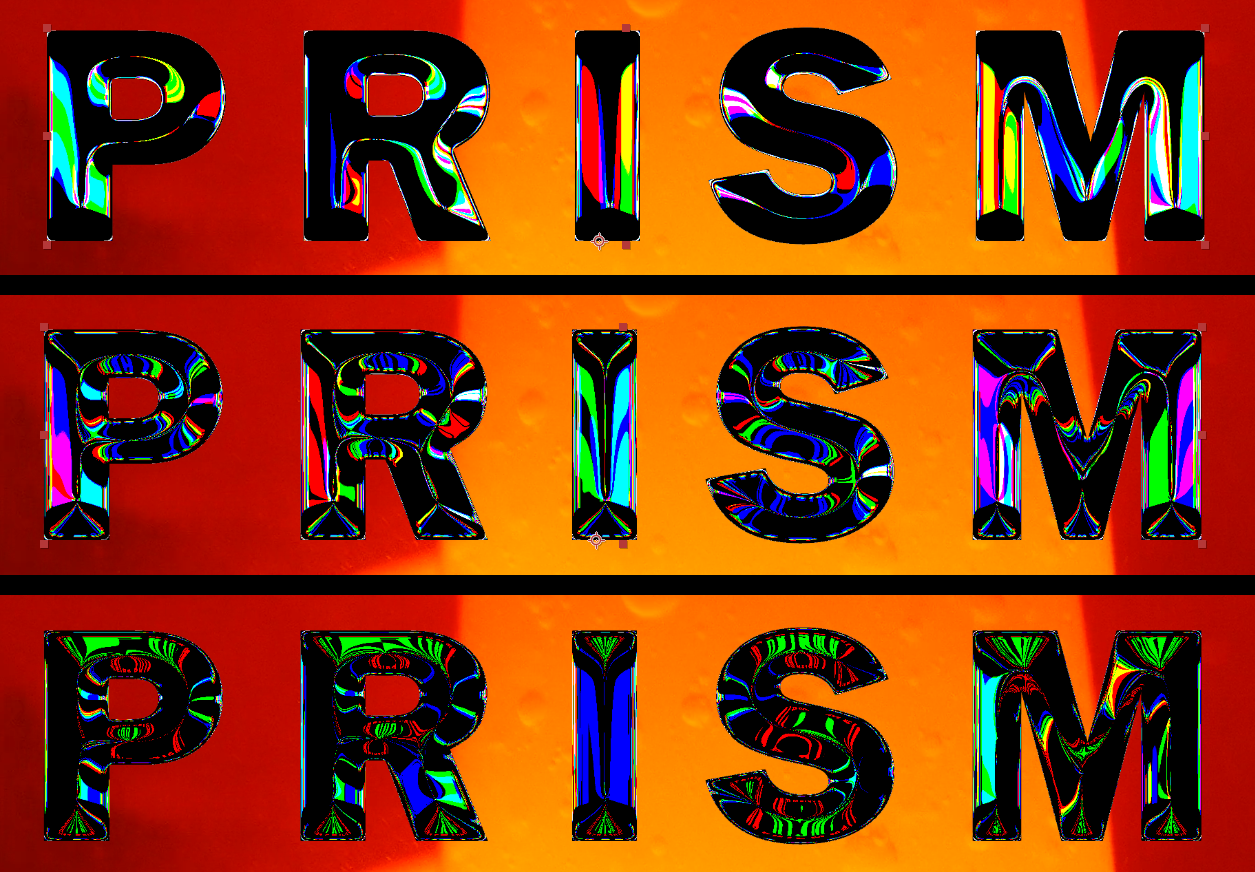
For comparison, we repeated these settings and captures, only changing Source to None.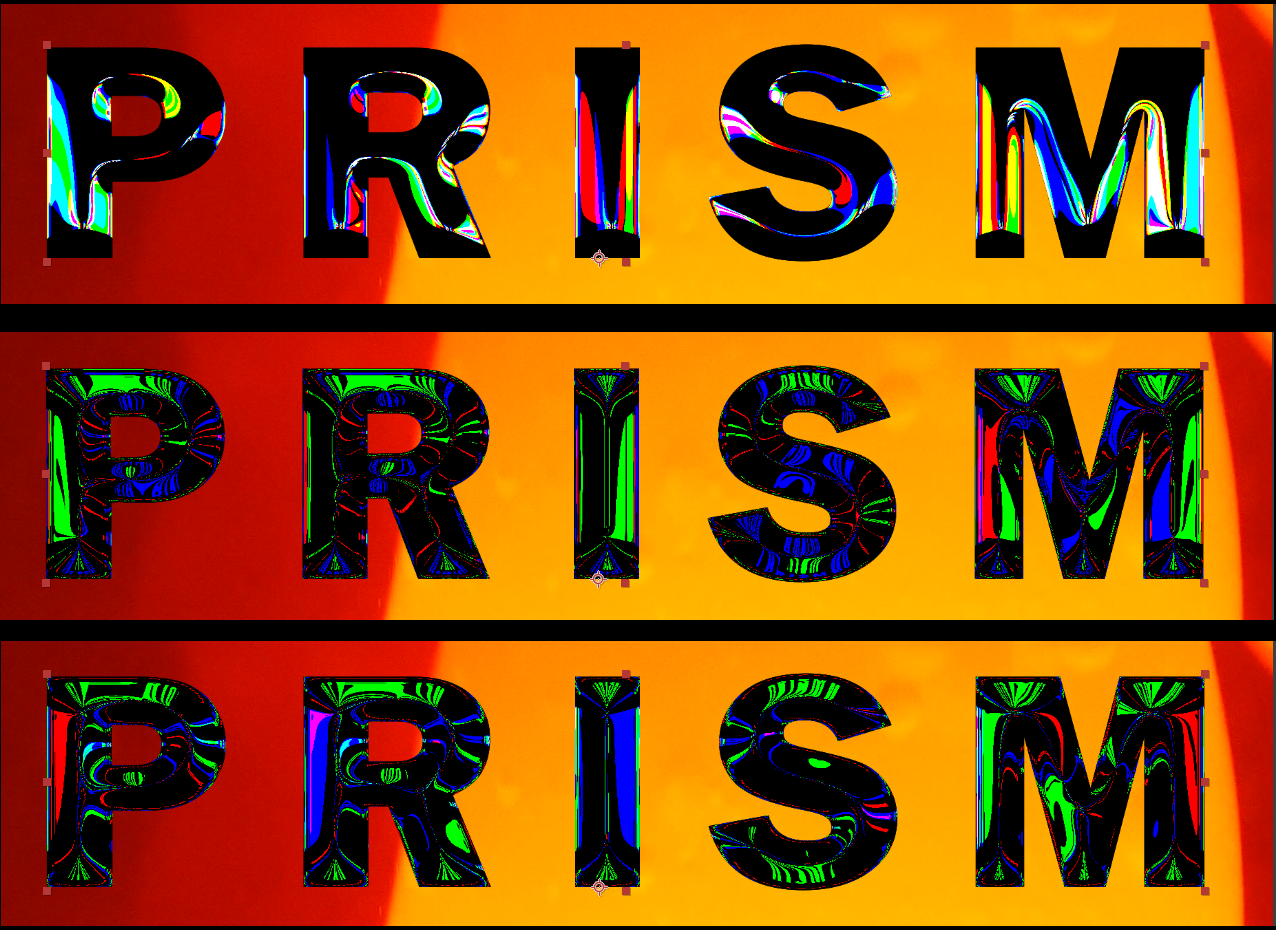
- In the Source drop-down, three options guide how you want Prism Displacement to view that source: as a Luminance map, an Alpha (premultiplied with gray), or as an Alpha (premultiplied with black). Default settings begin with 50% gray areas as neutral and with white and black areas distorting the footage.
-
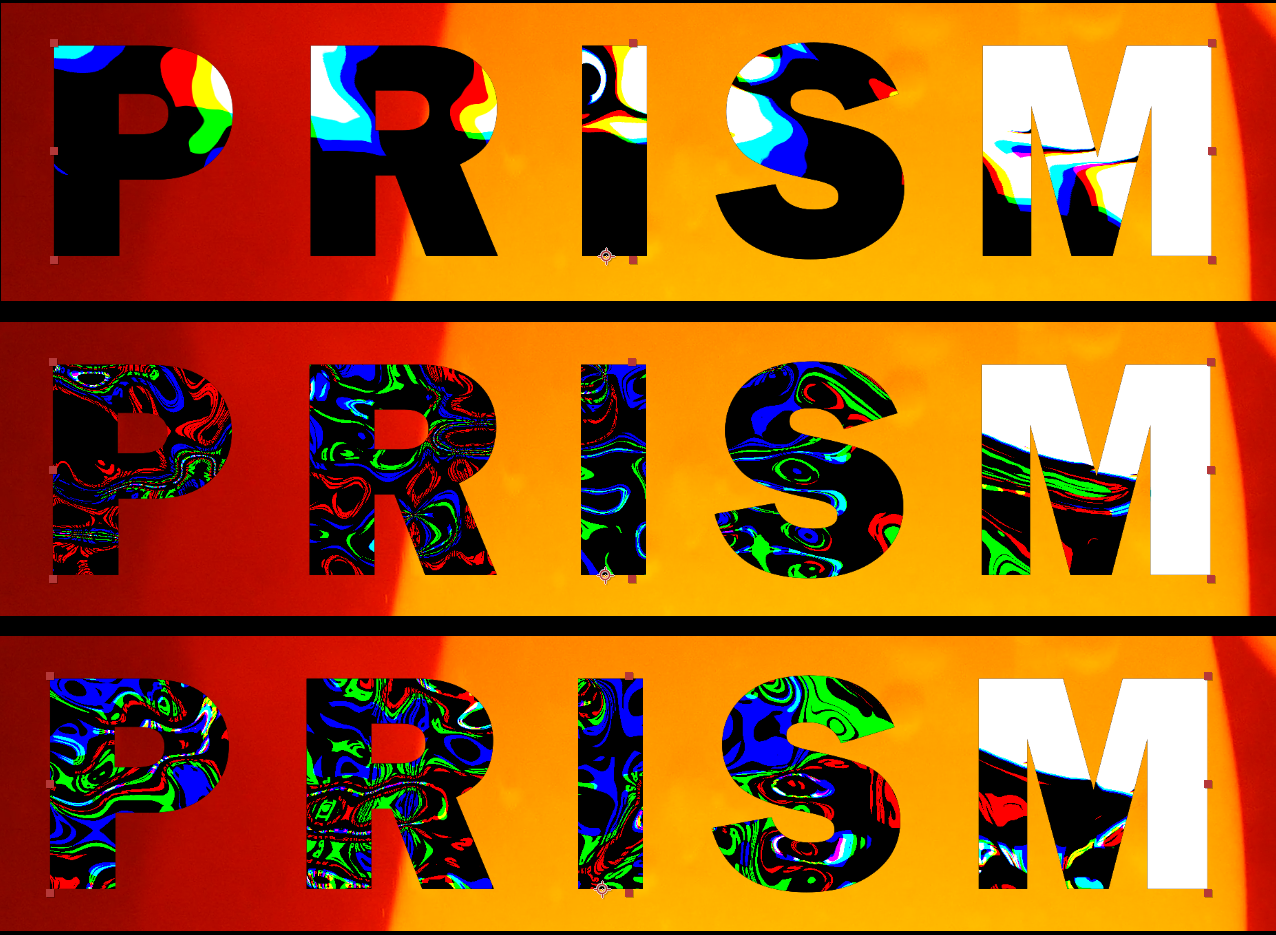
Glass Refraction
gives you a slider to control the amount of glass refraction happening.
The further you extend from 0, the more "dense" effect colors will appear. To illustrate, the follow trio shows values of 1 (top), 3 (center), and 6 (bottom).
- The Refractive Index is a multiplier to the Glass Refraction.
-
Soften Displacement Map
allows you to blur the edges of your map.
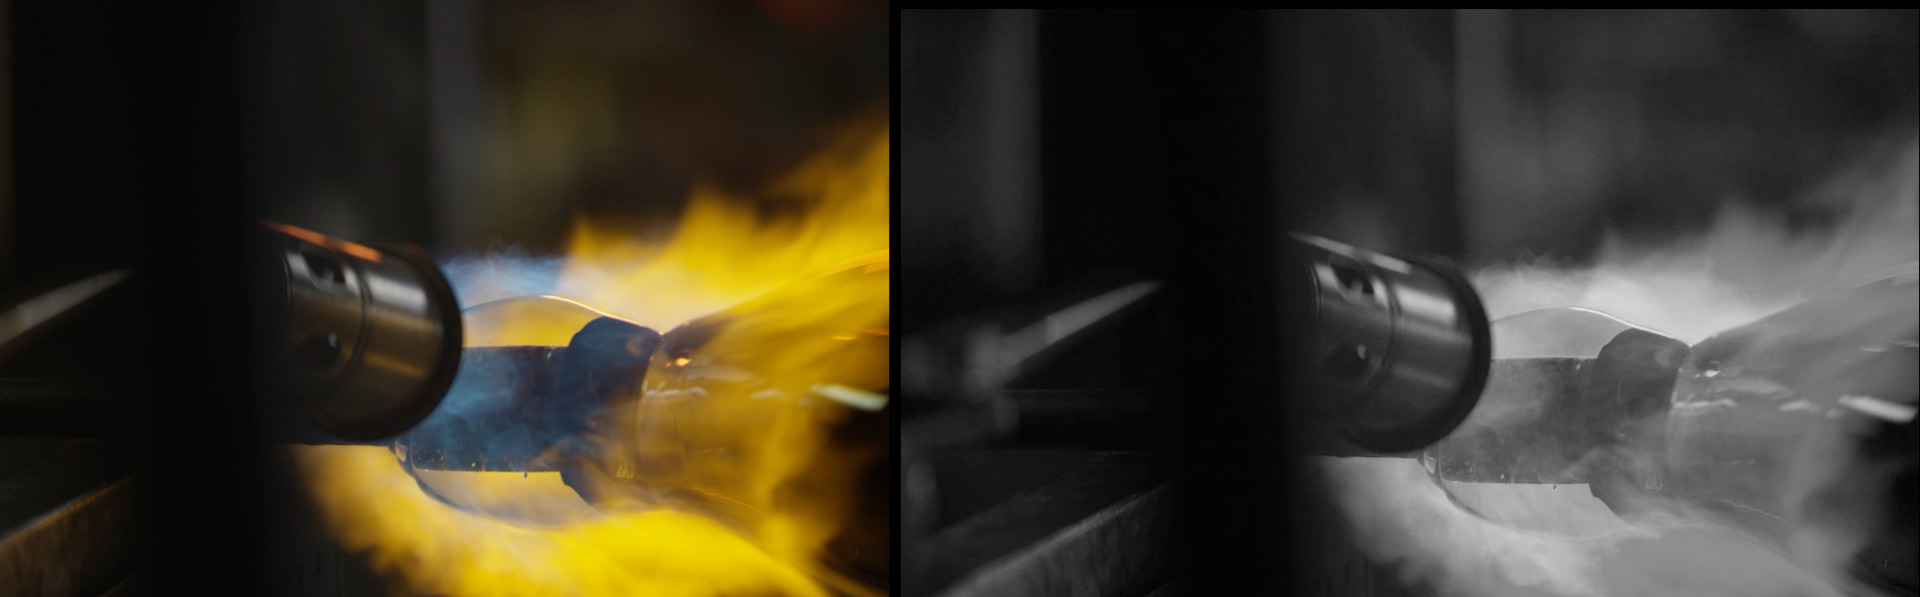
As you'll observe when enabling View Displacement Map (see below), if you have None as your Displacement Source, the map will be based on the layer to which Prism Displacement is applied, as you can see in this view of a video clip layer and the displacement map based on it.
- The Legacy Mode checkbox exists for users who have used Prism Displacement for many years and feel more comfortable with the tool's older model and options.
- The displacement amount of the red, green, and blue channels can be split individually by changing the Refraction Settings for each color.
-
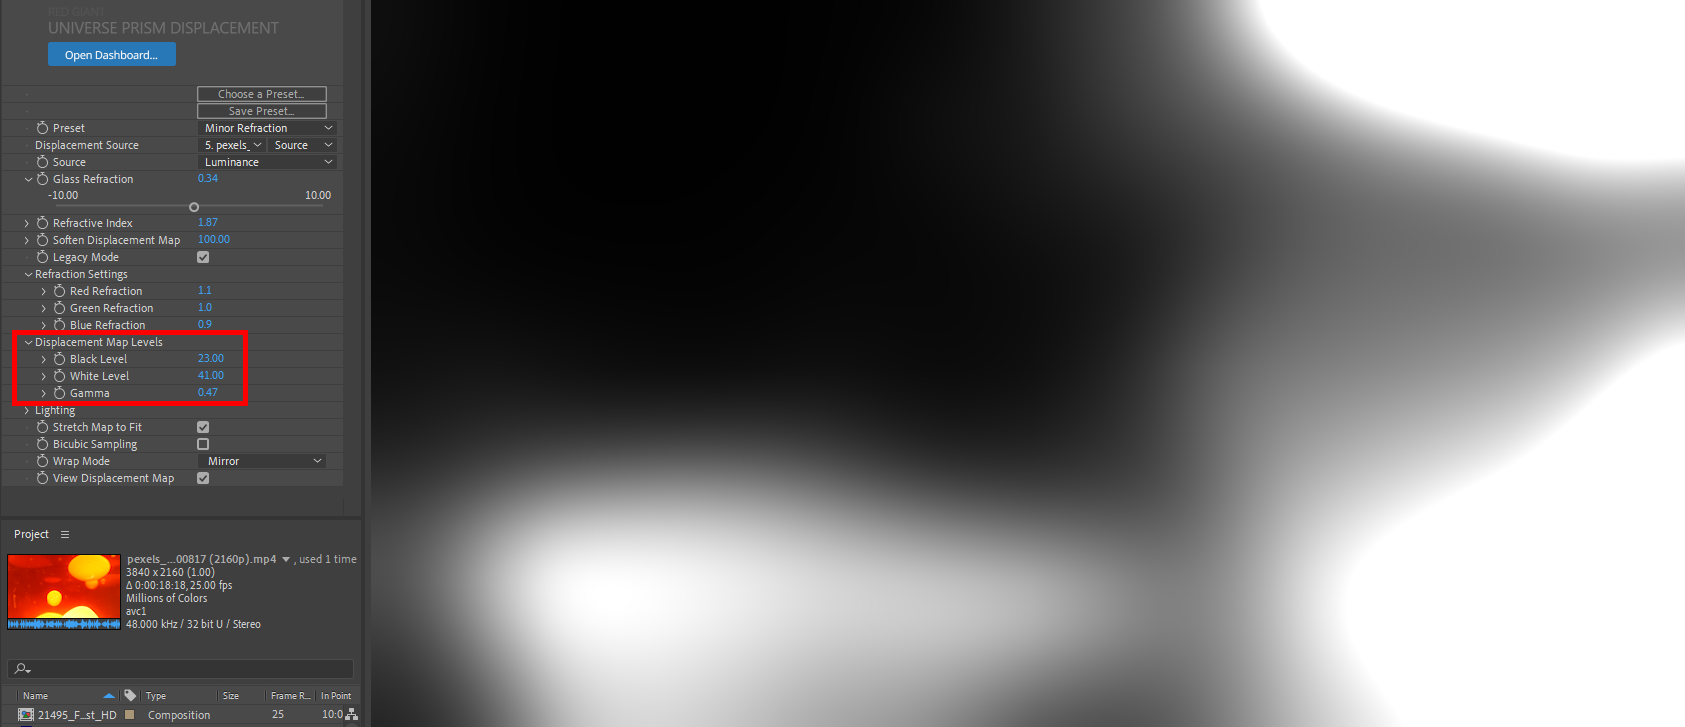
If you want to adjust the input levels of the displacement map colors, adjust the black, white, or gamma levels in the
Displacement Map Levels group. You may find this process more intuitive if you check the View Displacement Map box at the bottom of the ECP options. Seeing the map being extracted from your source layer can help you fine-tune your effects for greater contrast and drama.
- There is a section giving you control on the Lighting that hits your displacement, allowing you to position the light in x, y, and z as well as adding a diffuse color you can select with conventional color picker or eyedropper tools.
- Stretch Map to Fit (on by default) forces the displacement map to match the source image size.
- Bicubic Sampling provides a slightly slower but more accurate sampling method.
- The Wrap Mode shows options (Border, Repeat, Mirror, and Clamp) for extending edges of the image if distortion changes the image size.
- As noted above, check View Displacement Map if you want to see the map being used without turning off your source layer.