Contact points will allow rigid movement of any SubTool with an adjacent target SubTool. All three Contact points will allow the selected SubTool to move with the target mesh when posing.
To establish the Contact point, press Move, Scale or Rotate to activate the Transpose Line, draw the first point on the selected SubTool and then drag out the Transpose Line to the target SubTool.
For example, to move the arm of the DemoSoldier at the elbow, select the glove and establish three Contact points between it and the wrist of the top SubTool. (Hide the arm bands SubTool while doing this.) These points will create a link to the arm so that when it is moved the glove will move as well.
After moving a SubTool press Apply in the Contact sub-palette for each SubTool that uses Contacts.
Contacts can be added to the TimeLine. You can read more about the feature on the Contact page.
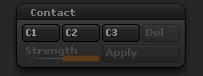
Tool > Contact sub-palette
C1
The C1 button will establish the first contact point that ZBrush will use to maintain distance between adjacent SubTools.
C2
The C2 button will establish the second contact point that ZBrush will use to maintain distance between adjacent SubTools.
C3
The C3 button will establish the third contact point that ZBrush will use to maintain distance between adjacent SubTools.
Del
The Del button will delete all contact points for the selected SubTool.
Strength
The Strength slider value determines the relationship between the selected SubTool and the target SubTool when using Contacts.
Apply
The Apply button will adjust the selected SubTool according to the Contact points, the Strength slider value and the target SubTool.