Tool > SubTool sub-palette with sections closed
SubTools are separate polygon objects. Each SubTool can be equal to the maximum number of polygons your system can handle. If your system handles 8 million polygons and you have 4 SubTools then your model can be composed of 32 million polygons. SubTools are, however, separate. You cannot sculpt or pose multiple SubTools at the same time.
SubTool list
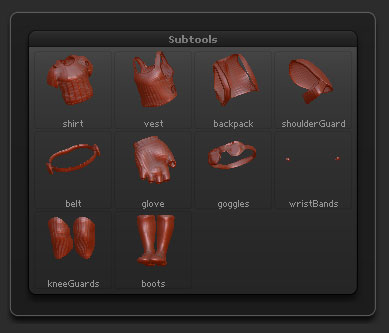
SubTools are displayed in a list. Up to eight SubTools are displayed – adjust the scrollbar to the left to show more SubTools.
SubTools can be hidden by turning off the eye icon next to their name in the list, or all but the selected SubTool can be hidden by using Solo mode.
Visibility Sets for SubTools

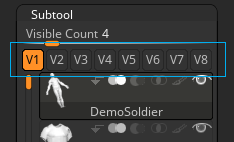
The Visibility buttons in the Tool>SubTool sub-palette
Eight buttons for storing visibility of subtools – V1 to V8 – have been added to the SubTool sub-palette. This will work with folder visibility.
SubTool list icons
SubTool icons
From left to right the icons are:
-
- Remesh: Add (default)
- Remesh : Subtract
- Remesh : Intersection – these first three icons are used when Remeshing SubTools.
- Polypaint on/off. Shift+click the paintbrush icon to turn polypaint on/off for all SubTools.
- Visibility on/off. Clicking the eye icon of the selected SubTool will turn off visibility for all SubTools – click below the icon to just turn off the selected SubTool (it will remain in view until you switch to a different SubTool).
List All

The ListAll (hotkey N) will list all SubTools alphabetically in a pop-up menu.
Up arrow
Selects the next SubTool up in the SubTool list.
Down arrow
Selects the next SubTool down in the SubTool list.
Up and over arrow
Moves the selected SubTool up in the list.
Down and over arrow
Moves the selected SubTool down in the list.
Rename
Press rename to change the name of the currently selected SubTool.
AutoReorder
The AutoReorder function changes the order of the SubTools in the list by ordering them according to their polygon counts. SubTools with larger polygon counts will be placed above SubTools with smaller polygon counts.
All Low
The All Low button will automatically set all SubTools to their lowest subdivision level.
All High
The All High button will automatically set all SubTools to their highest subdivision level.
Duplicate
The Duplicate button will duplicate the selected SubTool and add it below the selected SubTool.
Append
Press Append to add a new SubTool to the list. Choose the model you want to add from the pop-up; it will be added to the end of the list. ZBrush Primitives will automatically be converted to polymeshes, allowing them to be sculpted.
Insert
The Insert button will add a new SubTool to the list, immediately below the selected SubTool. Choose the model you want to add from the pop-up. ZBrush Primitives will automatically be converted to polymeshes, allowing them to be sculpted.
Delete
Press Delete to remove the currently selected SubTool. This only removes the selected SubTool, it does not affect any of the other SubTools. However, note that the SubTool is completely deleted – the action cannot be undone or the SubTool restored.
Deleting all the SubTools in the list will completely remove the Tool from the Tool palette (the final SubTool will be replaced by the Polymesh3D Star). This is a good way of removing unwanted models from a ZBrush project so as to keep the file size to a minimum.
Del Other
When the Del Other button is pressed, all SubTools will be deleted except for the selected SubTool. Note that the SubTools are completely deleted – the action cannot be undone or the SubTools restored.
Del All
The Del All button will completely delete all SubTools from the list and remove the Tool from the Tool palette (the final SubTool will be replaced by the Polymesh3D Star). This is a good way of removing unwanted models from a ZBrush project so as to keep the file size to a minimum. Note that the SubTools are completely deleted – the action cannot be undone or the SubTools restored.
 Split
Split
Split Hidden
The Split Hidden button will split the selected SubTool into two separate SubTools, so that the hidden part of the mesh and the visible part of the mesh become separate SubTools.
Groups Split
The Groups Split button will split the selected SubTool into separate SubTools based on the polygroups that are assigned to it; each polygroup will become a new SubTool. If the Split is performed with the SubTool at its highest sub-division level then the subdivision levels will be maintained.
Split To Similar Parts
Pressing Split To Similar Parts will split the selected SubTool into new SubTools based on the vertex count of individual mesh parts.This can be a useful way to separate meshes after using the Topology brush or InsertMesh brushes.
Split To Parts
The Split To Parts brush will separate all mesh shells into separate SubTools.
Split Unmasked Points
The Split Unmasked Points button will split the selected SubTool into two separate SubTools, so that the unmasked part of the mesh and the masked part of the mesh become separate SubTools.
Split Masked Points
The Split Masked Points button will split the selected SubTool into two separate SubTools, so that the masked part of the mesh and the unmasked part of the mesh become separate SubTools.
 Merge
Merge
MergeDown
The MergeDown button will merge the selected SubTool with the SubTool directly below in the list.
MergeSimilar
The MergeSimilar button will merge all SubTools which have similar polygon counts. This is a useful way of combining SubTools that were originally duplicated. This operation cannot be undone.
MergeVisible
The MergeVisible button will combine all the visible SubTools, creating a new Tool in the Tool palette which will have a name combining Merged_ with the name of the first visible SubTool. The Weld option affects the outcome of this operation.
Weld
If Weld is on when MergeVisible is pressed then all border vertices will be welded. Mesh borders will only be completely welded if all points line up.
Uv
If UV is on when MergeVisible is pressed the merge operation will also merge the UV for the visible SubTools.
 Remesh
Remesh All
The Remesh All button will create a new mesh by skinning the visible SubTools. This operation will take account of the Union, Difference and Intersection settings of each SubTool when skinning. The resulting mesh will be added to the end of the list as a new SubTool.
Symmetry can be used during the skinning operation by turning on the X, Y and Z axis indicators in the top part of the button.
Res
The Resolution slider determines the polygon resolution of the new mesh when Remesh All is pressed. Higher resolutions will take more computing time.
Polish
The Polish slider controls the strength of polish applied to the new mesh during a Remesh All operation. There are two different polish modes that can be chosen using the circle icon on the righthand part of the slider:
Open circle will apply a polish that maintains the over all volume and form of the SubTools.
Closed circle applies a polish that will smooth the skin without maintaining the volume.
PolyGrp
If the PolyGrp switch is turned on, the Remesh All operation will create new polygroups based on the intersection of the original SubTools. Turn off this switch if you don’t want the new mesh to have polygroups.
 Project
Project All
The Project All operation will project sculptural detail from a source mesh to a target mesh. The meshes don’t have to have similar topology but should be broadly similar in shape. Source and target meshes should be SubTools in the same list, and for best results should be the only two visible SubTools. The other settings in this section will affect the result of the projection.
Dist
The Dist setting affects the projection distance for each normal from the source mesh to the target mesh. A setting of 1 is the maximum.
Mean
The Mean slider will take the average of the point difference of target mesh to source mesh and set this as the plateau for Project All.
PA Blur
The PA Blur will apply a smoothing to the projection. Setting the slider to 100 will apply the strongest smoothing.
ProjectionShell
The ProjectionShell slider will establish the target mesh start point for ProjectAll.
In the image the red dog is the target mesh and the grey dog is the source mesh. The red dog’s ProjectionShell has been raised so that the Inner ProjectAll can be used for an accurate projection.
With this ProjectionShell setting and the Inner option turned on, ZBrush will only project inside of the Projection Shell to the source mesh. If any of the grey dog remained outside of the red dog then that would not be captured.
Farthest
The Farthest switch sets the ProjectAll operation to project from the target mesh to the farthest points of the source mesh.
Outer
The Outer switch sets the ProjectAll operation to project from the target mesh to only the outer points of the source mesh. If there is any of the source mesh inside of the target mesh then that part will not be projected.
This option is automatically turned on if ProjectionShell is set to a negative value.
Inner
The Inner switch sets the ProjectAll operation to project from the target mesh to only the inner points of the source mesh. If there is any of the source mesh outside of the target mesh then that part will not be projected.
This option is automatically turned on if ProjectionShell is set to a positive value.
Reproject Higher Subdiv
Use Reproject Higher Subdiv to relax your mesh. This operation will smooth out pinched or stretched polyons without loosing detail. To use, follow these steps:
1. Go three or more subdivision levels lower than your highest level, where the polygons are more evenly distributed. You may want to sculpt a bit at this level to adjust the distribution.
2. Press Reproject Higher Subdiv. ZBrush will compute a new distribution of polygons at the highest level, creating a more even distribute of polygons (‘relaxing the mesh’). For complex models, this may take some time.
3. After the process is complete, your model will automatically be displayed at the highest subdivision level.
 Extract
Extract
Mesh Extraction works by ‘extracting’ geometry from part of a model to create a new mesh. Much of the topology is duplicated but the edge is cleaned to create a smooth, even boundary. Sometimes this process will use triangular polygons at the smoothed edges.
You can define the part to be extracted in two ways; masking part of the mesh and hiding part of the mesh.
S Smt
The S Smt slider determines how smooth the surface of the extracted mesh will be. Two sorts of smoothing are available by setting the circle icon on the righthand part of the slider:
Open circle will maintain the volume of the extracted mesh.
Closed circle will not maintain the volume of the extracted mesh.
Thick
The Thickness slider sets the thickness of the extracted mesh. As a rough guide, use a setting 0.01 for cloth; 0.03 for leather.
Accept
The Accept button becomes active after an Extract operation. Pressing this button creates a new SubTool from the extracted mesh. Until this button is pressed the extraction is only a preview. This allows the settings to be adjusted before creating an actual mesh.
Double
When the Double switch is turned on the extracted mesh will be created both inwards and outwards from the original mesh surface. The positive or negative aspect of the Thick slider is ignored when this option is used.
TCorner
The TCorner option permits the use of triangles at the mesh corners during the extraction process.
TBorder
If TBorder is turned on then the extracted mesh will have a thin border around the edge.