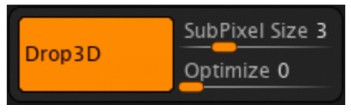
Drop 3D
The new Drop 3D function combines the technology of Sculptris Pro with the 2.5D functionality of the ZBrush canvas to produce a new workflow for enhanced creativity. Using Drop 3D, you can increase local mesh density to maintain high-resolution details where needed. Drop 3D inspires creativity by fusing the elements of both 2D and 3D design. With Drop 3D, you can explore design concepts aligned with illustration techniques, surface detailing, and 3D modeling.
The Drop 3D button activates the Drop 3D mode.
SubPixel Size
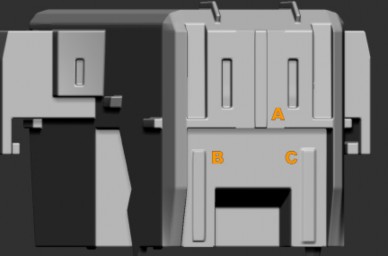
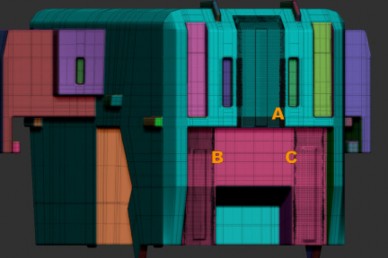
The SubPixel Slider controls density distribution on the asset surface after strokes are applied. In the accompanying image, three areas have varied topological density. They are the result of modulating the SubPixel Size slider from a setting of 0.5, 5, and 10. When setting the slider to 0.5, as seen in example A, the resulting stroke will retain a higher degree of fidelity and topological density. In the middle position seen in example B, the resulting stroke and topological density is reduced. Finally, setting the slider to 10 as seen in example C, yields a minimal density and smoothed perimeter edges.
Note: Clicking on a 2.5D brush or pressing the T hotkey does not activate Drop 3D mode.
Optimize
Topological distrubtion is triangulated in areas where strokes and 2.5D assets have been applied to the surface of the source asset. Setting the slider to a lower setting will apply less optimization in these areas. Setting the Optimize slider to a higher value will result in areas with higher density.
Begin by ensuring the asset does not include subdivision levels. If an asset intended for use with Drop 3D includes subdivision levels, the SDiv Slider should be adjusted to the lowest level. Next, the Delete Higher button should be used to delete higher subdivision levels.
Access the Document tab. Click on the Drop 3D button. Alternatively, you could use the 2D/2.5D space to create Alphas by modifying the Document size. Alphas can be used in expanded ways when converting 2D information into 3D assets. This functionality extends to include the use of Alphas for Stencils while editing and manipulating surfaces in the 2.5D mode.
Select a brush from the 2.5D brush menu located in the Tool palette. The STROKE and ALPHA parameters can be modified and changed to create surface details aligned with design needs.
Create a stroke on the surface of the asset and utilize the MOVE mode to change position along the surface. Access the MOVE mode by clicking the W key.
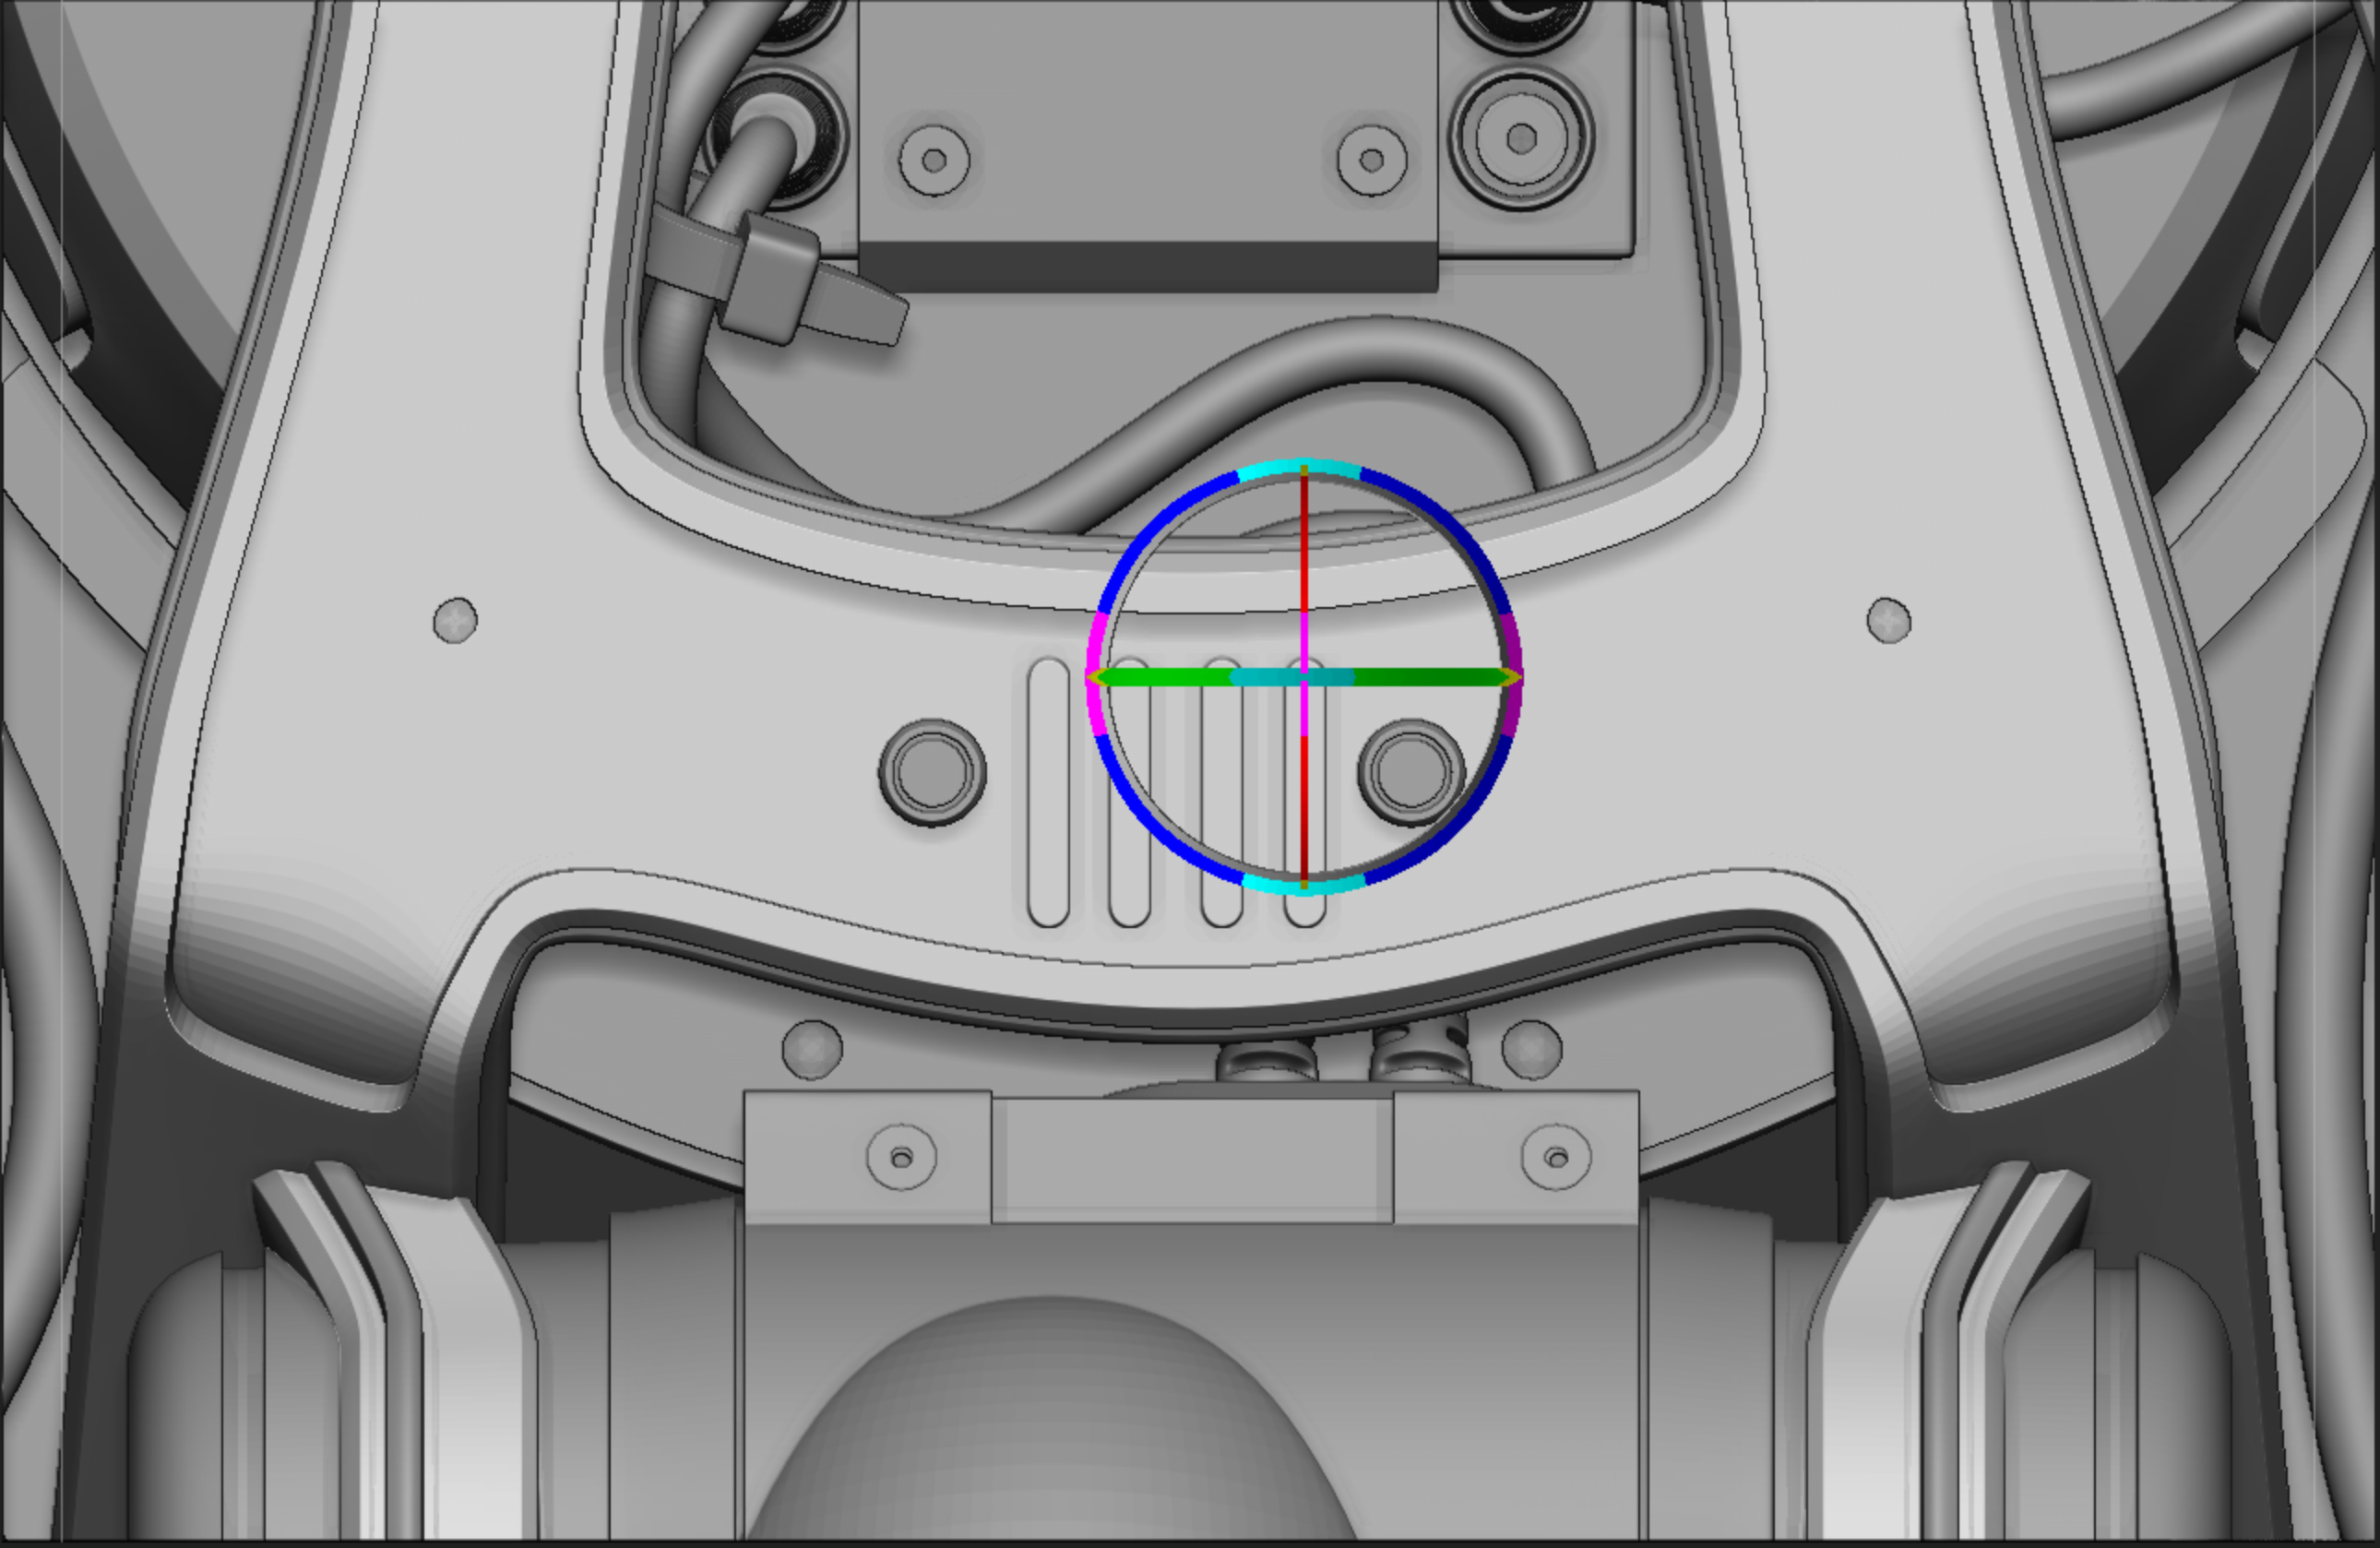
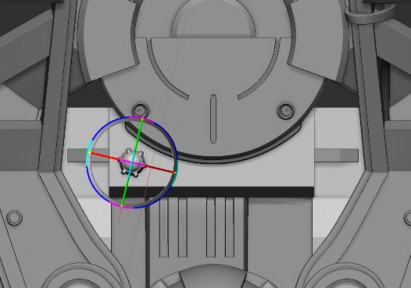
The Scale and Rotate functions will remain accessible. Activate these by clicking the E and R keys respectively. Use Scale and Rotate to continue affecting change as it relates to the location and size of the stroke applied on the surface. (The MOVE, SCALE, and ROTATE operations are achieved by using the multicolored indicator seen in Fig. 1 below.)
Incorporating the Shift+S key combination results in the stroke being applied to the surface while creating a second instance of the stroke. This is referred to as a Snapshot.
Drop 3D mode utilizes Sculptris Pro to create areas of increased density where strokes are applied. View the topological order and construction of assets by clicking Shift+F.
Strokes applied to the surface of the asset can take on positive and negative visual impact (see Fig. 2 below). Positive strokes meant to project out from the surface are achieved with ZAdd selected. Using Drop 3D while activating ZSub will result in strokes with imbedded visual representation, causing the surface to be “scored” or indented.
Modify the Subpixel slider.
Suface noise can be applied while working with Drop 3D.
The resolution of the asset will increase. Turning on polyframe will highlight the increase in density where strokes have been applied. Local topology in areas where strokes have been applied are maintained by Sculptris Pro.
Detail is maintained in areas where strokes are applied while global topology remains unchanged.
Using Drop 3D with IMM brushes is achieved by incorporating the Mesh From Brush function found inside the Geometry-Modify Topology menu.
Select any Insert Multi-Mesh brush (IMM) and press the M key to access the brush library. Each IMM brush comes equipped with multiple parts.
Click on the desired IMM part and press the Mesh from Brush button found in the Modify Topology menu.
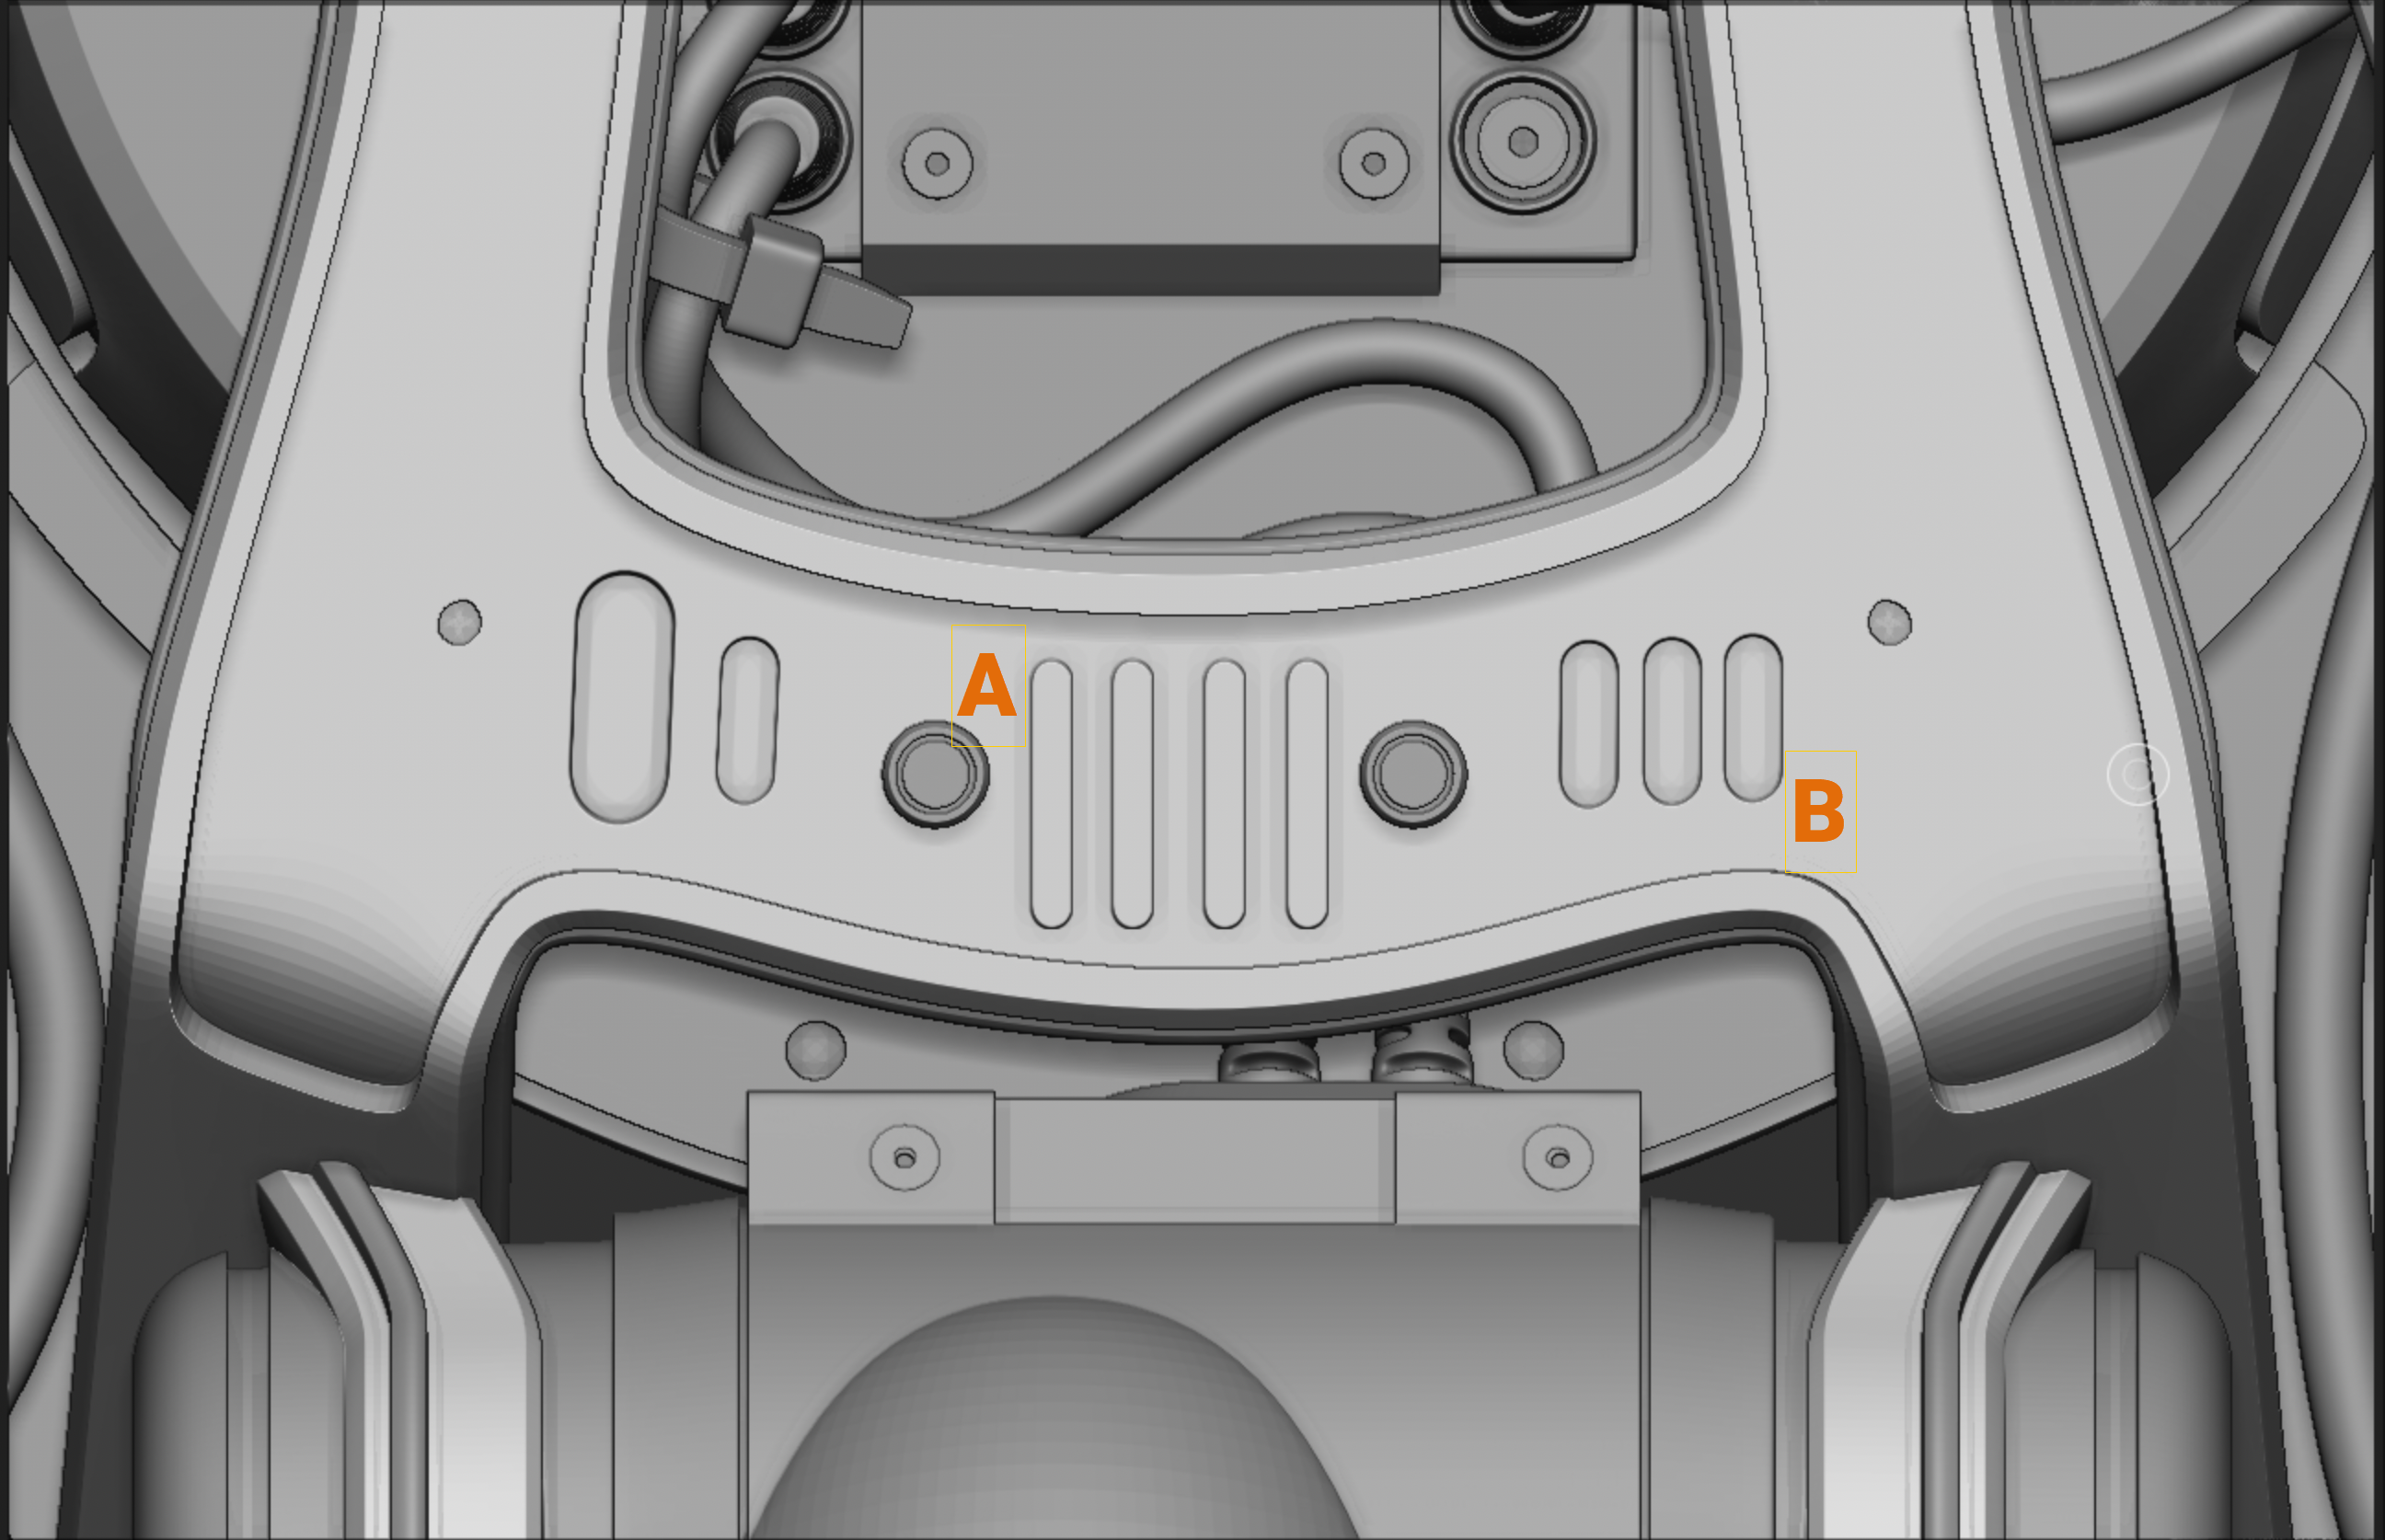
Be sure to press the Drop 3D button. Make changes to the Spacing slider found in the Stroke palette. Typical use could see the Line or Line 2 strokes selected. Adjusting the Spacing results in an effect similar to that found in the first image below.
With the IMM component part selected in the Tool palette click and drag across the section of the model intended for modification. The “bolt” is applied in acordance with the Line 2 stroke and Spacing slider settings as seen in example “A”.

Activate the Move, Scale, and Rotate options by clicking the W, E or R hotkeys.
Once Move, Scale, or Rotate is activated, the transformer will appear. The inserted piece can be moved up, down, left, right and in z space.
Click the Draw button to exit Move, Scale and Rotate modes. This will allow for creation of additional assets.
Once desired effects are realized, pressing the Drop 3D button will allow for continued digital sculpting in Edit mode.