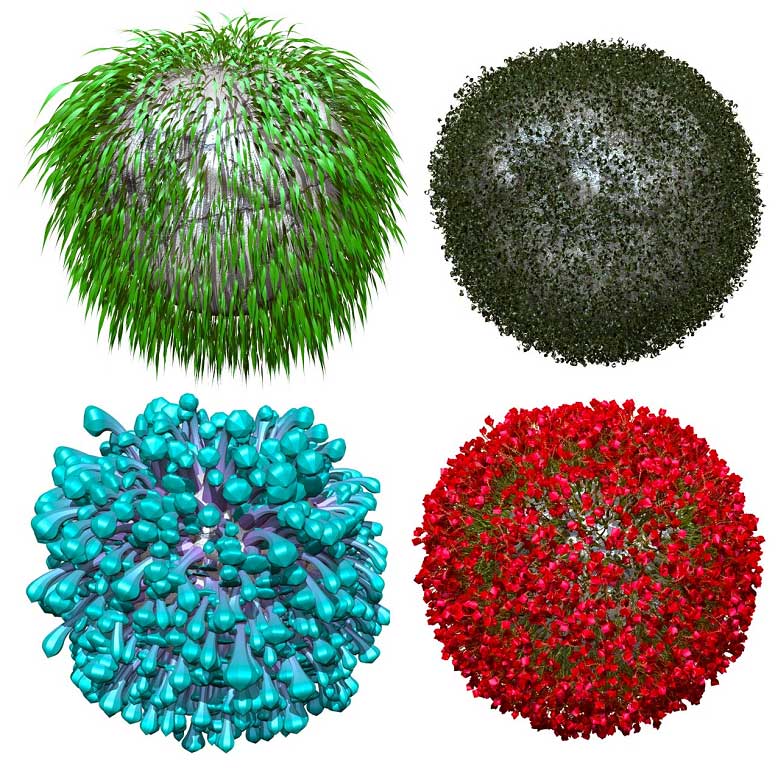
FiberMesh examples using Advanced options
Fibers must be generated on a mesh surface. They cannot simply be created out of empty space. Before generating your fibers, you must prepare the model that the fibers will be grown from. There are two main elements to this and of course, the Fibers settings:
- PolyPaint the source model with the colors of your choice. When the fibers are generated, they will (depending on the Fibers settings) draw their coloration from that of the underlying surface.
Note: The fibers can only use PolyPaint information. They cannot use the color information from a texture. You would need to convert your texture to PolyPaint to use it for FiberMesh color information.
To summarize:
1. Polypaint your model.
2. With Colorize on (so the polypaint shows) turn on FiberMesh>Preview.
3. In the FiberMesh>Modifiers set the TColor (Tip Color) slider to 0 and the BColor (Base Color) slider to 1. The fibers should now take on the polypaint color.
4. As the color in the Base Color selector (the icon to the left of the BColor slider) can affect the fibers color set this to black/white, although the BColor setting can be adjusted if you want to tint the fibers. Any BColor setting greater than zero should show the polypaint color.
Note: if you change the settings, or turn off Colorize, sometimes you need to move the BColor slider to get the fibers color to update.
- Draw a Mask to define where you wish to have your fibers grow from on the model. The intensity of the Mask will modulate the density and the length of the fibers. It is advised to change the Mask intensity by modifying the RGB Intensity of the Mask brush and/or by blurring your Mask after it has been drawn. Lower intensity will create a less dense area of fibers with a short length. At full Mask intensity the fibers will take on the full attributes defined in the Tool >> Fibers sub-palette.
Note:When modifying a Mask brush setting, you must hold down the CTRL key while changing its setting. Otherwise, you will affect the current sculpting brush settings instead of the Mask brush.
For better fibers distribution and overall best results, it is recommended to generate your model’s fibers in several passes. This will let you have better control over the results than if you try to generate all your fibers at once.
- Once the surface’s PolyPaint and Mask have been defined, modify the Fibers settings according to the style you are looking for. Now press the Preview button. Your fibers will appear as a non-editable preview. At this stage, if you move your point of view or orientation of the model, the fibers will disappear until you release your mouse cursor. While in Preview mode, changing any of the Fibers settings will instantaneously update the fibers on your model without the need to cancel your operation and start from scratch.
- To evaluate your Fiber with complete shading, press the BPR button at the top right of the interface or use the Shift+R hotkey. This will render your FiberMesh so that you can be sure you’re happy with the results before proceeding to the sculpting and styling phase. Picking the right Material is also a key factor in your FiberMesh render.
- Once you are satisfied with your results, press the Accept button to generate your FiberMesh as a new SubTool.
- You may now repeat the above steps with a different Masked area or different settings. In this way, a single surface can have many different types of Fibers effects.
Note: 3D brushes cannot be used on the preview fibers. You must click the Accept button in order to use any 3D brush with the FiberMesh feature. When Accept is pressed ZBrush will create a new FiberMesh SubTool that is ready for sculpting and detailing.

An example of using a texture-based Mask a PolyPaint to generate colorful fibers.
- Once your fibers have been generated, select the resulting SubTool in the Tool >> SubTool sub-palette. You may now start using the different sculpting brushes to alter the fibers, including their colors.
- ZBrush includes a wide variety of predefined Groom brushes dedicated to FiberMesh sculpting. These allow you to style the FiberMesh to the exact form and aspect that you wish. New settings have also been added to the Brush Palette for these brushes. (See the New Brushes section of this document.)
- In addition, all traditional sculpting brushes like Inflate, Pinch, Soft Concrete, Nudge (with the Picker set to Once Origin) and Move can be used to produce interesting results. Be aware that as these brushes were not designed specifically for use with Fibers, they can affect the shape of the fibers and the deformation can become extreme.
- To restore your fibers to their default width or length (but not position) you can use the new Tool >> Morph Target >> Morph width slider and Tool >> Morph Target >> Morph length slider. Please refer to this document’s Morph Target section for more information.
- As with a traditional PolyMesh 3D, you can use the Mask brushes to protect certain fibers. A unique feature when Masking fibers is that when the Mask is painted on any portion of a fiber, ZBrush will Mask off the fiber’s entire length.
FiberMesh Presets
By clicking the Save button located at the top of the FiberMesh sub-palette, you can save all the current settings for your FiberMesh Preview so that they can be reused later. Saved presets make an excellent starting point for any new model, saving you time by duplicating a specific “look” that you really liked on an earlier model.
To save your current settings, simply click the Save button and select a location of your choice. It is advised to save them in the ZFibersPresets folder located at the root of the ZBrush folder. This allows you to browse through and select from them quickly using LightBox, which now has a FiberMesh section.
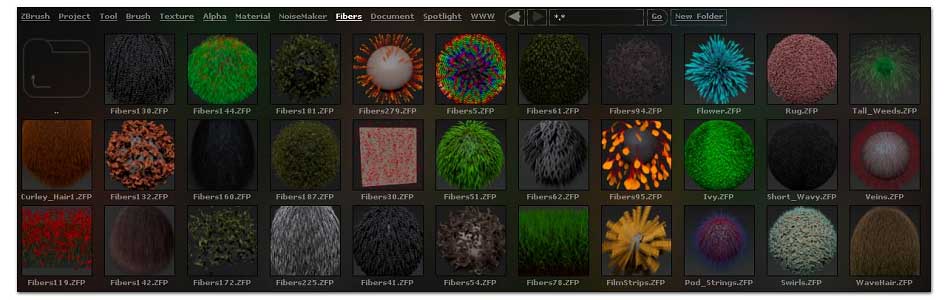
The FiberMesh presets in LightBox
Instead of LightBox you can of course use the Tool > FiberMesh > Open button.