Snapshot3D in Action: Creating a Complex Alpha
In this step by step we will see how we can combine and mix several alphas to create a complex shape in one click.
1. You can start from the previous step-by step or redoing through step 6.
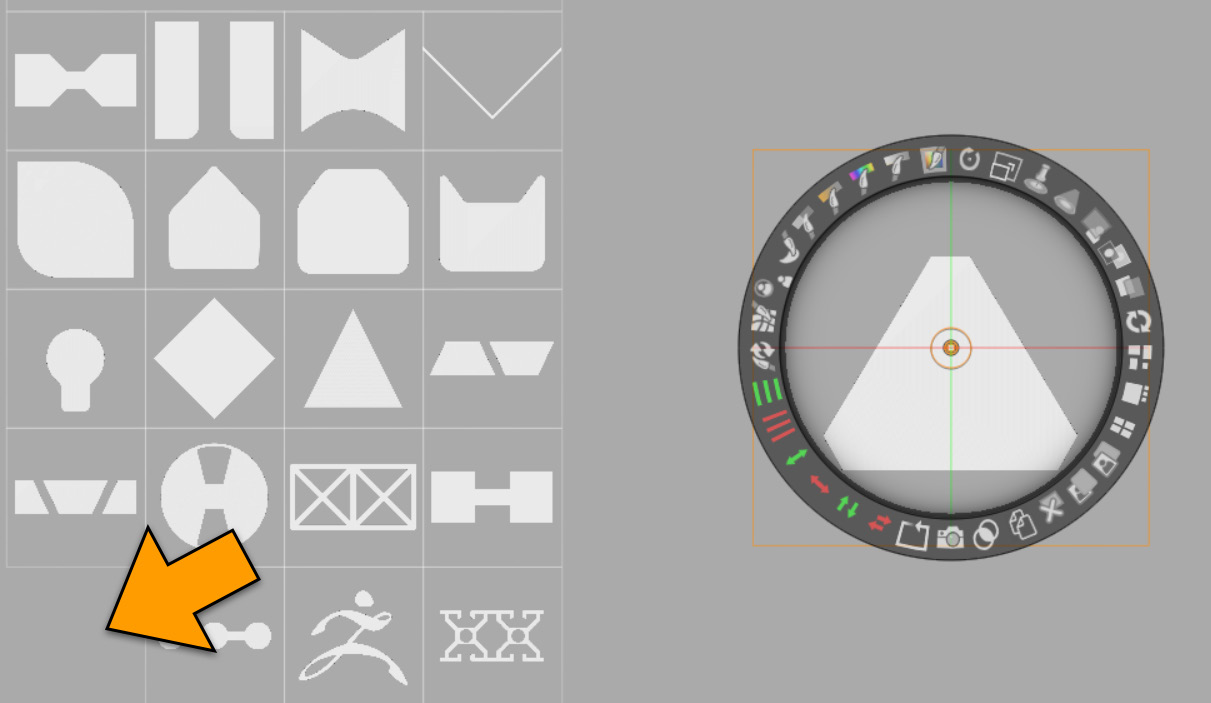
2. Select this first alpha:
CaptionText
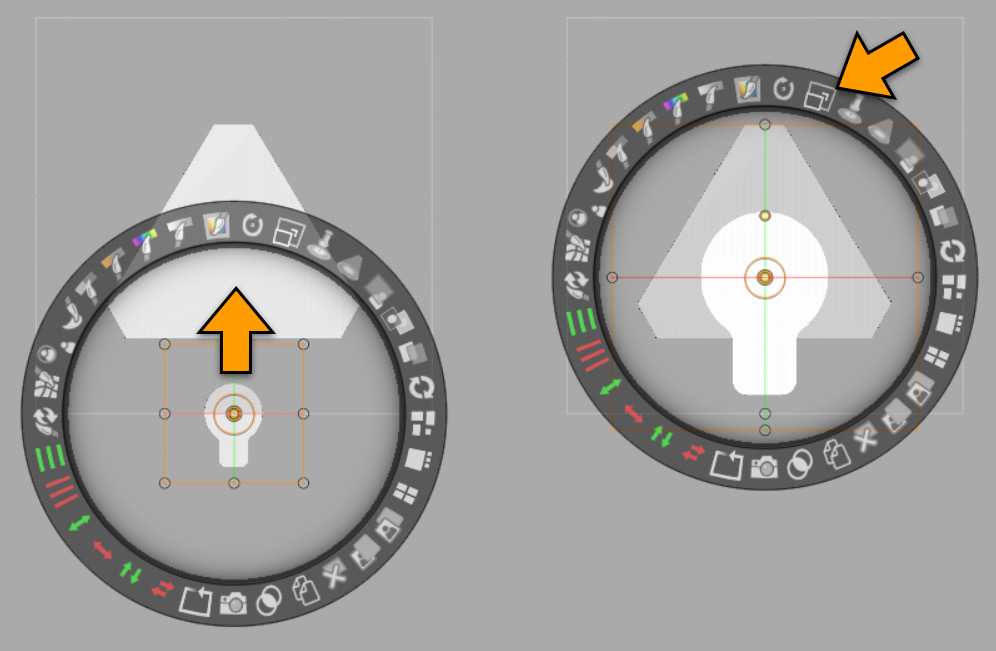
3. Then select this second alpha and put it under the bottom center of the first alpha. Notice that you have snap points when manipulating your alphas. It is important that your second alpha does not extend beyond the first alpha’s bounding box.
CaptionText
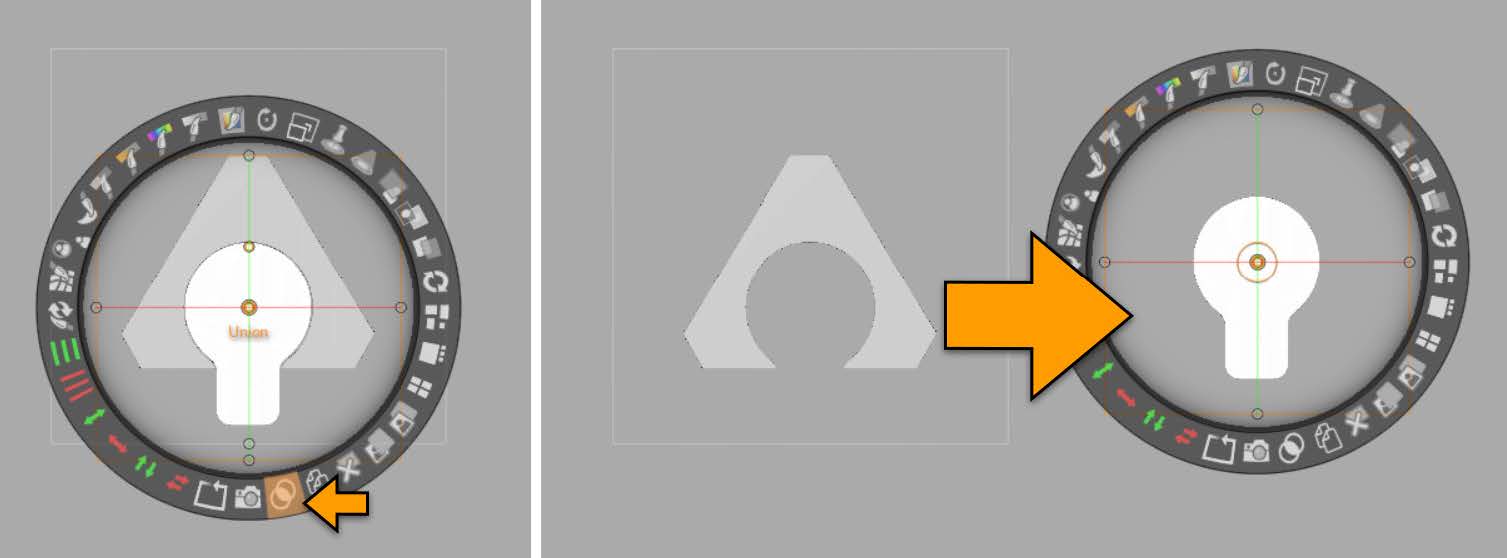
4. After rescaling and repositioning it, Alt+click the Union icon. The second alpha is subtracted from the first. You can see the result by moving the second alpha to another location.
CaptionText
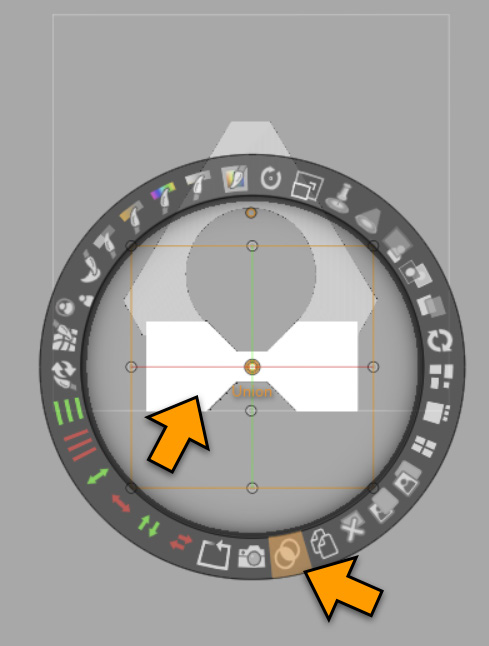
5. Pick a new alpha from the list, putting it in the location shown in the screenshot below.
CaptionText
6. Click Union. The alpha will be added to the result of the previous combination.
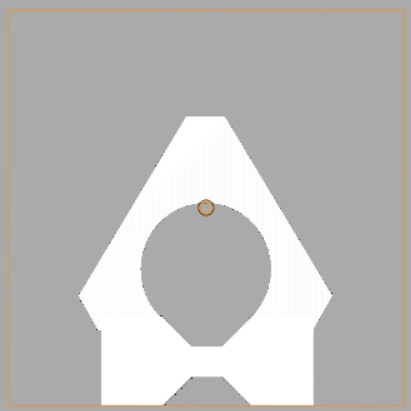
CaptionText
7. Now you can press the SnapShot icon to generate the 3D model.
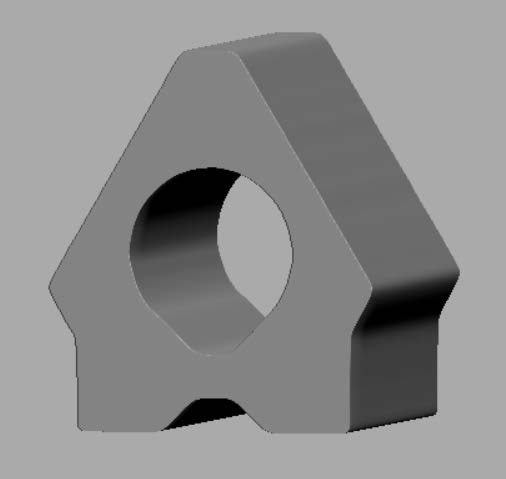
CaptionText
By combining these functions to create complex alphas and then merging the resulting SubTools through the Live Boolean feature, you will develop a very quick and instinctive way to generate models which would have taken a lot of time to create with other methods.