Added realism for cloth and fabrics by tiling meshes within Dynamic Subdivision renders
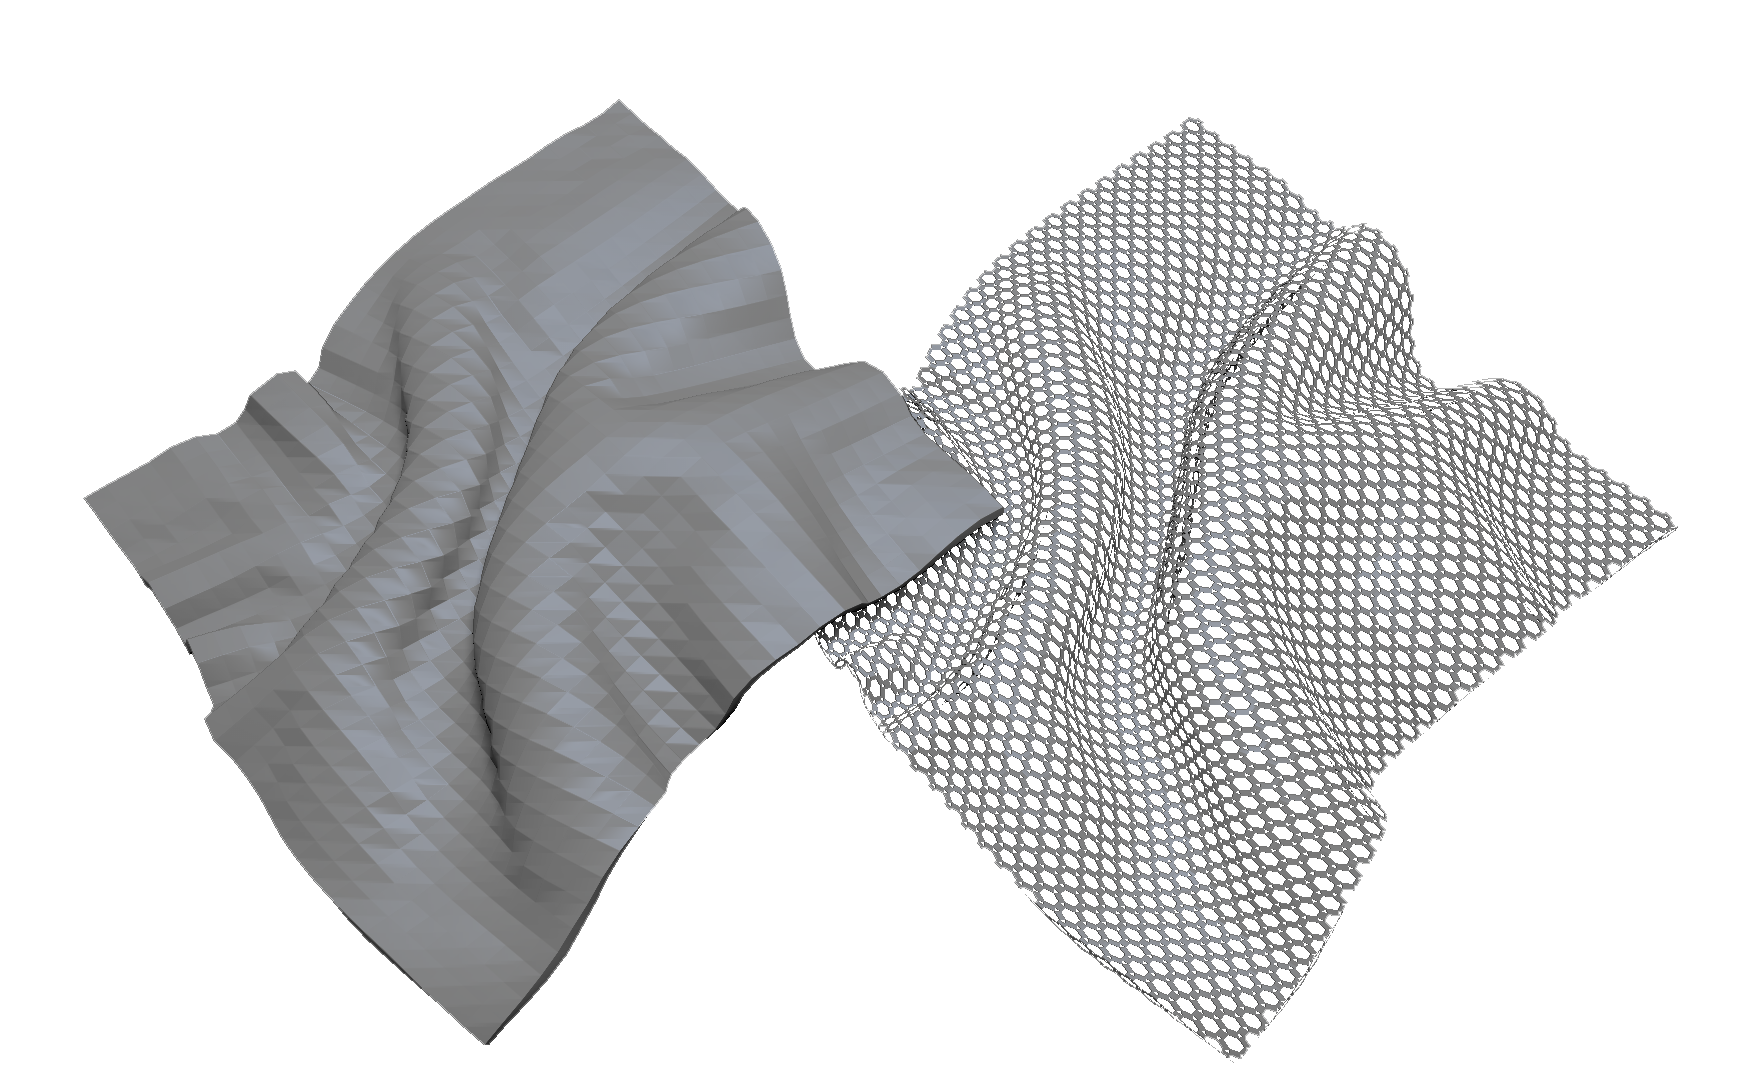
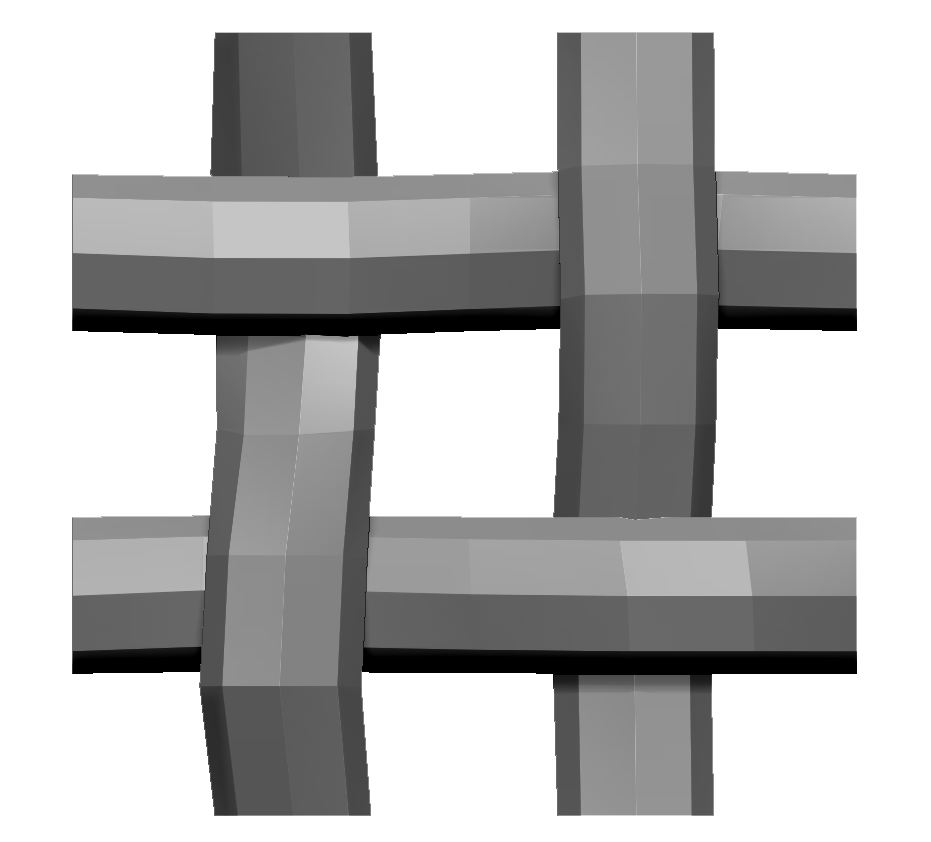
MicroPoly adds remarkable capabilities to Dynamic Subdivision by tiling 3D meshes within the rendered effect to produce cloth weave and other materials. Easily switch between different MicroPoly meshes to get exactly the effect you are after. Combine with cloth simulation to produce amazingly realistic results.

On the left, a low polygon mesh. On the right, with a MicroPoly applied.
How MicroPoly Works
Applying a MicroPoly to your mesh is as simple as turning on Tool >> Geometry >> Dynamic Subdiv >> MicroPoly On and selecting a mesh from the pop-up.
Setting the Smooth Subdiv slider to higher values will increase the number of base polygons, making the MicroPoly appear smaller and more numerous.
It doesn’t matter when the MicroPoly is applied within your workflow. You can create the cloth folds and apply afterward, or you can apply MicroPoly and then run the simulation. You can also swap between MicroPoly meshes during any part of the process.
PolyPaint can even be applied to the MicroPoly meshes. Any color that was applied to the original MicroPoly mesh will be combined in the final result.
Apply will convert all settings into actual geometry that can be sculpted.
Creating Your Own MicroPoly
Creating a MicroPoly mesh is easy so long as you remember a few important things:
-
- The mesh must be very low-resolution. This is because ZBrush will be repeating it many times and the total number of polygons being handled will quickly become quite large.
- The mesh must fit perfectly into the ZBrush unit square. (The Tool >> Preview window is exactly one ZBrush unit across.) This ensures that the mesh will tile correctly.
- The edge points must match up. This allows ZBrush to weld the points.
Here is a simple example:
Getting started
-
- Select the Cylinder3D primitive from the tool Palette.
- Set Tool >> Initialize >> HDivide to 8 and VDivide to 9. Set X Size to 20, Y Size to 20 and leave Z Size at 100.
- Press Tool >> Make Polymesh3D to create a PolyMesh copy of the cylinder.
Removing End Caps for Welding
-
- Turn on PolyFrame (Shift+F) and select the ZModeler brush (B-Z-M).
- Hover over any of the polygons on the top of the cylinder.
- Hold the Spacebar. Select the Delete Action and the Flat Island Target.
- Click on any of the polygons at the top (the cap) of the cylinder. All the faces at that end of the cylinder will be deleted.
- Rotate the cylinder to see the bottom faces and click on any polygon face to delete those polygons as well.
Setting the Mesh to one ZBrush Unit
-
- In the Draw palette, turn off the Perspective button and in the Floor button activate the Y axis option. This will show the grid behind the cylinder when it is positioned upright.
- Set the Floor Grid Size to 1 and the number of Tiles to 2.
- Set Tool >> Geometry >> Position >> X to -0.5. This will set the cylinder half-way to the left.
- Press Tool >> Geometry >> Modify Topology >> Mirror And Weld across the X axis. This will duplicate the cylinder.
- In the Tool >> Geometry >> Position sub-palette, check that the X, Y and Z sliders are set to 0.
- Duplicate the SubTool by pressing Tool >> SubTool >> Duplicate.
- Set the Tool >> Deformation >> Rotate slider to rotate 90 degrees for the Z axis. The easiest way to do this is to click the slider to select it, enter 90 from the keyboard and then hit Enter to apply.
Finishing the design
- In the Tool >> Masking >> Mask By Features section, turn off Crease and Groups so that only Border is on. Press Tool >> Masking >> Mask By Features. This will make sure the edge points are masked and do not move.
- With the Standard brush selected, set a large Draw Size such as 300 and move the cylinders to create a woven effect.
- Select the second SubTool and repeat, being sure to first use Mask By Features for the Border.
- When you are happy with the weave, select the top SubTool and then press Tool >> SubTool >> Merge >> Merge Down.
- Clear the masking.
- Press Tool >> Deformation >> Unify and check that the Tool >> Geometry >> Size X and Y sliders are set to 2.

A simple MicroPoly example
Your MicroPoly mesh is now ready to test. To load it direct from the Tool palette, select the mesh you wish to apply it to and then Ctrl+click the MicroPoly button. (If another MicroPoly is already active, Ctrl+click the MicroPoly thumbnail instead.) You will then be able to select your mesh from the Quick Pick pop-up instead of the default MicroPoly pop-up.
To have your MicroPoly mesh available each time ZBrush starts, you can add it to the MicroPoly pop-up. Save as a ZTL (Tool >> Save As) and place it in the ZMicroPoly folder within your ZBrush installation directory.
Variations and Enhancements
-
- You can PolyPaint your MicroPoly mesh to create some interest. For example by painting some parts black and some parts white. This will enhance the look of the cloth. The effect will show through any color you apply to the cloth mesh itself.
- You can duplicate the SubTool and create slight variations between each. (Make sure to mask the borders!) ZBrush will then automatically select them at random to create variations across the cloth. Any MicroPoly can have up to 8 SubTools for the variations.
- If you wish to modify any of the MicroPoly meshes included with ZBrush or later added to the library, open the MicroPoly pop-up and Alt+click on the one that you wish to change. That MicroPoly will be added to your Tool palette for editing.
MicroPoly Functions

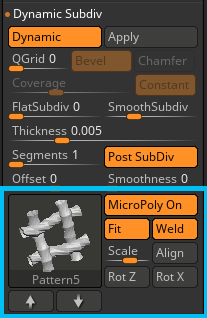
The MicroPoly section of the Dynamic Subdiv sub-palette
MicroPoly On
Turn on to use a MicroPoly on your mesh. If there is nothing showing in the thumbnail then the pop-up will appear so you can make your selection. Ctrl+click the button to select from the Tool palette quick pick pop-up instead of the default MicroPoly pop-up list.
MicroPoly thumbnail
The selected MicroPoly will show in the thumbnail. Click the thumbnail to change the selection from the pop-up. Ctrl+click the thumbnail to instead select from the Tool palette quick pick pop-up. Alt+click to add the selected MicroPoly to the Tool palette for editing.
Next/Previous arrows
The down arrow will select the next MicroPoly.
The up arrow will select the previous MicroPoly.
Fit
The mesh will be scaled to fit the polygons. This will mean ZBrush can weld the meshes, provided that the original mesh was created so that this is possible. With the Fit option turned off, all meshes will be the same size. As a result, they may appear separate and welding may not be possible.
Weld
The MicroPoly meshes will be welded where their points overlap with duplicates, provided that the original mesh was created so that this is possible. This will mean that after using Apply to convert the dynamic subdivision effect to actual geometry, the resulting mesh can be subdivided without producing holes.
Scale
Determines the size of the MicroPoly mesh relative to the polygons of the base mesh. When the Fit option is off, larger values may result in the MicroPoly meshes overlapping. When the Fit option is on, Scale will only affect the Z axis and at the lowest setting the meshes become flat.
Align
Use this option to set the MicroPoly meshes to all align in the same direction, as far as the mesh topology makes this possible. If your mesh shows obvious tiling then try pressing this button.
Rot Z
Change the MicroPoly mesh rotation around the Z axis.
Rot X
Change the MicroPoly mesh rotation around the X axis.