3D Layers allow for a non-linear workflow. Artists are able to work with a model at many different stages of development simultaneously. Artists can add details such as a reptile’s skin scales then turn those details off and refine the major forms underlying them.
3D Layers can also be to store poses or facial expressions. Using the Maya Blend Shapes plugin these can be easily exported to Maya as blend shapes.
The controls for 3D Layers are in the Tool > Layers sub-palette.

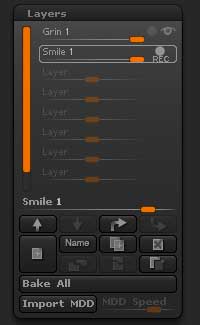
Tool > Layers sub-palette with two layers
Layers support geometry, Polypainting, and Masking. Mix them and change their opacity to create new results in a few clicks. You can also turn off a layer if it’s decided that the details aren’t needed or change the strength of details sculpted on the layer.
Layers can be easily animated with the help of the Timeline, allowing you to create and visualize the Morph target or Blend Shapes that you can create in ZBrush for other 3D packages.
ZBrush reads layers from the top of the list to the bottom. This information is important for good layer management in your models.
Record mode
Creating a new layer automatically turns on Record mode. Otherwise, you must turn on Record mode for a layer in order to record changes to sculpting, Polypaint or masking. If the layer only has the eye icon active there can be no changes made to the layer.
To turn on Record mode click on the REC icon. Once you have finished making changes, the layer must be taken out of Record mode by again clicking on the REC icon.

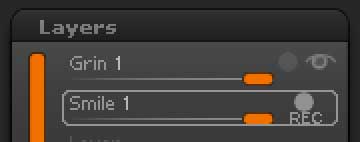
Two layers with the Smile layer in Record mode. The eye icon shows that the Grin layer is visible so its sculpting or Polypaint will also show while work is done on the Smile layer.
Record mode is represented by a plain circle and the REC label,on the right of each layer in the list.
Layers at different levels of subdivision
New layers must be created at the top subdivision level. Once in Record mode, you can sculpt or polypaint on any level but you will need to return to the top level to turn off Record mode. Hiding the layer by clicking the eye icon, or adjusting the layer Intensity slider, can be done at any level.
If you add more subdivision levels then layers can be transferred to the top subdivision level by simply adjusting the Intensity slider or by turning the eye icon off and then back on. Once a layer has been transferred to the top level it may not be sent back to the original creation level.
Erasing the Polypaint on a Layer
Any layer that has Polypaint information can be erased locally with your current brush by holding the ALT key while applying your stroke. Turning on ZSub will have the same effect.
Note: To locally erase the sculpted contents of a layer, hide it by clicking on its visibility icon and then store a morph target. Unhide it and pick the Morph brush: while drawing your stroke, ZBrush will erase the contents of your layer.
Baking sculpting from a single Layer
The sculpting from a single layer can be baked into the mesh this way:
1. At the highest subdivision level, make sure the layer is selected and the Intensity set to the desired level.
2. Press Tool>Morph Target>Store MT.
3. Delete the layer.
4. Press Tool>Morph Target>Switch. The sculpting is restored.
Note: Polypaint and masking will be lost with this method. Either split the layer first, so that the polypaint/mask is not lost or use the texture map creation options to store the color.