Introduction
ZSphere topology is a great way to create new topology over top of an existing model. Once you've learned the simple techniques in this tutorial you will also be able to use ZBrush to change the polygons of your existing models. You don't even have to lose sculpting that you've already done!
Setting Up the Tutorial
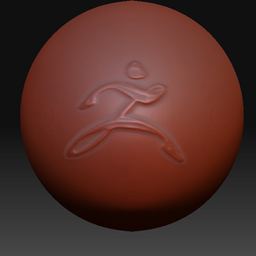
- For this tutorial, we're going to use a very simple object, which we'll create really quickly. Begin by selecting the Sphere3D and changing its Tool > Initialize menu to give an HDivide and VDivide of 16. Now press the Tool>MakePolymesh3D button. You'll have a low resolution sphere.
Draw the sphere on the canvas and divide the sphere five times, bringing the number of subdivision levels to 6. That will give you enough polygons to draw something simple on the surface like in Figure 1. Avoid going near the sphere's poles, since we'll be removing them.
Now that we have our model, clone it by pressing Tool:Clone. This is going to be important later, in order to keep the sculpting that we've done on this model. Switch back to the original version of the model.
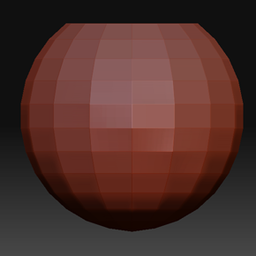
- OK, time to edit the polygons to cut a hole through the center of the sphere. To do that, we first need to remove unwanted polygons. One way to do that is simply to go to level 1 and hide the top few rows of polygons like shown in Figure 2. Now press Tool:Geometry:DelHidden.
We could do the same thing with the other end, but for this tutorial we'll remove those polygons via the retopology feature. That way you can see another way to go about things. Go ahead and turn on Tool:Display Properties:Double. This allows us to see the inside of the sphere, which will be helpful later.
Preparing for Retopology
Now for retopology! Begin by selecting the ZSphere tool. It'll replace the sphere in your viewport.
Next, press Tool:Rigging:Select Mesh. From the pop-up menu, choose the sphere that's missing one end.
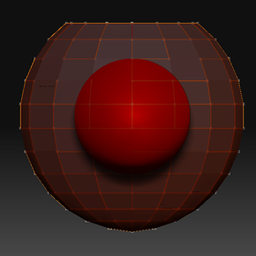
- Press Tool:Topology:Select Mesh and choose the same sphere again. What you should now see is shown in Figure 3. The original ZSphere is still visible, but your model should also be seen as a cage surrounding it. Press Tool:Topology:Edit Topology to tell ZBrush that you want to modify the polygons of the source model. The big ZSphere will immediately disappear, leaving you with just the topology cage.
At this point, we can edit the topology as easily as drawing or removing ZSpheres. Rotate the model so that you can see the bottom, and move your cursor across it. Notice how the cursor changes at certain points. Retopology works by adding or removing points. If adding points, then you also need to connect those to the rest of the mesh. It's pretty simple.

- When you get near an intersection, the cursor snaps to the intersection and appears as a red or green circle like shown in Figure 4. Clicking here will affect the point that the cursor is snapped to. The color of the circle has to do with ZBrush's analysis of your mesh. Green circles are better than red when working with topology, but you shouldn't let that stop you from doing the things you want to do.

- When your cursor is on a topology line, it will turn into a white square and snap to a point along the line. There will also be an indicator line connecting the cursor to one of the nearby ZSpheres. See Figure 5. Clicking here can affect the line OR the point that is targeted by the indicator. So you could delete the indicated point. Or you could add a new point at the cursor's location.
Removing Polygons
Rotate the sphere so you can see the bottom pole. Put the cursor over the pole and hold down Alt. You'll see a little minus sign appear next to the cursor, warning you that clicking will remove the point. That's what we want, so go ahead and do it. All the lines connecting to that point will disappear.
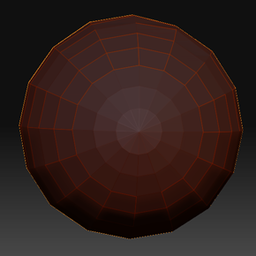
- Now start Alt-Clicking to remove the next two rows of points. When done you should have what's shown in Figure 6. Pressing A to preview the mesh will show that the hole has indeed been cut out as in Figure 7.
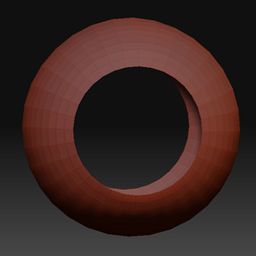
Obviously, this method is a bit more tedious than simply hiding and deleting polygons like we'd done with the other end. But there will be certain times when the reverse would be true, and editing on a point-by-point basis is the easiest way to go. It's good to have options!
Constructing Polygons and Bridging Gaps
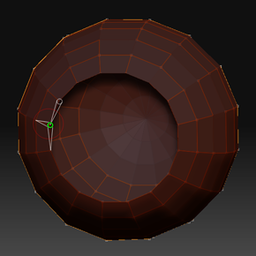
- The objective, though, was to actually tunnel through the sphere. So now what we need to do is construct polygons that will bridge the space between the holes. Rotate the sphere so that you can see the hole that we'd cut out before beginning with retopology. Move the cursor along the edge until you come to a point that gives you a green circle, as shown in Figure 8. This is a key topology line in the model, so our work will be easier if we work with it instead of the red points. Click on the point to select it as shown in Figure 8.
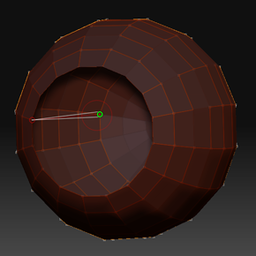
- Now rotate the model so that you can follow the line from the selected point to the hole on the opposite side. The selection indicators will disappear while rotating, but they'll show up again right away as soon as you release the mouse. That way you can't lose track of the selected point. Once you've identified the point on the other hole that corresponds with the selected point (hint: it will have a green circle, too!) go ahead and click that point. You'll see a new bone/line drawn between the two points as in Figure 9.
Click anywhere on the canvas to deselect your points. Otherwise, ZBrush would bridge to the new point from the previously selected one! Locate the next green point at the close end, which will be 1/4 of the way around the sphere. Select it and then bridge to its corresponding point on the far side. Repeat for the remaining green points. You'll end up with four lines that bridge from the near side of your sphere to the far side.
If you now press A to preview the sphere, nothing interesting will happen. You'll still just see a sphere with two holes in it. This means that we haven't given ZBrush enough information yet. Time to do some more bridging!
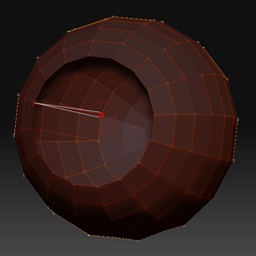
- Select one of the red rim points right next to one of the bridges that you already have in place. Take that and bridge to its counterpart on the far side as shown in Figure 10. Turning on the preview now will show that part of the interior has been filled in. This is shown in Figure 11. We've given ZBrush enough information that it can figure out what we want for this area, so it's now as easy as adding three more briges. In the illustration, I connected the points one step clockwise from a green point. So for the remaining three bridges, I'll continue to go one step clockwise. There's no need to add more bridges in the area where ZBrush is already doing what we want.
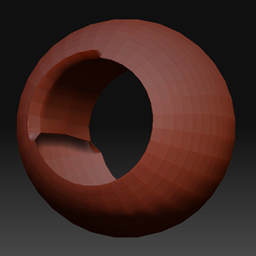
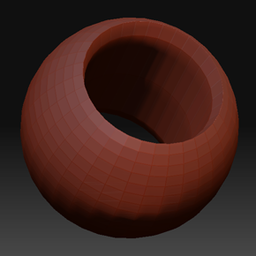
- With eight bridges drawn, activating the preview should give what's seen in Figure 12. You've now cut a hole through your sphere.
Finalizing the New Topology
Now all that remains is to detach this new topology from the ZSpheres. Remember how our original model had 6 subdivision levels? By default, ZSphere previews have 2 levels. Let's tell ZBrush that we want our new mesh to have 6 by setting Tool:Adaptive Skin:Density to that value. Now press Tool:Adaptive Skin:Make Adaptive Skin. This step is what actually detaches the new topology from the ZSpheres that we used to define it. Nothing will happen on the canvas, but a new model will appear in the Tool palette, named Skin_ZSphere#1. Select that to switch what's being drawn in the viewport.
Transferring Sculpt From the Source Mesh
Now if we were simply editing topology, this is where we'd stop. But we began the exercise by sculpting our original sphere. Wouldn't it be nice to transfer that sculpt to the new topology? Since the new model has exactly the same shape as the original model, this is super easy!
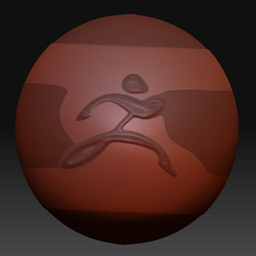
- Press Tool:SubTool:Append and select the cloned model that was created earlier. For various technical reasons, our new mesh is slightly smaller than the original and is lost inside it. Rotate the model to bring your sculpt fully into view. The currently selected SubTool should be the skin that you made, so use Tool:Deformation:Size to scale it up a little bit. A value of 4 should be about perfect, giving the results shown in Figure 13. Don't worry that the new model is larger than the source. The next step will fix that, by shrink-wrapping the new model onto the original.
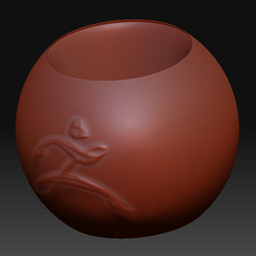
- All that remains is to press Tool:SubTool:Project All. This transfers details to the selected SubTool (our new sphere) from the non-selected SubTools (which in this case is the original sphere). However, it also has restrictions based on distance. This means that only details which are pretty close to the new sphere will be transferred. Any differences that are radically different (such as where the big hole exists) will be left alone. Now delete the source SubTool, and you're done. Figure 14 shows the finished results: A model with brand new topology, but also with all the sculpting (and even polypainting) of the original model.
Conclusion
So there you go. In this tutorial you've learned how retopology can be used to edit your models on a polygonal level, and even cut holes through your models by bridging gaps between the holes. And you can do all of this without losing any work that you've already put into your project. Not bad, huh? With practice you'll learn that retopology really lets you get creative with your models, making it possible to do some truly interesting stuff.