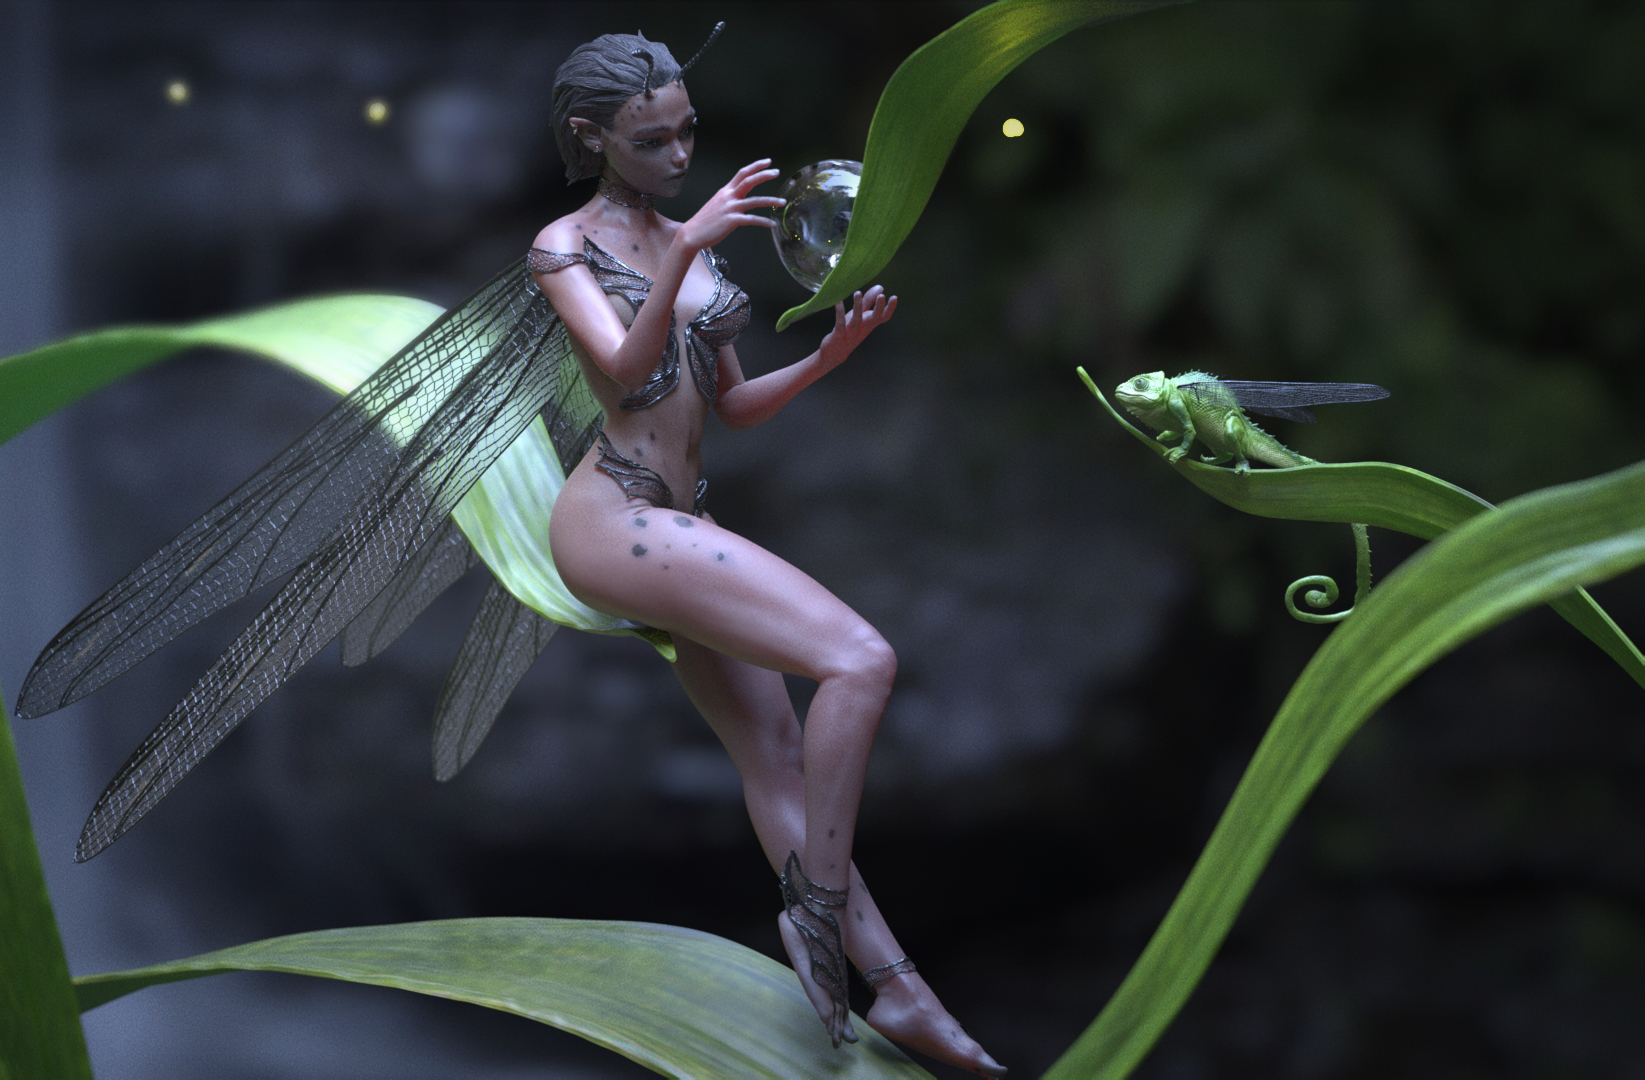
ZBrush artist: Nikita Lebedev
Stunning Redshift renders inside ZBrush
ZBrush artist: Nikita Lebedev
Render directly inside ZBrush using the Redshift renderer. Create stunning renders using the new Redshift materials – glass, metal, reflections, subsurface scattering, shadow-catchers.
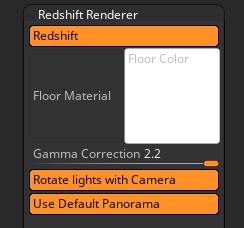
The top section of Redshift Renderer sub-palette
Turn on the Redshift button to enable rendering with Redshift. The Redshift rendering options will then become available.
Click the thumbnail to select a material for the Floor. Select the Shadow Catcher material to set the Floor as a shadow catcher.
Click the thumbnail to select a color for the Floor.
Allows for the changing of the gamma value. On Windows, the default is 2.2; on MacOS the default is 1.8.
When turned on, lights will be rotated with the camera which is especially useful if you want a light behind the model for SSS. When off, the lights will remain fixed.
Use the default panorama for lighting and reflections.

Render progress options
Denoising utilizes Intel Open Image Denoise (OIDN). When active, denoising is applied to Redshift beauty renders displayed in the canvas viewport and selected AOV Denoising passes.
ZBrush Redshift Denoising works with progressive rendering.
When Progressive Rendering is turned off, Bucket Rendering is enabled and the quality is determined by the Render Quality slider setting.
When turned on, the render will be shown progressively increasing in quality. The final quality of the render is determined by the Progressive Iterations slider.
If Progressive Rendering is turned off, then Bucket Rendering is enabled. The render will appear as a sequence of squares, rendered at final quality. The quality of Bucket Rendering is determined by the Render Quality slider.
When Progressive Rendering is turned on, the final quality of the render is determined by the Progressive Iterations slider. The higher the number of iterations, the better the quality.
The Primary GI Engine Quality sets the primary global illumination engine used by Redshift.
A setting of 0 disables the primary GI engine and the associated GI Rays (Brute Force Rays) parameter. A setting of 1 activates the Brute Force engine used for global illumination rendering with Redshift.
The Brute Force engine produces the most accurate global illumination results in Redshift and may produce more noise at lower GI Rays (Brute Force Rays) parameter values. Increase GI Rays and utilize Denoising to reduce the amount of noise.
The Secondary GI Engine Quality sets the secondary global illumination engine used for all indirect lighting bounces after the first. Set the Primary GI Engine Quality to 1 (Brute Force) to use the secondary GI engine.
A setting of 0 disables the secondary GI engine and the associated GI Rays (Brute Force Rays), Retrace Threshold, and Samples Per Pixel parameters.
A setting of 1 activates the secondary Point Cloud engine (Irradiance Point Cloud cache), which helps make the primary Brute Force engine faster, cleaner, and more efficient for difficult lighting situations.
A setting of 2 activates the Brute Force engine and associated GI Rays (Brute Force Rays), which are used for all indirect lighting bounces after the first.
GI Bounce (Trace Depth) specifies the total number of indirect lighting bounces.
If GI Bounce exceeds 1, the chosen Secondary GI Engine will be used for all bounces 2 and up.
GI Rays (Brute Force Rays) defines the number of rays to shoot per pixel.
A higher setting produces cleaner results at the expense of render time.
Sets the quality of the preview material icon inside ZBrush before rendering with Redshift. A lower number will increase speed when rendering and reduce quality. Increasing the value of the slider will increase the quality while increasing the update time.
Sets the size of the preview inside ZBrush before rendering with Redshift.
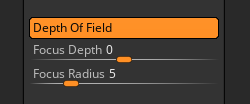
Depth of Field settings
When the Depth Of Field button is enabled, Redshift will render depth of field.
Focus Depth sets the point at which the model is in full focus. You can click+drag from the slider to the model.
Focus Radius sets how quickly the model becomes blurred.
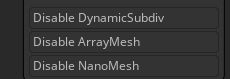
Subtool Disable options
In order to speed up test renders there are three options to disable functions for visible subtools.
Disables Dynamic Subdivision for visible SubTools.
Disables ArrayMesh for visible SubTools.
Disables NanoMesh for visible SubTools.
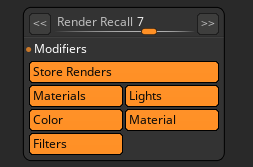
Render Recall section
Render Recall allows you to scroll through previous renders and recall their settings. What is recalled can be set using the options. This makes it easy to reuse a favourite material or light setting with your current render.
Important Note: Although you will see the previous render it is only the settings that are recalled. If a different model was used then this isn’t reloaded.
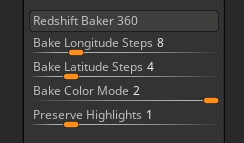
Redshift Baker settings
Redshift Baker enables you to bake the current Redshift render materials into a model as polypaint. The mesh is rotated a number of times and the material color averaged for each polygon.
Press the Redshift Baker button to start the baking progress
The number of Longitudinal rotation steps the baker will make. The total steps will be Longitude and Latitude steps multiplied together.
The number of Latitudinal rotation steps the baker will make. The total steps will be Longitude and Latitude steps multiplied together.
The Bake Color Mode slider controls the average of two separate projections. Bake Color Mode works best with materials with reduced specularity or shine.
The Preserve Highlights slider controls the affect of brighter colours being applied to your model for the baking process. Slight variations in lighting may result in a dimming of specular highlights. This slider gives greater weight to brighter colors and specular quality is retained. The higher the value the greater the weighting.

Some of the new Redshift materials
New Redshift Materials are provided in ZBrush so that you can get the best out of Redshift. Each material has a set of modifiers which can be adjusted allowing you to tweak the settings and create new materials. Your materials can be saved an reloaded just like ZBrush standard materials.
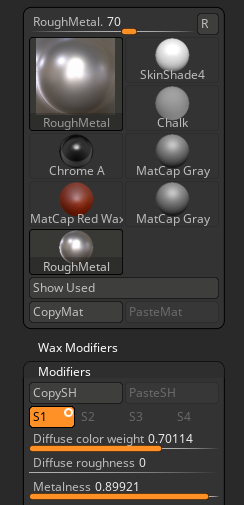
Redshift RoughMetal material selected with some modifiers showing
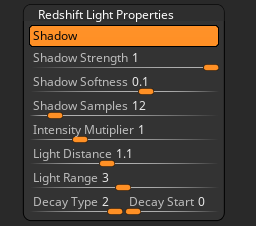
The Lights palette has a new section for Redshift Light Properties.
Turn Shadow on or off per Light.
Strength – full black or degrees of gray.
Softness – sharp edge or soft edge.
Shadow Samples
Intensity Multiplier
Distance – how far the light is from the object
Range – how far the light will reach
Decay Type – power of 2 or linear
Decay Start

The Background section of the Light palette has some Redshift options.
The Redshift Exposure slider affects Redshift only so it can be set differently to the HDR Exposure. This can be used to create dramatic effects – for example, the background exposure can be quite dark but the model fully illuminated.
The Redshift HDR Shadows slider affects Redshift only so it can be set different to the HDR shadows.
In the Tool>SubTool>Redshift Properties section is the Smooth Surface button. This option allows you to tell Redshift to smooth the surface at render time. It can be set per subtool. This is designed for making low resolution and faceted meshes look good, so don’t use it with high resolution meshes! The setting can be turned on for all visible subtools by using the Apply Last Action button.