Step into the future of product development and manufacturing with the awesome power of ZBrush and the 3D Print Hub plugin.
Open up to a world of 3D printing. Extend your design concepts beyond the confines of your computer screen. Pixologic’s ZBrush supports all major 3D printing file formats including STL (stereo lithography), OBJ and VRML. STL files are the standard files used to output your ZTools as physical objects. The VRML file format takes this one step further by providing support for UV’s, textures and PolyPaint, giving you the ability to print in color. In addition to these, you get the versatility of OBJ file support.
Take your digital designs from photo-real, to desktop-real!
Main features
-
- Export in STL, Binary and Ascii.
- Export in VRML.
- Size in Inches and millimeters.
- Export the current or all the SubTools.
3D Print Hub in 5 Steps!
Using this plugin is very easy and can be done by just pressing few buttons!
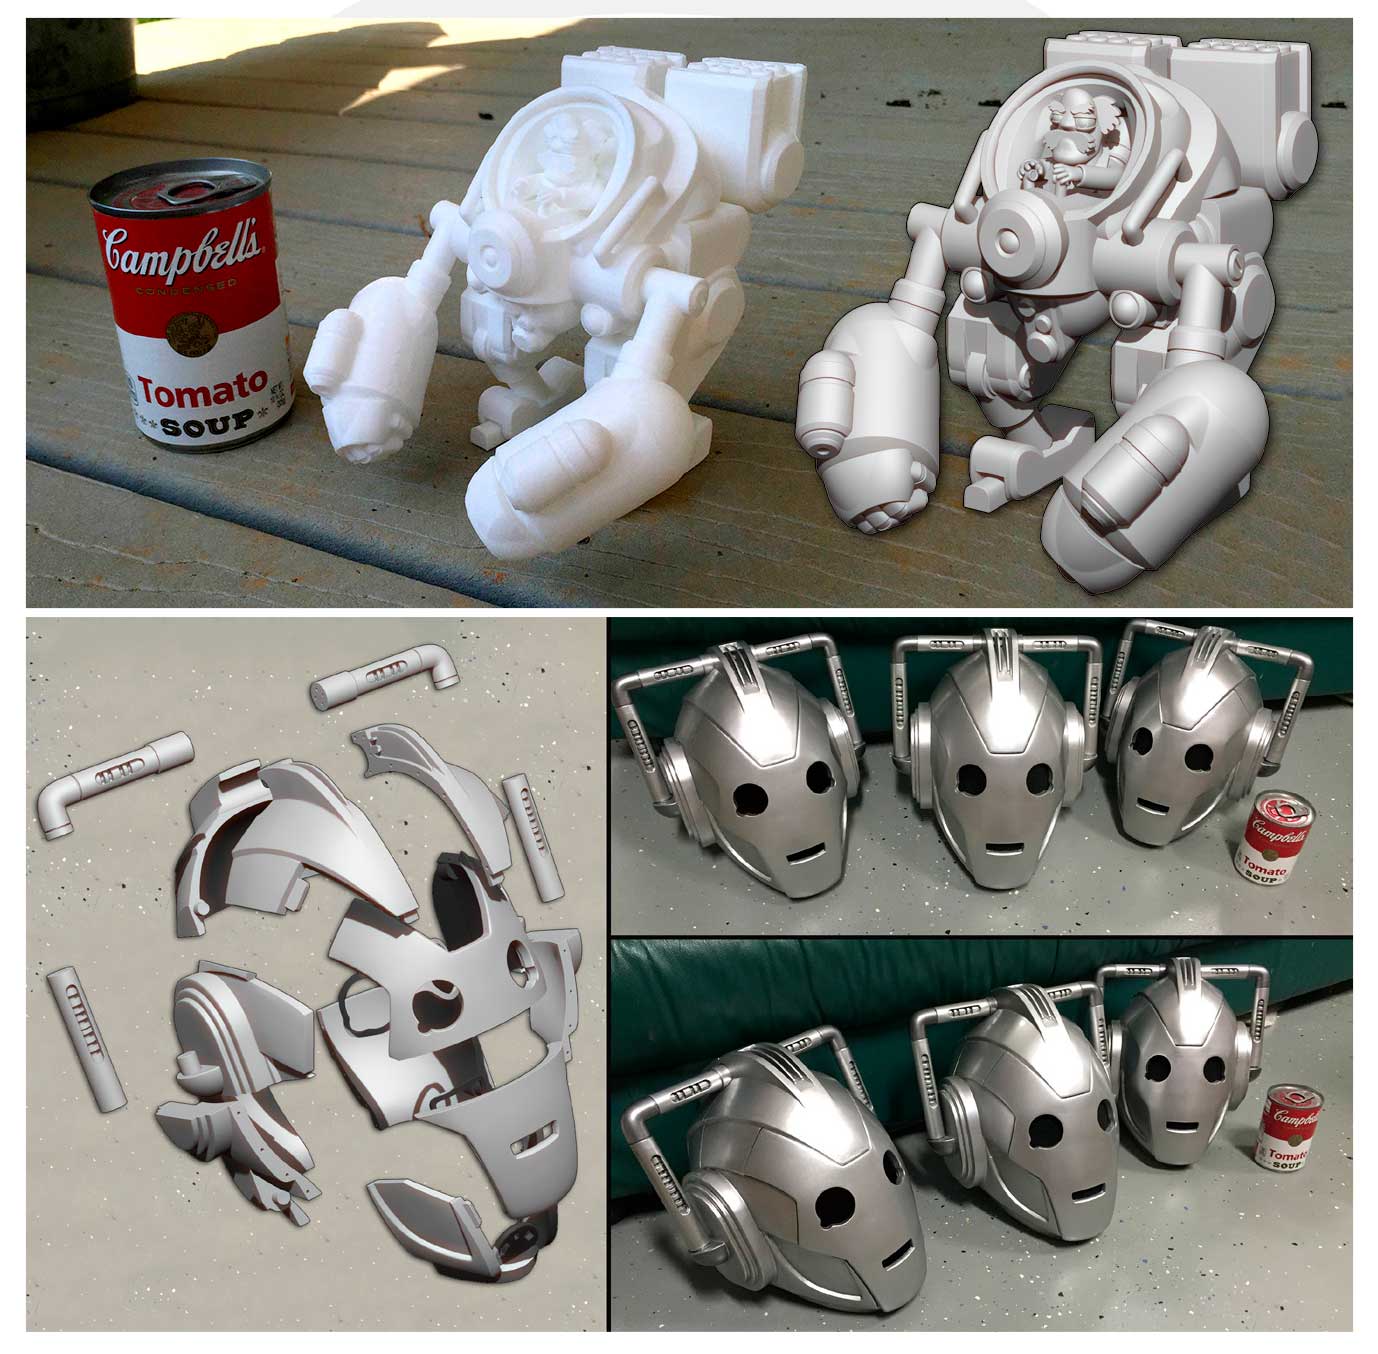
Before beginning you will need to load a ZTool to export, such as the Demo Soldier.
This Tool must be a PolyMesh 3D. If your model is a Primitive or a ZSphere model, you
need to convert it first.
With your model selected, open the ZPlugin >> 3D Print Hub menu. Let’s start!
- Click the “Update Size Ratios” button to capture the ZTool’s bounding box size.
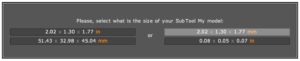
- A window will appear with several size settings. Choose the one which best fits your model size, scale and units (millimeters or inches).
- Change one of the three sliders to define the size of the object to export. The values here will depend on the units chosen in Step 2.
- In the Export options, choose if you would like to export all SubTools, only the visible SubTools or just the currently selected SubTool.
- Finally, click the file format that you wish to export: OBJ, STL or VRML. You can also click the appropriate link to open the model in the compatible target application of your choice, like Preform for Formlabs 3D printers.
It’s done!
Of course, you can modify the different settings and options available in the “Size options” and “Export options” to fit your needs.
Preparing the Model
If you want to have your model printed in 3D, you should check several things prior to using 3D Print Hub. Please be aware of these items in order to avoid complications during the printing process.
-
- The 3D mesh must be watertight. That means that there can be no open holes to the interior. Put another way, if you were to temporarily remove the top polygon in the model and pour water in, there wouldn’t be any holes farther down that the water could leak out of. If there are any holes, you must fill them prior to exporting. Examples would be the eyes, nostrils, mouth, etc.
- The Normals of your object(s) must be unified and oriented out. Flipped surface Normals may create unexpected results.
- Some printing companies or machines may not support the high resolution meshes that ZBrush is capable of creating. In this case ZBrush can generate too many triangles for the final model to be loaded by the printing company’s equipment. If your model exceeds the polygon count support by your printer, use the Decimation Master plugin to optimize your model and reduce the polygon count without sacrificing details.
- Do an overall check of your model to ensure that everything can be printed. You may not find all the problems but you can avoid some of them. Your printed models will follow physical laws: For example, you can’t create a floating character that has nothing to support it.
- Your model will also be restricted by some printing limitations. Even if the printer can create very accurate details, some elements can still become very hard to clean up after the printing process or may become very fragile. An example of this would be thin ropes that hang from the figure.
- The final cost of your model may vary depending on various elements — even for the same model. An important part of the price is dependent on the printing material and the printing time. If you cut your model in several parts and/or if you hollow out your objects to reduce the overall volume of your model, the price and printing time will be reduced. This means that extra preparation on your part can give you a bigger printed model for the same price as a smaller piece without that effort. Some printing companies can also offer you this service and the amount that you pay them for it can be more than offset by savings on the final print. Contact the company for more information.
- The 3D mesh must be watertight. That means that there can be no open holes to the interior. Put another way, if you were to temporarily remove the top polygon in the model and pour water in, there wouldn’t be any holes farther down that the water could leak out of. If there are any holes, you must fill them prior to exporting. Examples would be the eyes, nostrils, mouth, etc.
The Exporting Process
The export process is quite easy but needs to be done in separate steps. For most of the basic and simple usage, you only have to modify a very few settings and can ignore the advanced options. Even if you do need to use the advanced options, you will still need to first set or change the basic items.
The 3D Print Hub plugin with its tools
1. Updating the size information
To accurately set the size of your model and export it to the correct scale, you must tell ZBrush what the ZTool’s real-world measurements actually are. This is done by updating the size information for your loaded ZTool. This step must be done for each model you will export.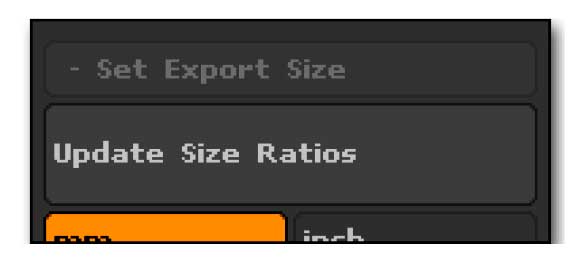
Simply click the Update Size Ratio button to update the size of the loaded ZTool. This action will open a window which will let you choose the scale of your model. It also provides alternatives for the model’s size and your choice of units. ZBrush does not natively work with units. For this reason, even if you have set TransPose Units and are working with accurate proportions, ZBrush doesn’t know whether you are using inches or millimeters.
This dialog box lets you choose between four solutions which mix the unit and the scale in what is basically a 2.54 ratio between mm and in. By selecting the size which is close to your target size, you will help the plugin to start with the most convenient size values.
The computation of the size/scale is based on the advanced options found in the Size Options section. If the option “Use size of the selected SubTool” is enabled, the size of the whole model will be based on the selected SubTool and all the other SubTools will be scaled accordingly. If this option is disabled, the bounding box will be computed from all visible SubTools as if they are a single model. (Hidden SubTools are always excluded.)
Please read the Advanced options section for more information.
2. Set the Unit and Size
In this step, you specify the dimensions of the exported model and whether that size is in inches or millimeters. This value applies to the entire model, including all visible SubTools.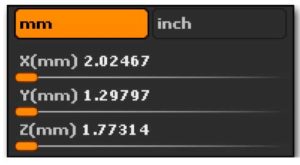
- Set the units for export by clicking on the button of your choice: “inch” for inches
and “mm” for millimeters. This option is available in case you wish to change the units
after having used the Update Size Ratio function explained above. - Move one of the sliders to change the size of your object. When releasing the slider, the two other sliders will automatically be updated.
3. File Format and Exporting
When all your basic options have been set (and any advanced option), the last step is to choose the file format you need: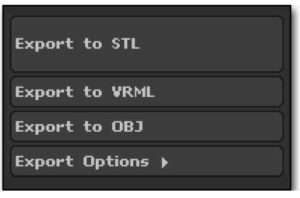
-
- STL: This is the standard file format for 3D printing. By default, only vertices are exported which are then displayed as triangles when the file is opened. Using the Advanced Options, vertex color (PolyPaint) can also be exported.
- VRML: This file format is best when you need to export a model which has UV mapping and a texture applied to it. This format is ideal for use in color printing. If you only have PolyPaint, check with the printing company to verify that they can support vertex RGB. If they can, activate PolyPaint in the Advanced Options. Otherwise, assign UV mapping and convert the PolyPaint to a texture.
- OBJ: This file format is the most common one in the 3D industry. Most 3D printing companies will accept it and therefore it can be a good alternative to the VRML file format. The OBJ format only supports textures; not vertex color/PolyPaint.
- STL: This is the standard file format for 3D printing. By default, only vertices are exported which are then displayed as triangles when the file is opened. Using the Advanced Options, vertex color (PolyPaint) can also be exported.
Clicking one of these buttons immediately opens a system dialog box so that you can name your file and specify where it and any corresponding textures will be saved. When the export process is completed, a note will be displayed on-screen to let you know it was successful.
4. Exporting to a 3rd party 3D printer
3D Print Hub includes a mechanism for sending the 3D model directly to the printing software provided by certain 3D Printer manufacturers. This functionality will export the model at the set size, automatically opening the target software and loading the file into it.
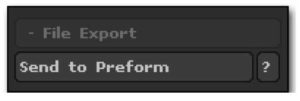
For most uses, this process makes the 3D printing export process truly seamless.
Preform and Formlabs printers
Preform is the software from Formlabs which manages their 3D printers: Form1, Form1+ and Form2. Using the function Send to Preform will automatically:
-
- Launch Preform
- Fix your model’s topology if needed
- Launch the one click print functionality
Of course, you can override the one click functionality and take the full control of the printing process.
To learn more about Formlabs and Preform, visit their website.
5. STL import
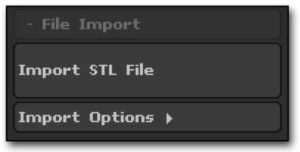
3D Print Hub can import the STL file format, which is commonly used by 3D scanners. This allows you to import your scan data for use in ZBrush, as well as loading your STL files back into ZBrush.
When clicking on the STL Import button, a system dialog box will open so that you can browse your hard drive and select the desired STL file. ZBrush will then import the model. If another 3D object is currently in Edit mode, ZBrush will replace that model with your imported model — just like it does with the default Import process.
ZBrush will retain a record of the model size from the imported model, but it has no information about the units used in the software that generated the model. If the model was 10mm width in the original software, it will become 10 “units” in ZBrush.
Advanced Options
3D Print Hub includes several advanced options allowing you to fine tune your imports, size settings and exports. It is strongly advised to look at these settings as in some cases you may need to make use of several of them. For example, if you need to scale a figurine based on the size of its base.
To display these settings, click the Import, Size and/or Export options buttons. You must modify these settings prior to clicking the desired main action.
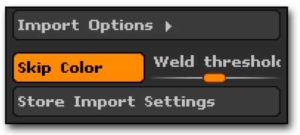
1. File Import Options
-
- Skip color: This option will ignore any color information included in the imported STL file. Only a few programs support exporting color as part of an STL file, so this option is enabled by default.
- Weld Threshold: This option will automatically weld all the imported model vertices which are very close to each other in 3D space. The STL format doesn’t have welded polygons, which means that when the file is imported, the vertices must be welded to produce a watertight mesh and clean surfaces.
The default setting will work for the vast majority of imported models but one very rare occasions you may need to increase or decrease the value. - Store Import settings: This option will save a configuration file containing the current Import settings for future uses of the 3D Print Hub plugin. This is convenient if you always need the same settings for all your 3D model imports.
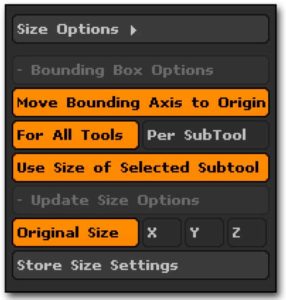
2. Size Options
-
- Move bounding box axis to origin: Move the origin of the bounding box for the exported 3D object (even if the object is comprised of multiple SubTools) to the 0,0,0 location.
- For all SubTools: All SubTools will be moved to the new Origin location, while retaining their positions relative to each other. This is the default option when using the Move to Origin feature.
- Per SubTool: When enabled, all SubTools will be individually moved to the origin location and scaled to fit the bounding box size.
- Use the size of the selected SubTool: Defines the size of the bounding box based on the currently selected SubTool. All other SubTools will be resized relative to this one. This option is convenient if one item must have an exact predefined size – such as a support object, in which case all other parts need to be resized according to the support.
- Original Size: This option will only work for a model that has been imported into ZBrush. Enabling it instructs ZBrush to use the original dimensions of the model as they were set by the source program. In this case, 3D Print Hub will ignore the size dimensions specified in the basic settings.
- X, Y and Z: Enable one of these to keep the ratio constant based on the specified axis. The sizes for the other two axes will be recalculated.
- Store size settings: This option will save a configuration file containing the current Import settings for future uses of the 3D Print Hub plugin. This is convenient if you always need the same settings for all your 3D model exports.
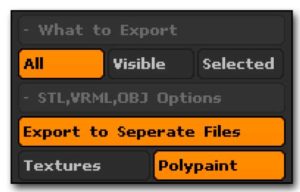
3. Elements to Export Options
-
- All: When enabled, all the SubTools are exported, including those which have been hidden.
- Visible: When enabled, only the visible SubTools are exported. Non-visible SubTools won’t be exported.
- Selected: When enabled, only the current SubTool is exported.
- Export in separate files: When enabled, each SubTool is exported as a separate file (OBJ, VRML or STL). When disabled, all visible SubTools will be exported as part of a single file.
- Textures: Exports any textures on the SubTools using the Texture Format. (See next section.) Only the VRML and OBJ file formats can export textures.
- PolyPaint: Exports any vertex color painting information (PolyPaint) on the SubTools as part of the saved file. Only the VRML and STL file formats can export vertex painting.
4. Texture Format Options
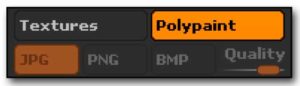
Image file size can be important with some printers. It is critical to choose a texture file format that will fit your printer’s limitations.
-
- The JPG, PNG and BMP buttons are used to specify the image format which will be used when 3D Print Hub needs to include any textures that are applied to the SubTools.
- JPG provides a destructive compression (data and quality loss) but has a very small file size.
- PNG provides a non-destructive compression. It produces files larger than with JPG but a lot smaller than that of uncompressed formats.
- BMP provides uncompressed images with no quality loss, but produces very large files.
- Quality: This setting is used only when the JPG file format is selected. It specifies the amount of compression. Values under 60 will see significant image degradation.
5. STL Export Options
These options are specific only to the STL file format.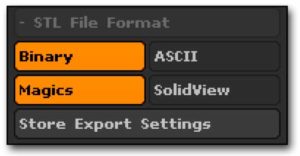
- Binary and Ascii: Save your STL file as a clear text (ASCII) file or in binary format. Binary format results in a smaller file size and is the default setting since almost all printing companies and software can read the binary format.
- Magics and SolidView: These options set the way vertex color information is written within the STL file format. Please check your other 3D packages or with your printing company to determine which file formats they support.
- Store Export settings: This option will save a configuration file containing the current Import settings for future uses of the 3D Print Hub plugin. This is convenient if you always need the same settings for all your 3D model exports.
For a PDF of this documentation, see 3D Print Hub PDF.