Shapes Hierarchy
Just like with text, in order to work with Vector Shapes in Autograph, you have to use the Shapes Generator.
This Generator is a container specially designed to create and combine all types of vector shapes, whether they are drawn manually or produced by Generators.
Differences with Shape Layers in After Effects
To keep things simple, we'll use the term Shape Layer here; however for those migrating from After Effects where a Shape Layer is a very specific type of layer, note that in Autograph it's no different from any other layer using a Generator.
Like all Generators, a Shape Generator is designed so that there is no quality degradation with multiple transformations. You can also substitute its source with any other Generator or connection to a reader:
Bear in mind that changing the source to another one will destroy all Shape Generator content.
Creating Your First Shape Layer:
One way of adding this Generator to a new layer is to click on the "+" button at the top of the Timeline and select Shapes. Note this will only add the container, without any content.
To also draw a Vector Path and add a Style to this container, use the Shape Tool.
Shape Tool
The Shape Tool can be selected from the vertical toolbar in the Viewer, but you can also press the d key, like Draw.
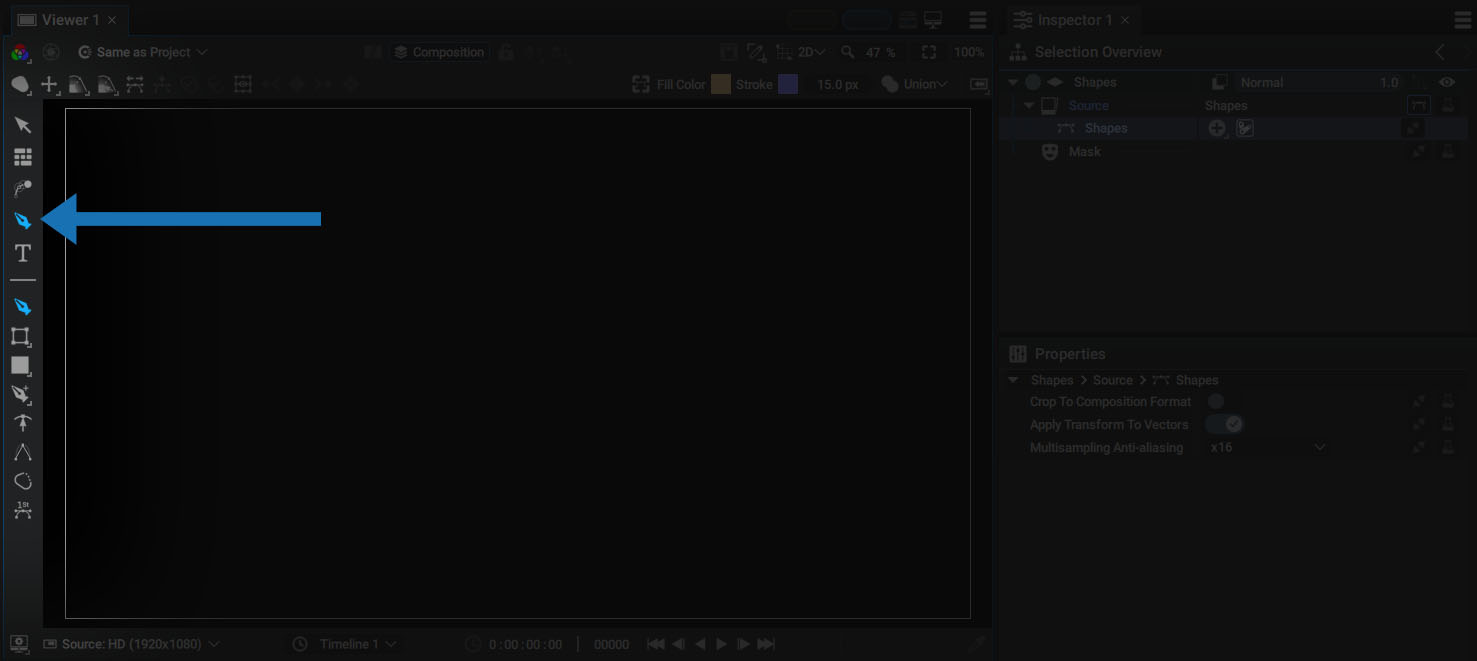
Switching to this tool will also display several Sub-Tools in the lower section of the vertical bar.
With the first sub-tool active and a new, empty composition, we'll start to draw a Bézier curve in the Viewer:
- Quickly and repeatedly clicking the mouse without moving it will add new points without adjusting tangents
- Holding down the mouse button each time you add a point will define the tangent position
Shape Generator Hierarchy in the Selection Overview
Having created this first Shape, let's take a look at how the various elements appear in the Inspector.
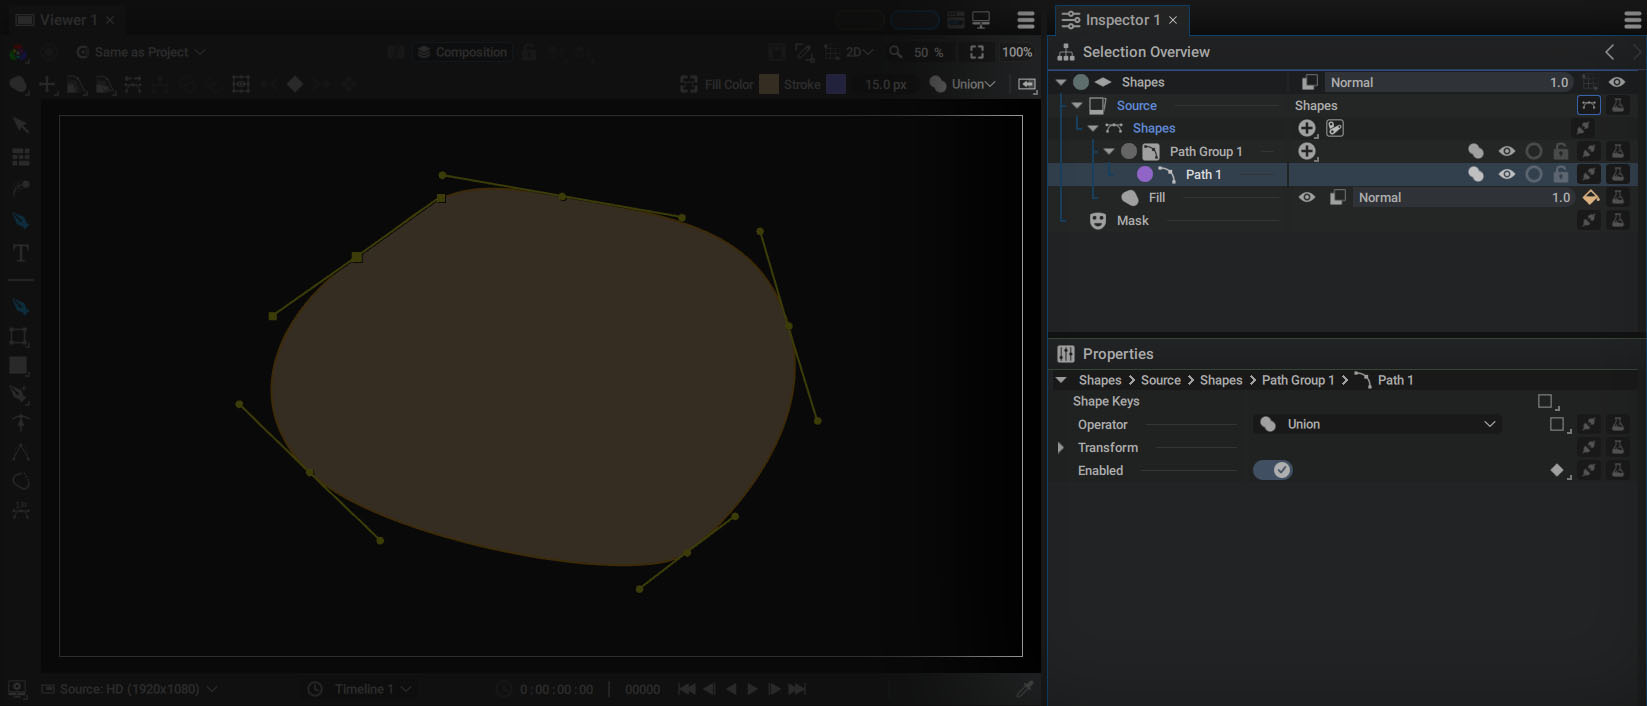
- By clicking in the Viewer with the Shape Tool, a new layer, Shape 1, will automatically be created
- The layer's Source will then be connected to a Shapes Generator
- Path Group 1 will be created in this container
- Path 1 which is the drawn curve, will be added to Path Group 1
- A Fill Style, which has automatically been added, will draw this shape on the screen
Many elements have been added in a single action, and we'll detail them all as we go.
But first, we'll clarify some of the terms used:
- Path: a path is a series of connected points producing an open or closed curve, called a Vector Path
- Path Group: a group containing several Paths in a single container, both for better organization and to create complex Boolean operations
- Style: a module that draws one or more Paths, filling in the interior or drawing contours, for example; several Styles can be applied to the same Path(s)
- Shape: the name given to the combination of a Path and a Style
A Path cannot exist outside of a Path Group. This is why these two elements are automatically created as soon as the first point is added.
Shape: A Combination of Paths and Styles in a Specific Order
A Vector Path defines a curve made up of interconnected points. Curvature at a point is controlled by two tangents, one before the point and one after.
- The further these tangents are from the point that carries them, the greater the curvature arc
- On the other hand, if these tangents have a length of zero, the curve forms an angle at this point

As demonstrated above, holding down the mouse button when using the Shape Tool lets you control this tension while drawing a Path. But this Path contains no information on how it should be drawn. For the moment, these are simply vector instructions that define the curve. To draw this Path, it must be followed by one or more Styles.
In the example we used at the start of this chapter, a Fill Style was automatically added so that you could see something.
Importance of Operation Order
When describing the available styles, we used the term “followed”. This reflects the importance of the operation order.
The Selection Overview is the panel you'll refer to all the time when working with the Shapes Generator. It'll help you organize your work, but also to quickly visualize the flow of operation.
These operations are always read from top to bottom:
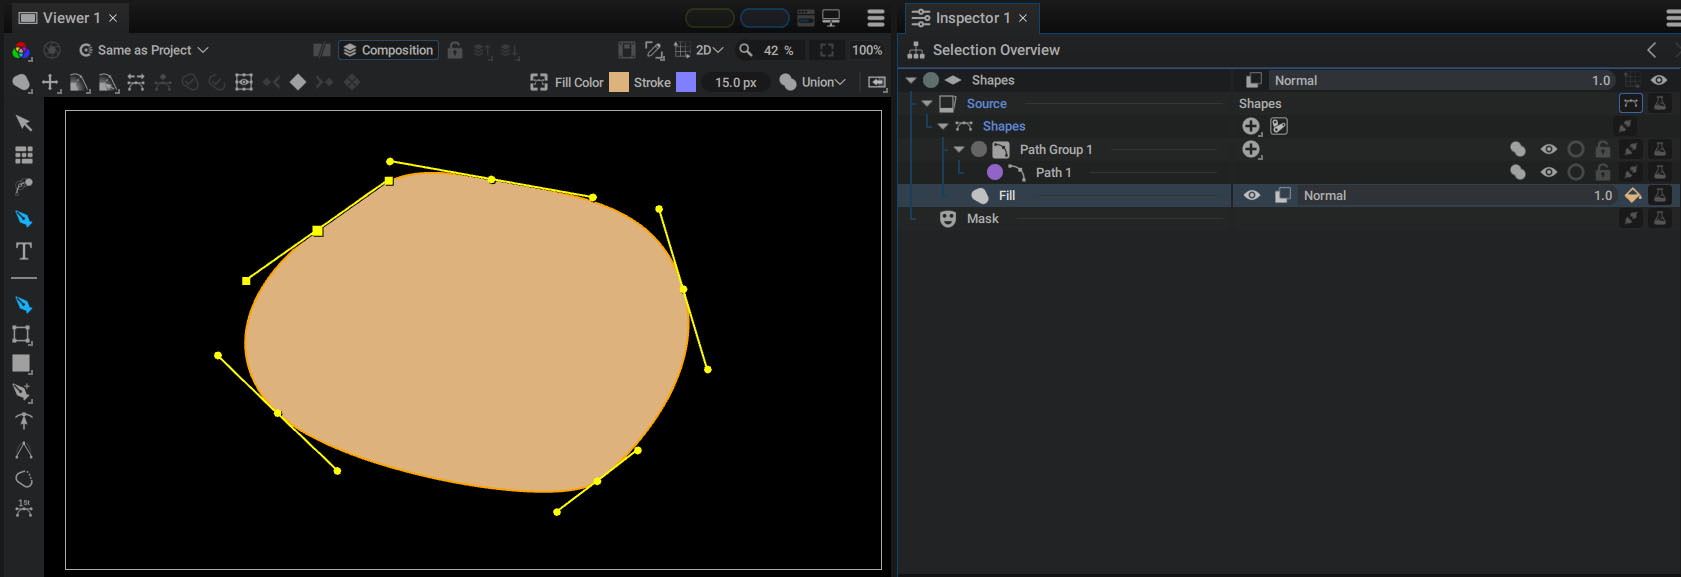
- Path Group 1 is created
- Path 1, contained in Path Group 1, will define a curve
- Fill 1 will draw the curve(s) defined above in the tree by filling them with a solid color
These items can be reordered to change the Generator's rendering:
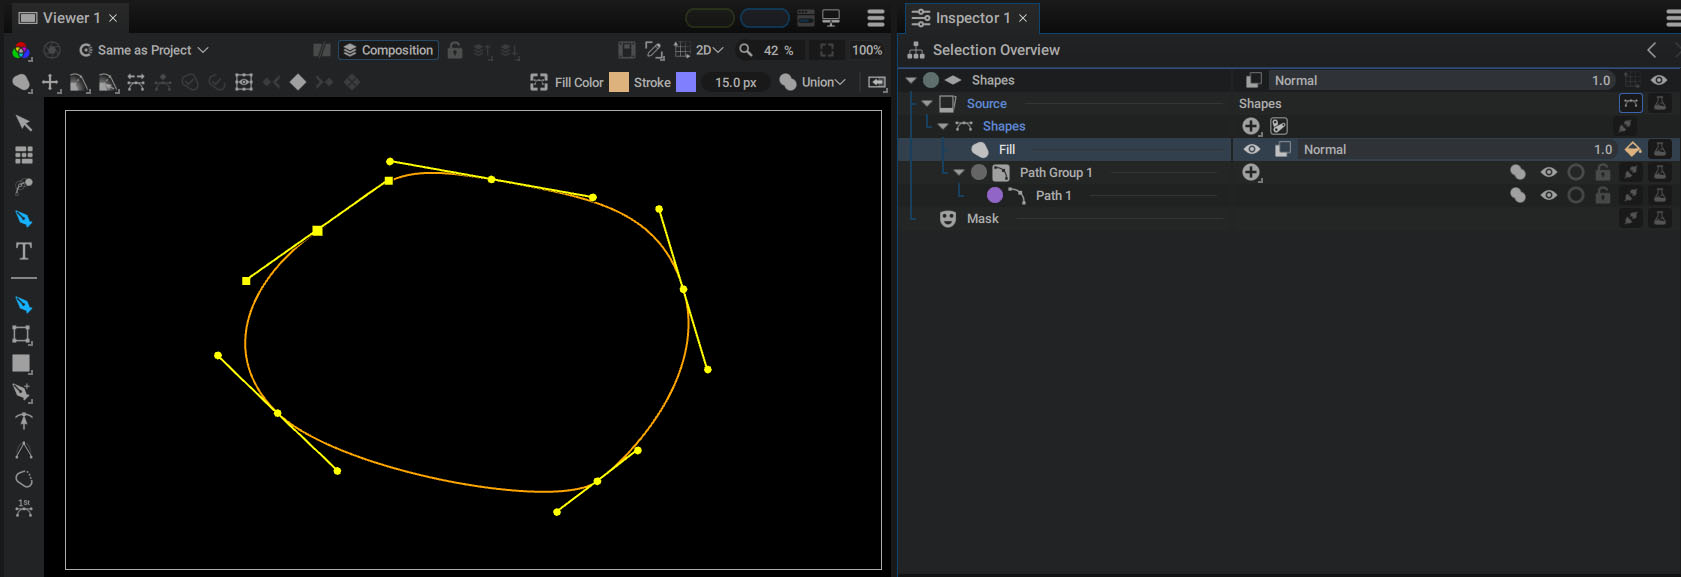
If you drag Fill 1 over Path Group 1:
- The Fill Style will search up the tree for Paths to draw, but without success.
- Then Path 1 will define a curve, but no there will be no Style to draw it.
It's important to understand this logic of successive actions when rendering your shapes.