The Project Panel
The Project Panel is where you can create, import and manage all of your project items.
The top of the Project Panel contains:
- A bar for navigating the structure of your project, usable only in Grid Mode (see below)
- An item creation bar to add to you project a new Composition, Audio Mix, Connected Composition and Audio Mix, 3D Scene and Directory (from left to right)
The Project Panel is where you can create/import compositions, Audio Mixes, images, video/audio files, 3D assets, 3D scenes, tables, linked projects, and fonts.
It features two display modes, Tree and Grid, which can be accessed via the button at the top-right of the panel.
Tree Mode
This mode organizes projects in the form of a tree, displaying all project contents by unfolding each sub-folder.
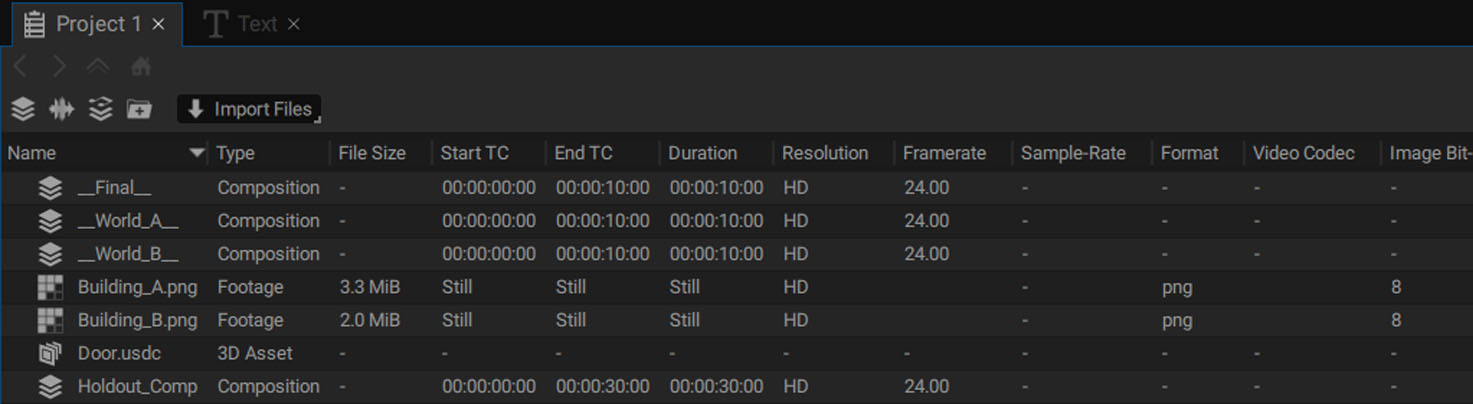
Following the item names are several columns indicating:
- Item type: composition, folder, 3D scene, footage, etc.
- Start and end timecodes and duration of animated items (movie or image sequence)
- Resolution: in pixels or using one the available format presets
- Frame-Rate: for animated items
- Sample-Rate: for audio items or video items containing at least one audio track
- File format: .exr, .jpg, .png, .mp3, .ac3, .aac, .flac, etc.
- Image Bit-Depth: such as 8bpc, 10bpc, 16bpc, and 32bpc
- Audio Channels: stereo, 5.1, 7.1, etc.
- Audio Bit-Depth: 16-bit, 24-bit, 32-bit, etc.
- Audio Codec
By clicking on the column header, you can change the item sorting order. By default, items are sorted by name.
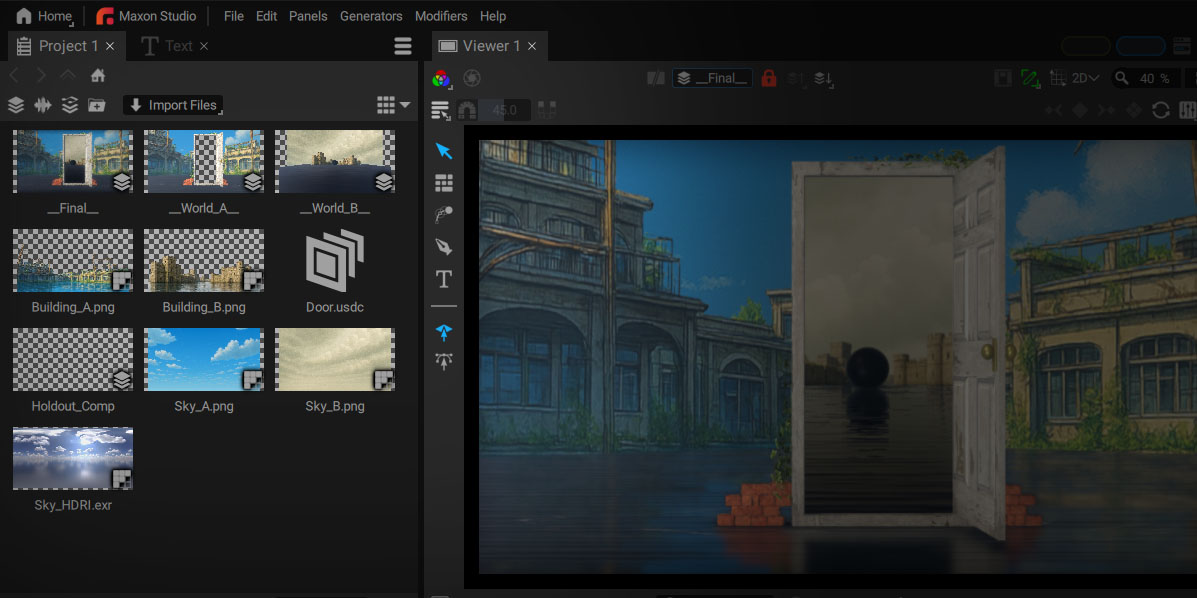
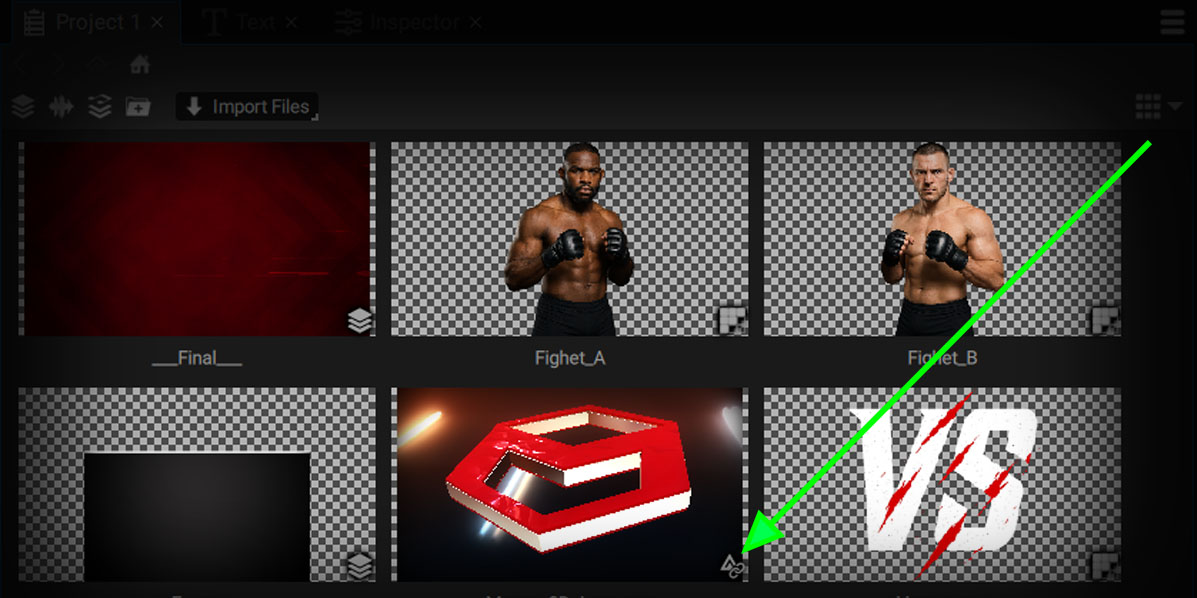
Grid mode
Each item in the current directory is shown as a thumbnail.
The navigation bar at the top allows you to:
- Go back or forward in the browsing history, using the first two arrows
- Move up one level in the hierarchy
- View each folder nested up to the current location using the house icon; you can also click on each folder to access it

The triangle arrow button to the right of the Grid icon will open an options box with the following options:
- Zoom Level: defines thumbnail size in pixels
- Sort by: defines how elements are sorted (by name, duration, creation date, resolution, etc.)
- Sort order: Ascending or Descending
Creating folders and organizing your work
To create a new folder, click on the + folder button at the top of the panel:
- In Tree mode, the current selection defines where the new folder will be create.
- In Grid mode, the new folder will be added to the current folder.
Moving items into folders
In Grid Mode
You can click and drag any item into a child folder and then double-click on it to go inside.
The top navigation bar displays the current folder and its position in the path.
To move items into a previous folder, simply drag them on the bar to bring them back to another parent folder or the project root.

In Tree Mode
This mode gives you a global view of your entire project, especially when all the sub-folders are unfolded.
Simply drag and drop the files to reorganize your project.
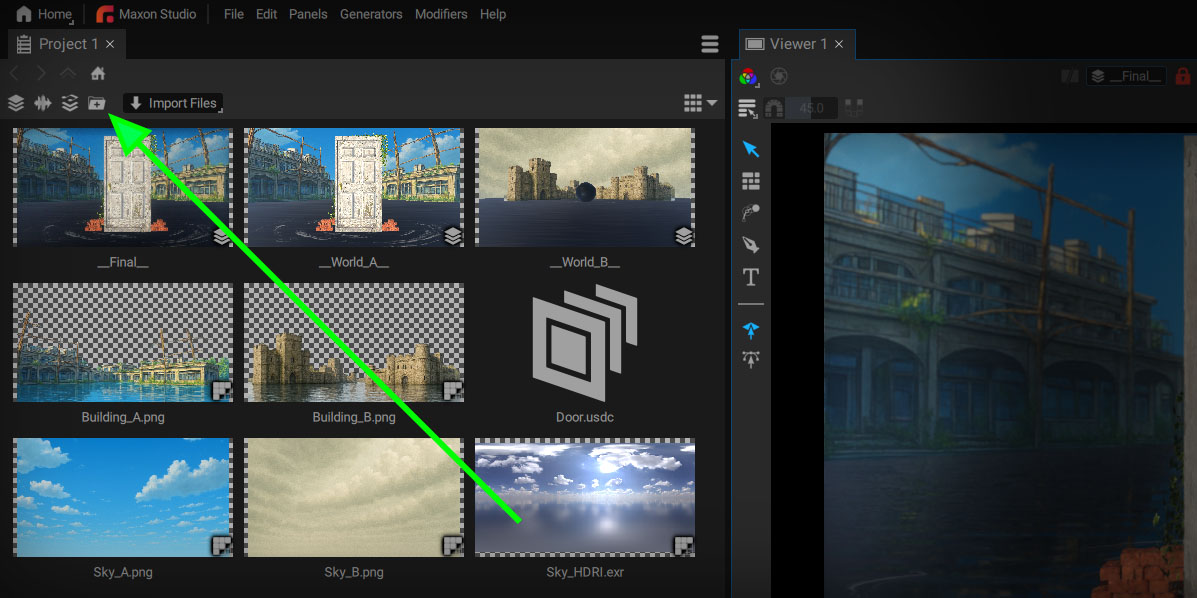
Importing items into the Project Panel
To import an item:
- Click on the Import Files arrow button at the top of the panel and select the element you want to add
- Press ctrl / cmd + i to import images, image sequences, movies, and audio files
- Double-click in the empty area of the panel to open the File Browser
- Right-click in the empty area to bring up the Import Files menu
- Drag And Drop any file from your system browser to the Project Panel.
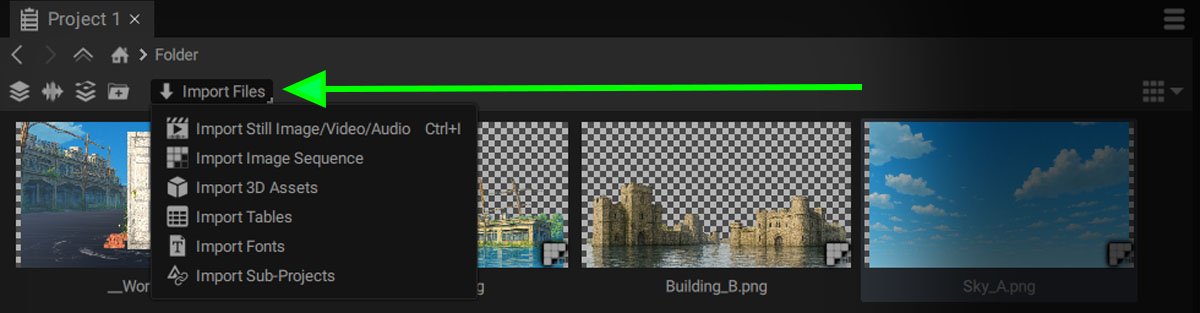
- Add Image Sequences or Videos: connects to video, raster/vector images, and image sequences
- Add 3D Assets: connects to .usd, .gltf/.glb, .fbx, .obj files
- Add Tables: connects to a .csv file
- Add Fonts: connects to a .ttf or .otf file, to use a font that isn't installed on your system
- Add Sub-Projects: connects to another Autograph project and references any of its compositions
Connecting versus importing
We've used the term import but technically the term connect is more accurate.
Connecting means that:
- Any external modification made to these items will automatically update the data Autograph uses - whether these items are images, 3D scenes, numerical data, or textual data.
- The project refers to them, but does not contain them. So, for example, if you copy a small project onto a USB stick and try to open it on another device without having copied the external resources as well, the project will be incomplete.
To retrieve all of these items, use the Collect Files in Project option.
Linking to another Autograph Project
Connecting to compositions in external projects
To facilitate collaborative work, an Autograph project can reference compositions contained in other Autograph projects.
For example, one artist can focus on removing the green screen from behind an actor, and another artist can work on reintegrating it into a virtual set.
The first artist can save their project without having to render their work. The second artist can then connect to the first artist's project in order to use the composition containing the actor without the background.
As previously mentioned, the goal is to connect to another project and not to import it. Any modifications made to the project containing the actor will automatically be reflected in the project referencing it.
A referenced project will appear in the Project Panel with a link icon next to the Autograph logo.
Selecting a composition
Once connected, you just have to select this item to see the list of compositions it contains in the Properties section of the Inspector panel.
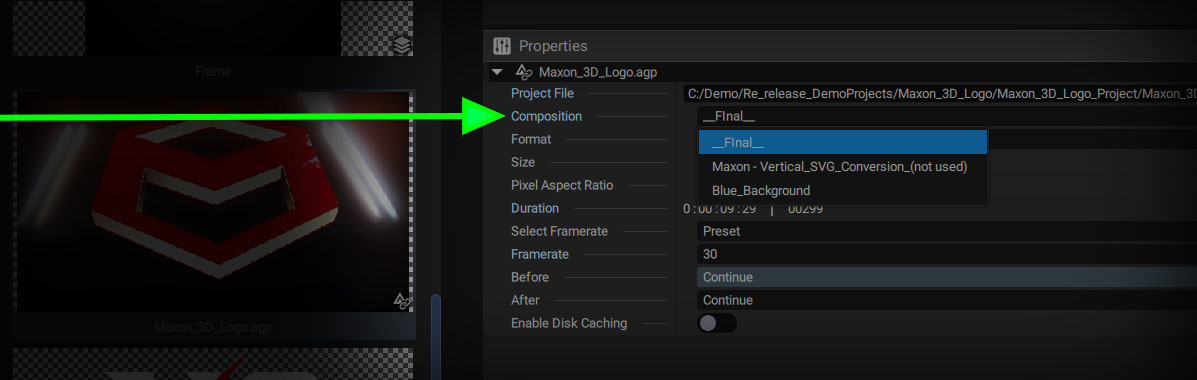
Once you've defined the composition to be rendered, you can drag and drop this linked item from the Project panel to the stack, just like any other image or video.
If you instantiate this element several times in the Timeline and want to modify some parameters for one of them, such as choosing another composition in the linked project, you must unshare the composition selector.