Table Of Contents
Introduction
The Redshift Sprite Node allows the use of texture to define the parts of a surface that are totally transparent. This can be useful to create detail on thin, low-polygon geometry. A good example of this is foliage: the leaves of a tree can be modeled as quads, but the shape of each leaf can come from a black and white texture. The alternative solution would be to model the shape of each leaf with triangles/quads but that could require a lot of effort and would occupy significant memory resources.
In Redshift, apart from the sprite node, one could achieve the same result by simply connecting a texture to the shader's transparency port. In the case of the architectural shader, one could connect a black and white texture to the shader's 'opacity cutout' port.
However, both of these alternatives can be problematic:
- They can reduce the performance of the renderer. When a ray hits a polygon, Redshift has to execute certain operations to read the texture, setup the next transparency/refraction ray, etc. These operations can be wasteful if the ray hits a 'totally empty' part of the polygon.
- The transparency/refraction trace depth would have to be increased in order to prevent transparency/refraction rays from being terminated prematurely and introducing visual artifacts.
The Redshift Sprite Node addresses both of these issues! First, it is optimized to very quickly skip empty parts of a polygon and with very few operations. That can yield far superior performance compared to transparencies. Secondly, it does not rely on the refraction trace depth. So, even if your max refraction trace depth was zero, the rays would still successfully go through any opacity/alpha cutouts and without any artifacts.
However, to achieve this performance, the sprite node has a couple of limitations too:
- The textures used by the sprite node occupy GPU memory and cannot be out-of-core. This means that if your scene is using many high-resolution alpha textures, Redshift could potentially run out of GPU memory. This is in contrast to all other textures in Redshift which are out-of-core and can be of any size without triggering out-of-memory issues. A 1024x1024 sprite node texture occupies 1MB of memory, a 4K one occupies 16MB of memory and so on. The number of megabytes these textures occupy is shown in the " Feedback Display" window.
- No shader node operations are permitted on the sprite node alpha texture. This means that you cannot use shader nodes to adjust the texture's look, like for example brighten or darken it. Or be able to blend multiple alpha textures together before connecting the result to the sprite node. Therefore, any modifications to the sprite node texture have to happen in your texture authoring tool.
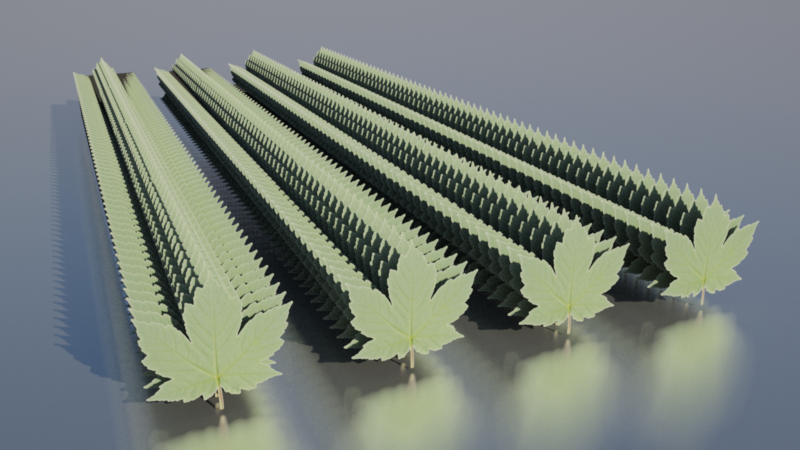
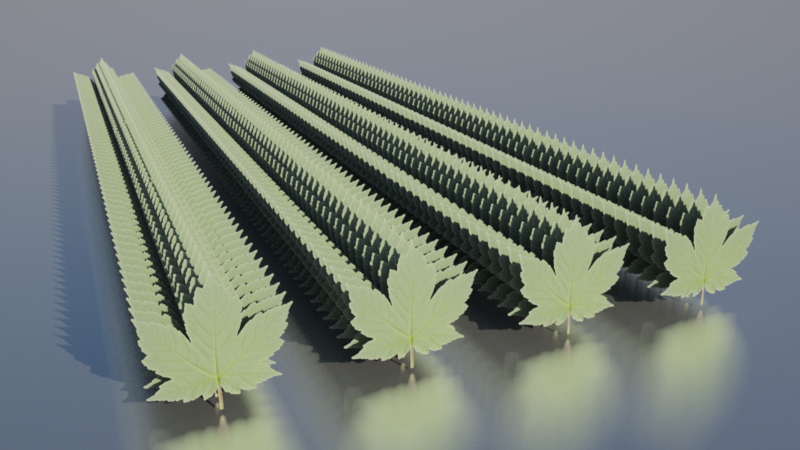
Below are two screenshots demonstrating alpha-cutout using the architectural shader's opacity cutout port and using the sprite node.
Please note that the large performance difference demonstrated below is because of the multiple stacked cards which is a pathological case. In this scene all ray types (primary, GI, shadow, reflection) have to travel and intersect many layers of alpha cutout geometry. A scene with fewer layers would yield a smaller performance benefit - but a benefit nevertheless!

Scene rendered using the architectural node's opacity cutout feature. Even with a high trace depth limit, there are still artifacts on the upper left part of the image. Also some reflections are missing between the first two rows. Rendering time was approx. 50 seconds on a low-end GPU.

Scene rendered using the sprite node. There are no trace-depth-related artifacts. Rendering time was approx. 14 seconds on the same GPU as the example above. Trace depth limits were left the same, but they are irrelevant to the sprite node.
Parameters

Shader Input
This is the shader graph to execute when the sprite is not cut-out.
Map
This is the opacity cut out texture map file.
Texture Space
This is the texture mapping space, which defines the uv channel.
Opacity Calculation
This tells the Sprite shader how to calculate the opacity value from the texture map. It can be derived in one of two ways:
- From Color Intensity ( uses the RGB channel color information)
- From Alpha ( uses the alpha channel information)
Stencil Opacity Threshold
This is the opacity cut out threshold. When the value from the opacity texture map is greater than this threshold, the material will be executed as normal. When the value is less than or equal to this threshold, the material will be cut out as if completely transparent.
Texture Repeats
This option allows you to repeat the texture map image without having to repeat the uv coordinates.
How To Use
In order to enable sprite opacity cut-out on your material, this shader node must be connected to the Surface shader material input in Softimage, whereas in Maya this connection is automatic when you assign the shader node to an object (through 'Assign Material To Selection', for example). Once it is connected it will automatically affect shadow and photon shaders too, regardless of their individual shader graph inputs.

Valid material using the Sprite node, placed at the head of the shader graph
The Sprite shader node settings must be correct in order for it to function. Here are the conditions:
- A texture map file must be assigned.
- The texture space uv channel assignment must exist in the mesh the material is assigned to.
If one or more of these conditions are not met, the sprite shader will be disabled. When there is a texture space miss-match, Redshift will also issue a warning or an error ( see below).
Warnings and Errors
Proxy Mesh
If you wish to assign a new material with a sprite node to an imported proxy mesh, it is important to make sure the texture space uv channel property that your new sprite shader will use was exported with the proxy. If the proxy mesh does not contain the named uv channel, you will see this warning:
Mesh 'NAME' is a proxy and is using a sprite shader node that is referencing a uv channel that does not exist on the original exported proxy.
Instanced Mesh
As with Proxy Meshes, an instanced mesh (or model) template must contain the texture space uv channel property that your new sprite shader will use. If the instanced mesh does not contain the named uv channel, you will see this warning:
Mesh 'NAME' is instanced and its instances are using a sprite shader node that is referencing a uv channel that does not exist."
Another more problematic situation will arise if your instanced mesh template uses a sprite shader that references a
different uv channel to the instance, but both channels exist. In this case, you will actually get the following error message and rendering will be aborted:
Mesh 'NAME' is instanced and its instances are using a sprite shader node that is referencing a different uv channel to the template. Aborting rendering.
Instanced Proxy Mesh
An instanced proxy mesh will have had its sprite node uv channel baked into it on export (if it exists and is even using a sprite node shader). So, bearing this in mind, if you instance a proxy mesh, the original proxy material must also be using a sprite node with a matching uv channel to your instance. Failure to do this will result in the following error and rendering will be aborted:
Mesh 'NAME' is instanced and its instances are using a sprite shader node that is referencing a different uv channel to the one exported with proxy template. Aborting rendering.