Forces
These two settings establish a connection between keyframe animation - or start state (without animation) - and simulation. If the two values are 0, only the simulation is effective. As soon as you increase the values, imagine a spring that is applied between the keyframe animation position and the simulation position (can be adjusted separately: Position and Rotation). The higher you set the two follow values, the stronger this spring is. At very high values, the Rigid Body follows the animation uncompromisingly and even penetrates collision objects.
This lets you create very interesting effects as you smoothly fade back-and-forth between animation and simulation.
Damping values above 0 are necessary so that the combination of keyframe animation and simulation does not tend to oscillate. With higher values, the animation/simulation appears more and more as if it were immersed in viscous oil: Rigid Bodies are slowed down and react more slowly to forces.
These two settings simulate more natural motion sequences that are generated via counter movements or overshoots created by recurring forces.
Negative values reverse the counter movements. 0 switches this effect off.
Aerodynamics
The following two parameters, Drag and Lift, give the Rigid Bodies areodynamic properties. If both of these are set to 0, the aerodynamics are switched off, i.e. Rigid Bodies behave as if they were in a vacuum (apart from Damping settings).
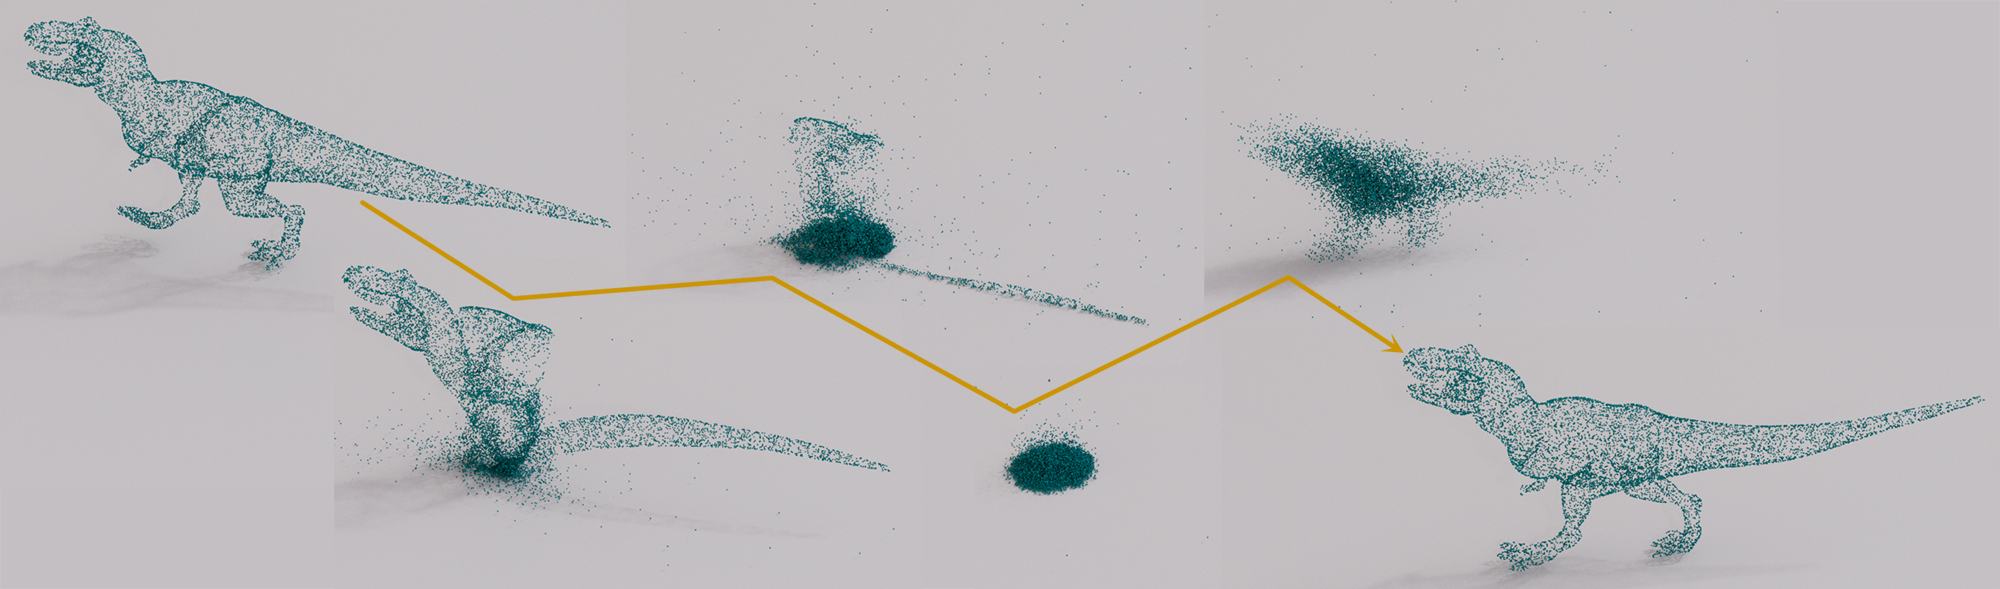
If you imagine a falling board or pane of glass in reality, it will behave differently depending on whether you let it fall horizontally or hold it vertically beforehand. In the first case, it will initially be slowed down by air resistance, while in the second case it will very quickly reach a high falling speed. In both cases, the board/glass pane will start to "sail" after a while. It is precisely these behaviors that are made possible by the areodynamic settings.
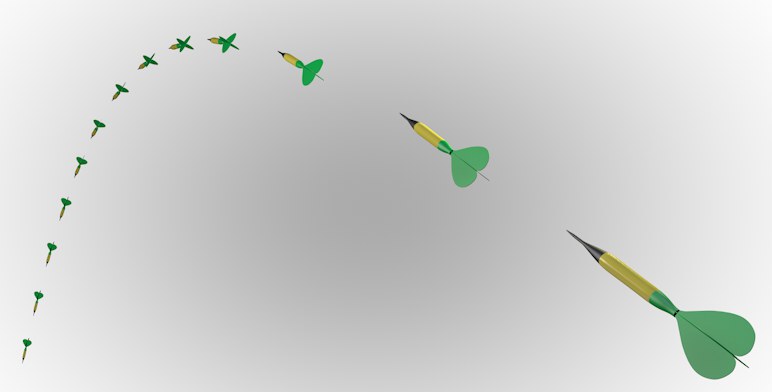 The aerodynamics lead to a correct arrow flight in that the arrow wings will always align the arrow tip in the direction of flight.
With the aerodynamic settings, a Rigid Body (and Cloth, by the way) can be influenced by air resistance. But where does the air resistance come from? Imagine the scene filled with air. If a Rigid Body falls downwards due to gravity, an air flow is generated locally for the falling object, which acts on each individual object polygon.
The greater the air flow on the polygon, the greater the forces acting on the polygon. There are basically 2 forces due to air flows in Cinema 4D for the simulation: one is a force due to air resistance and the other is the lift force, which simulates the airplane wing effect:
 Left: only the air resistance is effective; right: the cube also experiences a lift force in addition to the air resistance.
Please note that the following two parameters are also available for the Cloth tag.
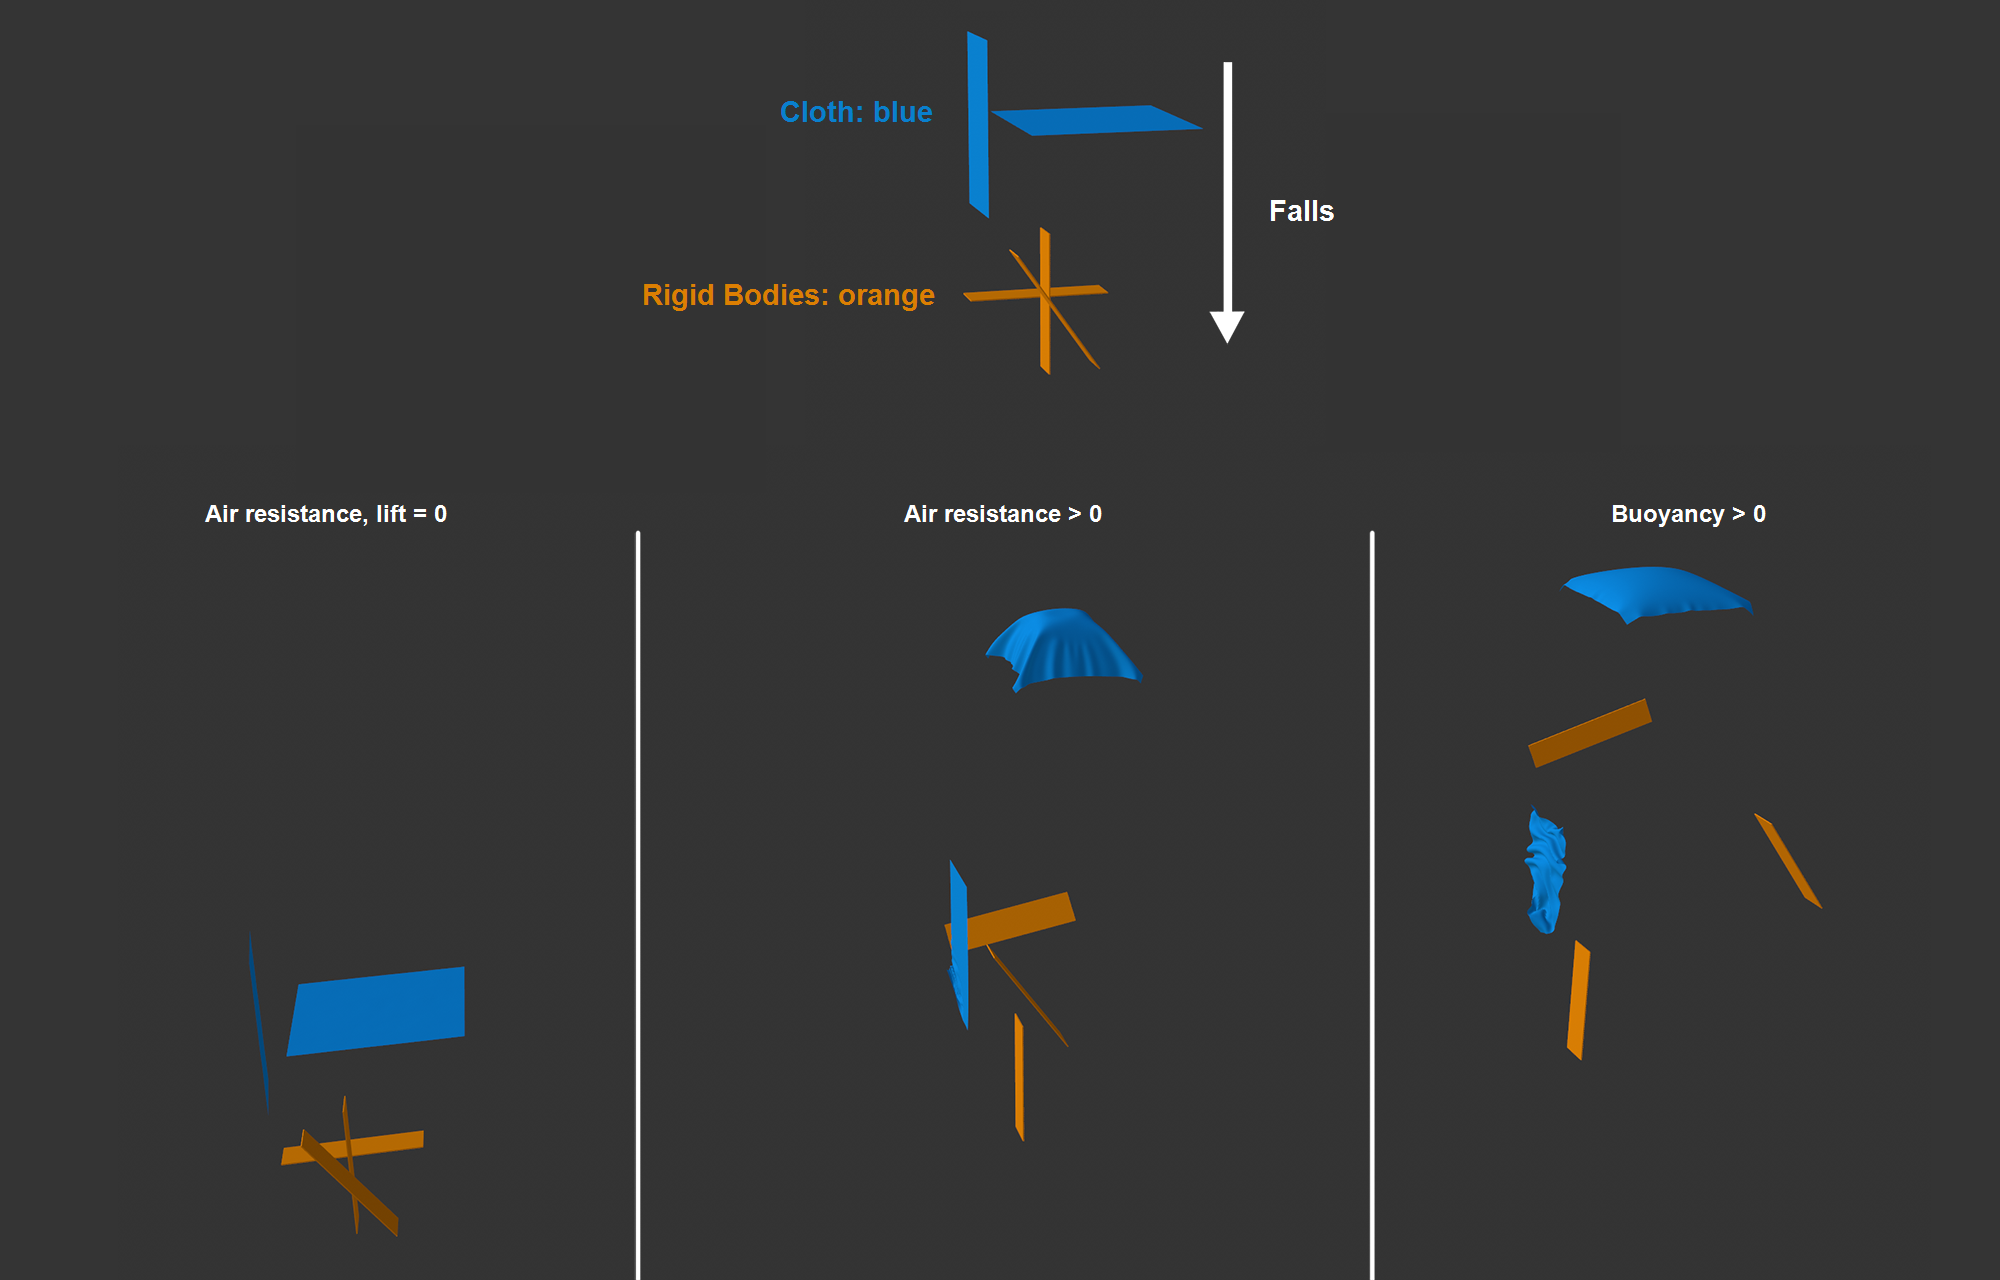 The setup of Rigid Bodies and Cloth shown above is falling. The increasing air resistance is ignored on the left-hand side; in the middle, the objects are slowed vertically, with the horizontal garment forming a parachute shape; on the right, the lift ensures that the initially sloping Rigid Body sails away to the right and the vertical garment begins to flutter.
This is used to control the force on polygons that are positioned frontally (i.e., with the surface Normal up to a maximum of 90° against the air flow. Sides facing away or parallel to the wind will be ignored against the air flow. The force will always act exactly opposite the air flow. The more perpendicular the polygon is to the air flow, the more force it will exert.
The higher the value set here, the greater the force that acts accordingly. For falling or other driven objects (if no Force objects are acting), this corresponds to a braking force that always acts against the direction of movement.
The Lift force always acts against the direction of the surface normal. The air flow must be offered a surface to act on. Polygons facing away from or parallel to the air flow are not taken into account. If a surface is therefore at an angle to the air flow, a lifting force acts. The value to be defined here then acts as a multiplier for the acting force.
Other parameters
The Mode can be used to include or exclude the Force Objects located in the following Object list.
The switch to the right of each object can be used to switch the corresponding effect on and off. You can use the pipette to the right of the list to click on force objects in the Object Manager to add them to the list.
Note also the ![]() Simulation Scene object, where you can also enable or disable Force Objects.
Simulation Scene object, where you can also enable or disable Force Objects.
If you want Cinema 4D's Pyro system to apply forces to Cloth (define a value greater than 0 at Fluid Force Factor ), deselect this option.