Texel density
Especially in the field of video games, the so-called Texel Density is an important measure. The Texel Density indicates how many texture pixels are projected per object surface. There are essentially 3 reasons to care about Texel Densities:
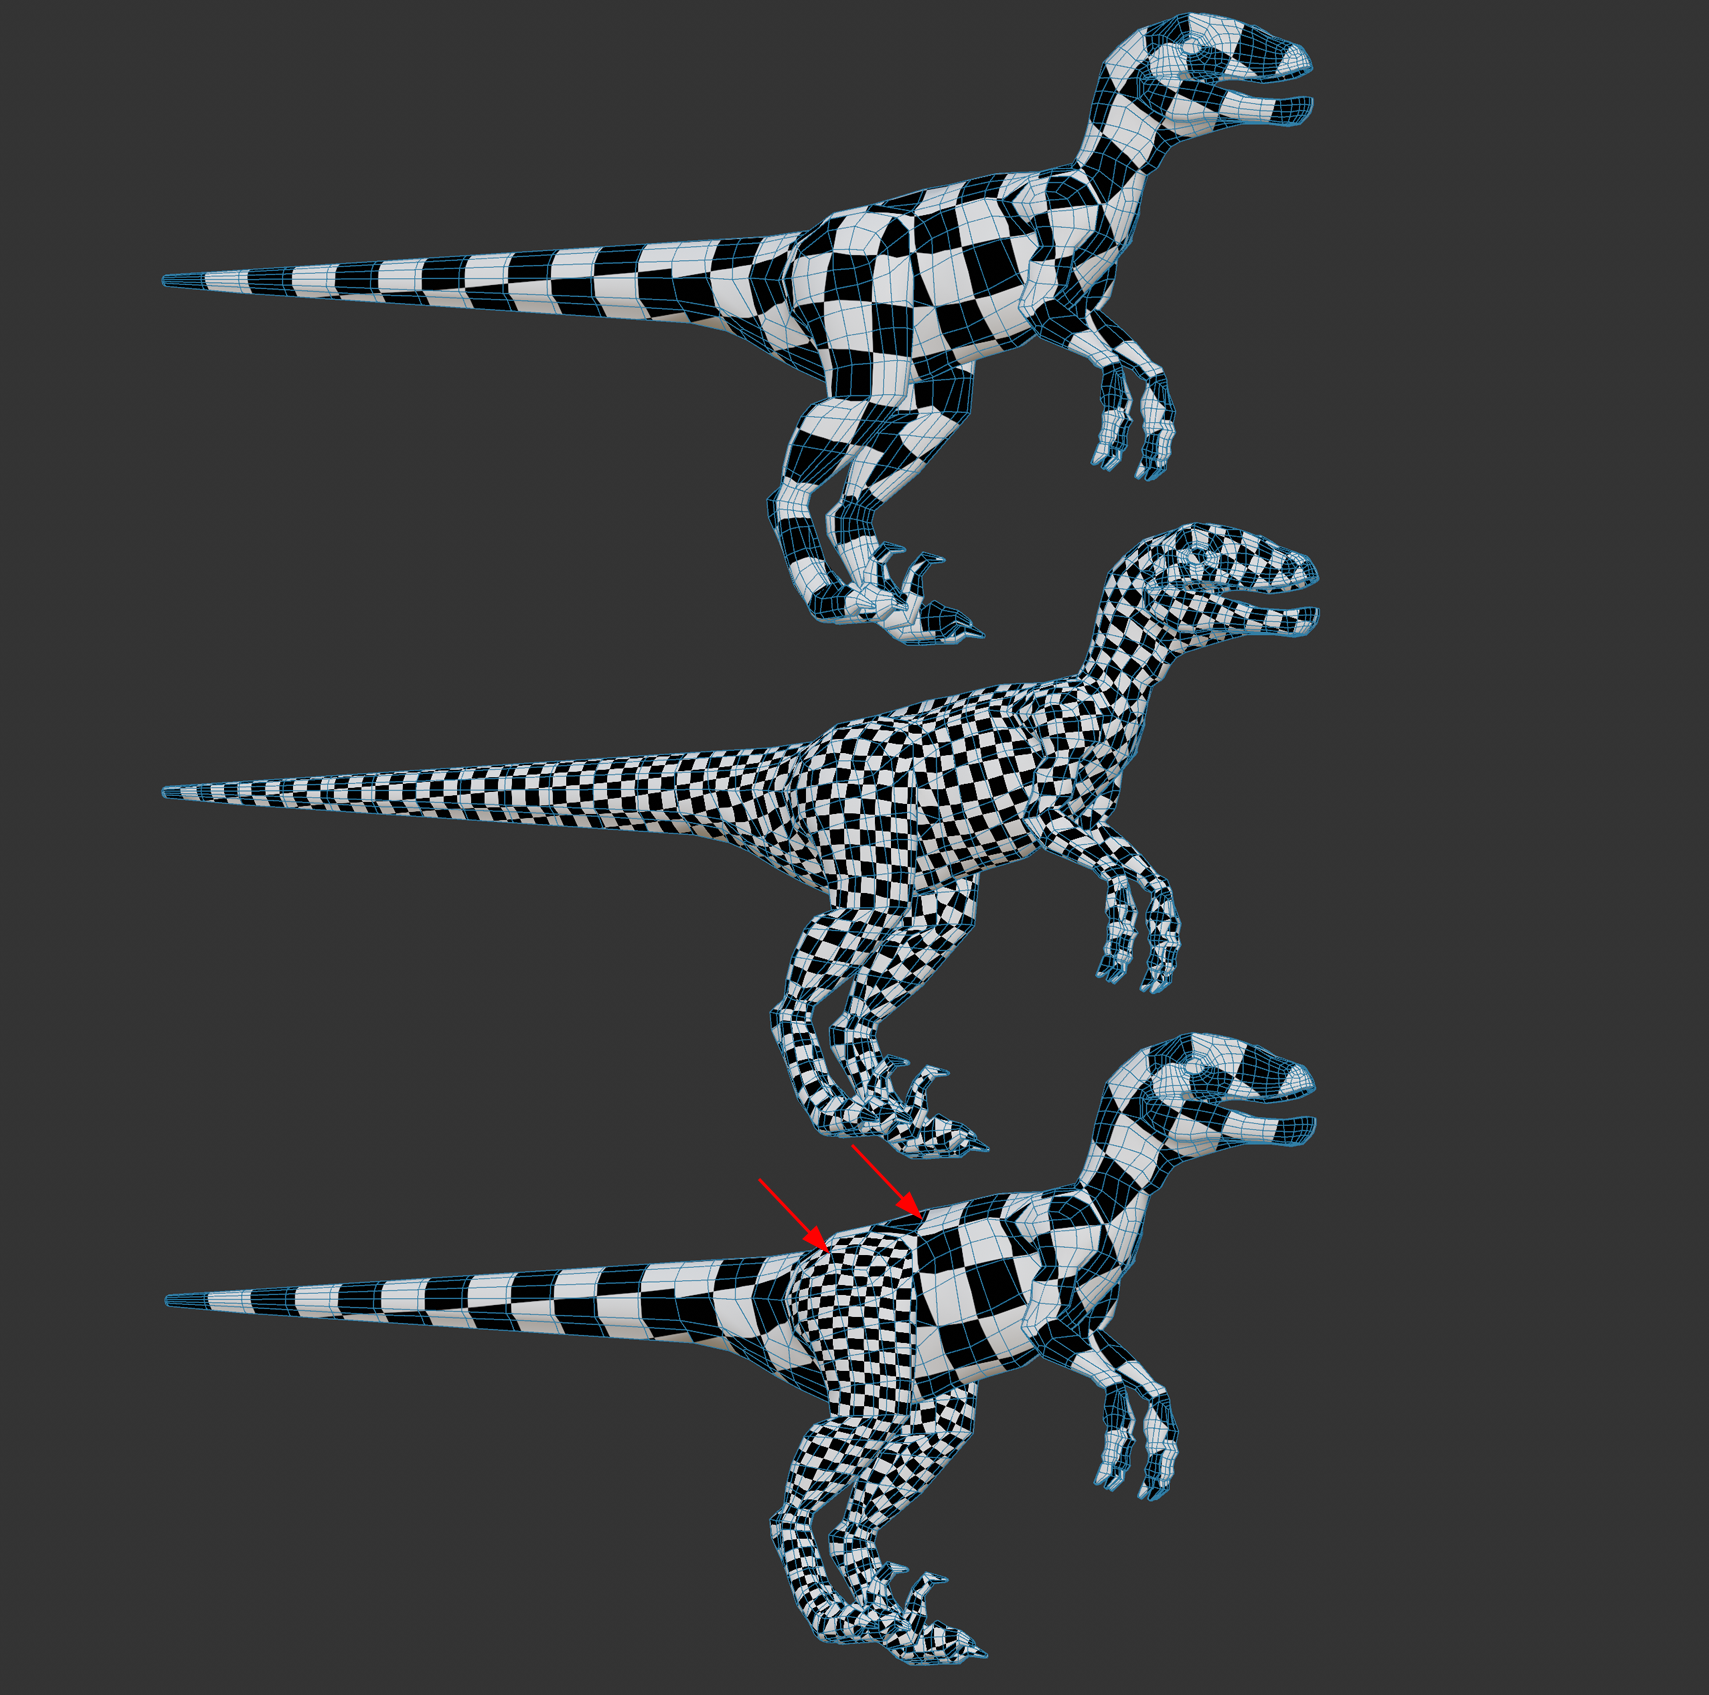
- Texture resolution: if the Texel Density is too low, textures appear spongy when you get close to them. If it is too high, the textures appear crisp even up close, but you may be wasting precious UV area.
- Texture homogeneity: in a scene, objects stand out that have a completely different texel density than their surroundings. This can disturb the immersion in video games, for example. It is therefore important to use similar Texel Densities in a scene (see also video below).
- Texture efficiency: Video game engines tend to have limited memory and computing capacities, which means that the Texel Density must be kept as low as possible and still look good. For this reason, Texel Densities are defined for assets in video game productions, for example, which the employees must adhere to in order to ensure a fast and high-quality texture display in all game situations.
As you can see, video games in which Texel Densities play a role have just been mentioned here several times. In fact, constant Texel Densities are not so important in 3D rendering, for example, because unlike video games, the camera perspectives are fixed and do not have to look perfect from every perspective. Real-time rendering is also - to date - a rather subordinate priority.
The settings and commands of this UV Manager tab are available to calculate Texel Densities and to support you in splitting the UV islands onto new UV or UDIM tiles. Also note the UDIM functionality, which allows you to conveniently move UV islands onto new UDIM tiles and thus have almost unlimited texture area available.
You can use the following settings and buttons:
Map Size (px)
A map target size in pixels can be freely set here.
You will find a small menu on the right where you can select one of the common texture sizes (e.g. 2k, 4k, 8k corresponding to 2048*2048, 4096*4096, 8192*8192 pixels - textures are usually square corresponding to a UV tile).
Only with this setting - and an object or UVW tag selected in the Object Manager - can a Texel Density be calculated or UV selections scaled further down. Cinema 4D determines the object surface and can then display a Texture Density.
Get Selected
This command calculates the average Texel Density for selected UV polygons from the Map Size and the mesh area and displays it below.
Texel Density (px/cm)
Calculated Texel Densities (Get Selected) or target densities (the Set buttons) are displayed here. If, for example, you have UV polygons with different Texel Densities and you want to adjust them, proceed as follows:
- Select a few UV polygons of the desired target Texel Density and click on Get Selected. The target value is displayed under Texel Density.
- Select the UV polygons to be adjusted and click on Set Selected. The target value still entered is adopted for the selection and the UV polygons are scaled accordingly.
Otherwise, you can also simply enter the desired Texel Densities here and then transfer them to other UV polygons using the 3 buttons below.
- the Map Size, i.e. the size of the texture bitmap.
- the Object Size of the 3D object in the scene.
- the UV Polygon Size or area.
I.e. the larger the map and/or UV polygons and smaller the object size, the greater the texture density and vice versa.
You will find a small menu on the right in which you can select one of the common Texel Densities. To give you an approximate guide: in the video game sector, there are roughly 3 different types of game in which the camera can generally move more or less close to assets. Select the following texel densities, for example:
- First person (games from the first person perspective): e.g. 10.24
- Third person (games where the camera is placed behind the character): e.g. 5.12
- Top Down (games from which you look at the action from above): e.g. 2.56 or smaller.
In general, the closer the camera is to the asset, the higher the Texel Density should be. In a first person shooter, for example, you can get as close as you like to an asset, which is why higher Texel Densities are required here.
You can also visualize the Texel Density in the Texture UV Editor and in the view: see Shading (UV settings, "View" tab).
Set Selected
This sets the selected UV polygons to the average area calculated from the Map Size and Texel Density.
Set Current Tile
If only one UV polygon is selected on a tile, all other UV polygons on this tile are also set to the average area calculated from the Map Size and Texel Density.
Set All
This scales the entire UV mesh, whether selected or not and on whichever tile parts of it are located, to the average area calculated from the Map Size and Texel Density.