UDIM and UVTILE in the Texture UV Editor
General
Since Cinema 4D 2025.3, the UV mapping extension UDIM ("U DIMension") and UVTILE are supported. Both basically do the same thing (in the following description, for the sake of simplicity, only UDIM is used as a term for the functionality). In general, the use of UDIM is recommended, as it is somewhat easier to read and understand due to its consecutive numbering.
Whereas UV mapping was previously limited to UV coordinates 0-1, any number of UV tiles can now be used, which follow the following naming scheme:
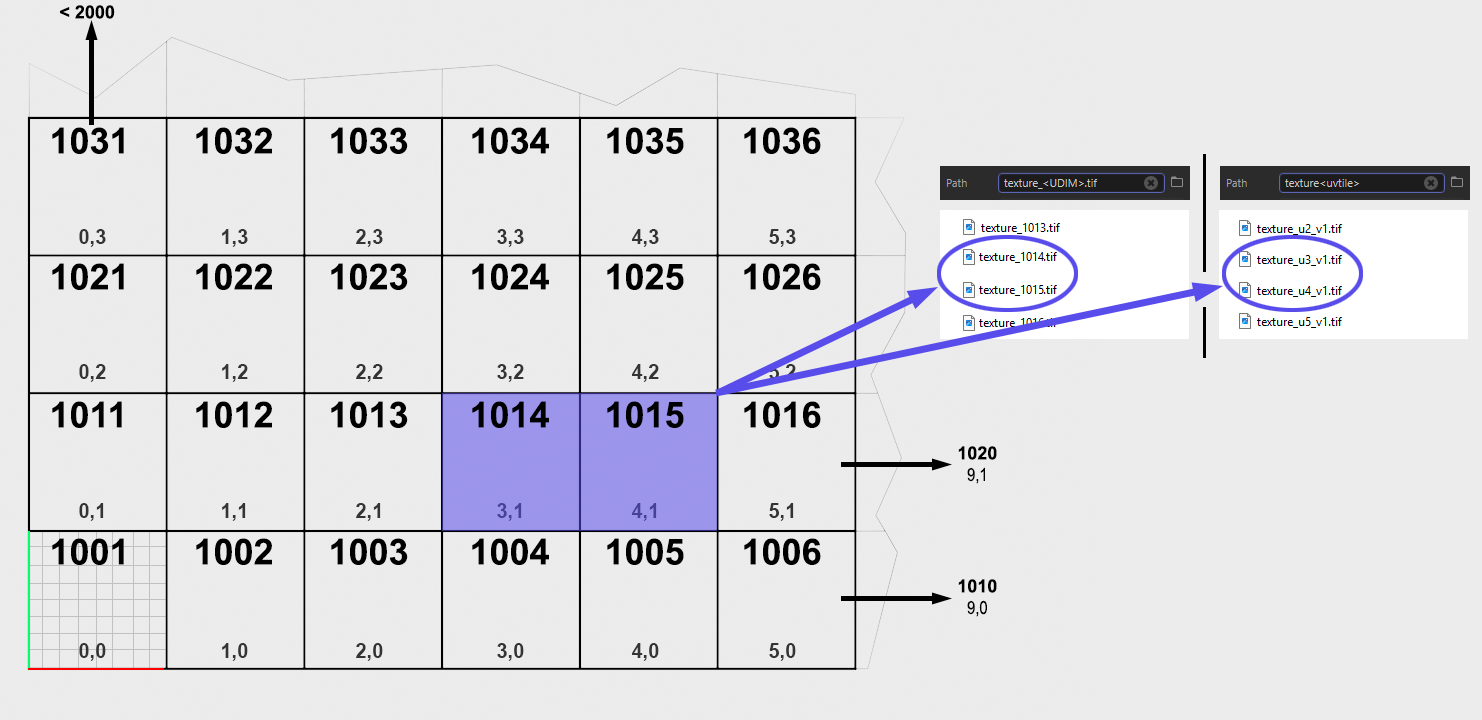 The previously used UV space corresponds to tile 1001 or 0.0. With UDIM, any number of tiles including the associated texture are now possible.
Each tile can be assigned an image file, which must then also have this number or its UV coordinates in its name. Each image file could have an individual resolution.
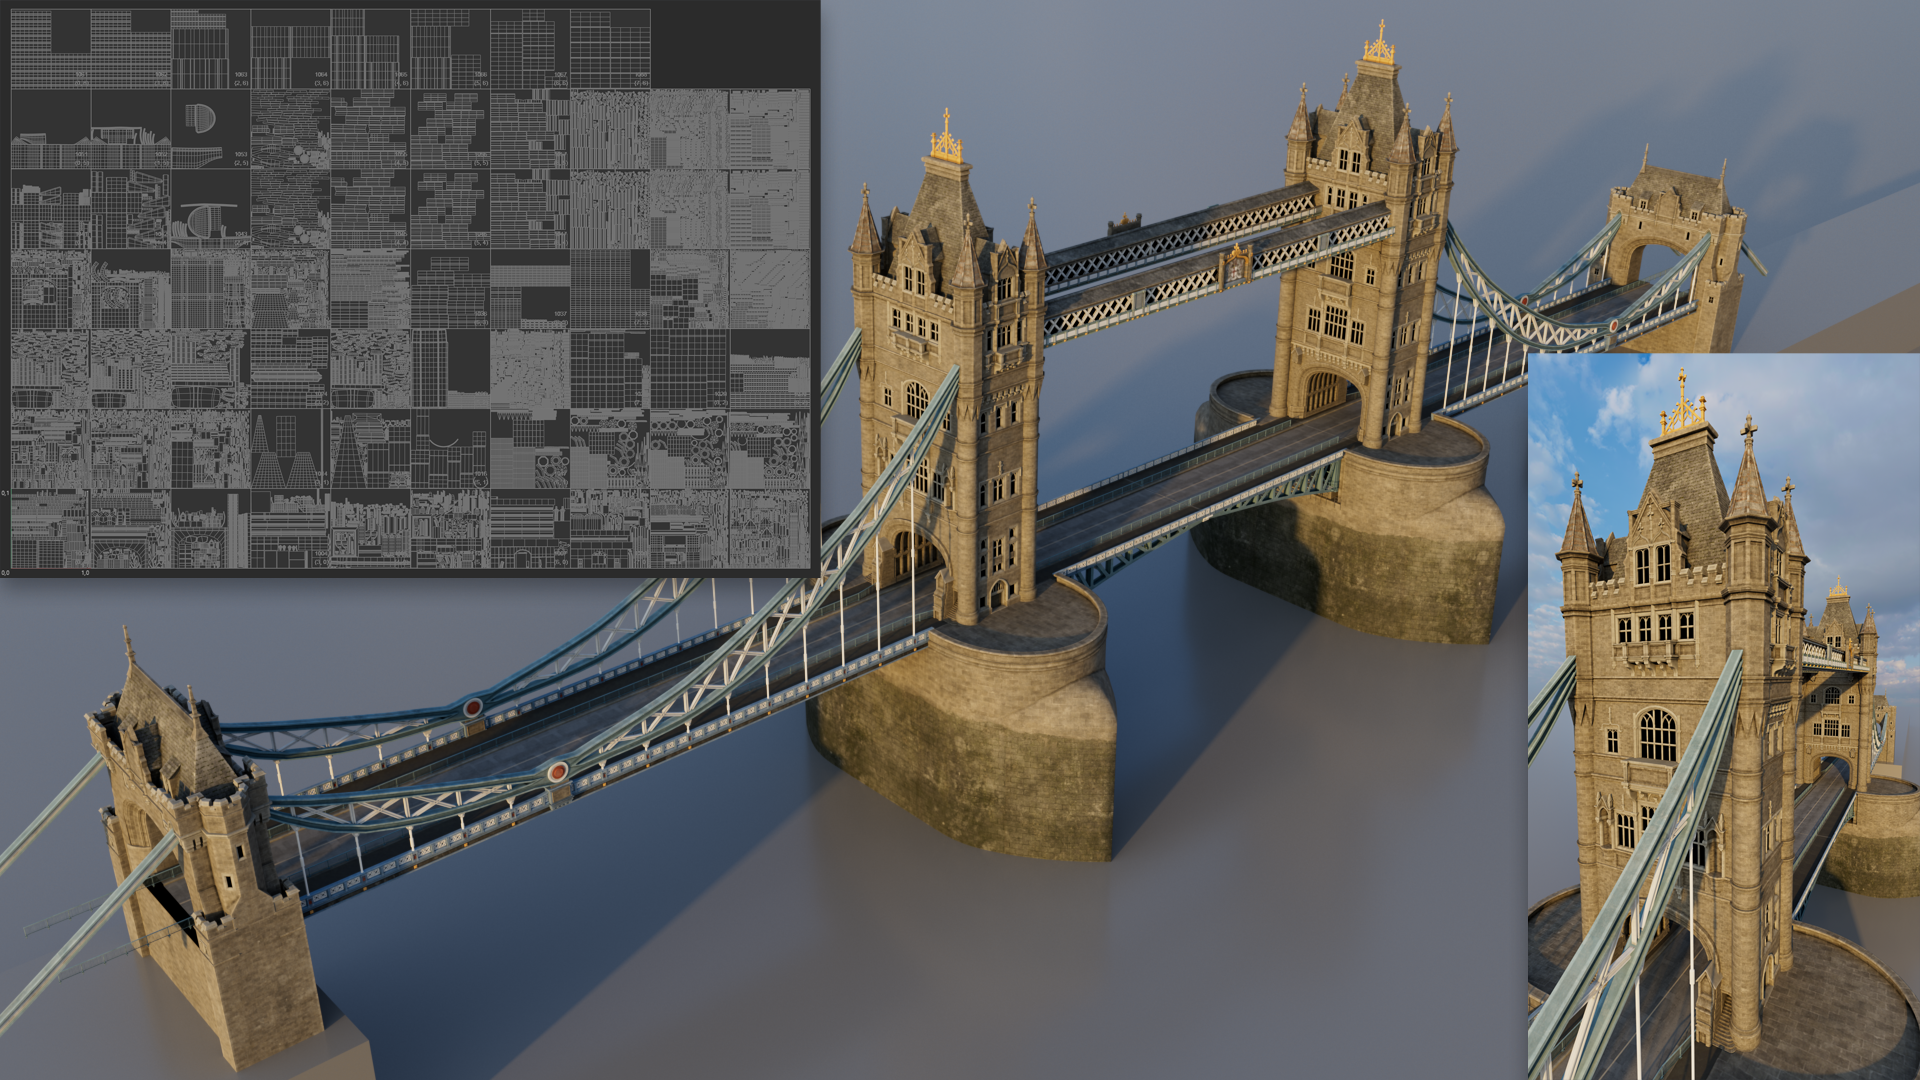 Sufficient UV and texture area: here 67 UV tiles were used to texture the Tower Bridge. model/textures: Milk vfx.
Please also note the UDIM functionality when opening a file in the Texture UV Editor:
If you move UV elements into negative areas of the UV coordinate system, the corresponding tiles will be coloured red. Negative areas can be used temporarily, for example, to move a UV island there because it is in the way or similar. Otherwise you should avoid using red tiles!
UDIMs therefore have the following advantages:
- They have an almost unlimited amount of texture and UV surface available - the only limits are set by their hardware - which means that high Texel Densities are possible.
- A single material can contain any number of textures.
- Better texture organization: Previously you had to place all textures on one tile, but now you can place a character's face on one tile and hands, feet and clothing on different tiles.
- Textures of individual tiles can be edited independently of each other without having to readjust a huge overall texture.
Other things to know about the UDIM functionality
- Note that the UDIM functionality does not work with BodyPaint 3D, with the exception of the UV Tools. Anything to do with painting, projection painting and the like will not work correctly with UDIMs.
- If you do not want to use UDIM, work exclusively on the first tile at the bottom left as before.
Example
In the following scene - all 4 pictures hanging on the wall are a single object with a single material - the Texel Density is perfect in both cases at a greater camera distance (left). However, if you then move the camera closer to the lower left picture (top center), the living room image is insufficient - the picture appears pixelated and blurred.
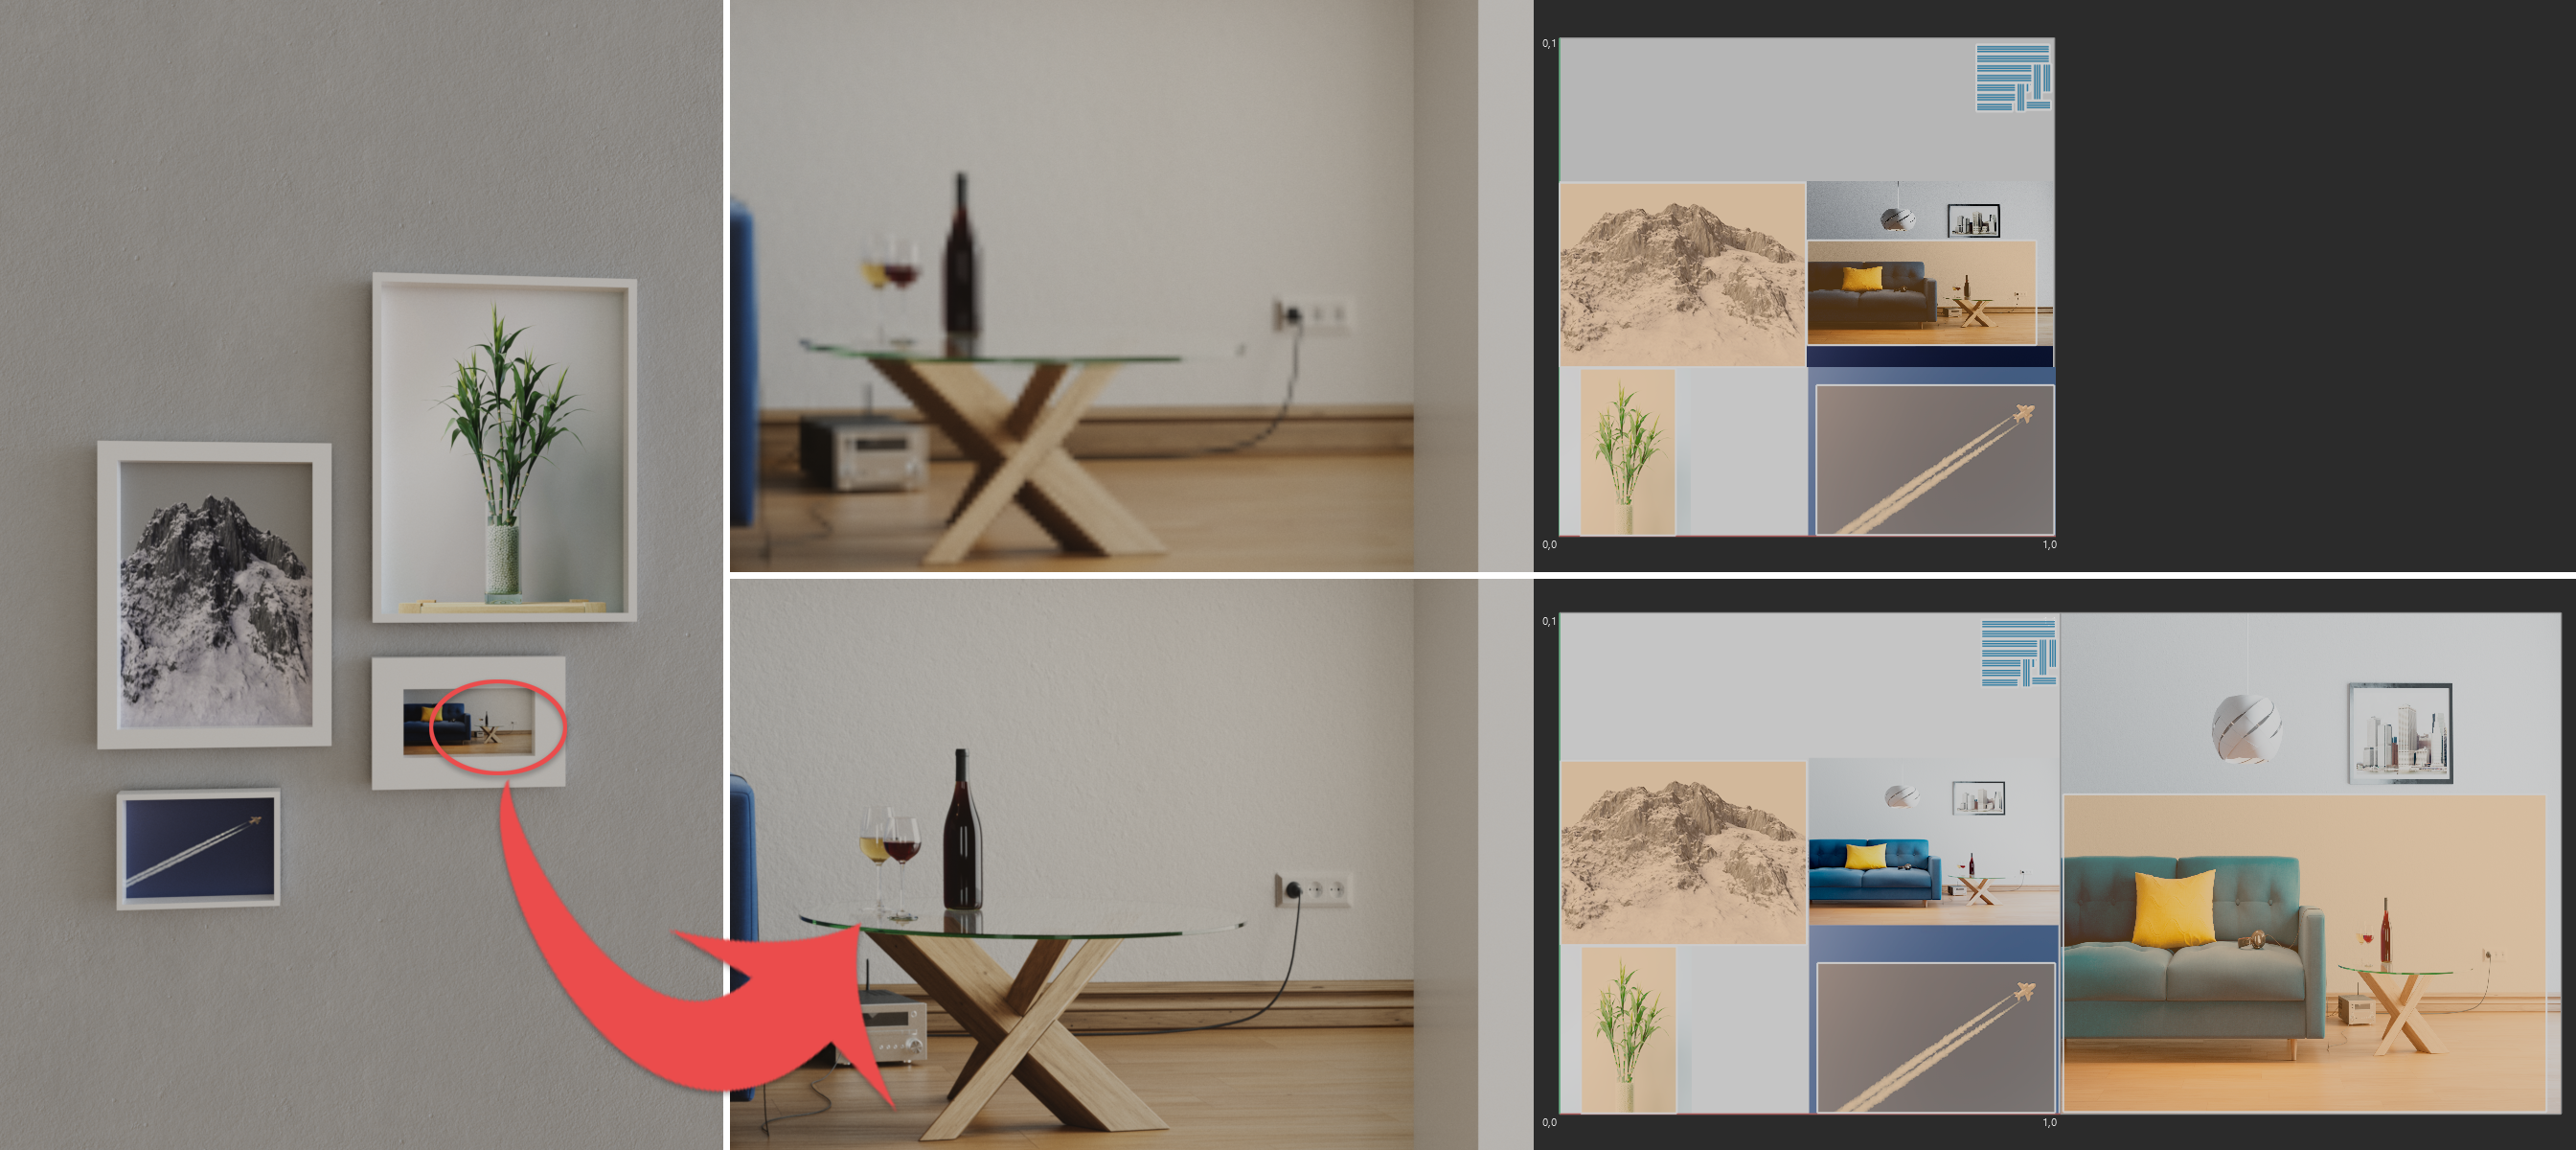
However, if you now move the UV polygon of the image in question to a new UDIM tile and assign a new, larger and more detailed texture, the image is displayed in focus (bottom center). On the right, you can see the UV islands together with the texture.
Also take a look at these files to see the difference in file path and UV mesh (if necessary, load the associated UDIM textures in the Texture UV Editor to view UV mesh and texture):