Table Of Contents
Introduction
The Brute-Force GI Engine is the most basic GI Engine. It doesn't attempt to interpolate any results and, as such, is very accurate but also the slowest.
Brute-Force can be selected as a primary or secondary GI engine. It works by simply shooting rays as shown below.
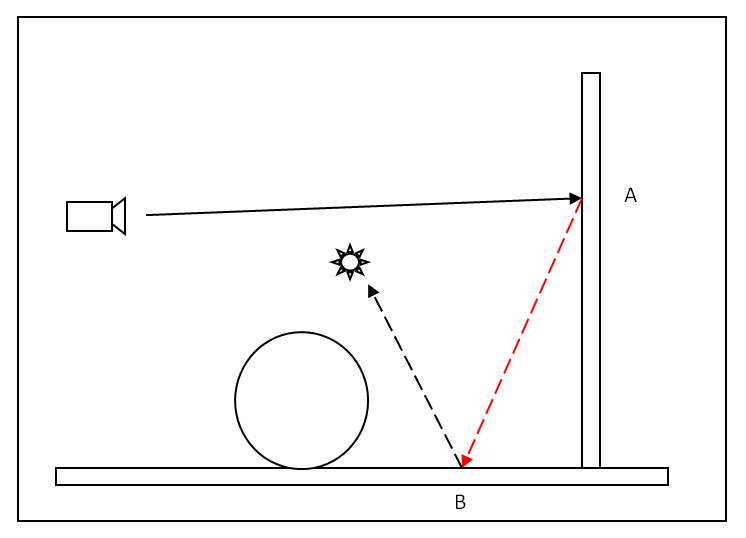
Zero GI Bounces. Camera shoots a ray and hits wall (point "A"). The primary GI engine is used and shoots another ray of which is shown in red. This way, direct lighting (black dashed line) on point "B" affects point "A".
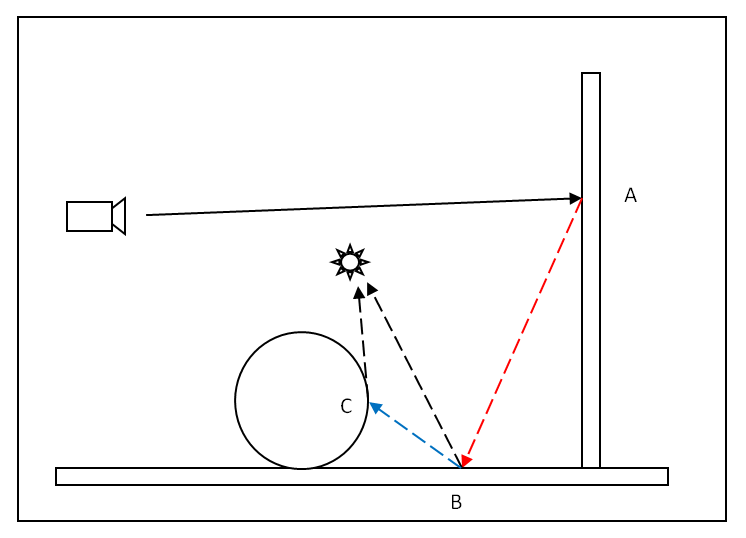
One GI Bounce. The processing now goes a bit further. Point "B" uses the secondary GI engine to gather illumination from the sphere by shooting a single ray (shown in blue). This way, the direct lighting (black dashed line) of points "B" and "C" affects point "A".
Pros
- Accurate
- No flickering in animations
- It's easy as it only has one setting to tweak ("Num Rays")
- Does not require any storage so the final image resolution and scene detail does not matter
Cons
- It's the slowest technique. But due to Redshift's speed, it's more practical compared to other renderers.
- Unless many rays are shot per pixel, it can produce grainy images – especially in difficult lighting situations
Settings
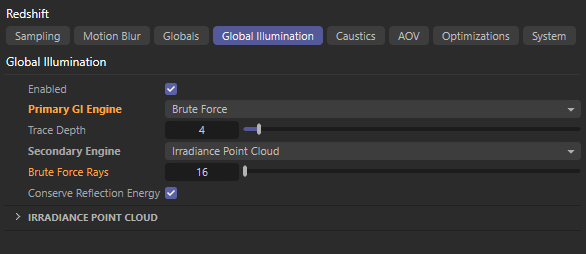
Num Rays / Brute Force Rays
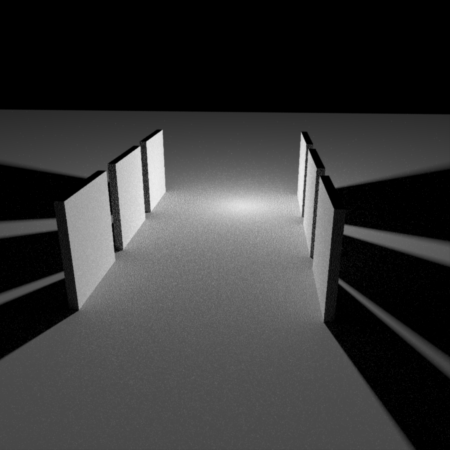
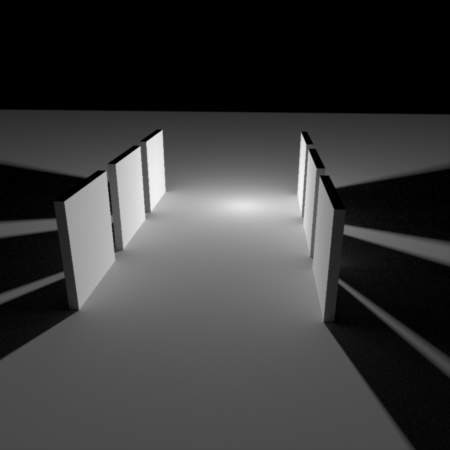
With Brute Force GI, each pixel on the screen has its GI computed by shooting out a number of rays. The more rays are shot, the cleaner (less "grain") the result but the longer the computation time. Scenes that have few small bright light sources might need many rays to produce grain-free results.
Below we show the effect of "Num Rays". The images are pretty self-explanatory.
|
|
|
|
"Num Rays" set to 16. The result is grainy. |
Now using 512 rays, which produces a smoother result. |
