Particle Groups
This object is required in your particle system in any case, as it manages the particles and offers you the option of assigning objects and display forms and also enables the combination with the MoGraph Cloner, a Volume Builder or the Pyro Emitter, for example. For this reason, Particle Groups are also created automatically each time a new Emitter is created, for example.
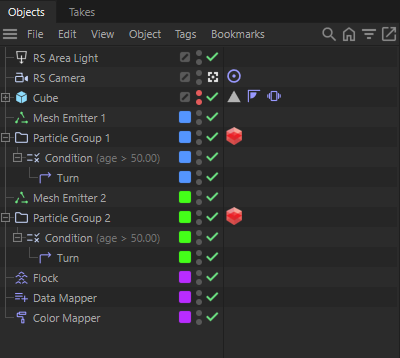 Conditions, Forces and Modifiers are often sorted directly in groups so that they only affect the particles in the group. If such objects are outside the group hierarchies (see purple Modifiers at the end of the Object Manager), they will always affect all particles in the scene.
As can be seen in the image above, Particle Groups not only serve to collect the particles of an Emitter, but also make these particles available to subordinate Conditions, Modifiers and Forces. This is always important if you have several Emitters in the scene and want to control their particles independently of each other or if you want to split the particles of an Emitter and control them individually. If Conditions, Modifiers or Forces should act on particles from different Particle Groups, it is advisable to use Multi Groups, which can make the particles of several groups available at the same time.
Particle Groups are linked within Emitters or even some special Modifiers in order to record and manage the particles created there. Even particles that are generated at an Emitter but are not assigned to a group there will be managed in an invisible group whose display options can be found in the Scene Settings (under Simulation/Particles). These groupless particles are colored purple by default. In general, however, all particles should be managed in groups, as this is the only way they can be rendered.
In addition, only Particle Groups provide options for calculating Alembic cache files, which are required for rendering with motion blur, among other things.
As already mentioned, Particle Groups are normally created automatically together with new Emitters. However, they can also be created manually at any time and assigned to Modifiers or Emitters, for example. Corresponding Group link fields are available in these objects for this purpose. The Particle Group contains various settings that can be used to adjust the display of the particles in the viewports. The following image shows an example of this.
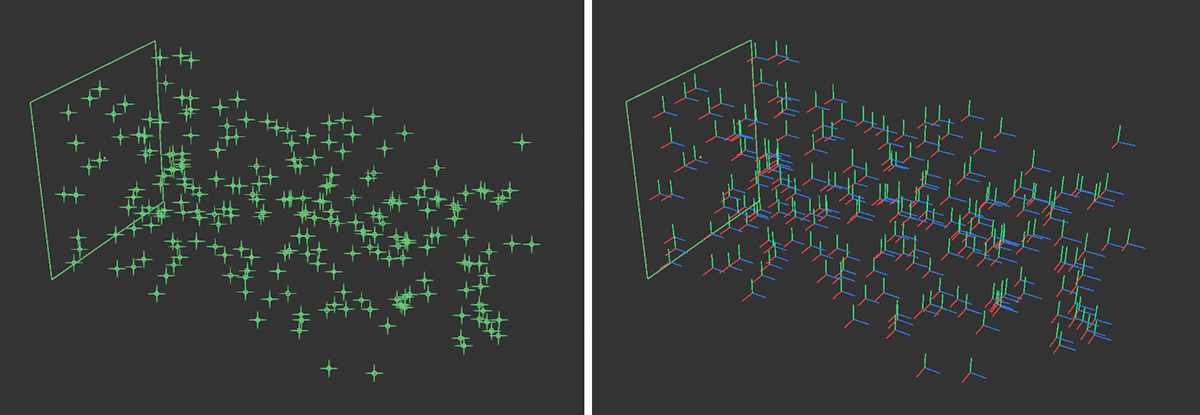 The display of the particles in the view windows can be controlled individually via their Particle Group.
As particles can also change groups, the individual display type of each group also makes it possible to quickly identify which particles are in which group. Additional information can also be displayed, e.g., on the radius of each particle, its flight direction or orientation, which can also provide useful information on the appearance and behavior of the particles when viewing a standing simulation.
The Particle Group is comparable to a polygon object, in which the particles are managed similarly to points and the particle properties are saved as vertex or Vertex Color maps. Therefore, a Particle Group can also be combined directly with many Generators, as shown in the following image.
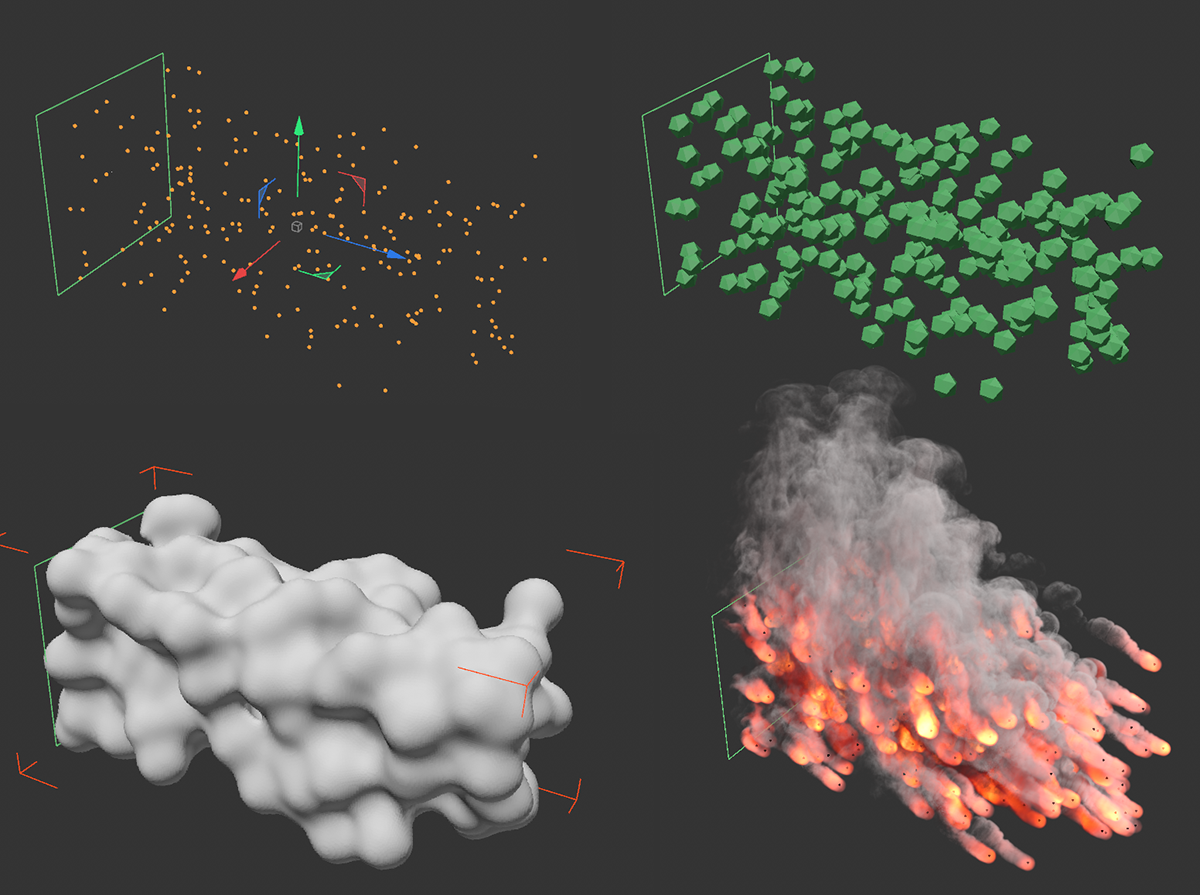 At the top left you can see a Particle Group that has been converted to an object using Convert Current State. The particles now appear as simple, static dots. To the right, a MoGraph Cloner was used to duplicate objects on the particles. On the bottom left, the Particle Group was used with a Volume Generator and on the right, it was used as a Pro Emitter.
The following options for using a Particle Group are available (see also the image above):
-
Conversion: A converted copy of the Particle Group can be created using Current State to Object, which displays the static state of the particles as points in a Polygon object. In addition, the most important properties of the original particles are available as tags on this Polygon object.
You can also recognize the internally used names of this data from these tags if you want to access the corresponding particle properties of a Particle Group via nodes, for example.
Please note that the default names for the properties of the particles are always framed by double underscores (e.g. __age__ for the age of the particle).
Depending on the data type of a property, Vertex Map Tags(for float values) or Vertex Color Tags (for Vectors) are used: - __lifetime__ (Vertex Map) corresponds to the lifetime
- __distance__ (Vertex Map) corresponds to the distance traveled
- __radius__ (Vertex Map) corresponds to the radius of the particles
- __age__ (Vertex Map) corresponds to the age of the particles
- __angularvelocity__ (Vertex Colors) corresponds to the angular velocity of the particles
- __alignment__ (Vertex Colors) corresponds to the alignment of the particles
- __velocity__ (Vertex Colors) corresponds to the velocity of the particles
- __color__ (Vertex Colors) corresponds to the color and alpha value of the particles
-
Assignment with objects: It is practical that Redshift Object Tags can also be used on Particle Groups. At this tag you will find a special category for rendering Particles. For example, some standard shapes such as discs, squares or spheres can be selected there, but any objects can also be assigned for use instead of the particles.
A second option is to link the Particle Group in a MoGraph Cloner object that uses the Object Mode. In this way, any objects can be cloned onto the particles and thus also rendered.
In this case too, a Redshift Object Tag on the group makes sense in order to switch off the automatic display of a shape on the particles (tab: Particles, Mode: Disabled) so that multiple displays of shapes do not occur on one particle.
Without using a Redshift Object Tag or other methods to render 3D shapes instead of particles, particles are rendered as simple spheres by default. -
Processing with Generators: As the particles within the Particle Group are treated like dots, they can also be used with generators such as the Volume Builder. This allows, for example, volumes filled with voxels to be created in the vicinity of the particles. However, it can also be combined with a MoGraph Tracer, for example, which allows the movements of the particles to be traced with splines.
The combination with deformers is also attractive, as the trajectory of the particles can then be changed without having to adapt the simulation via forces or modifiers. -
Combining with other simulations: Particles can also generate smoke or fire directly by assigning a Pyro Emitter Tag to the Particle Group, for example. The Pyro Emitter Tag automatically switches to a special particle mode in which any radius can be defined around the particles in which pyro voxels are generated. The opposite interaction is also possible. For example, particle trajectories can be moved by the density or temperature of a Pyro simulation.