Object Properties
General settings
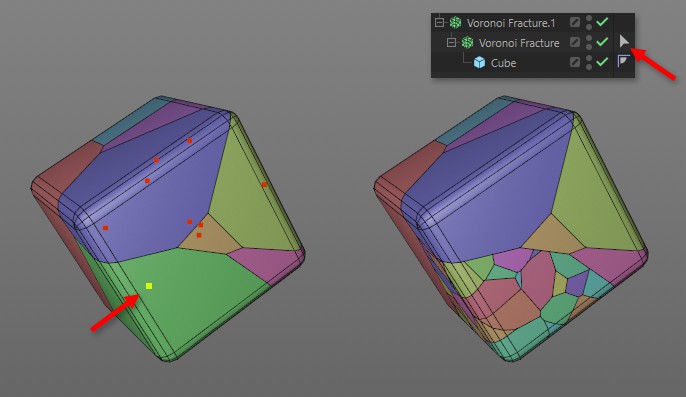 The green fragment as part of a MoGraph selection is further fragmented during the decomposition of "Voronoi Bruch.1".
Imagine you want to subdivide certain fragments further. If, for example, the cube in the above illustration should fall on the bottom corner and more fragments should be generated there, it would be practical to allow a further decomposition to affect only specific fragments rather than all fragments of the first decomposition. This is exactly what this field does: It restricts the effect of the Voronoi break object to MoGraph selections.
Drag a MoGraph Selection tag of the Child object here and the further decomposition will only affect the MoGraph selection.
MoGraph Weightmap tags can be stored in this field (see also previous point Selection, same scene structure). With increasing weighting, fragments will be increasingly fragmented. For this to work, you must activate the Create Points Per Object option.
To better distinguish the fragments, you can have them colored randomly here by activating this option.
Fragmentation will create all kinds of new geometry. Cracks that run across the original polygons, fracture edges under the surface, etc. This new geometry will always be triangulated unless you activate this option. N-gons will then be formed from adjacent triangles lying on a plane.
If you want to create gaps at the fragment break edges, you can do so with values greater than 0. At the fracture surface, both fragments will deviate by this value. The gap width will correspond to twice the value entered here. If the gaps become larger, affected fragments can be "engulfed" by them.
Gaps can be visually appealing, but sometimes a tiny gap can also be practical when using Dynamics, so that a collision does not already occur at the start of the simulation.
Please note that Fragment Offset does not work with the Connect fragments functionality.
If the Fragment Offset is greater than 0, i.e., there are gaps to the neighboring fragment, the activated option will create a mesh that corresponds to these gaps:
 From left to right: deactivated, activated option Invert, then additionally activated option Surfaces Only and finally additionally a defined Thickness.
The mesh will then consist internally of only one object and not of many fragments.
Note that the mesh inside the object is hollow.
When objects are fragmented, fracture surfaces and fragments (with volume) will also be formed under the original object surface. If you want to do without this for special purposes and only want to fragment the surface, activate this option. Imagine the fragmented object as a kind of fragmented eggshell.
If you have defined Surfaces Only, this parameter is used to create a volume by extruding the surface fragments in the Normal direction. Smaller values are usually recommended here, otherwise mesh overlaps will occur. Negative values can also be used to extrude outwards.
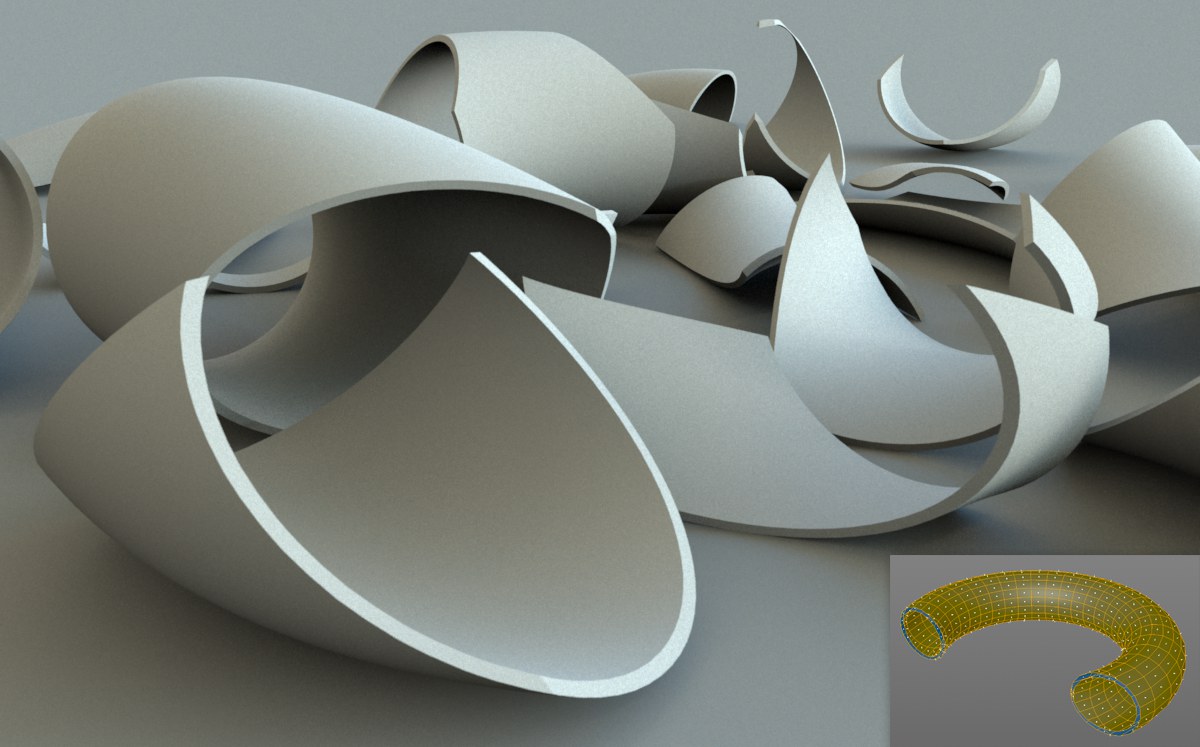 Use the Hollow Object option to disassemble hollow objects: a double-walled ring will become a pile of shards (a cut ring at the bottom right to illustrate the required polygon directions).
This option is specially designed for hollow objects. For example, a double-walled cube or a chocolate Easter bunny, i.e., closed objects that form a cavity by means of a second polygon layer (note the Normal directions of the inner layer; these must point in the opposite direction to the outer layer, i.e., into the inner cavity). In such cases, activate this option so that the corresponding object can be broken down correctly. This can cause problems with other types of objects that consist of many separate polygon islands (only activate this option if the special case described above applies).
Note the Cloth Surface object with which you can create hollow objects.
If the option is deactivated, open meshes (i.e., meshes that do not span a volume without gaps, e.g., spheres with holes, planes, etc.) will not be fragmented as volumes, but as if the Surfaces Only option were activated (see above).
Otherwise, this option should be deactivated for complex objects that you know are closed, as this will save you computing time.
If this option is activated, an attempt will be made to close holes and open shapes internally and to fragment the resulting volumes. This does not always work with predictable results and, depending on the object, may only work as a shell (see also Hull Only). Mesh optimization is also carried out (congruent points are merged).

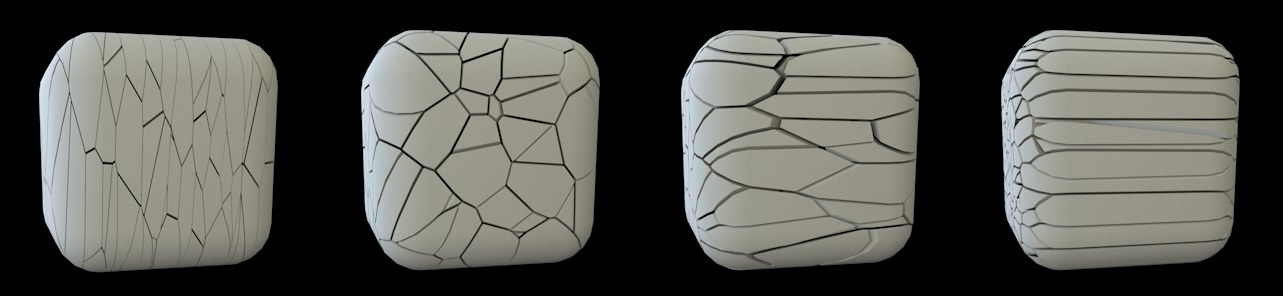 Scale from left to right 0.2,1, 3 and 20.
You can use these 3 parameters to stretch (values > 1) or compress (values <1) the Voronoi cells in one axis direction (or in any combination). This will cause the fragments to deform in the defined direction. This is good for wood splinters/crystals, for example.
Disassembling objects can take a long time under certain circumstances (detailed object, many fragments). If desired, the already disassembled object can also be saved in the file, which will make the disassembly process unnecessary when the scene is reloaded. Please note that the file may become considerably larger.
Depending on the complexity of the objects, parameter will change to the Voronoi break object can lead to longer calculation times, which can be disruptive in the workflow. In such cases, deactivate Automatic refresh. To apply changed settings, click on the Update button.