Background
- Off: Background is not used for rendering.
- Render Settings: The camera uses the Background settings from the Render Settings dialog. This is the default mode.
- Override: The Background settings from the camera are used, even if the Render Settings are configured in another way.
This setting determines when the color or background image is applied when rendering - critically, it controls if the background is color corrected or takes part in effects such as depth of field.
-
In-Render: The background is used during object rendering and is therefore subject to all the same lens effects - essentially this is the same as if you were to render an image plane in the scene at infinite distance. The background will be affected by anti-alising, bent rays for refractive materials, depth of field and all the same exposure and color correction settings as the other 3D objects in the scene.
The In-Render type matches the backplate render behavior of previous versions of Redshift when the backplate was controlled by a Dome Light.
It is also the only type that is compatible with the Legacy setting "Refractions Affects Alpha Channel."
-
Pre-Composite: The background is applied after the rendering is complete but before the post effects are calculated. In this way, a background image can still influence the calculation of bloom or flare effects, for example, but will exclude the background image from anti-alisasing and bent rays for refractive materials and depth of field.
-
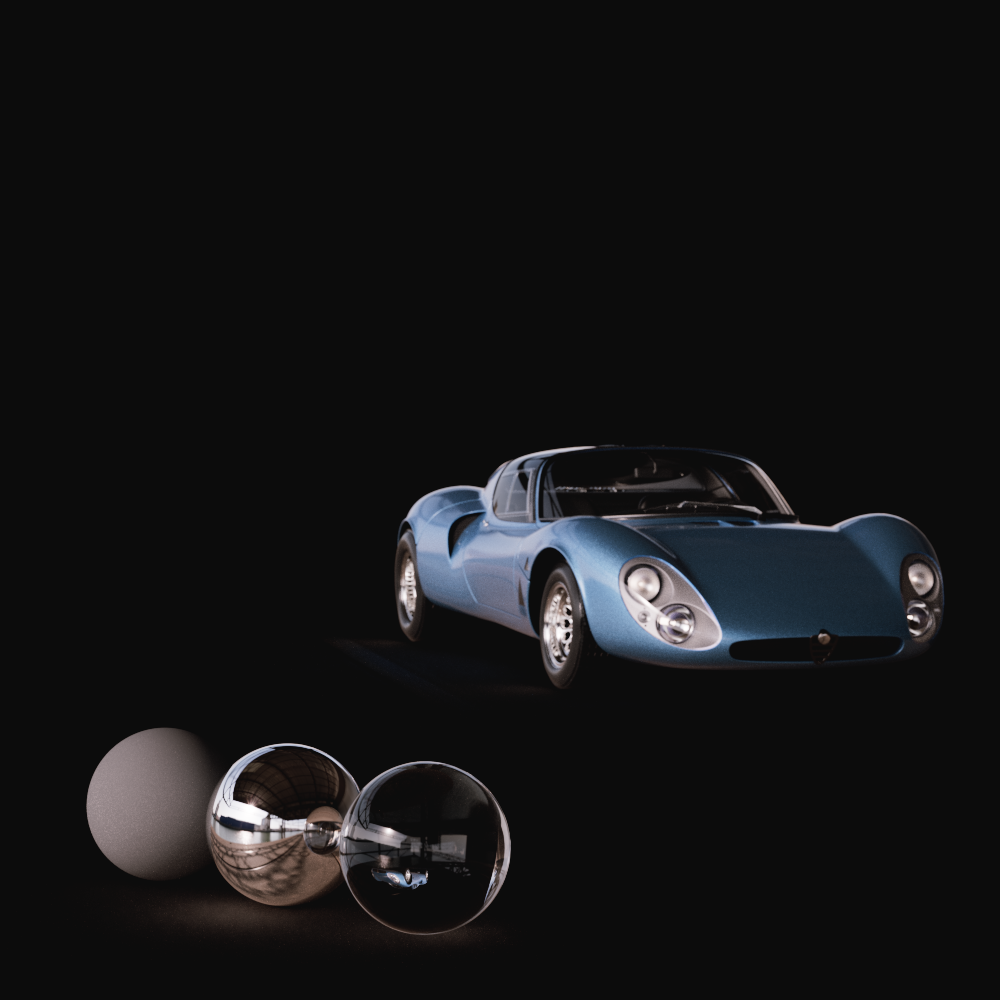
Post-Composite: The background is applied only after scene rendering and post effects have been calculated. Camera level exposure, color corrections, and all other post effects do not affect the background image.
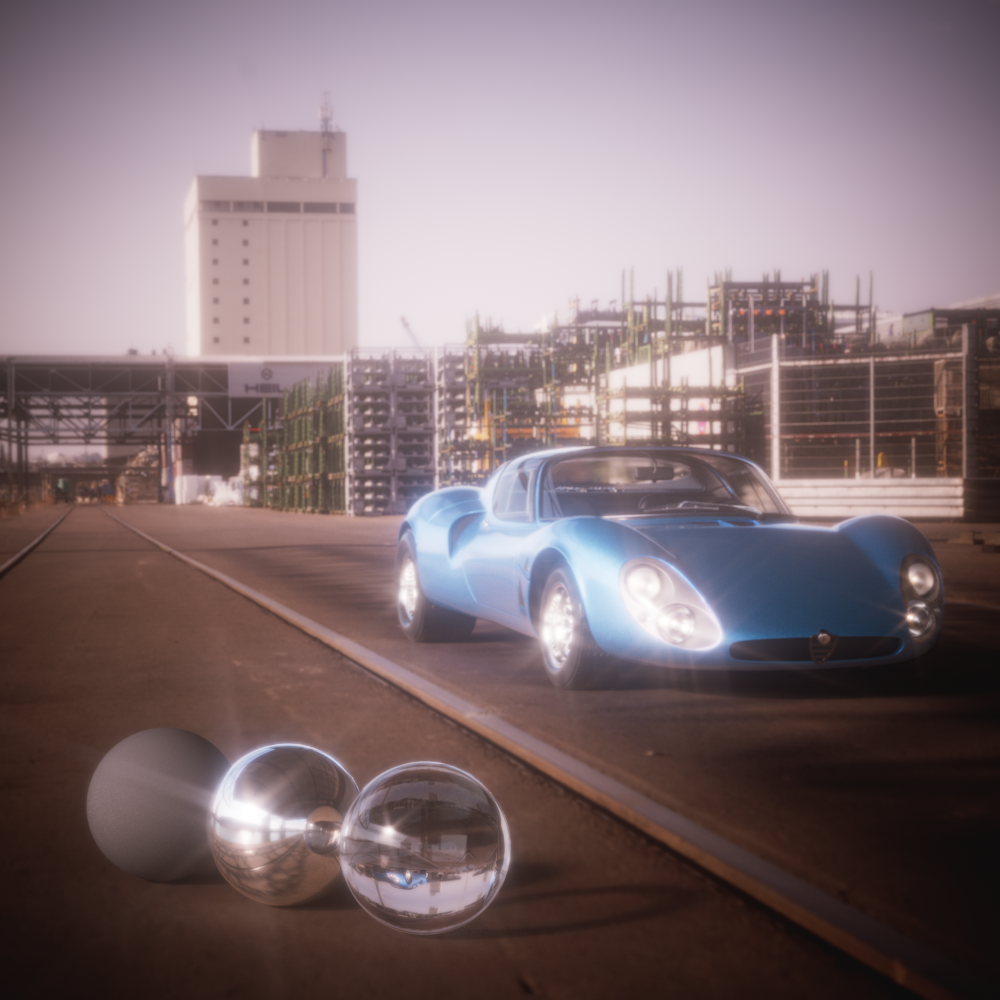
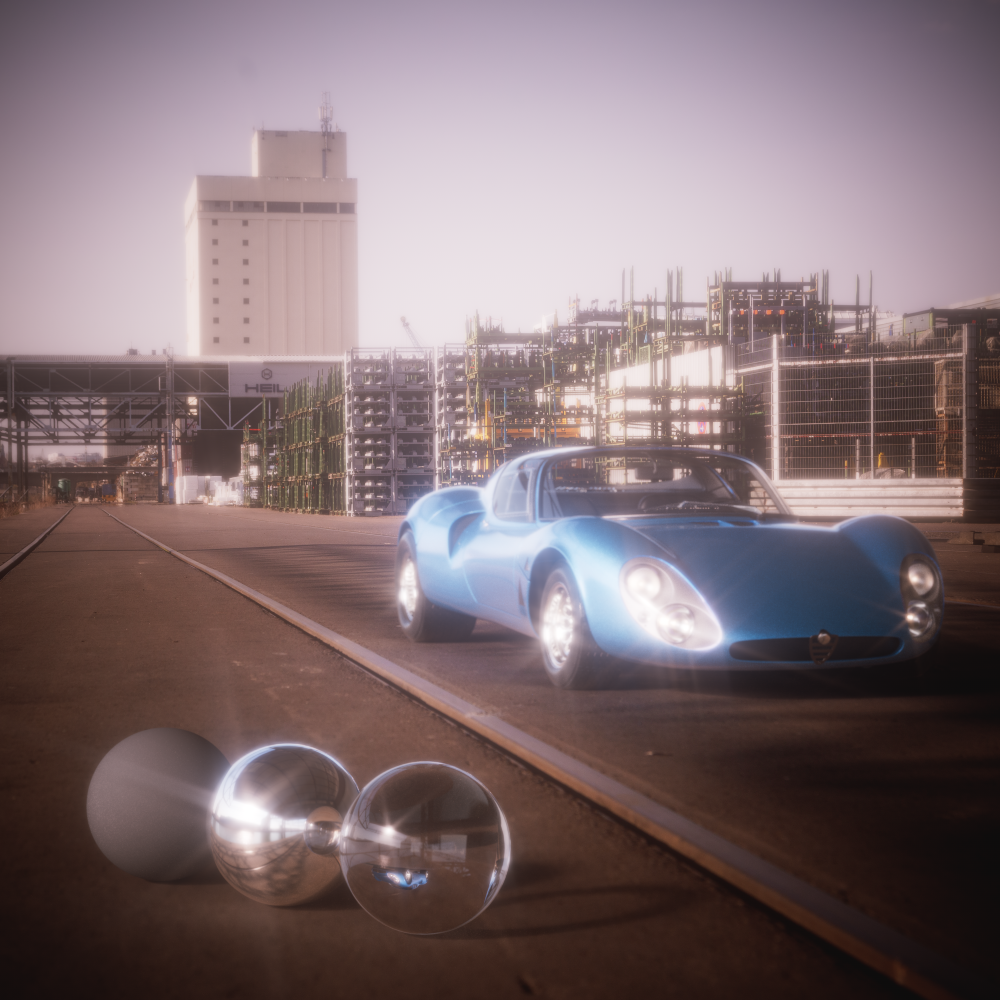
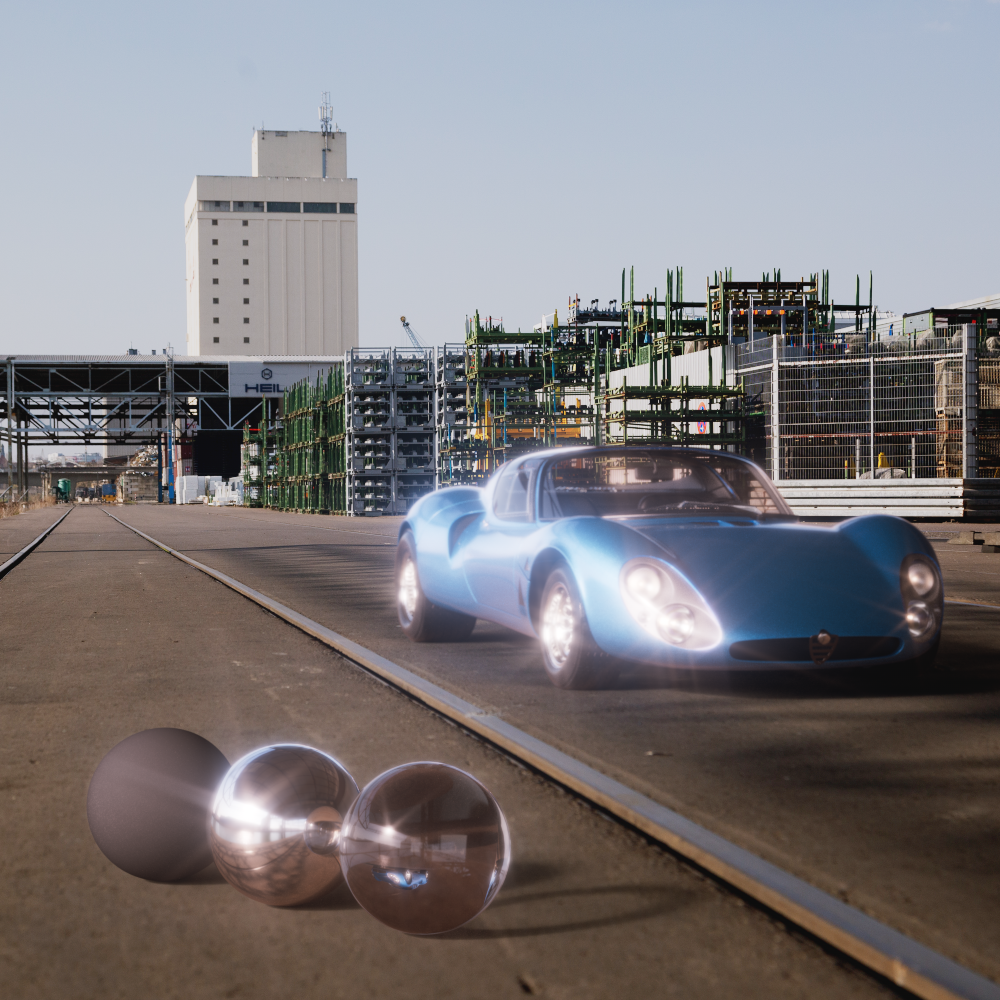
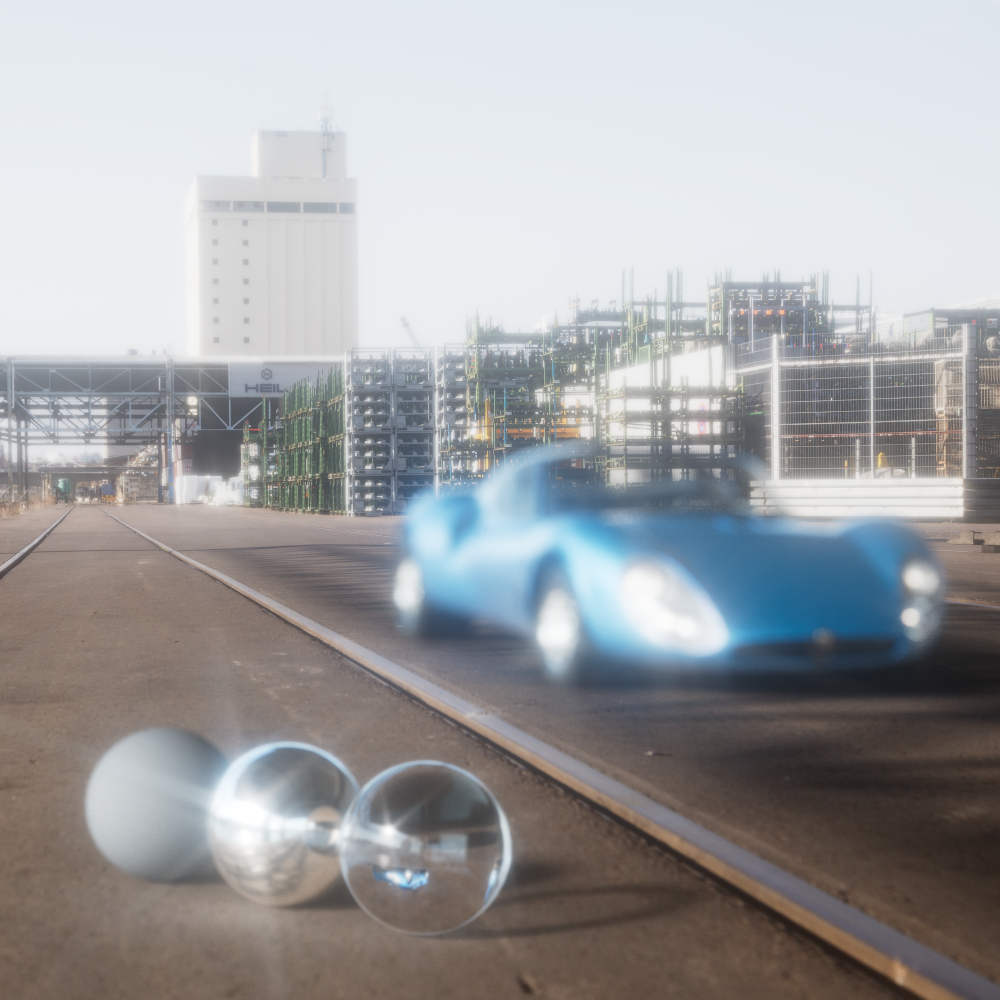
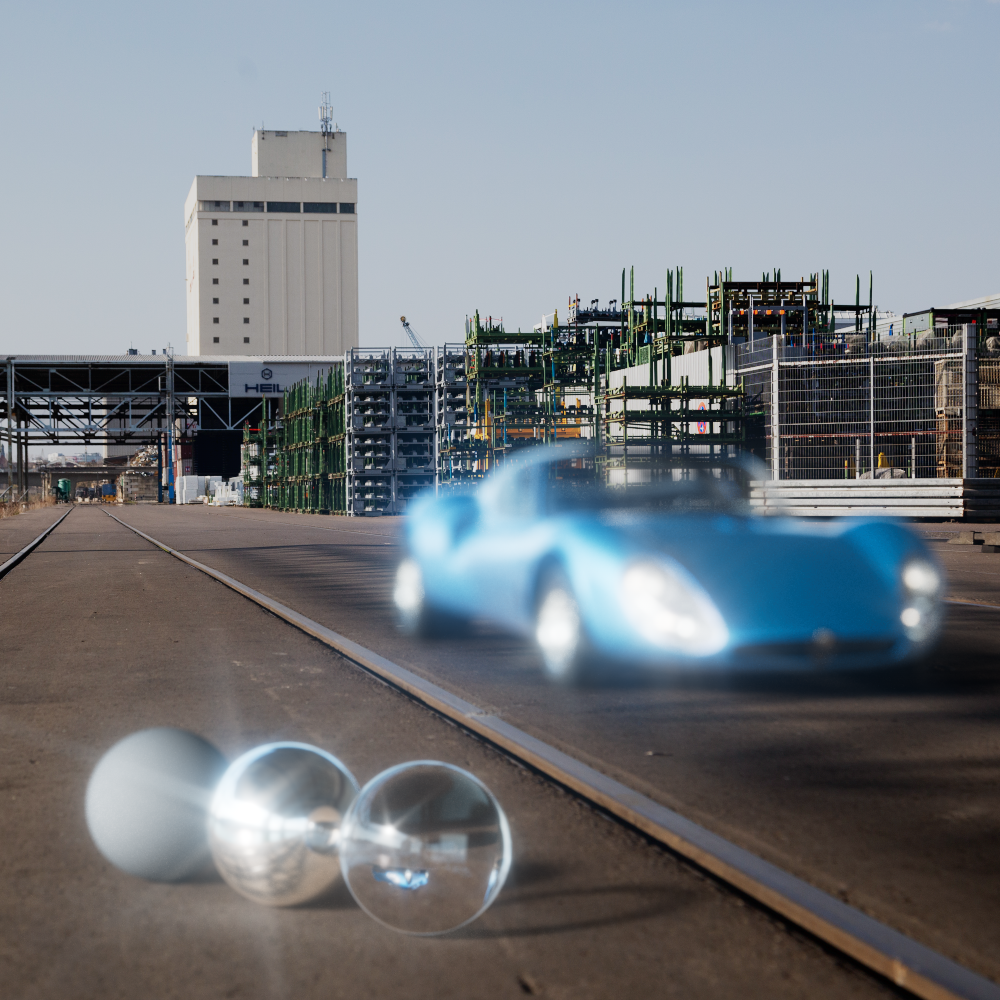
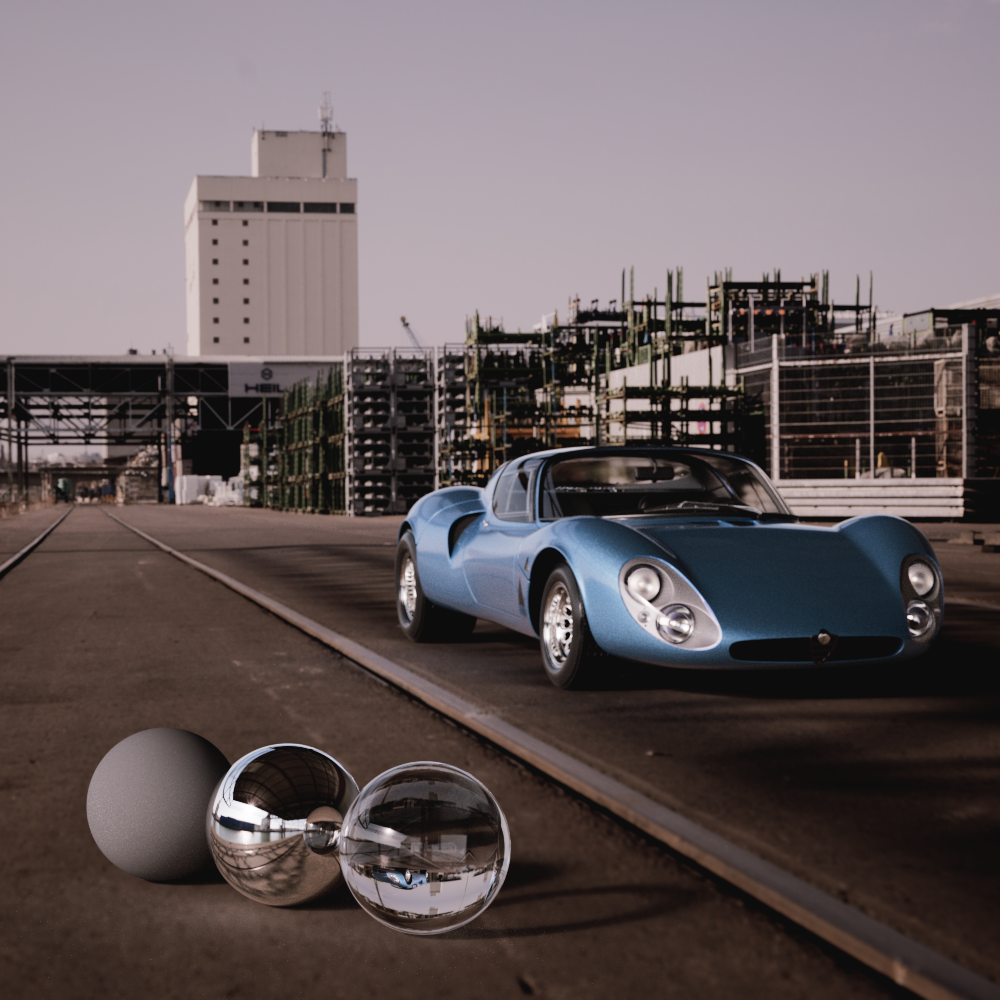
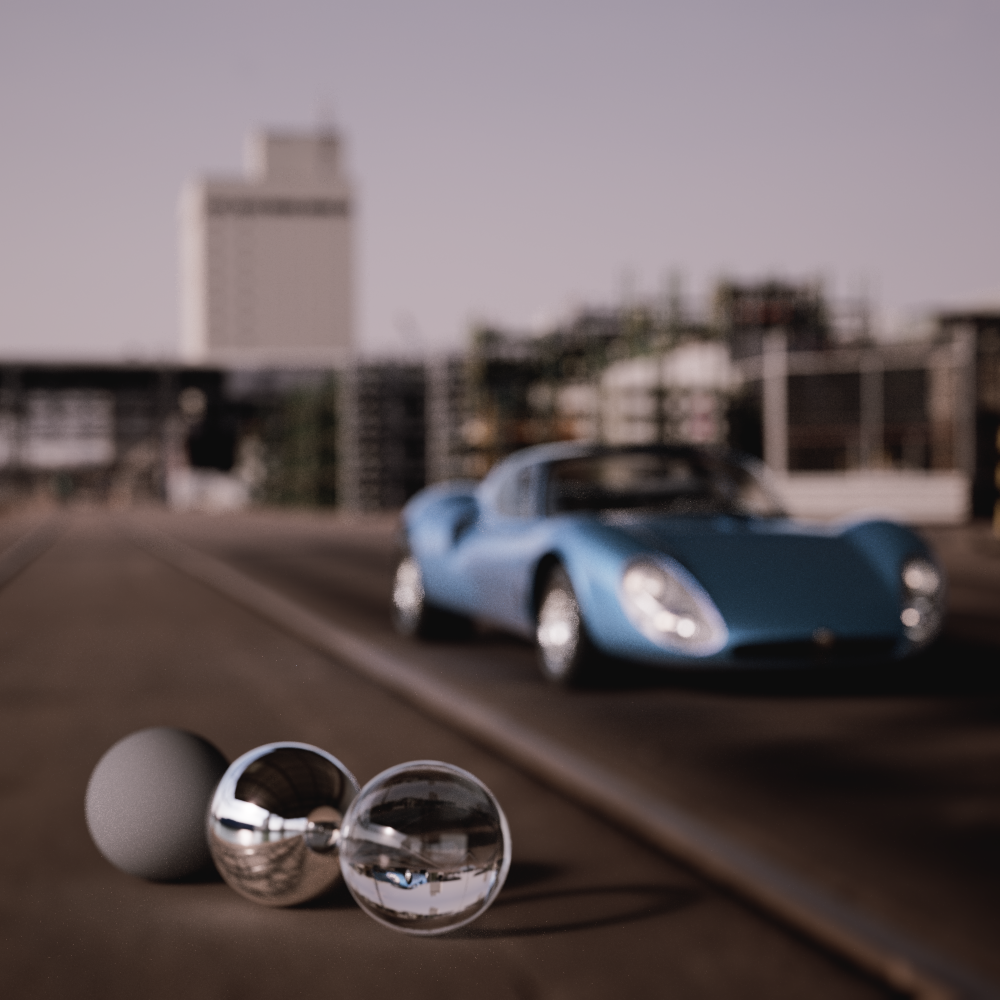
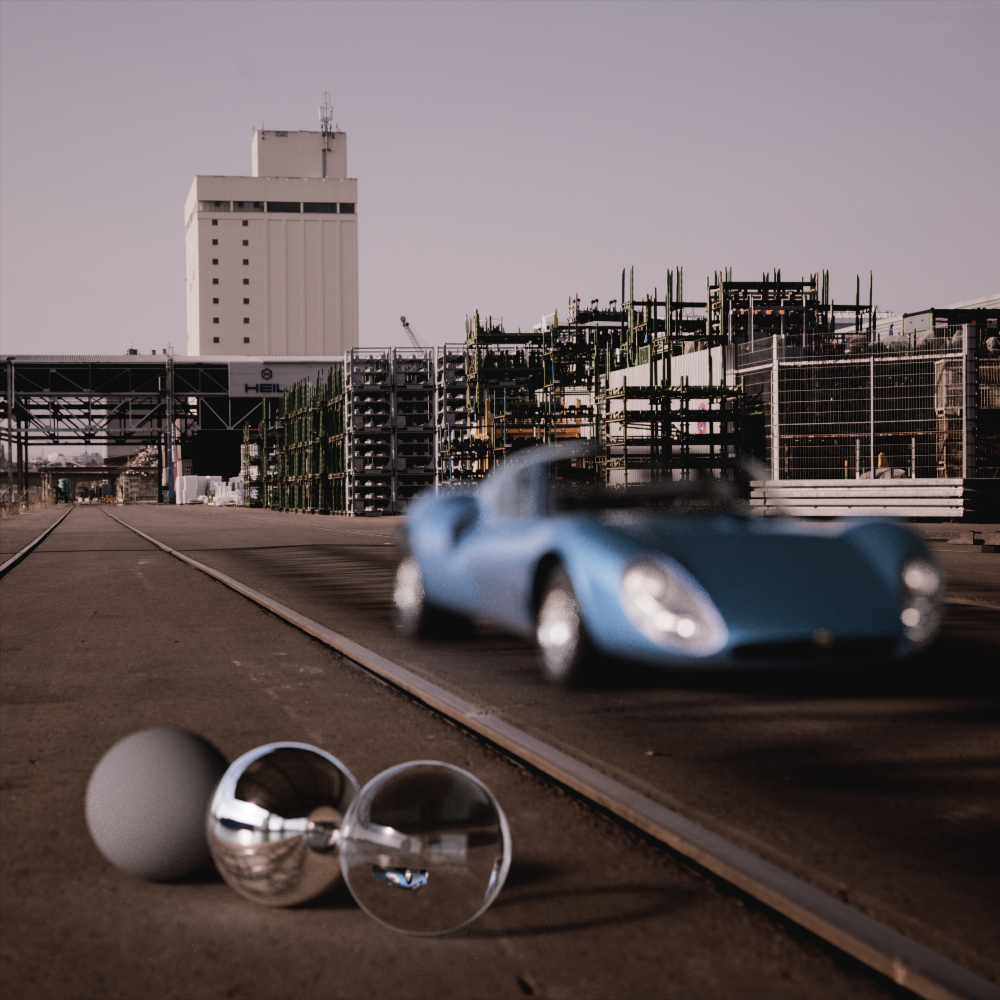
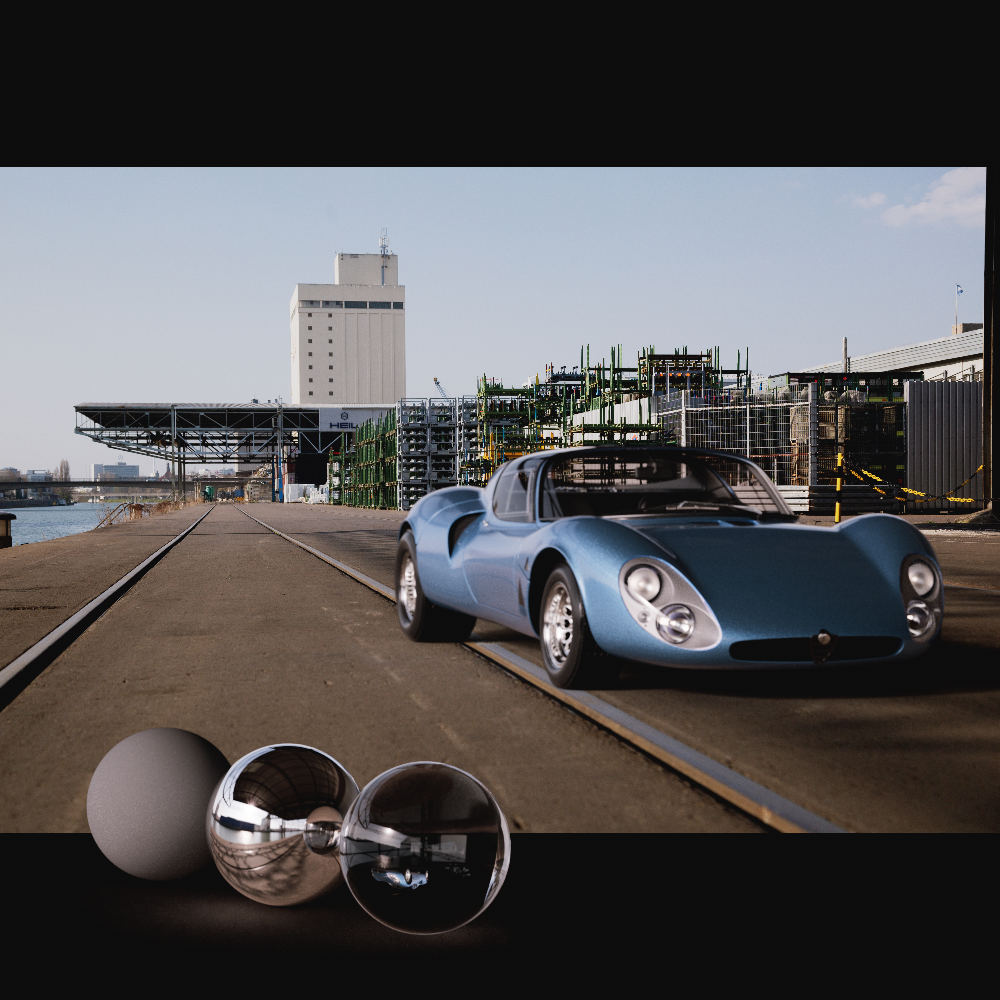
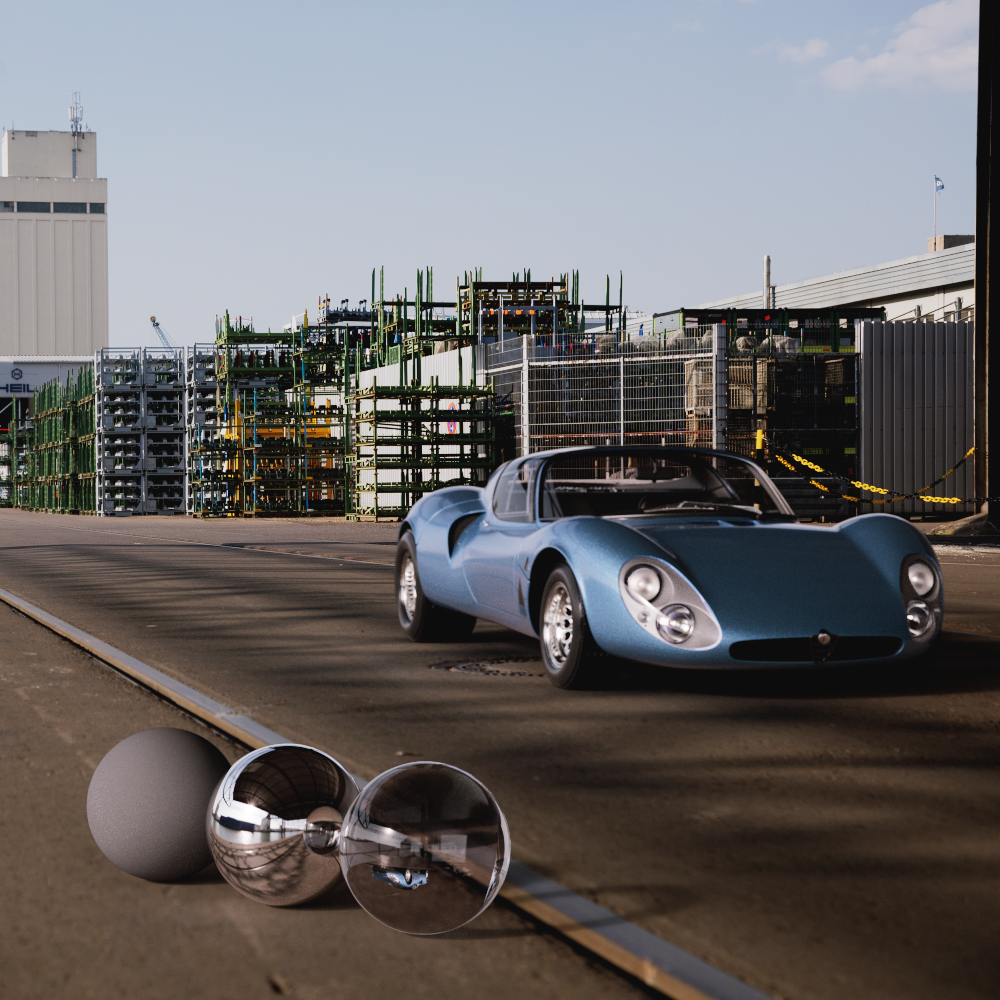
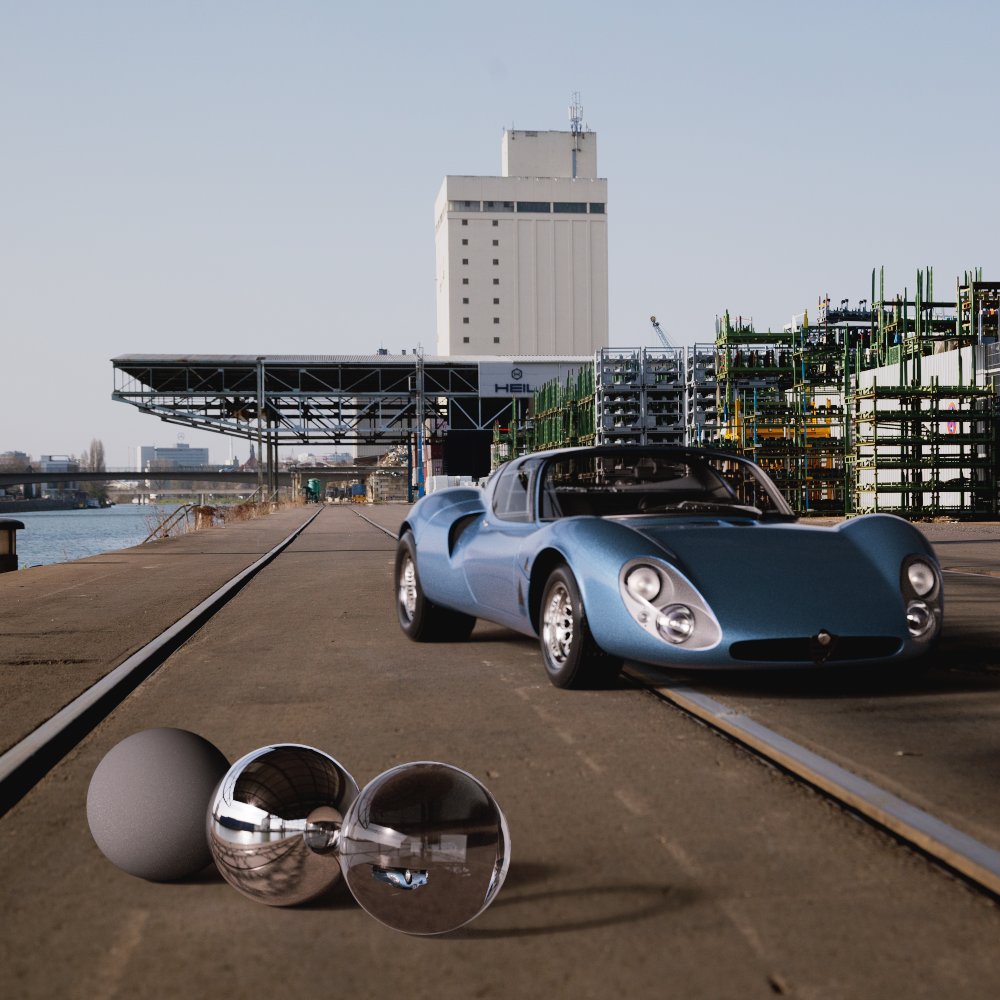
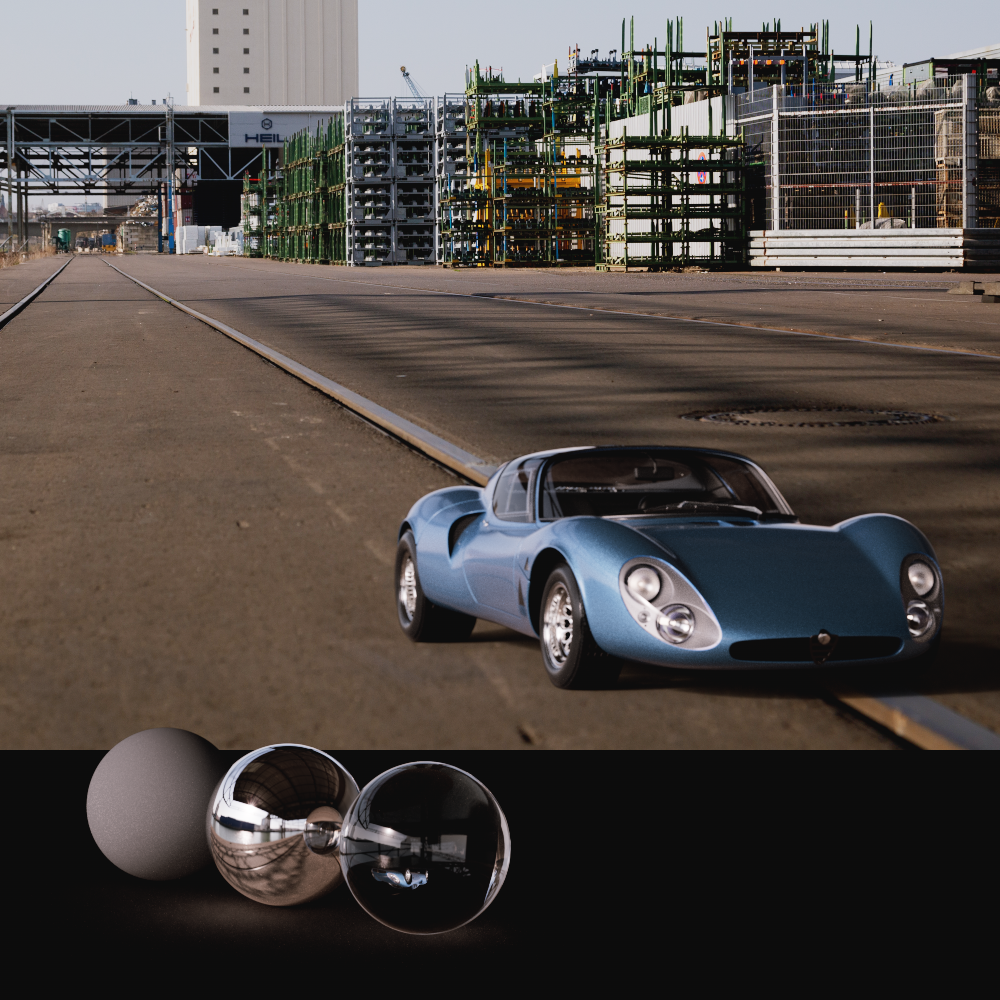
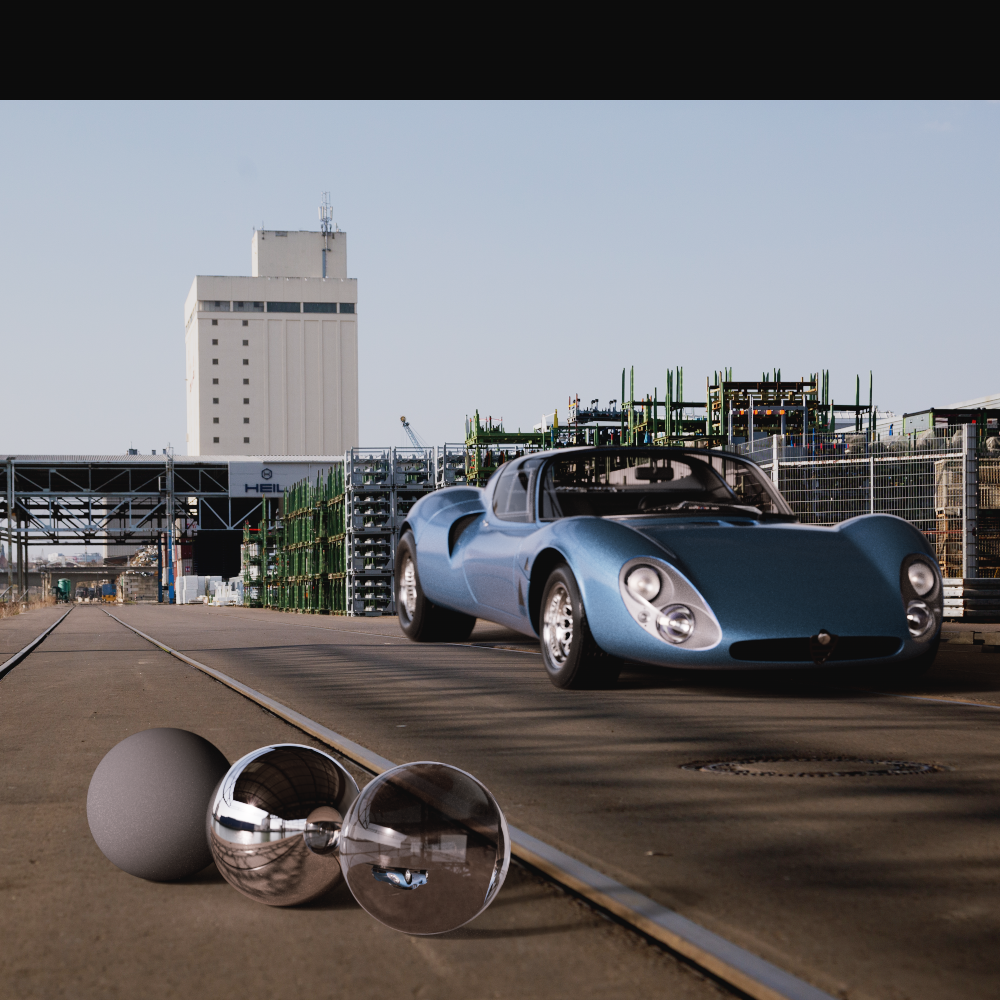
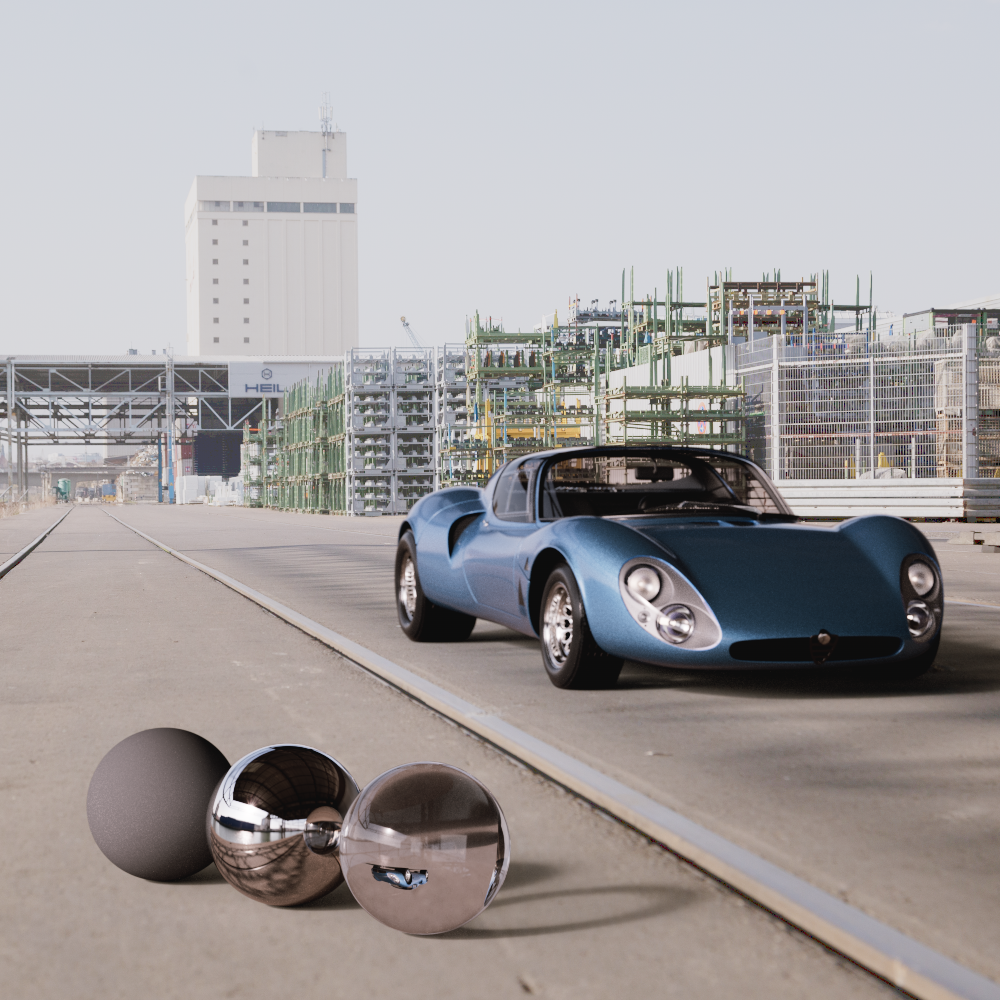
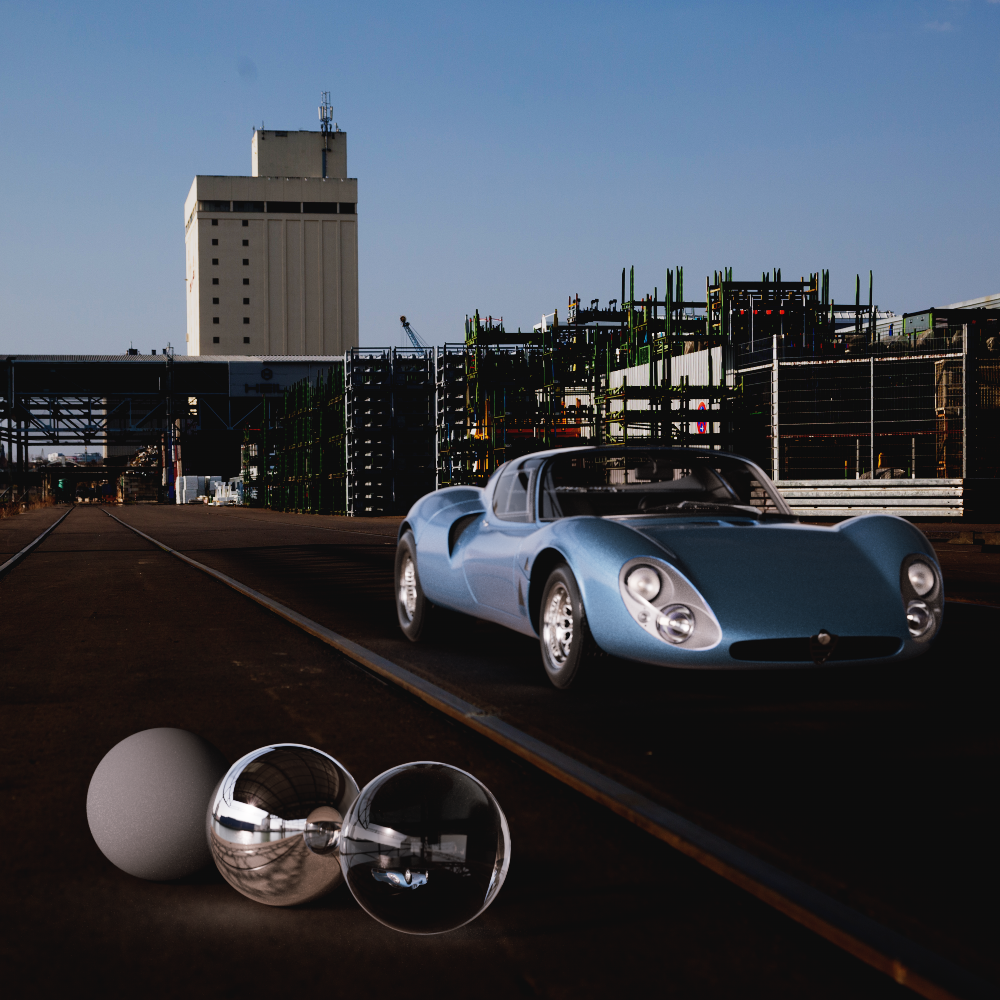
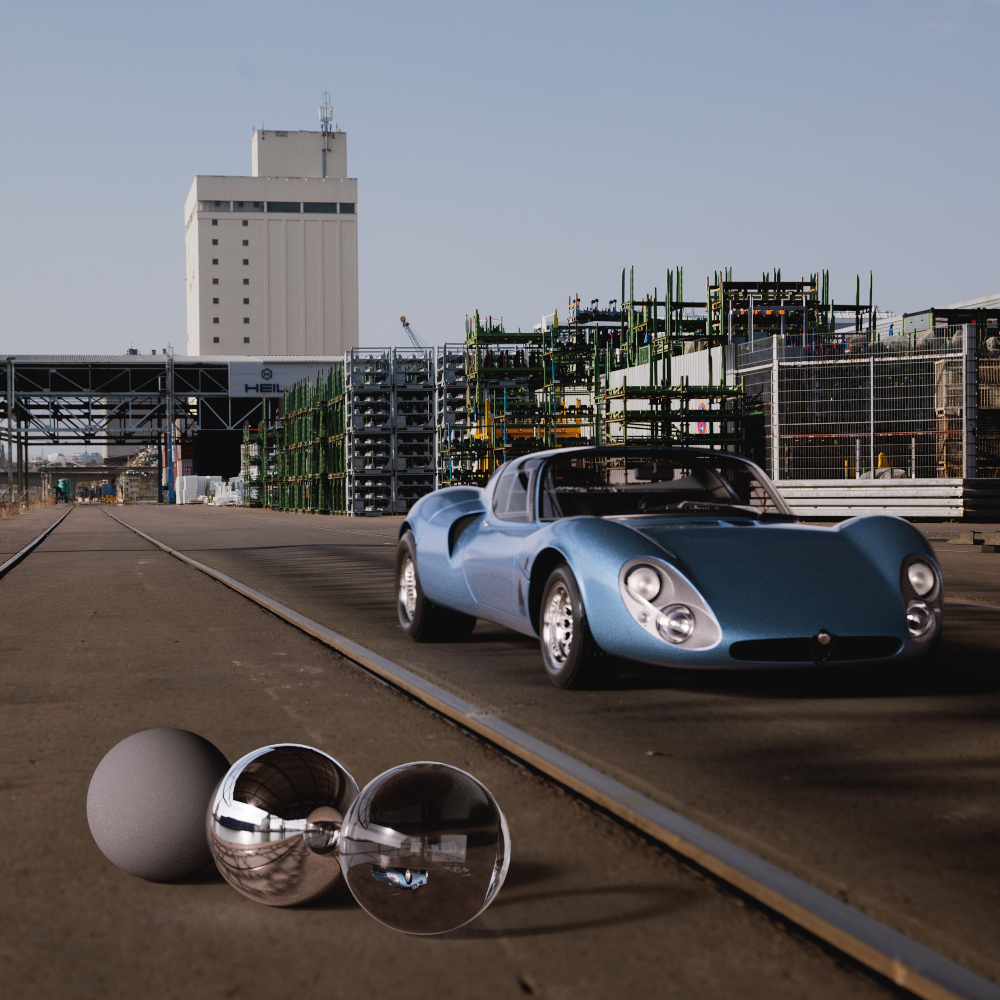
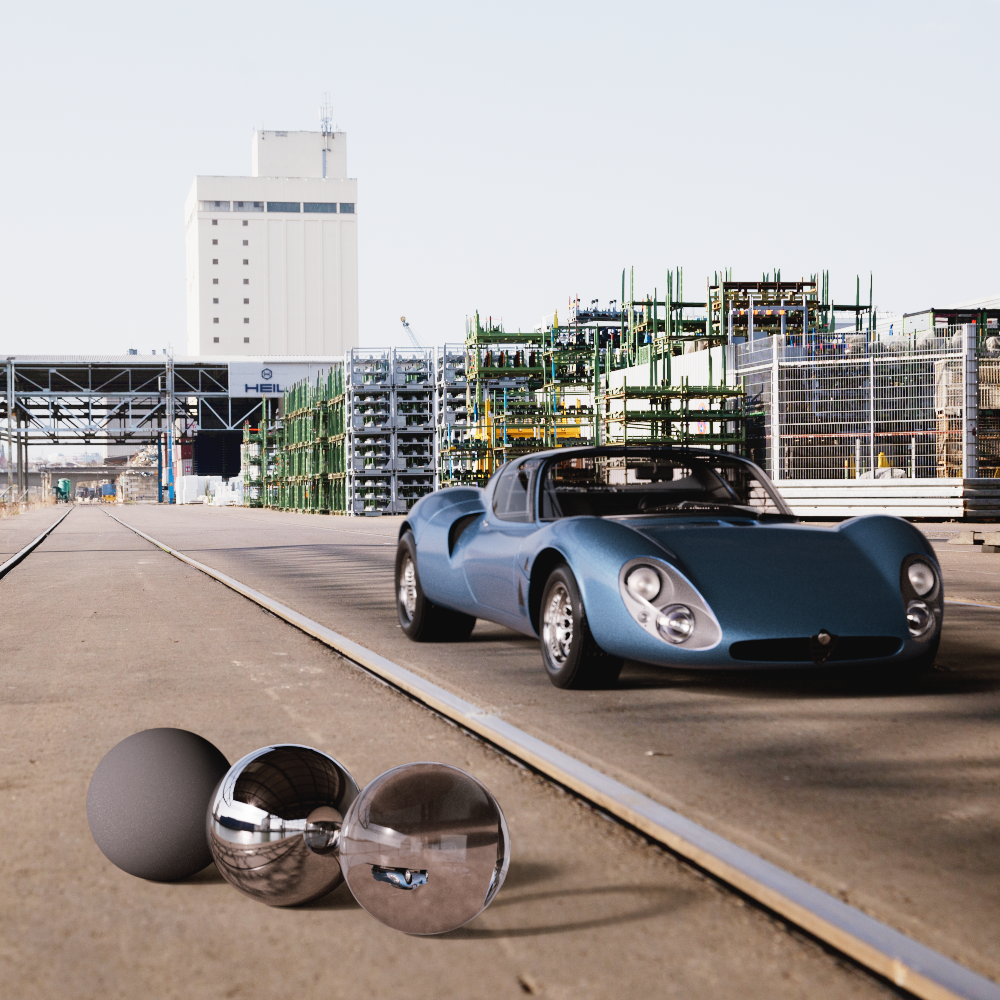
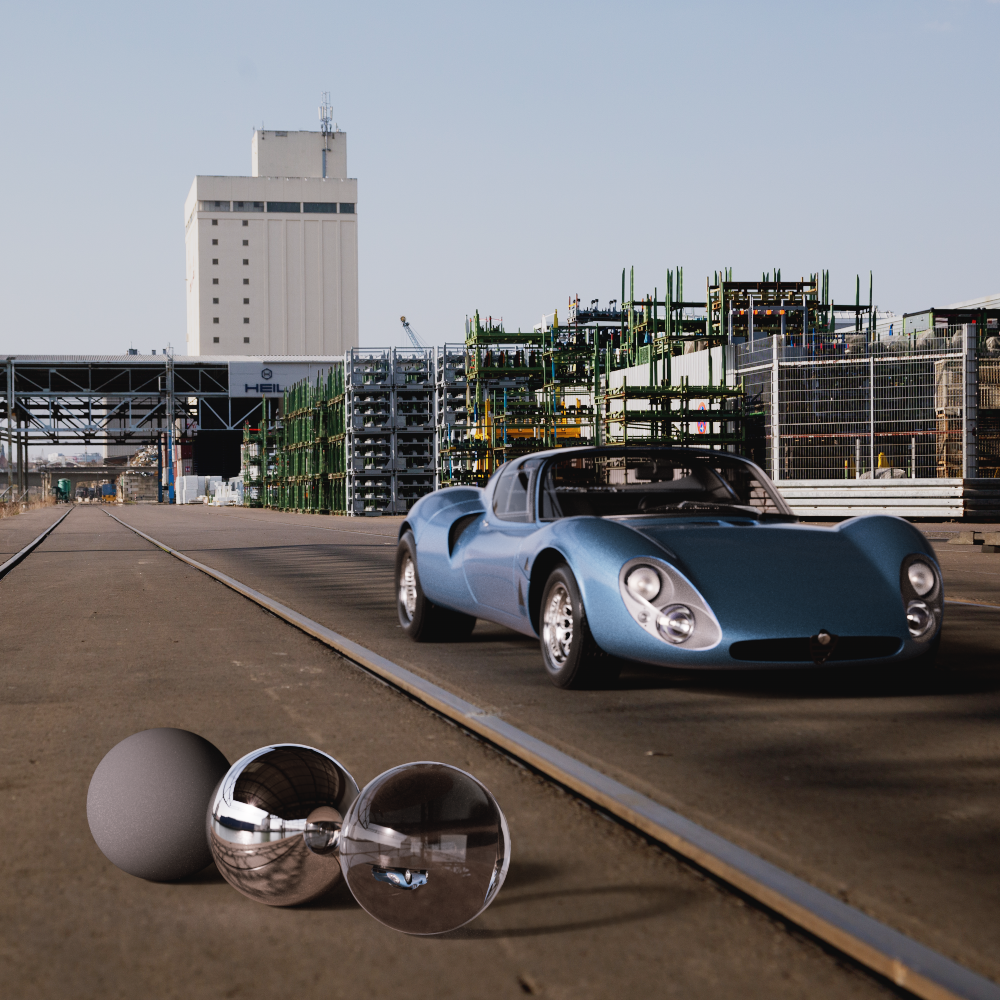
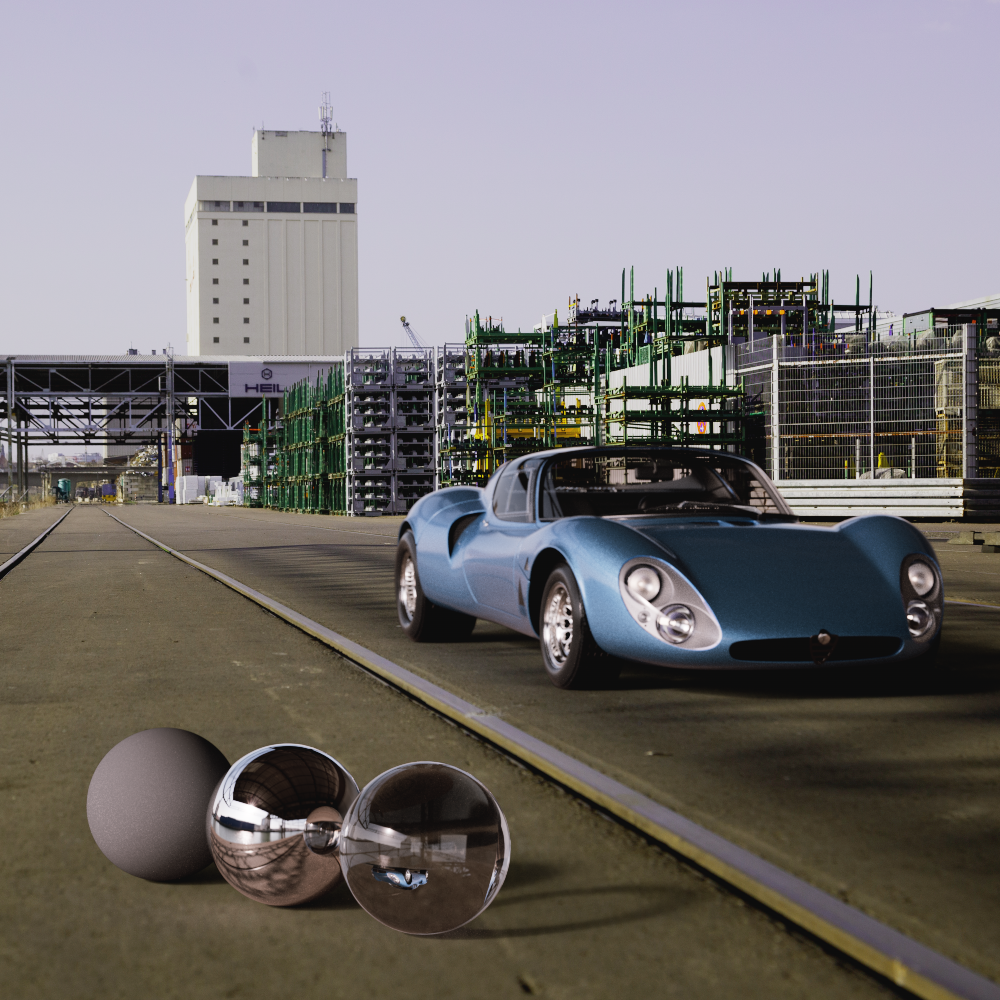
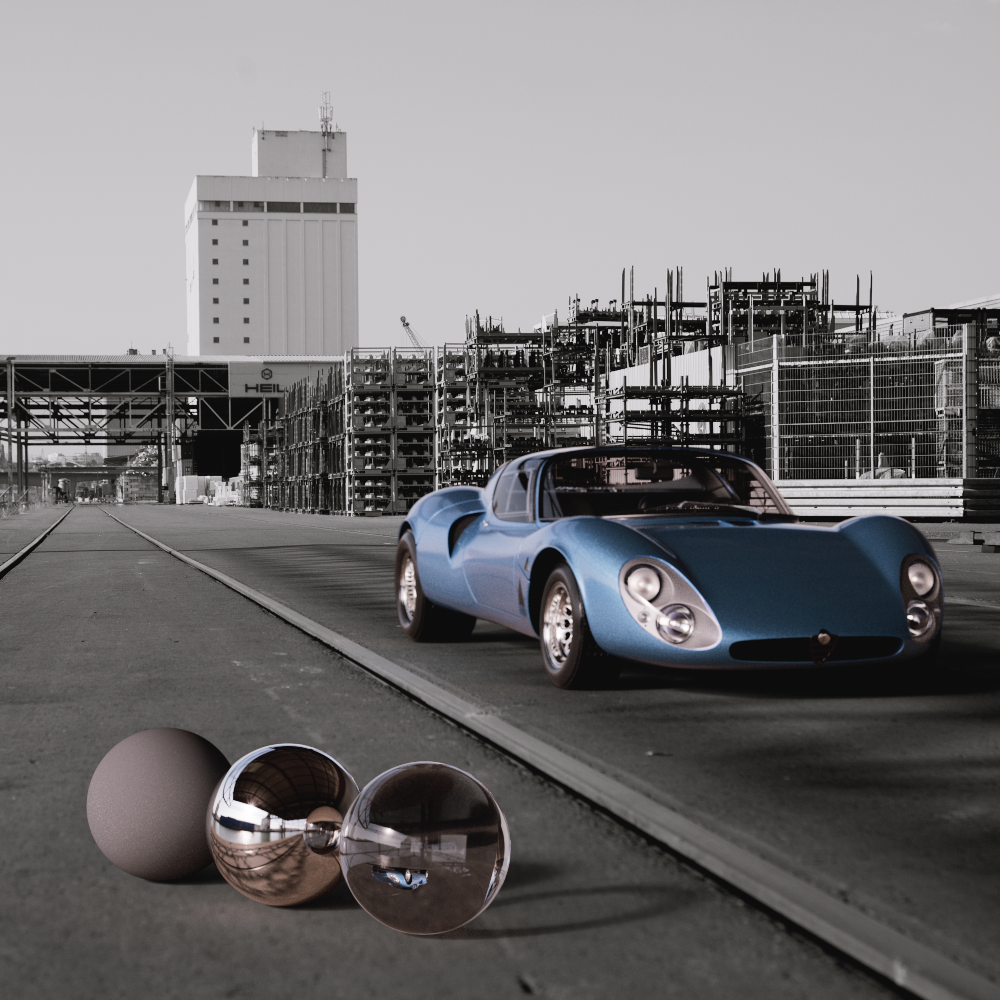
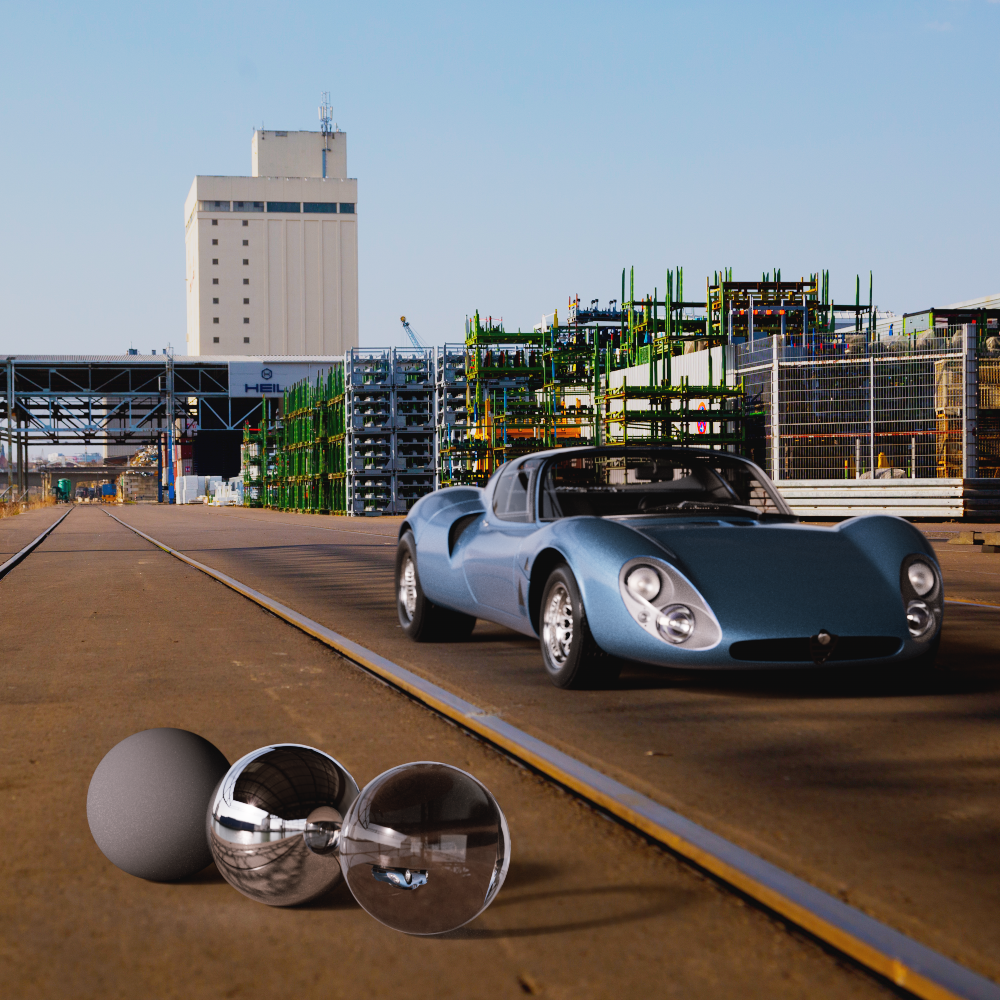
In the example images below take note that while the In-Render and Pre-Composite types can look very similar, only In-Render is affected by depth of field and transmissive materials. All the while, Post-Composite is not affected by any camera effects.
|
|
|
| Type: In-Render | Pre-Composite | Post-Composite |
|
|
|
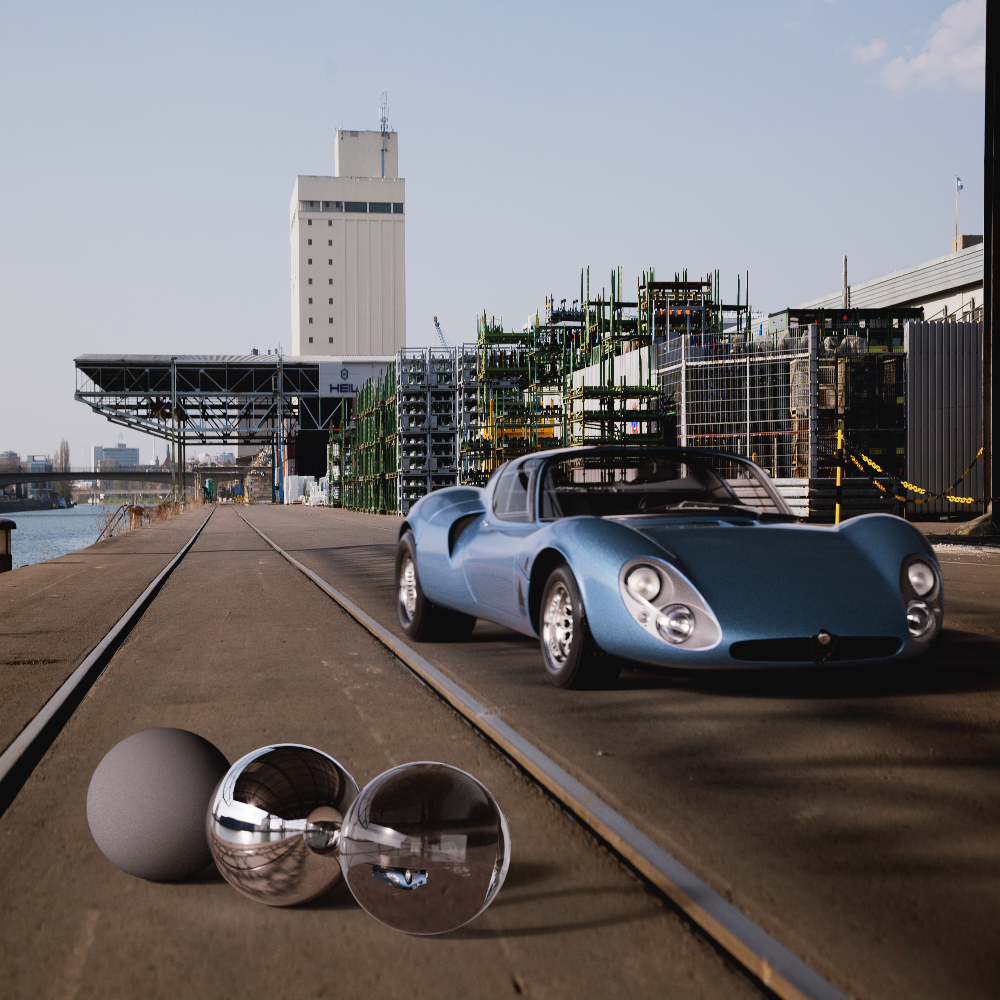
| Car model by Luis Lara and Maxime Truchon HDRI and Backplate by Apex Automotive |
||
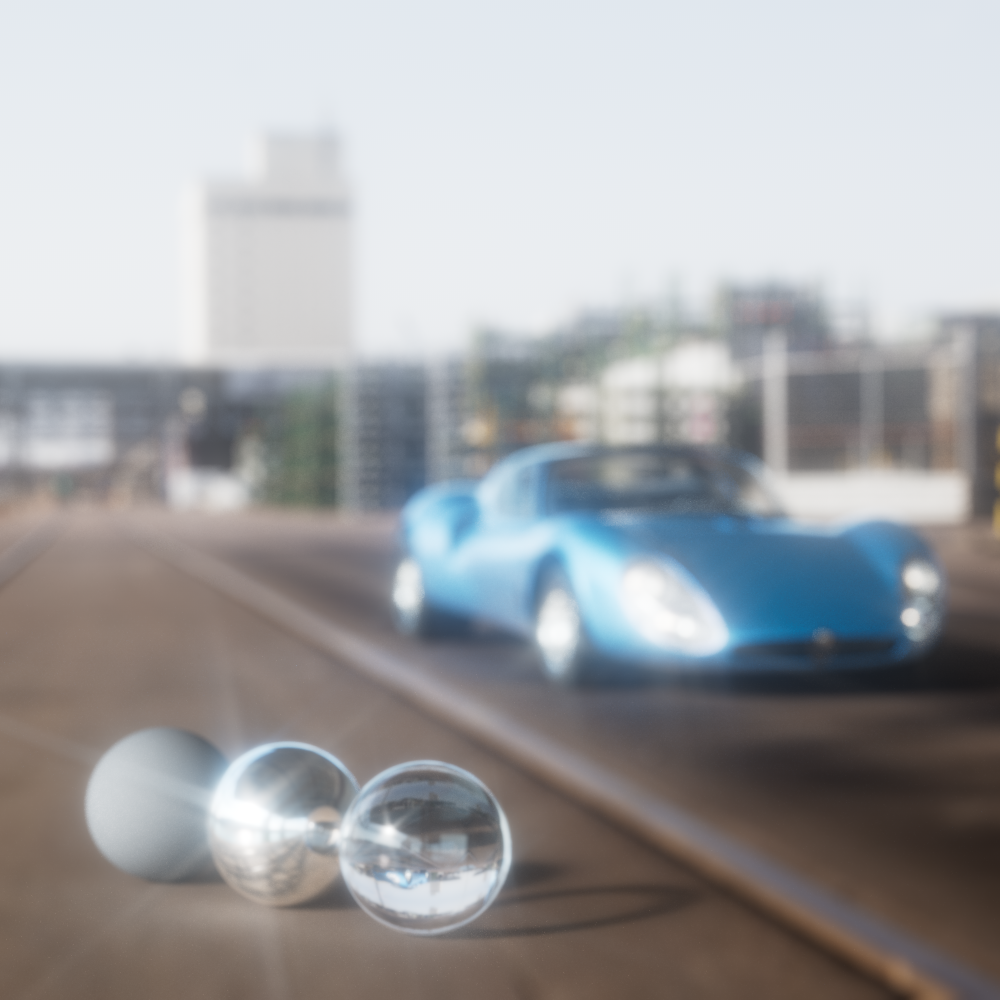
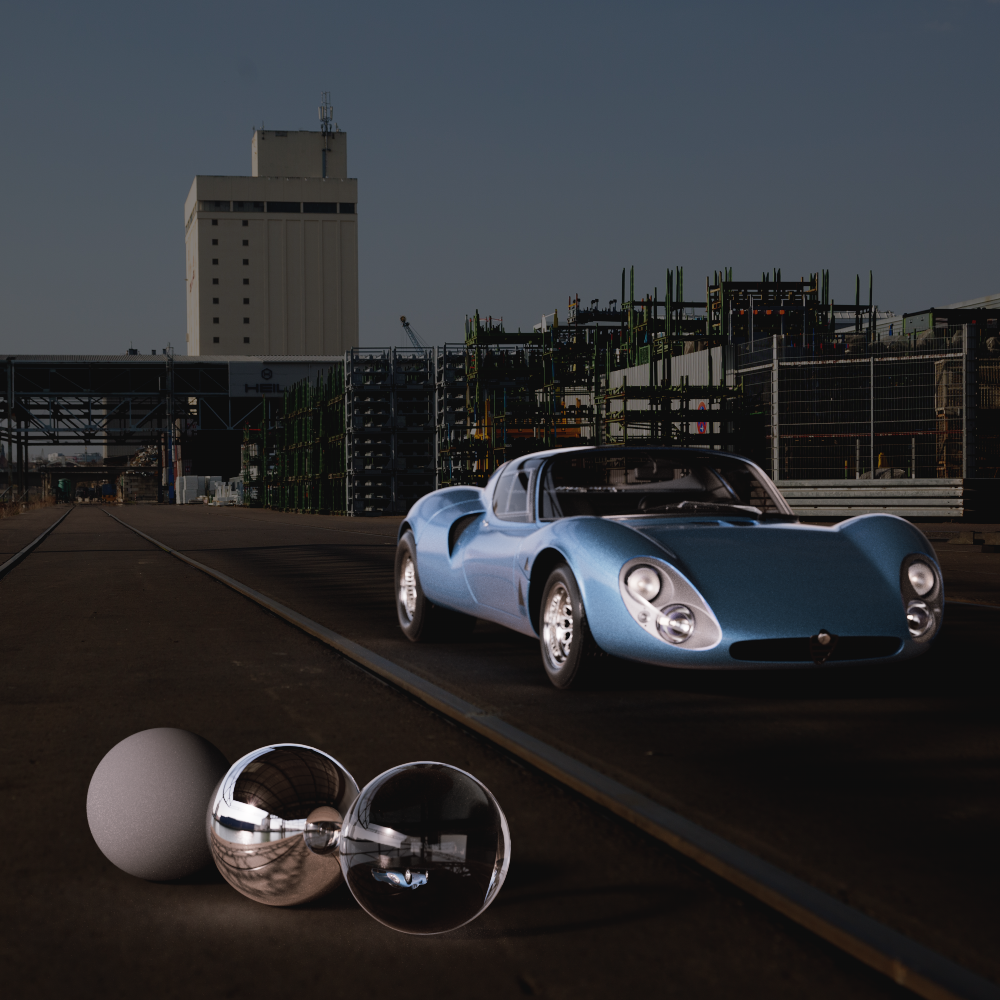
Only relevant when In-Render background type is used.
When enabled, the background is rendered like a normal 3D object in the scene and is therefore also subject to changes, e.g. when viewed through a refractive/transmissive object or when rendered with depth of field. When disabled, the background is not affected by these effects but is still subject to changes to exposure and color correction.
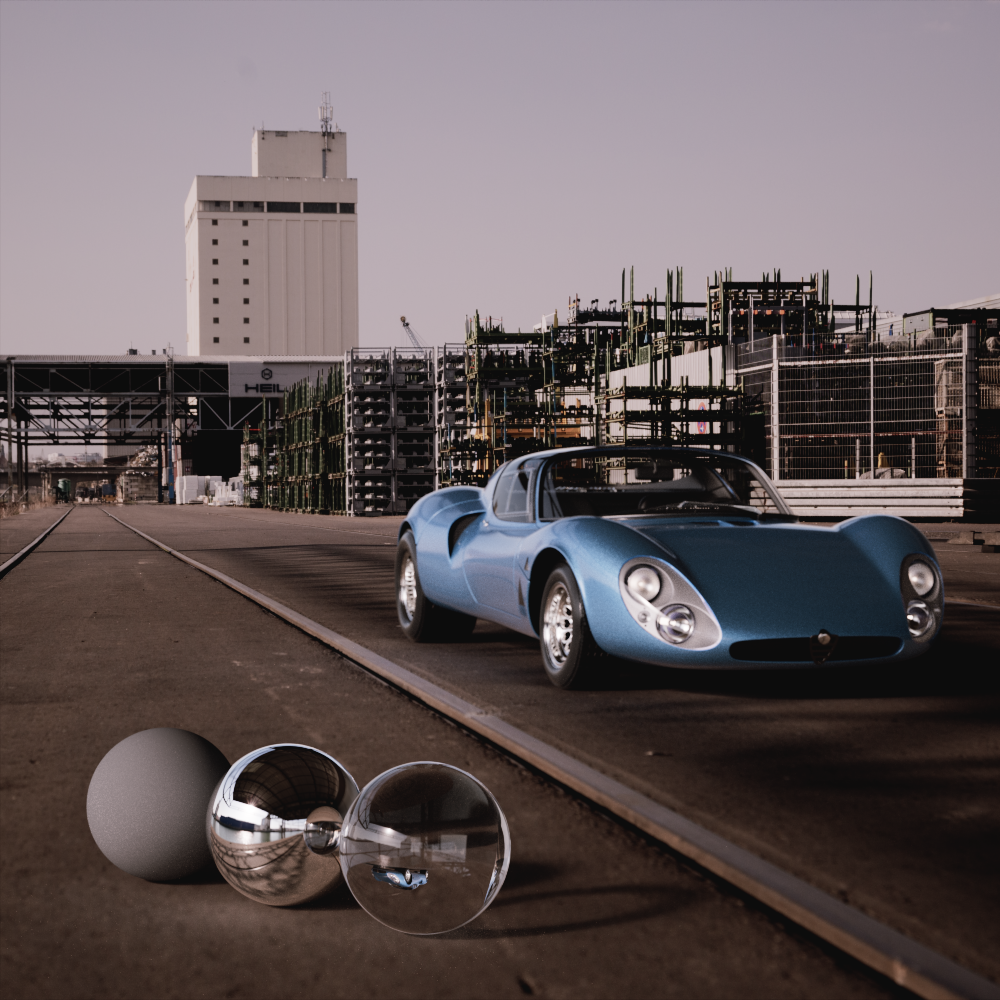
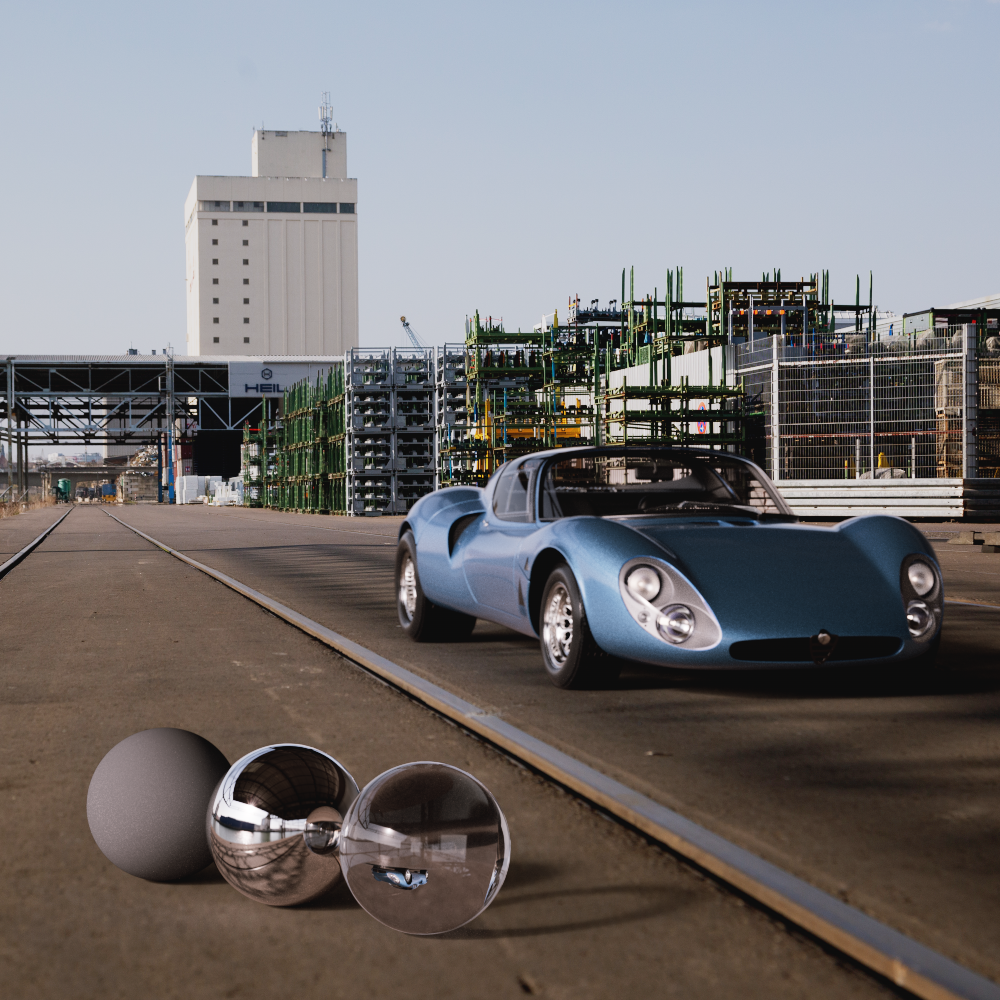
In the example images below notice how the background is bent by the transmissive glass sphere and car windows or blurred by depth of field when enabled. By comparison, the background is completely clear and the rays are not bent by transmissive objects when disabled, instead they pass right through and only the actual 3D scene is affected by these types of effects.
|
|
|
|
| Affected by Bent Rays: Enabled (default) |
Disabled | Enabled (default) | Disabled |
The color used in the background of the render.
The background color is overridden when a background image is loaded, however the alpha value of this color can still be used to control the alpha of a background image.
|

|

|
| Background Color: Black (default) | White | Image |
An image loaded here replaces or covers the solid Color of the background. The background color may still be visible in the render if the background image does not cover the entire framebuffer (see Frame or Offset parameters) or if the loaded Image has an alpha channel.
When enabled an alpha channel from the loaded background image is used for alpha output in renders, if there is no alpha channel it will be rendered with an alpha of 1.
When disabled, the alpha of the background is controlled by the alpha value of the background color.
If you have loaded an Image for the background, this setting adjusts the scaling of the image in the rendering. This is only relevant if the width to height ratio of the image does not match the aspect ratio of the rendering:
-
Stretch: The width and height of the Image are changed to match the aspect ratio of the renderings. The background image will cover the entire background in any case, however, the image will be distorted if it doesn't have the same aspect ratio as the render.
-
Crop:The background image is scaled evenly to fit the longest side of the rendering. For portrait rendering, this is therefore the height of the rendering, and for landscape rendering, it is the width. The image portion along the shorter side may overhang the rendering and will therefore be truncated for the rendering.
-
Fit: The background image is scaled evenly to fit the shortest side of the rendering. This always leaves the entire background image visible in the rendering, but there may be areas that are not covered by the image. The plain background color is then displayed there.
|

|
|
| Frame: Stretch | Crop | Fit |
Allows you to move the background Image horizontally. In the areas that become free as a result, the plain background color becomes visible.
|

|
|
| Offset X: -20 | 0 (default) | 20 |
Allows you to move the background Image vertically. In the areas that become free as a result, the plain background color becomes visible.
|

|
|
| Offset Y: -25 | 0 (default) | 10 |
Changing the Gamma value lightens or darkens only the midtones, without significantly affecting the highlights and depths. This means: Black remains black even after a Gamma change, white remains white.
|

|
|
| Gamma: 0.5 | 1 (default) | 2 |
All brightnesses of the loaded Image can be raised or lowered evenly.
|
|
|
| Exposure: -2 | 0 (default) | 2 |
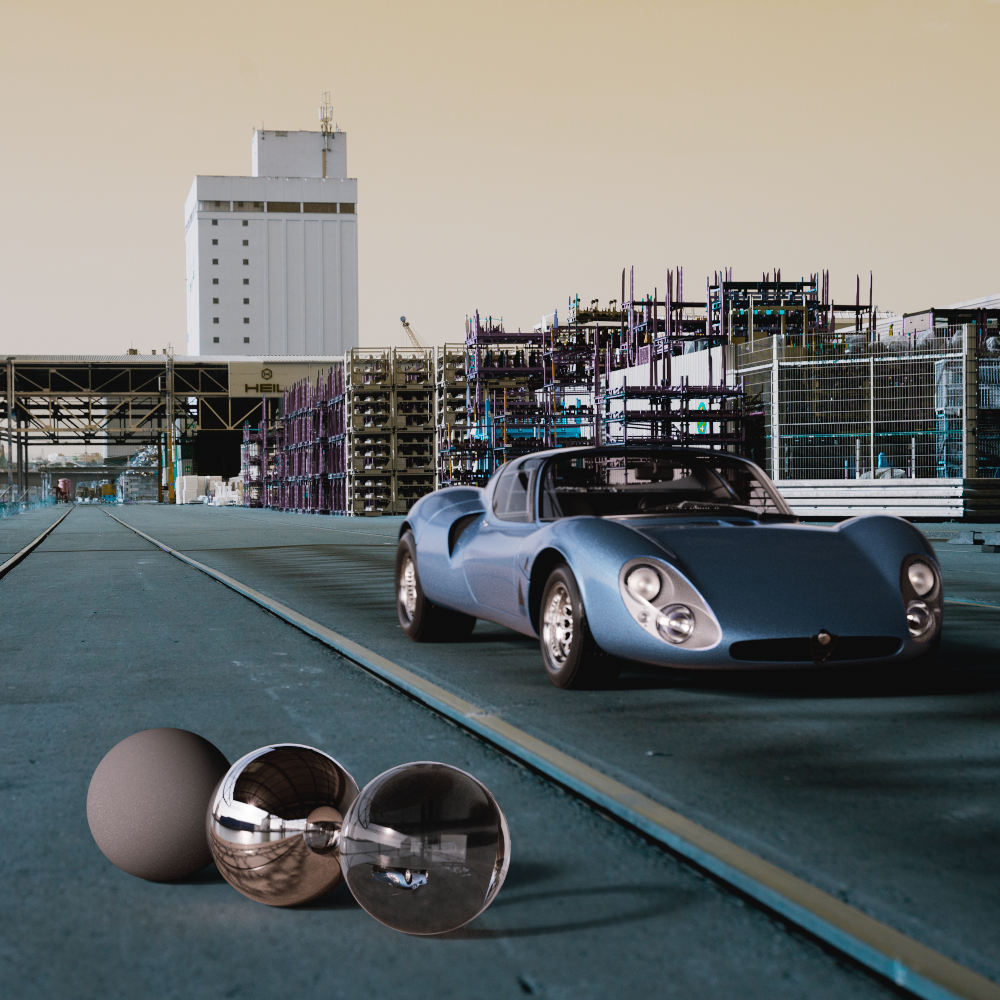
This allows all color values of the loaded Image to be shifted evenly. The basis for this is a color ring on which all colors are applied. The color shift can then be specified via an angle between 0° and 360°. For this reason, a color shift of 360° also shows the original color values again.
|
|
|
| Hue: 0 (default) | 20 | 180 |
Use this value to decrease or increase the color saturation of the loaded background Image.
|

|
|
| Saturation: -100 | 0 (default) | 100 |
When disabled, the loaded background image will be affected by the camera's Exposure settings.

|
|
| Compensate for Exposure: Disabled (default) |
Enabled |